
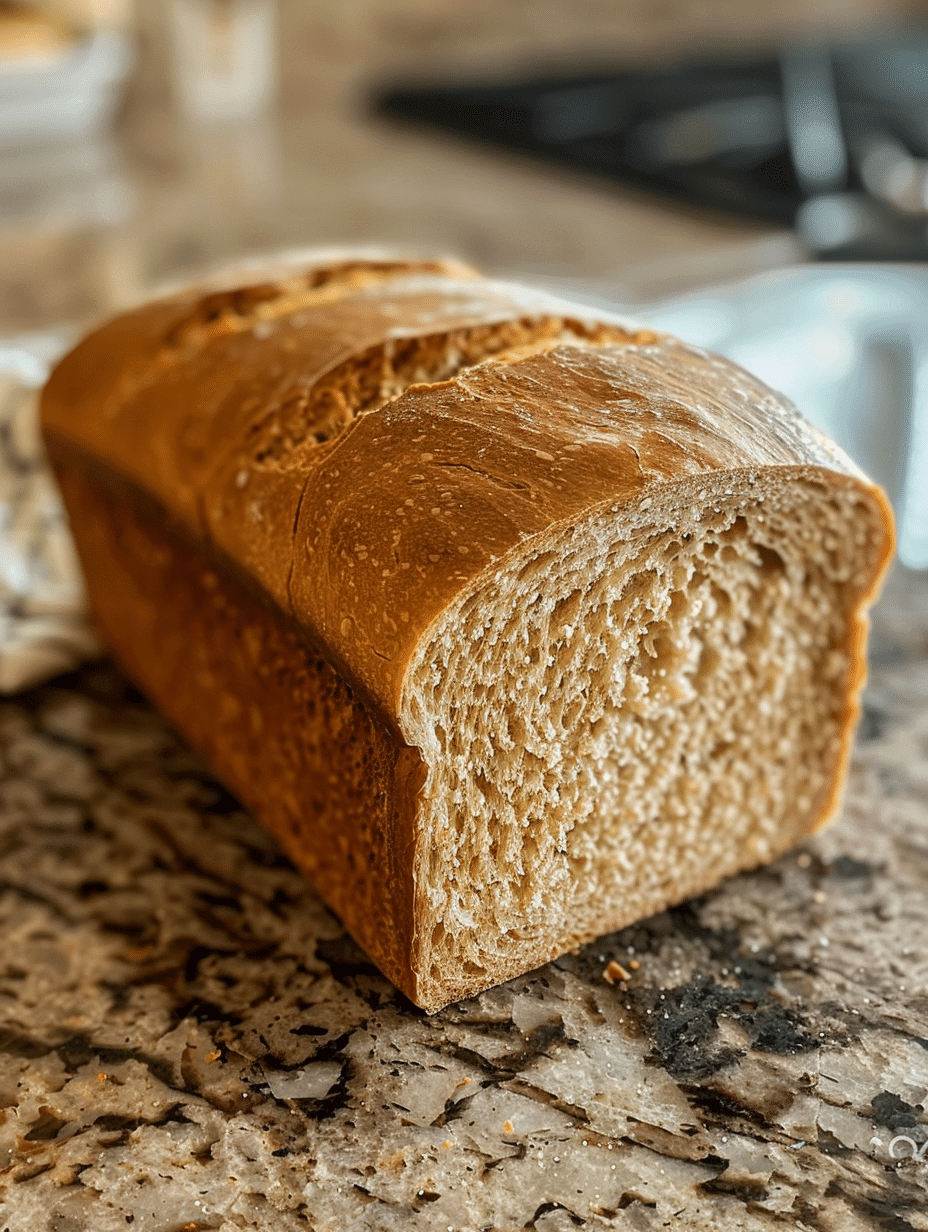
Whole wheat bread is a nutrient-dense baked staple that combines whole grain flour with water, yeast, and salt to create a hearty, flavorful loaf. This traditional recipe delivers robust flavor, superior nutrition, and satisfying texture compared to refined white bread. Making whole wheat bread at home takes approximately three hours from start to finish and requires minimal hands-on work. The result is a golden-brown loaf with a tender crumb and chewy crust that outperforms any commercial bakery option. Fresh homemade whole wheat bread fills your kitchen with incredible aroma while providing dietary fiber, protein, and essential minerals for your family’s health.
About Eva Stoner and Fresh Recipes Corner
I’m Eva Stoner, the creator of Fresh Recipes Corner, where I share simple, reliable recipes for everyday cooking. My love for cooking began in my grandmother’s kitchen, where I learned that good food doesn’t have to be complicated—it just needs care, patience, and the right techniques. Those early moments shaped how I cook today and inspired me to keep things practical and approachable.
I’ve spent over fifteen years perfecting bread-baking techniques, and whole wheat bread remains one of my most-requested recipes from readers. When my grandmother taught me to bake her traditional whole wheat loaf, she emphasized understanding how flour absorbs water differently depending on protein content and humidity. This foundational knowledge transformed my baking confidence and taught me that mastering bread requires observation and intuition, not just following steps blindly. Today, I share these lessons through Fresh Recipes Corner to help home bakers achieve consistent, beautiful results in their own kitchens.
Recipe Overview
| Metric | Details |
|---|---|
| Prep Time | 15 minutes |
| First Rise | 90 minutes |
| Shape and Second Rise | 60 minutes |
| Bake Time | 35-40 minutes |
| Total Time | 3 hours |
| Servings | 1 loaf (12-16 slices) |
| Difficulty Level | Beginner to Intermediate |
| Cuisine | American/European |
Why This Recipe Works
I developed this whole wheat bread recipe by testing multiple hydration ratios and fermentation times to balance nutrition with approachability. Whole wheat flour contains bran and germ that absorb more water than refined flour, requiring careful attention to moisture levels. This recipe uses a higher hydration percentage that creates an open crumb structure while remaining manageable for home bakers. The extended bulk fermentation allows flavors to develop fully, resulting in complexity that rivals artisanal bakery loaves.
The key to successful whole wheat bread lies in understanding that whole grain dough behaves differently than all-purpose flour dough. Bran particles act like tiny blades that cut gluten strands, so whole wheat dough requires slightly gentler handling and longer resting periods. I incorporate a small percentage of bread flour to strengthen the gluten network without sacrificing the nutritional benefits and flavor profile of whole grains. This hybrid approach produces loaves with excellent structure, chewy crumb, and superior shelf life.
During my years at Fresh Recipes Corner, I’ve found that whole wheat bread enthusiasts often struggle with dense crumbs or dry texture. This recipe solves those issues through proper hydration, adequate fermentation, and precise baking temperature. When you follow these steps with attention to dough feel rather than rigid timing, you’ll achieve professional results that rival commercial whole grain breads. The satisfaction of pulling a perfectly baked whole wheat loaf from your oven justifies the minimal active work required.
Ingredients
| Ingredient | Quantity | Notes and Alternatives |
|---|---|---|
| Whole Wheat Flour | 350g (2¾ cups) | Use stone-ground for superior flavor; bread flour works but reduces earthiness |
| Bread Flour | 100g (¾ cup) | All-purpose flour acceptable but yields slightly less structure; unbleached preferred |
| Water | 350ml (1½ cups) | Temperature 75-80°F; chlorine-free or filtered water yields best fermentation |
| Instant Yeast | ½ teaspoon (3g) | Active dry yeast requires 10% more by weight; avoid rapid-rise yeast for this recipe |
| Sea Salt | 1¼ teaspoons (7g) | Fine sea salt preferred; kosher salt works but use 1½ teaspoons; avoid iodized |
| Honey | 1 tablespoon (15g) | Supports fermentation and adds subtle sweetness; maple syrup substitutes equally |
| Olive Oil | 1 tablespoon (15ml) | Optional but improves crumb texture and shelf life; coconut oil acceptable alternative |
Step-by-Step Instructions
Mixing and Autolyse Phase
- Combine 350g whole wheat flour and 100g bread flour in a large mixing bowl, whisking together until evenly distributed.
- Add 350ml room-temperature water to the flour mixture, stirring with a wooden spoon until no dry flour remains and a shaggy dough forms.
- Cover the bowl with a damp kitchen towel and let rest for 20-30 minutes—this autolyse period allows flour to fully hydrate and improves gluten development.
- Sprinkle ½ teaspoon instant yeast and 1¼ teaspoons sea salt over the rested dough along with 1 tablespoon honey and 1 tablespoon olive oil.
- Wet your hand and pinch the yeast and salt into the dough using a hand-mixing technique, folding dough over itself until ingredients are fully incorporated (approximately 2-3 minutes).
Bulk Fermentation Phase
- Transfer the dough to an oiled bowl or leave in the mixing bowl, turning to coat all surfaces with light oil.
- Cover with the damp towel and let ferment at room temperature (72-75°F) for 90 minutes total.
- Perform 4 sets of coil folds during bulk fermentation: at 20, 40, 60, and 80 minutes—wet your hand, grab one side of the dough, stretch it over the center, and rotate the bowl 90 degrees, repeating 4 times per set.
- Observe the dough for a 50% volume increase and a slight dome on the surface indicating proper fermentation (do not over-ferment or gluten will weaken).
- Transfer the dough to a lightly floured work surface and perform a pre-shape by gently pulling the dough toward you in a circular motion, creating surface tension without degassing completely.
Shaping and Final Proof Phase
- Let the pre-shaped dough rest for 15-20 minutes (bench rest) to relax the gluten and allow easier final shaping.
- Using both hands, fold the dough in half lengthwise, then roll tightly from the top toward you, pinching the seam with your palm heel to create tension.
- Place the shaped loaf seam-side up in a banneton basket or bowl lined with a flour-dusted kitchen towel.
- Cover with the damp towel and let proof at room temperature for 45-60 minutes until the dough holds a slight indent when gently poked with a floured finger (poke test).
- During final proof, position an oven rack to the lower-middle position and preheat your oven to 450°F (230°C) for 30 minutes.
- If using a Dutch oven, place it in the oven during preheating so it reaches full temperature.
Scoring and Baking Phase
- Turn the proofed dough out onto parchment paper by inverting the banneton, supporting the loaf with your other hand.
- Using a sharp bread lame or serrated knife, score the top of the loaf with a single diagonal slash approximately ¼-inch deep, angling the blade at 45 degrees.
- Carefully transfer the parchment and loaf to the preheated Dutch oven (or place on a preheated baking sheet if not using Dutch oven).
- Bake covered with the Dutch oven lid for 20 minutes to trap steam, which creates the characteristic crispy crust of artisan whole wheat bread.
- Remove the Dutch oven lid and continue baking for 15-20 minutes until the crust achieves deep golden-brown color and the loaf sounds hollow when tapped on the bottom.
- Transfer to a wire cooling rack and let rest for at least 30 minutes before slicing—this allows the interior crumb structure to set properly.
Chef Tips for Perfect Results
- Water temperature matters: Use water between 75-80°F to ensure predictable fermentation timing. Cold water slows yeast activity while hot water can damage gluten development. A simple instant-read thermometer takes the guesswork out of hydration.
- Coil folds build strength: These gentle stretching motions develop gluten more effectively than aggressive kneading, especially important for whole wheat dough which is more delicate. Perform folds consistently at 20-minute intervals during bulk fermentation.
- The poke test prevents over-fermentation: Poke the final proof dough gently; it should hold a slight indent but spring back slowly. If the indent disappears immediately, proof longer; if it doesn’t spring back at all, you’ve over-proofed and should reshape and start again.
- Steam creates superior crust: Using a Dutch oven or steam pan creates the crispy, audible crust that characterizes professional bakery loaves. If you don’t own a Dutch oven, place a metal pan on the oven floor and pour boiling water into it just after placing your loaf in the oven.
- Score with confidence: A single diagonal slash guides oven spring (the rapid expansion of gas during baking). Score decisively and at 45 degrees; hesitant or shallow scoring results in uncontrolled tearing.
- Cooling is non-negotiable: Slicing warm bread collapses the crumb structure because internal steam hasn’t fully escaped. Wait at least 30 minutes—patient bakers are rewarded with perfect slice clarity.
Common Mistakes to Avoid
Too Much Yeast Leading to Over-Fermentation
Using more than ½ teaspoon yeast accelerates fermentation beyond your control, causing the dough to collapse and lose structure. The gluten network weakens, resulting in dense, gummy crumb. Solution: Measure yeast precisely using a kitchen scale and trust the fermentation timeline provided, adjusting only for room temperature.
Insufficient Hydration Creating Dry Crumb
Whole wheat flour requires more water than white flour, but many bakers reduce hydration because the dough feels wet. This results in tight crumb and tough texture. Solution: Follow the recipe’s hydration ratio exactly and observe dough feel rather than appearance—whole wheat dough should feel tacky but hold its shape.
Skipping the Autolyse Period Compromising Gluten
Rushing from dry ingredients directly to fermentation prevents complete flour hydration and gluten formation. The finished loaf lacks oven spring and exhibits poor crumb structure. Solution: Wait 20-30 minutes after initial mixing to allow bran particles to absorb water fully.
Neglecting Coil Folds Weakening Dough Structure
Whole wheat dough lacks the extensibility of white flour dough, so it requires more frequent, gentle gluten development. Skipping folds results in loose dough that spreads rather than rises. Solution: Perform scheduled folds at 20-minute intervals during bulk fermentation—this takes 30 seconds per set and dramatically improves final volume and structure.
Baking Without Steam Producing Tough, Pale Crust
Whole wheat bread requires steam during the first 20 minutes of baking to achieve expansion and browning. Without steam, the crust sets immediately, trapping the loaf and creating dense crumb. Solution: Use a Dutch oven or steam pan method consistently; this single step separates mediocre bread from bakery-quality results.
Variations and Substitutions
| Ingredient | Substitution | Impact on Flavor and Texture |
|---|---|---|
| Whole Wheat Flour | Einkorn or spelt flour (ancient grains) | More pronounced nutty flavor with slightly more delicate gluten; use 5% less water |
| Bread Flour | All-purpose flour (12% protein content) | Slightly less structure and chew; acceptable but yields shorter shelf life |
| Bread Flour | Rye flour (50g whole wheat flour reduction) | Distinctive earthiness and darker crumb; reduces rise slightly but adds complexity |
| Honey | Maple syrup or molasses (equal weight) | Maple adds subtle sweetness; molasses creates deeper color and minerality |
| Olive Oil | Coconut oil or ghee (clarified butter, omit for vegan) | Subtle flavor shift; ghee adds richness while coconut oil remains neutral |
| Instant Yeast | Active dry yeast (increase to 1 teaspoon/6g total) | Slower fermentation requires 10-15% longer timing; similar results |
| Sea Salt | Himalayan pink salt or Celtic sea salt | Minimal flavor difference; use same weight measurement for consistent salinity |
| Water | Vegetable broth (unsalted) or filtered mineral water | Broth adds subtle depth and umami; mineral water improves crust color |
Seed and Mix-in Variations
Enhance your whole wheat bread by adding 50-75g of optional mix-ins during the last coil fold of bulk fermentation. Toasted sunflower seeds provide nutty crunch and nutritional value. Linseeds add earthiness and omega-3 fatty acids. Chopped walnuts contribute richness without overwhelming the bread’s natural grain flavor. Sesame seeds create a subtle nuttiness and attractive appearance when sprinkled on the loaf before scoring. Dried fruit such as raisins or cranberries (added sparingly, 25-40g maximum) introduces subtle sweetness that complements whole wheat’s robust character.
Whole Grain Variations
For a multi-grain loaf, substitute 50g of the whole wheat flour with rolled oats, buckwheat flour, or millet flour. Each grain contributes unique flavor: oats create creaminess, buckwheat adds earthiness, and millet provides delicate sweetness. Adjust water content upward by 15-25ml when using oats since they absorb additional moisture. These variations transform the basic recipe while maintaining the core fermentation and baking techniques that ensure success.
Serving Suggestions and Pairings
Whole wheat bread’s robust flavor and nutritional profile make it ideal for both sweet and savory applications. Toast thick slices and serve with almond butter and sliced fresh berries for a protein-rich breakfast that sustains energy through morning activities. For lunch, construct hearty sandwiches featuring hummus, roasted vegetables, sprouts, and fresh greens. The bread’s chewy texture contains these fillings beautifully without falling apart.
Transform whole wheat bread into sophisticated appetizers by rubbing toasted slices with olive oil, garlic, and fresh herbs for homemade crostini. Top with white bean puree and rosemary, roasted red pepper spread and thyme, or caramelized onion and mushroom medley. These toppings celebrate the bread’s grain-forward flavor rather than obscuring it.
Create elegant dinner occasions by serving warm whole wheat bread with quality olive oil infused with garlic and red pepper flakes for dipping. Pair slices with creamy soups such as butternut squash, tomato, or lentil varieties—the bread’s hearty texture complements these dishes perfectly. For Mediterranean-inspired meals, serve whole wheat bread alongside fresh green salads and tahini dressing, highlighting the bread’s natural earthiness.
Host casual gatherings by offering whole wheat bread with cheese boards featuring aged cheddar, goat cheese, and manchego alongside fresh fruit, nuts, and quality olives. The bread’s mild acidity and substantial crumb complement aged cheeses particularly well. For sweet occasions, toast bread and top with ricotta cheese, honey drizzle, and fresh thyme for an elegant dessert course that feels indulgent without excess sugar.
Storage and Reheating
| Storage Method | Duration | Instructions |
|---|---|---|
| Room Temperature (Countertop) | 3-4 days | Wrap cooled loaf in paper towels, then place in a paper bag or linen bread bag. Avoid plastic, which traps moisture and accelerates staleness. Store in a cool, dry location away from direct sunlight. |
| Refrigerator | 1 week | Wrap cooled loaf in paper towels, place in a paper bag, then store in the refrigerator. Cold slows mold growth but may soften crust slightly. This method works well if you slice bread before storing. |
| Freezer | 2-3 months | Cool loaf completely, wrap tightly in plastic wrap, then place in a freezer-safe bag with air removed. Label with date. Thaw at room temperature for 2-3 hours, or slice before freezing for individual toasting. |
| Frozen Slices | 2-3 months | Slice cooled bread, layer with parchment paper between slices, place in freezer-safe container. Toast directly from frozen without thawing for quick breakfast or snack. |
| Toasting (Room Temp Bread) | Immediate | Toast slices in a toaster or toaster oven at medium setting until golden. Toasting revives crunch and improves flavor of bread aged 2+ days. |
| Reheating Whole Loaf | Immediate | Wrap cooled loaf in foil and place in a 350°F oven for 10-15 minutes until warmed through. This method rehydrates the crumb slightly while crisping the crust. |
Whole wheat bread stays fresher longer than white bread due to its higher fat and mineral content. The bran and germ contribute natural antioxidants that slow oxidation and mold development. However, proper storage remains essential since whole grain breads can develop off-flavors if exposed to heat, light, or air for extended periods.
For optimal flavor within the first three days of storage, keep bread at room temperature in a paper-based container that allows moderate air circulation. This maintains crumb softness while preventing moisture accumulation that encourages mold. Never store bread in the refrigerator unless you plan to consume it within one week, as cold temperatures accelerate staling through a process called retrogradation.
Nutritional Information
| Nutrient | Amount per Serving (1 slice, approximately 50g) |
|---|---|
| Calories | 120-130 |
| Protein | 4-5g |
| Total Fat | 2-2.5g |
| Saturated Fat | 0.3-0.5g |
| Carbohydrates | 22-24g |
| Dietary Fiber | 3-4g |
| Sugars | 1-2g |
| Sodium | 220-240mg |
| Iron | 1.2-1.5mg (6-8% DV) |
| Magnesium | 45-50mg |
| Phosphorus | 150-170mg |
| Zinc | 1.2-1.4mg (8-10% DV) |
Approximate values based on 14-slice loaf yield. Actual nutritional content varies depending on specific flour brands, water absorption, and ingredient sourcing. These values represent whole wheat bread without mix-ins or add-ons. Whole wheat bread provides approximately 12% of the daily recommended fiber intake per slice, supporting digestive health and stable blood sugar levels. The mineral content—particularly iron, magnesium, and zinc—significantly exceeds refined white bread due to the presence of bran and germ.
Homemade whole wheat bread contains no preservatives, commercial additives, or excess sodium compared to commercial bakery loaves. This recipe uses minimal salt for flavor development and gluten modulation, making it suitable for sodium-conscious diets. The protein content (approximately 20% of daily recommended intake per slice) supports muscle maintenance and satiety, making whole wheat bread an excellent staple for active individuals or those managing weight through whole foods.
Frequently Asked Questions
Can I substitute all bread flour for whole wheat flour in this recipe?
No, using only bread flour creates white bread rather than whole wheat bread. You’ll lose the nutritional benefits of bran and germ along with the distinctive nutty flavor that defines quality whole grain bread. Use the specified ratio of 350g whole wheat to 100g bread flour for optimal results. If you want a softer crumb, you may reduce the whole wheat to 300g and increase bread flour to 150g, but this produces a lighter loaf.
How do I know when my whole wheat bread is fully baked?
Properly baked whole wheat bread has a deep golden-brown crust and sounds distinctly hollow when you tap the bottom with your knuckles. Use an instant-read thermometer inserted into the center—the internal temperature should read 205-210°F. If the loaf reaches the correct internal temperature but lacks crust color, place it back in the oven uncovered for an additional 5 minutes.
Why is my whole wheat bread dense and gummy inside?
Dense, gummy crumb results from under-baking, over-fermentation, or insufficient gluten development through coil folds. Ensure your oven maintains 450°F throughout baking, perform all scheduled folds during bulk fermentation, and verify your dough reaches only 50% volume increase (not more). Slice only after the loaf has cooled completely—premature slicing traps steam and creates gummy texture.
Can I make this bread dough the day before and bake it the next morning?
Yes, you can prepare dough through the bulk fermentation stage, shape it, and place it in the refrigerator for 8-16 hours for a cold final proof. This actually improves flavor through extended fermentation. Remove the shaped loaf from the refrigerator 30-45 minutes before baking to allow it to come to room temperature, then score and bake using the standard method.
What’s the best way to slice whole wheat bread without crushing the loaf?
Use a sharp serrated bread knife and apply gentle downward pressure with a slight sawing motion—avoid pressing hard, which crushes the crumb structure. Wait at least 30 minutes after baking to slice, allowing interior crumb to set properly. A bread knife with fine, sharp serrations cuts cleanly through the crust without compressing the interior.
Does whole wheat bread need a long bulk fermentation, or can I speed up the process?
Bulk fermentation cannot be significantly rushed without compromising flavor and structure. The 90-minute timeline allows proper gluten development, fermentation flavor development, and gluten relaxation. Using additional yeast (more than the recipe specifies) accelerates fermentation but results in over-proofed, collapsed dough. Cold fermentation or cool room temperatures extend the timeline but improve flavor—choose patience over speed for superior bread.
Conclusion
Homemade whole wheat bread rewards your effort with superior nutrition, authentic grain flavor, and shelf stability that surpasses commercial loaves. This recipe guides you through every step with techniques I’ve refined over fifteen years of baking and teaching at Fresh Recipes Corner. Following the coil fold instructions, respecting fermentation timing, and using proper baking techniques ensures consistent success. Your first homemade whole wheat loaf marks the beginning of a baking journey that transforms how you nourish your family. Slice warm bread and experience the nutty, complex flavor that only comes from carefully made whole grains.
Whole Wheat Bread: Homemade Recipe for Healthy Loaves
Ingredients
- 2 3/4 cups whole wheat flour
- 1/2 cup + 1 tbsp bread flour
- 1 1/2 tsp salt
- 2 1/4 tsp active dry yeast
- 1 tbsp honey or sugar
- 200 ml warm water (105°F/40°C)
- 1 tbsp unsalted butter (optional for moisture)
Instructions
- Combine 1 cup whole wheat flour, yeast, and warm water in a bowl. Let sit 10-15 minutes to activate yeast.
- Mix in remaining whole wheat flour, bread flour, salt, and honey. Add butter if using. Knead for 8-10 minutes until smooth and elastic. (Total prep time included in 15 minutes)
- Place in a greased bowl, cover, and let rise for 90 minutes at room temperature.
- Punch down dough, shape into a loaf, and transfer to a baking sheet lined with parchment paper. Cover and let rise for 60 minutes.
- Preheat oven to 375°F (190°C). Cut 2-3 slashes on top of the loaf. Bake for 35-40 minutes, or until golden brown and an internal temperature reaches 200°F (93°C).
- Cool completely on a wire rack before slicing.
