
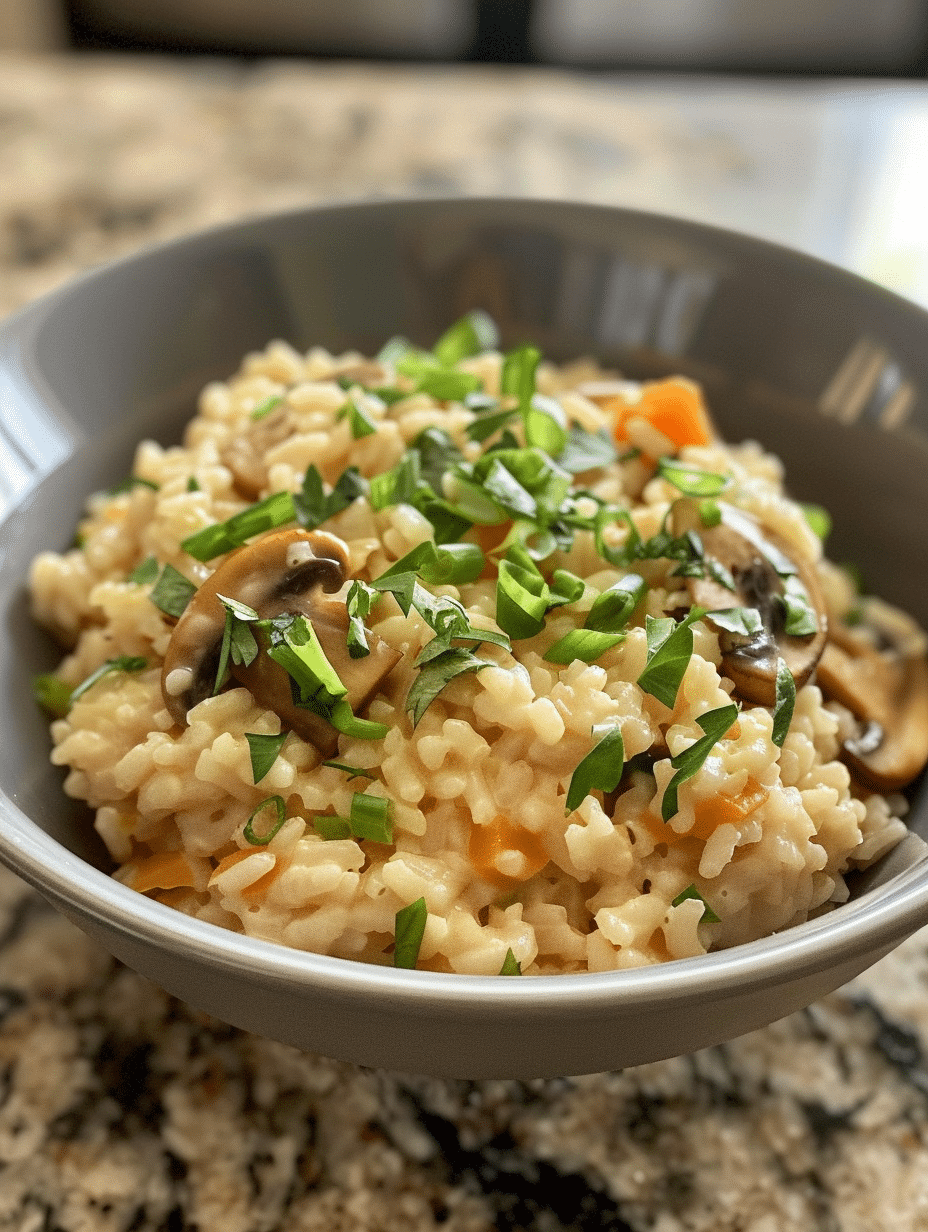
Instant pot fried rice is a complete one-pot meal that transforms leftover rice, vegetables, and protein into a restaurant-quality dish in under 15 minutes. This recipe combines the speed of pressure cooking with traditional fried rice technique, delivering fluffy, separated grains infused with savory soy sauce and sesame oil. Whether you’re feeding a busy family or meal prepping for the week, this versatile dish requires no special skills and adapts to whatever ingredients you have on hand.
About the Recipe Creator
I’m Eva Stoner, creator of Fresh Recipes Corner, where I share straightforward recipes designed for real home cooks. My passion for cooking started in my grandmother’s kitchen, where I discovered that excellent food doesn’t require complicated techniques—it needs care, patience, and trusted methods. I’ve applied those principles to every recipe I develop, including this instant pot fried rice, which combines speed with authentic flavor that my family requests weekly.
Recipe Overview
| Attribute | Value |
|---|---|
| Prep Time | 10 minutes |
| Cook Time | 5 minutes |
| Total Time | 15 minutes |
| Servings | 4 |
| Difficulty Level | Easy |
| Cuisine | Asian |
Why This Recipe Works
I developed this instant pot fried rice method after discovering that traditional stovetop fried rice requires constant stirring and timing precision that doesn’t fit modern cooking schedules. The pressure cooker approach steams the rice with aromatics and sauce, then the sauté function creates that signature fried texture without the wok. What makes this recipe reliable is the rice-to-liquid ratio and the sequence of ingredient additions that prevent mushiness while preserving vegetable texture.
This recipe works because it layers flavor development at each stage: garlic and ginger infuse the oil during sauté, soy sauce and broth penetrate the rice during pressure cooking, and the final high-heat sauté creates those slightly crispy, separated grains. The timing is forgiving enough that whether your guests arrive in 12 minutes or 20, the dish remains perfectly cooked and restaurant-quality.
Every ingredient serves a purpose in this dish, from the sesame oil that adds toasted richness to the white pepper that provides warmth without visible spice. I’ve tested this recipe with various rice types, proteins, and vegetable combinations, and the technique remains consistent and foolproof.
Ingredients
| Ingredient | Quantity | Notes |
|---|---|---|
| Cooked Rice (day-old, chilled) | 3 cups | White jasmine or long-grain preferred; cold rice prevents clumping. Leftover rice works perfectly. |
| Vegetable Oil | 2 tablespoons | Neutral oil for high-heat cooking. Canola or peanut oil are excellent alternatives. |
| Garlic Cloves | 3, minced | Fresh garlic provides essential aromatics; jarred garlic adds less flavor impact. |
| Fresh Ginger | 1 tablespoon, minced | Ground ginger may be substituted at 1 teaspoon, though fresh provides superior brightness. |
| Carrots | 1 cup, diced small | Finely diced ensures even cooking. Frozen carrots work if fresh unavailable; add during sauté phase only. |
| Frozen Peas | 1 cup | No thawing needed. Fresh peas require 30 seconds additional cooking time. |
| Eggs | 3, beaten | Room-temperature eggs cook evenly. Creates protein-rich fried rice texture. |
| Low-Sodium Soy Sauce | 3 tablespoons | Use tamari for gluten-free option. Regular soy sauce adds saltiness; adjust other seasonings accordingly. |
| Chicken Broth | ½ cup | Vegetable broth creates plant-based version. Water works but reduces depth of flavor. |
| Sesame Oil | 1 tablespoon | Toasted sesame oil essential for authentic flavor. Not coconut oil or other alternatives. |
| White Pepper | ¼ teaspoon | Black pepper may substitute but appears visibly in dish. Ground white pepper keeps appearance clean. |
| Green Onions | 3, sliced | Fresh garnish adds color and mild onion flavor. Use white and green parts separately for layered flavor. |
| Protein (optional) | ½ pound | Cooked chicken, shrimp, or tofu work excellently. Diced cooked chicken is most economical substitute. |
Step-by-Step Instructions
Phase 1: Prepare Your Instant Pot
- Set your Instant Pot to sauté mode on high heat and allow it to preheat for 2 minutes until the display shows “hot.”
- Add 1 tablespoon of vegetable oil to the heated inner pot and swirl to coat the bottom evenly.
Phase 2: Build Flavor Foundation
- Stir minced garlic and ginger into the hot oil for 30 seconds until fragrant but not browned.
- Add diced carrots to the pot and stir continuously for 2 minutes until they begin softening at the edges.
- Pour in soy sauce and broth, then stir thoroughly to combine all liquid ingredients.
Phase 3: Cook Rice Under Pressure
- Add the chilled cooked rice to the pot, breaking up any clumps with a spoon and stirring until all rice is evenly coated with sauce.
- Cancel sauté mode and seal the Instant Pot lid, ensuring the steam valve is set to “sealing.”
- Press “pressure cook” or “manual” and set timer for 3 minutes at high pressure.
- When pressure cooking completes, allow natural release for 2 minutes, then carefully move steam valve to “venting” to release remaining pressure.
- Remove lid and add frozen peas, stirring gently to distribute evenly throughout rice.
Phase 4: Finish with Eggs and Final Sauté
- Return to sauté mode on high heat and push rice mixture to the sides of the pot, creating a small well in the center.
- Pour beaten eggs into the center well and allow to cook undisturbed for 20 seconds until edges set.
- Scramble the eggs gently using a wooden spoon, breaking them into small pieces as they combine with rice.
- Stir in sesame oil and white pepper, tossing the entire mixture for 1 minute until fragrant and eggs are fully cooked.
- Cancel sauté mode, add sliced green onions and optional cooked protein, and stir until evenly distributed.
- Serve immediately while steam rises from the rice, creating that characteristic fried rice texture and aroma.
Chef Tips for Perfect Results
- Use day-old chilled rice: Warm or fresh rice contains excess moisture and becomes mushy during pressure cooking. Refrigerated rice grains remain separate and develop proper texture. If using fresh rice, spread it on a baking sheet and refrigerate for at least 2 hours before cooking.
- Break rice into small grains before cooking: Use your spoon to separate any clumps of rice before the pressure cycle begins. This ensures even sauce distribution and prevents dense pockets of stuck-together grains throughout the finished dish.
- Don’t skip the final high-heat sauté: This 1-minute phase creates slightly crispy, separated grains characteristic of authentic fried rice. The sauté function on high heat is essential—this step cannot be replicated with low heat or covered pot sitting.
- Add vegetables in stages based on cooking time: Carrots cook in 2 minutes during sauté phase, peas need only the steam from pressure cooking, and green onions add as fresh garnish. This sequence prevents overcooked vegetables and maintains vibrant colors and textures.
- Keep sesame oil for the very end: Toasted sesame oil loses its distinctive aroma when exposed to high heat during pressure cooking. Adding it during the final sauté preserves that nutty, toasted flavor that defines quality fried rice.
- Adjust soy sauce based on your broth choice: Low-sodium chicken broth pairs with 3 tablespoons soy sauce; if using regular broth, reduce soy sauce to 2 tablespoons to prevent oversalting the finished dish.
Common Mistakes to Avoid
Using Warm or Fresh Rice
Why this happens: Home cooks often use rice that was just cooked or rice at room temperature for convenience. The problem: Warm rice contains excess moisture that absorbs too much liquid during pressure cooking, creating gummy, clumpy fried rice instead of separated grains. The fix: Plan ahead and refrigerate leftover rice at least 4 hours before cooking, or spread freshly cooked rice on a sheet to cool rapidly, then refrigerate for 2 hours minimum.
Overcrowding Vegetables
Why this happens: Cooks add too many vegetables hoping for a more nutritious dish, adding broccoli, cauliflower, bell peppers, and snap peas simultaneously. The problem: Large vegetable pieces or too much volume creates uneven cooking—some vegetables remain hard while others become mushy, and the texture of fried rice suffers. The fix: Limit vegetables to 2-3 cups total, dice them uniformly into pea-sized pieces, and add in stages: carrots during sauté, frozen vegetables during pressure phase, fresh garnishes after cooking completes.
Skipping the Final Sauté Phase
Why this happens: Cooks believe pressure cooking completes the dish and serve immediately to save time. The problem: Without the final high-heat sauté, rice remains steamed and soft rather than fried, lacking the characteristic texture and slightly crispy grains. The fix: Never skip the final sauté on high heat for at least 1 minute after all ingredients are combined. This 60-second step transforms steamed rice into authentic fried rice texture.
Adding Sesame Oil During Pressure Cooking
Why this happens: Cooks add all liquids and seasonings together at the beginning for simplicity. The problem: High pressure and heat destroy the delicate toasted sesame aroma, leaving only a faint flavor and losing the distinctive nuttiness that defines quality fried rice. The fix: Reserve sesame oil, white pepper, and green onions until the final sauté phase when you add them after pressure cooking completes. This timing preserves their vibrant flavors.
Not Beating Eggs Before Adding
Why this happens: Cooks crack eggs directly into the pot or beat them insufficiently. The problem: Unbeaten eggs create large clumps and uneven distribution throughout rice, resulting in some bites being egg-heavy and others lacking any egg presence. The fix: Beat eggs in a separate bowl until yolks and whites fully combine, creating uniform color. Pour into the well and allow edges to set for 20 seconds before gently scrambling with a wooden spoon, breaking eggs into pea-sized pieces as they incorporate.
Variations and Substitutions
| Ingredient | Substitution Option | Impact on Flavor and Texture |
|---|---|---|
| Jasmine Rice | Brown rice or basmati rice | Brown rice adds nuttier flavor and chewier texture; basmati creates more delicate, separate grains but requires 1 minute less cooking time. |
| Chicken Broth | Vegetable broth or water | Vegetable broth maintains umami depth; water reduces richness but keeps rice light and neutral, allowing soy sauce to shine. |
| Soy Sauce | Tamari (gluten-free) or coconut aminos | Tamari provides identical salty-savory profile; coconut aminos add subtle sweetness, slightly reducing the savory depth. |
| Carrots and Peas | Corn, diced zucchini, bell peppers, or mushrooms | Corn adds sweetness; mushrooms create umami depth; bell peppers brighten flavor; zucchini adds textural contrast without altering taste significantly. |
| Eggs (3) | Scrambled tofu or cashew cream | Tofu creates plant-based version with similar protein content and mild flavor; cashew cream adds richness but creates creamier texture than traditional fried rice. |
| Sesame Oil | Chili oil or garlic-infused oil | Chili oil adds spice and complexity; garlic oil maintains Asian flavor profile but reduces toasted nuttiness. Sesame oil remains the authentic choice. |
| White Pepper | Black pepper, cayenne, or white miso paste | Black pepper appears visibly but provides sharp heat; cayenne increases spice significantly; white miso adds savory depth and mild sweetness. |
| Protein: Cooked Chicken | Shrimp, beef, tofu, or additional vegetables | Shrimp adds seafood flavor; beef creates deeper savory profile; tofu maintains plant-based option; additional vegetables increase fiber without changing core flavors. |
Serving Suggestions and Pairings
Serve instant pot fried rice immediately after cooking while steam rises from the pot, creating an inviting presentation that draws guests to the table. The versatility of this dish accommodates countless meal contexts and flavor pairings.
Pair fried rice with steamed edamame and cucumber salad for a complete vegetarian lunch with substantial protein and fresh vegetables. The salty soy sauce in the rice balances beautifully against the refreshing crunch of cucumber and mild sweetness of edamame.
Serve alongside chicken satay skewers or grilled lemongrass tofu for a Southeast Asian-inspired dinner that impresses guests without requiring extended prep time. The sesame oil in fried rice complements grilled proteins with Shared nutty undertones.
Accompany fried rice with simple miso soup or clear chicken broth for a Japanese-influenced meal that feels complete and balanced. The broth’s delicate clarity contrasts beautifully with the savory richness of seasoned fried rice.
Pack leftover fried rice into bento boxes with steamed broccoli, fresh fruit, and a side of sriracha mayo for nutritious meal prep lunches throughout the week. Cold fried rice remains delicious and provides satisfying afternoon fuel without requiring reheating at work.
Storage and Reheating
| Storage Method | Duration | Instructions |
|---|---|---|
| Refrigerator | 3-4 days | Transfer cooled fried rice to airtight container immediately after cooking. Store on middle shelf away from raw proteins. Label with date prepared. |
| Freezer | 2-3 months | Cool completely, transfer to freezer-safe container leaving 1-inch headspace for expansion. Freeze flat in zipper bags for space-efficient storage. Thaw overnight in refrigerator before reheating. |
| Instant Pot Reheat (Best Method) | 5 minutes | Add ½ cup water to inner pot, place trivet inside, set container of fried rice on trivet. Pressure cook 3 minutes, natural release 2 minutes. Stir and serve immediately. |
| Stovetop Sauté | 5 minutes | Heat 1 tablespoon oil in large skillet over medium-high heat. Add cold or thawed fried rice, breaking up any clumps. Stir constantly for 4-5 minutes until heated through and slightly crispy at edges. Add 1 tablespoon water if rice seems dry. |
| Microwave (Quick but Less Ideal) | 3 minutes | Place fried rice in microwave-safe bowl, cover loosely with paper towel. Microwave on 50% power for 2-3 minutes, stirring halfway through. Add 1 tablespoon water if needed. Texture becomes softer than stovetop reheating. |
Nutritional Information
The following nutritional values represent one serving of instant pot fried rice (approximately 1.5 cups), prepared with the base recipe ingredients and optional cooked chicken. Approximate values; actual nutrition varies based on specific brands and ingredient choices.
| Nutrient | Amount per Serving |
|---|---|
| Calories | 310 calories |
| Protein | 16 grams |
| Total Fat | 12 grams |
| Saturated Fat | 2.5 grams |
| Total Carbohydrates | 35 grams |
| Dietary Fiber | 2 grams |
| Sugars | 1 gram |
| Sodium | 680 milligrams |
| Cholesterol | 95 milligrams |
Frequently Asked Questions
Can I make instant pot fried rice with freshly cooked rice?
You can, but the results suffer significantly compared to using chilled day-old rice. Fresh cooked rice contains excess moisture that absorbs too much liquid during pressure cooking, resulting in gummy, clumpy fried rice rather than separated grains. Spread hot rice on a baking sheet, allow it to cool to room temperature for 15 minutes, then refrigerate for at least 2 hours before cooking.
How do I know when the fried rice is done cooking?
The instant pot signals completion when the pressure cooking timer expires and the float valve drops, indicating pressure has released. After natural release for 2 minutes and manual venting, the lid opens easily and rice grains are heated through and distinct. The final high-heat sauté adds the characteristic texture—rice should be hot enough to create slight steam but not so hot that it splashes outside the pot.
Why is my fried rice mushy even though I used old rice?
Mushy rice results from either too much liquid during cooking or insufficiently chilled rice that wasn’t broken into small enough pieces before cooking. Ensure you use the exact ratio of ½ cup broth listed in the recipe, break rice clumps thoroughly before pressure cooking begins, and keep rice refrigerated until the moment you add it to the pot. If rice still turns mushy, reduce cooking time to 2 minutes instead of 3 minutes at high pressure.
Can I make this fried rice recipe vegetarian?
Yes, this recipe is easily adapted to vegetarian preferences by substituting vegetable broth for chicken broth and replacing the optional chicken protein with seasoned tofu, chickpeas, or additional vegetables like mushrooms and snap peas. Keep the eggs as your primary protein source, or use cashew cream stirred in during the final sauté to maintain richness. The soy sauce, garlic, ginger, and sesame oil provide substantial umami depth that compensates for missing meat.
How far in advance can I prepare instant pot fried rice?
You can prepare all ingredients up to 24 hours ahead by measuring vegetables, mincing garlic and ginger, and beating eggs in separate containers stored in the refrigerator. Keep rice chilled in a separate container. Do not combine ingredients until cooking time arrives, as this prevents the rice from absorbing moisture prematurely. The actual cooking time takes only 15 minutes once you begin the sauté phase.
What’s the best way to reheat leftover instant pot fried rice?
Stovetop reheating produces the best results and recreates the slightly crispy texture of freshly cooked fried rice. Heat 1 tablespoon oil in a large skillet over medium-high heat, add cold fried rice in a single layer, and stir frequently for 4-5 minutes until heated through with light browning at the edges. This method takes only 5 minutes and maintains texture better than microwave reheating, which softens the rice despite being faster.
Conclusion
Instant pot fried rice transforms busy weeknights into restaurant-quality dinners, delivering complete meals in 15 minutes with minimal cleanup. This recipe proves that speed and flavor are not mutually exclusive when you use proper techniques and quality ingredients. The combination of toasted sesame oil, savory soy sauce, and fluffy separated grains makes every bite satisfying enough to serve guests confidently or pack for lunch satisfaction.
Instant Pot Fried Rice Recipe
Ingredients
- 3 cups cooked, cooled leftover white rice
- 1 tablespoon neutral oil (e.g. safflower or vegetable oil)
- 1/4 cup diced yellow onion
- 1 teaspoon minced garlic
- 1 tablespoon low-sodium soy sauce
- 0.5 tablespoons rice vinegar (optional)
- 0.5 cup frozen peas and carrots (or separate 1/4 cup each)
- 0.75 cups finely diced red bell pepper
- 1 egg (optional for added protein)
- 0.25 teaspoon white pepper
- 2 tablespoons water for pressure cooking
Instructions
- Press SAUTÉ on your Instant Pot and heat the neutral oil until shimmering.
- Add minced garlic, finely grated ginger (optional), and sauté for 30 seconds.
- Add diced onions and cook for an additional 2 minutes until softened.
- Stir in cooked rice with a silicone spatula, making sure it doesn’t stick.
- Pour in low-sodium soy sauce, sesame oil, and white pepper, mixing thoroughly.
- Add frozen peas and carrots, then red bell pepper; stir until combined.
- Transfer everything to the bottom of the pot (no heat, using a wooden spoon is fine if you have one).
- Close the lid and set to Pressure Cook/High for 1-2 minutes (this is purely for distributing heat; Instant Pot is fast). Allow natural release for 5 minutes, then quick release any remaining pressure.
- Switch back to SAUTÉ-ON-HIGH mode and cook 2-3 minutes, lifting and stirring frequently until the rice gets slightly crispy.
- Scramble in the egg directly in the pot for protein if desired before serving.
Notes
Flexibility is key—swap veggies with broccoli, mushrooms, or snow peas.
Season to taste with furikake or toasted sesame seeds and scallions at the end.
Adjust soy sauce for less salt if needed.
