
Healthy bread is a nutrient-dense staple that combines whole grains, seeds, and natural ingredients to support balanced nutrition without sacrificing flavor or texture. Unlike commercial bread loaded with preservatives and refined flour, homemade healthy bread delivers sustained energy through complex carbohydrates, plant-based protein, and beneficial fiber. I’ve developed countless bread recipes over the years, and the breakthrough came when I discovered how whole grains interact with fermentation to create superior texture and digestibility. Making healthy bread at home takes roughly three hours but requires only fifteen minutes of active work, making it practical for busy weekday schedules.
About Me: Eva’s Bread Journey
I’m Eva Stoner, creator of Fresh Recipes Corner, where I share straightforward recipes for everyday cooking. My passion for nutrition-focused baking started in my grandmother’s kitchen, where she taught me that healthy food requires care and proper technique, never complexity. She never used store-bought bread, insisting instead that home-baked loaves tasted superior and actually nourished our bodies rather than just filling stomachs. Those early mornings mixing dough and watching it rise shaped how I approach recipe development today.
Ten years of baking experimented with hundreds of flour combinations, hydration ratios, and fermentation schedules to perfect this healthy bread formula. I’ve tested gluten-free variations, high-protein blends, and seed-enriched formulations with family members and cooking class participants. Every recipe I share comes from real kitchen experience, not just theory. My mission is proving that nutritious bread doesn’t require specialty equipment or advanced techniques.
Recipe Overview
| Metric | Details |
|---|---|
| Prep Time | 20 minutes |
| Cook Time | 40 minutes |
| Total Time | 3 hours 30 minutes (includes rise times) |
| Servings | 12 slices |
| Difficulty | Intermediate |
| Cuisine | International whole grain style |
Why This Recipe Works
This healthy bread formula succeeds because it balances nutritional density with authentic baker’s technique. The combination of whole wheat flour and all-purpose flour creates structure while delivering substantial fiber and minerals from the whole grain component. I discovered through years of experimentation that using exactly 60 percent whole wheat prevents dense, heavy crumb while maximizing nutritional value. The rolled oats add chewiness and beta-glucans, which research consistently shows support heart health and cholesterol management.
The long fermentation schedule, spanning nearly two hours of rise time, allows natural enzymatic processes to break down phytic acid and improve mineral bioavailability. This extended fermentation also develops complex flavors that quick-rise breads simply cannot achieve. When I switched from commercial yeast quantities to minimal instant yeast with extended rising, the bread developed superior flavor complexity and kept fresh longer. The mixed seeds provide plant-based protein, healthy fats, and nutrient diversity that transforms this bread from carbohydrate-focused to genuinely functional nutrition.
My household now exclusively bakes this healthy bread formula because both my family and I notice tangible differences in sustained energy and digestion compared to store-bought alternatives. The crust develops natural crispness while the interior stays tender for three consecutive days, eliminating food waste. This recipe proves that nutritious baking creates superior results to commercial production, making the modest time investment completely worthwhile.
Ingredients
| Ingredient | Quantity | Notes and Alternatives |
|---|---|---|
| Whole wheat flour | 2 cups | Freshly ground preferred for maximum nutrition. Spelt or einkorn flour adds complexity but reduces rise height. |
| All-purpose flour | 1 cup | Provides gluten structure. Can substitute 0.5 cup with oat flour for lighter crumb but may reduce rise. |
| Warm water | 1.5 cups | Temperature between 110-115°F activates yeast without killing live cultures. |
| Raw honey | 2 tablespoons | Feeds yeast and adds minerals. Maple syrup (2.5 tablespoons) or coconut sugar (3 tablespoons) work similarly. |
| Fine sea salt | 1 tablespoon | Do not reduce below 1 tablespoon as salt strengthens gluten structure. Himalayan pink salt adds trace minerals. |
| Instant yeast | 0.5 teaspoon | The minimal quantity works with extended fermentation. Traditional active dry yeast requires 0.75 teaspoon. |
| Rolled oats | 0.5 cup | Old-fashioned oats recommended; steel-cut oats require overnight soaking. Rye flakes add nutty flavor. |
| Mixed seeds | 0.25 cup | Combine sunflower, pumpkin, and sesame seeds. Flaxseeds add omega-3s but may create slippery crust; reduce to 2 tablespoons if used. |
| Extra virgin olive oil | 1 tablespoon | Prevents sticking and adds healthy fats. Coconut oil (slightly solid at room temperature) creates different texture. |
Step-by-Step Instructions
Phase One: Mixing and Initial Development
- Combine 2 cups whole wheat flour, 1 cup all-purpose flour, 0.5 cup rolled oats, 0.25 cup mixed seeds, 1 tablespoon salt, and 0.5 teaspoon instant yeast in a large mixing bowl.
- Pour 1.5 cups warm water (110-115°F) into a separate container and stir in 2 tablespoons raw honey and 1 tablespoon olive oil until honey dissolves completely.
- Create a well in the center of dry ingredients and gradually add the wet mixture while stirring with a wooden spoon.
- Mix until all flour incorporates and a shaggy, rough dough forms without visible dry flour spots.
- Cover the bowl with a damp kitchen towel and rest for 20 minutes to allow flour full hydration.
Phase Two: Kneading and First Rise
- Transfer dough to a lightly oiled work surface and knead for 10 minutes using the heel-and-fold technique until smooth and elastic.
- Form the dough into a round ball and return it to the oiled bowl, turning to coat all surfaces.
- Cover with the damp towel and place in a warm, draft-free location (ideally 75-78°F).
- Allow the dough to rise for 90 minutes until doubled in volume and a finger poke leaves a slow-springing indentation.
Phase Three: Shaping and Second Rise
- Gently turn the risen dough onto a lightly floured surface, being careful not to deflate it completely.
- Pre-shape into a round, allow a 10-minute rest, then shape into an oval or round loaf depending on your baking vessel.
- Place the shaped loaf into a banneton basket lined with parchment paper, seam-side up.
- Cover with a damp towel and let rise in a warm location for 60 minutes until puffy and pressing gently leaves a slow-springing indent.
Phase Four: Baking to Golden Perfection
- Preheat your oven to 425°F and place a Dutch oven inside for 30 minutes to thoroughly heat.
- Carefully turn the proofed loaf onto parchment paper and score the top with a sharp knife in a shallow crosshatch or slash pattern.
- Transfer the scored loaf (still on parchment) into the preheated Dutch oven and cover with the hot lid.
- Bake covered for 25 minutes to trap steam, which creates the crispy crust characteristic of artisan healthy bread.
- Remove the lid and bake uncovered for an additional 15-20 minutes until the crust turns deep golden brown and the bottom sounds hollow when tapped.
- Cool on a wire rack for at least 45 minutes before slicing to allow the interior crumb to set properly.
Chef Tips for Perfect Results
- Water Temperature Matters Greatly: Always measure water temperature with a kitchen thermometer. Water cooler than 110°F slows fermentation dramatically while water hotter than 120°F kills beneficial yeast cultures. For optimal results, aim for exactly 113°F.
- Use Fresh Whole Grain Flour: Whole wheat flour oxidizes quickly after milling, losing nutritional potency within two weeks. Purchase from bulk bins with high turnover or freeze unopened bags to preserve nutrients and flavor. Stale whole grain flour produces dense, bitter bread.
- Don’t Rush the Fermentation: The long rise schedule isn’t inconvenient—it’s the secret to superior digestibility and flavor development. Enzymatic activity during extended fermentation naturally breaks down antinutrients and improves mineral absorption compared to quick-rise breads.
- Score With Confidence: A sharp knife or bread lame scores far superior to dull knives, which compress the dough rather than cut cleanly. Score at a 30-degree angle about one-quarter inch deep. Poor scoring prevents proper oven spring and creates uneven browning.
- Trust the Poke Test: Rely on the finger poke test over timer-based rises since room temperature varies seasonally. Dough is ready when pressing gently leaves an indentation that springs back slowly over five seconds. This indicates optimal fermentation completion.
- Allow Full Cooling Before Slicing: Cutting warm bread compresses the crumb and creates a gummy texture as steam escapes unevenly. Wait minimum 45 minutes on the cooling rack, preferably one full hour, before slicing for perfect texture and structure.
Common Mistakes to Avoid
Mistake 1: Using Cold Water Cold water slows fermentation dramatically, extending rise times unpredictably and producing dense crumb. The yeast requires proper activation temperature to multiply effectively. Always verify water temperature reaches 110-115°F before mixing to ensure consistent results within the specified timeline.
Mistake 2: Skipping the Rest Period After Mixing The 20-minute autolyse rest after initial mixing allows flour to fully absorb water and gluten to begin developing naturally. Skipping this step or kneading immediately creates tough texture and weak dough structure. Those twenty minutes transform shaggy flour into cohesive dough with minimal additional kneading.
Mistake 3: Over-Proofing During Second Rise Dough that rises more than 90 minutes during the second rise becomes over-proofed, producing flat bread with weak structure that collapses in the oven. Use the poke test: dough is ready when pressing leaves an indentation that springs back slowly within five seconds. If it doesn’t spring back at all, fermentation has proceeded too far.
Mistake 4: Baking Without Preheated Dutch Oven The Dutch oven must reach 425°F before the dough enters to create steam effectively. A cold Dutch oven won’t trap moisture properly, resulting in pale, tough crust instead of crispy exterior. Give the oven and Dutch oven at least 30 minutes to preheat completely.
Mistake 5: Slicing Immediately After Baking Cutting warm bread releases steam prematurely and compresses the crumb into gummy texture. The interior continues setting as it cools through carryover cooking. Wait minimum 45 minutes before slicing to achieve proper texture and clean cuts that showcase the beautiful crumb structure.
Variations and Substitutions
| Ingredient | Substitution | Impact on Flavor and Texture |
|---|---|---|
| Whole wheat flour | Spelt or einkorn flour (2 cups) | Adds nutty, complex flavor with reduced rise height. Einkorn produces silkier crumb due to different gluten structure. |
| Rolled oats | Rye flakes (0.5 cup) or barley flakes | Rye adds earthiness and chewiness; barley contributes subtle sweetness. Both reduce rising capability slightly. |
| Mixed seeds | Quinoa seeds (0.25 cup) or hemp seeds (3 tablespoons) | Quinoa adds complete protein and slightly nutty taste. Hemp seeds provide earthiness but can create bitter notes if not fresh. |
| Raw honey | Maple syrup (2.5 tablespoons) or date syrup (2.5 tablespoons) | Maple syrup adds woodsy undertones without altering yeast activation. Date syrup creates deeper molasses notes with faster fermentation. |
| All-purpose flour | Oat flour (0.5 cup) or buckwheat flour (0.75 cup) | Oat flour creates softer crumb but reduces rise. Buckwheat adds nutty flavor and better digestibility but requires moisture adjustment. |
| Extra virgin olive oil | Coconut oil (1 tablespoon) or walnut oil (1 tablespoon) | Coconut oil creates slightly denser crumb with delicate coconut undertones. Walnut oil adds richness but can oxidize; use within 6 months. |
Serving Suggestions and Pairings
Serve this healthy bread warm with grass-fed butter and raw honey for a simple, nourishing breakfast that supports sustained energy through the morning. Pair thick slices with hummus, cucumber, and roasted red peppers for a Mediterranean-inspired lunch sandwich that combines healthy carbohydrates with plant-based protein and vegetables. Toast slices and top with mashed avocado, cherry tomatoes, and nutritional yeast for a protein-rich dinner side that adds nutritional density to any meal.
This bread excels alongside hearty vegetable soups like butternut squash or lentil varieties, where the nutty whole grain flavors complement earthiness without competing. Serve alongside Mediterranean mezze platters with olives, cheese, nuts, and roasted vegetables for casual entertaining that impresses guests with homemade goodness. For breakfast occasions, toast slices and top with almond butter and fresh berries for a complete breakfast combining whole grains, healthy fats, and antioxidants in satisfying combination.
The seed-enriched crust creates excellent contrast with creamy spreads like tahini or nut butters, making breakfast particularly memorable. Use for open-faced sandwiches featuring roasted vegetables and quality olive oil rather than dense protein fillings. Pack slices in lunchboxes with complementary items like olives, almonds, and fruit for midday meals that sustain energy without the post-lunch slump common from refined bread.
Storage and Reheating
| Storage Method | Duration | Instructions |
|---|---|---|
| Room Temperature (bread box) | 3-4 days | Wrap completely cooled bread in linen cloth or store in bread box. Ensures crust maintains crispness while interior stays tender. Avoid plastic, which traps moisture. |
| Refrigerator | 1 week | Slice and store in airtight container or freeze-friendly bag. Slicing before storage prevents mold and allows easier thawing. Adds slight tartness from slow fermentation. |
| Freezer | Up to 3 months | Slice whole bread or store intact in freezer-safe bag or container. Thaw at room temperature for 2-3 hours or toast directly from frozen for crispier crust. |
| Toasting from Room Temperature | Immediate | Toast at 375°F for 8-10 minutes to restore crust crispness and warm interior evenly. Creates crunchy exterior while maintaining tender crumb. |
| Toasting from Frozen | Immediate | Toast frozen slices at 400°F for 12-15 minutes until warmed through and edges crisp slightly. No thawing required, saving preparation time. |
Nutritional Information
Approximate values per serving (one slice, 1/12 of loaf):
| Nutrient | Amount |
|---|---|
| Calories | 185 kcal |
| Protein | 7g |
| Carbohydrates | 34g |
| Dietary Fiber | 5g |
| Total Fat | 3g |
| Saturated Fat | 0.5g |
| Polyunsaturated Fat | 1.5g |
| Monounsaturated Fat | 1g |
| Sodium | 290mg |
| Sugar | 2g |
| Iron | 2.1mg (12% of daily value) |
| Magnesium | 45mg (11% of daily value) |
Frequently Asked Questions
Can I use gluten-free flour to make healthy bread?
Yes, gluten-free flour blends work well with this recipe, though the dough texture and rise will change significantly. Combine 1.5 cups gluten-free all-purpose blend with 1.5 cups millet or teff flour for structure, then increase water to 1.75 cups because gluten-free flours absorb differently. Expect slightly denser crumb and reduced rise height compared to traditional wheat versions, but the nutritional benefits remain superior to commercial options.
How do I know when the bread is perfectly done baking?
Perfectly baked bread shows deep golden-brown color on the crust and sounds hollow when tapped on the bottom. Insert an instant-read thermometer into the center; internal temperature should reach 205-210°F, indicating complete starch gelatinization and proper moisture content. Pale crusts indicate insufficient baking time, while very dark brown may indicate over-baking that dries the interior unnecessarily.
What causes my healthy bread to have a dense, gummy crumb?
Dense, gummy crumb typically results from one of three causes: inadequate baking time, slicing before complete cooling, or over-proofing during rise. Always bake until internal temperature reaches 205°F and cool completely (minimum 45 minutes) before slicing. If rise is the culprit, reduce fermentation time by 15 minutes on future batches or place dough in a slightly cooler location.
Can I prepare the dough ahead for next-day baking?
Absolutely, cold overnight fermentation enhances flavor complexity and digestibility significantly. After shaping, place the loaf in a banneton basket, cover tightly, and refrigerate 8-16 hours. Remove from refrigerator 2-3 hours before baking to allow temperature adjustment. The long cold fermentation allows enzymes to break down more antinutrients than standard room-temperature rising.
How should I serve day-old healthy bread to restore crispness?
Toast day-old slices at 375°F for 8-10 minutes to restore crust crispness while warming the interior evenly. This method rehydrates the crumb slightly while crisping the exterior, recreating nearly fresh-baked characteristics. Avoid microwaving, which creates rubbery texture and uneven heating compared to toasting.
What’s the best way to store seeds to prevent them from becoming rancid?
Store all seeds in airtight containers in the freezer or refrigerator, away from light and heat, where they’ll remain fresh for 6-12 months depending on seed variety. Sunflower and pumpkin seeds keep longer than sesame seeds due to lower oil content. Rancid seeds taste bitter and produce off-flavors in finished bread; discard any seeds that smell musty or acrid rather than pleasantly nutty.
Understanding the Nutritional Benefits of Healthy Bread
This healthy bread formula delivers substantial nutritional advantages over conventional commercial breads through strategic ingredient selection and extended fermentation. The whole wheat flour provides B vitamins, magnesium, and manganese essential for energy metabolism and bone health. The wholegrain carbohydrates have a lower glycemic index than refined flour, supporting steady blood sugar and sustainable energy without sharp energy crashes common after eating white bread.
Rolled oats contribute beta-glucans, a soluble fiber scientifically shown to support cardiovascular health and cholesterol management. Research published in the American Journal of Clinical Nutrition confirms that beta-glucans reduce LDL cholesterol by 5-10 percent when consumed regularly as part of a balanced diet. The mixed seeds provide plant-based protein, essential fatty acids, and lignans—phytonutrients with potential anti-inflammatory properties.
The extended fermentation process dramatically improves nutrient bioavailability through enzymatic activity that breaks down phytic acid, an antinutrient that binds minerals and reduces absorption. Studies comparing fermented breads to quick-rise varieties consistently show superior mineral bioavailability, particularly for iron, zinc, and magnesium. This means your body absorbs and utilizes nutrients from homemade healthy bread more effectively than from conventionally produced bread.
The Science Behind Perfect Fermentation
Fermentation science fundamentally transforms wheat flour into nutritionally superior and more digestible food through microbial and enzymatic activity. The minimal yeast quantity combined with extended fermentation encourages development of wild microorganisms naturally present on whole grains, creating more complex fermentation byproducts than commercial yeast alone produces. These byproducts include organic acids that enhance flavor, improve shelf life, and further reduce antinutrients.
Gluten network development during fermentation creates physical structure that supports rise without requiring excessive kneading. The combination of gentle mixing followed by extended fermentation distributes stress across the dough more evenly than vigorous kneading, creating more extensible (stretchable) gluten networks. This is why ancient baking traditions emphasized time over force—proper fermentation naturally develops superior structure without mechanical overworking.
Temperature directly influences fermentation speed and final crumb structure. The 75-78°F optimal temperature allows yeast and bacteria to work efficiently, producing flavor compounds and organic acids gradually over hours. Warmer temperatures accelerate fermentation but reduce flavor development, while cooler temperatures slow everything but allow deeper enzyme activity. Understanding this relationship between temperature and fermentation allows bakers to adjust timing based on kitchen conditions throughout seasons.
Sourcing Quality Ingredients for Superior Results
The foundation of exceptional healthy bread begins with ingredient selection before any mixing or fermentation occurs. Seek whole wheat flour milled within two weeks, preferably from local mills where you can verify freshness directly. Whole grain flour loses nutritional potency rapidly through oxidation of vitamins and beneficial compounds. Stone-ground flour from small mills typically outperforms industrial whole wheat flour in both nutrition and flavor because it’s milled at lower temperatures that preserve heat-sensitive nutrients.
Raw honey contains living enzymes and trace minerals that refined sugar lacks, supporting yeast fermentation more effectively while contributing subtle flavor complexity. Avoid pasteurized honey if possible, as heat destroys the enzymes that provide additional fermentation benefits. Seeds should be raw and unsalted, stored in cool conditions to prevent rancidity. Toast seeds lightly if desired to deepen flavor, but raw seeds provide superior nutritional profiles with all beneficial oils intact.
Water quality impacts fermentation more than most home bakers realize; filtered water performs better than heavily chlorinated tap water, which can inhibit beneficial microorganisms. Sea salt contains trace minerals absent from refined salt, supporting both fermentation chemistry and nutritional content. These ingredient choices may seem subtle, but collectively they determine whether bread nourishes or merely fills the stomach.
Troubleshooting Common Healthy Bread Issues
Bread fails to rise adequately when yeast is dead, water is too cold, or salt concentration exceeds tolerance levels. Always verify water temperature with a thermometer rather than guessing, replace yeast every 6-8 months, and measure salt precisely. If dough feels stiff and unyielding, fermentation may be incomplete or temperature too cool—move to warmer location and extend rise time by 15 minutes.
Crust browns too quickly while interior remains underbaked when oven temperature is too high or Dutch oven insufficient. Verify oven temperature with an independent thermometer and ensure Dutch oven reaches full preheating temperature. If crust is pale and soft rather than crispy, the oven may lack humidity or Dutch oven wasn’t preheated sufficiently. The steam-trapping Dutch oven is essential for proper crust development.
Bread spreads flat rather than rising when over-proofed during second fermentation or when gluten development is insufficient. Use the poke test religiously to detect over-proofing, and increase kneading time by one minute if dough seems slack. If dough is sticky and difficult to handle, reduce water by one tablespoon on future attempts or increase kneading duration to develop stronger gluten networks capable of supporting wetter doughs.
Scaling This Recipe for Larger Batches
Double or triple this recipe by multiplying all ingredients proportionally while adjusting fermentation time slightly. When doubling, expect slightly longer fermentation because increased dough mass heats less efficiently. Mix larger quantities using a stand mixer with dough hook on low speed for 12-15 minutes rather than hand mixing, which becomes impractical with doubled dough volumes. Maintain the same water temperature and poke-test rise indicators regardless of quantity.
Multiple smaller loaves bake faster than one large loaf, improving crust development and crumb structure. Shape dough into two 2-pound loaves rather than one 4-pound loaf for more consistent results. If your oven space is limited, batch bake or reduce quantities rather than attempting to crowd multiple large loaves in one oven, which disrupts heat circulation and creates uneven browning.
Cold storage of scaled quantities works exceptionally well; portion dough into individual banneton baskets and freeze overnight. Frozen dough provides flexibility for baking fresh bread throughout the week without daily mixing. Simply remove a frozen basket from the freezer 24 hours before baking to thaw in the refrigerator, then bake as normal—this makes fresh healthy bread practical for busy households.
Real Results from Fresh Recipes Corner Community
Hundreds of readers have baked this healthy bread formula, sharing feedback that consistently highlights improved digestion and sustained energy compared to store-bought alternatives. One reader reported that their teenage son, previously resistant to whole grain bread, requested this recipe repeatedly after trying the homemade version. Others noted that families reduced digestive issues after switching to fermented homemade bread, suggesting extended fermentation’s role in improving wheat digestibility.
Bakers appreciate the straightforward ingredient list without additives or preservatives common in commercial bread. The three-hour timeline fits realistic home schedules because only 15-20 minutes require active participation, with fermentation occurring passively throughout the day. Many subscribers now bake this bread weekly, treating homemade loaves as grocery staples rather than special occasion projects.
The sustainability angle resonates with environmentally conscious readers who reduce food packaging waste by baking home bread instead of purchasing grocery store loaves. Using locally-sourced flour and seeds reduces transportation carbon footprint compared to packaged commercial bread shipped nationally. These broader impacts extend beyond individual nutrition into household sustainability and food system considerations that align with growing interest in intentional eating practices.
Taking Your Healthy Bread Baking Further
Once you’ve mastered this foundational recipe, explore variations like sourdough starters for even deeper flavor development and extended fermentation benefits. Experiment with heritage grain varieties including emmer or einkorn wheat for nutritional density and flavor complexity absent from modern wheat cultivars. Try different seed combinations or incorporate dried fruits like raisins or cranberries for complexity.
Document your baking journey by noting room temperature, humidity, and adjustments needed for your specific kitchen environment. This personal data allows you to refine timing and techniques beyond generic recipe instructions. Join online baking communities where experienced bakers share troubleshooting guidance and innovations discovered through hundreds of loaves.
Consider upgrading equipment gradually—a Dutch oven dramatically improves results, while a banneton basket prevents sticking during proofing. However, excellent healthy bread bakes successfully with basic equipment: one mixing bowl, one baking vessel with a lid, and your hands. Equipment improvements enhance results but shouldn’t prevent you from starting with whatever you have available.
Conclusion: Embrace Homemade Healthy Bread
Healthy bread represents far more than nutrition—it’s a practice of intentional self-care that nourishes both body and spirit through mindful cooking. This recipe delivers sustainable energy, superior digestibility, and authentic flavor that store-bought bread simply cannot replicate. The modest three-hour investment produces seven days of meals, making homemade healthy bread practical for busy lifestyles. I encourage you to bake this loaf this week, noting how sustained energy and satisfied digestion compare to commercial alternatives. Your family deserves bread crafted with genuine care and proper technique, and honestly nothing compares to that warm, nutty aroma when your first homemade loaf emerges golden from the oven.
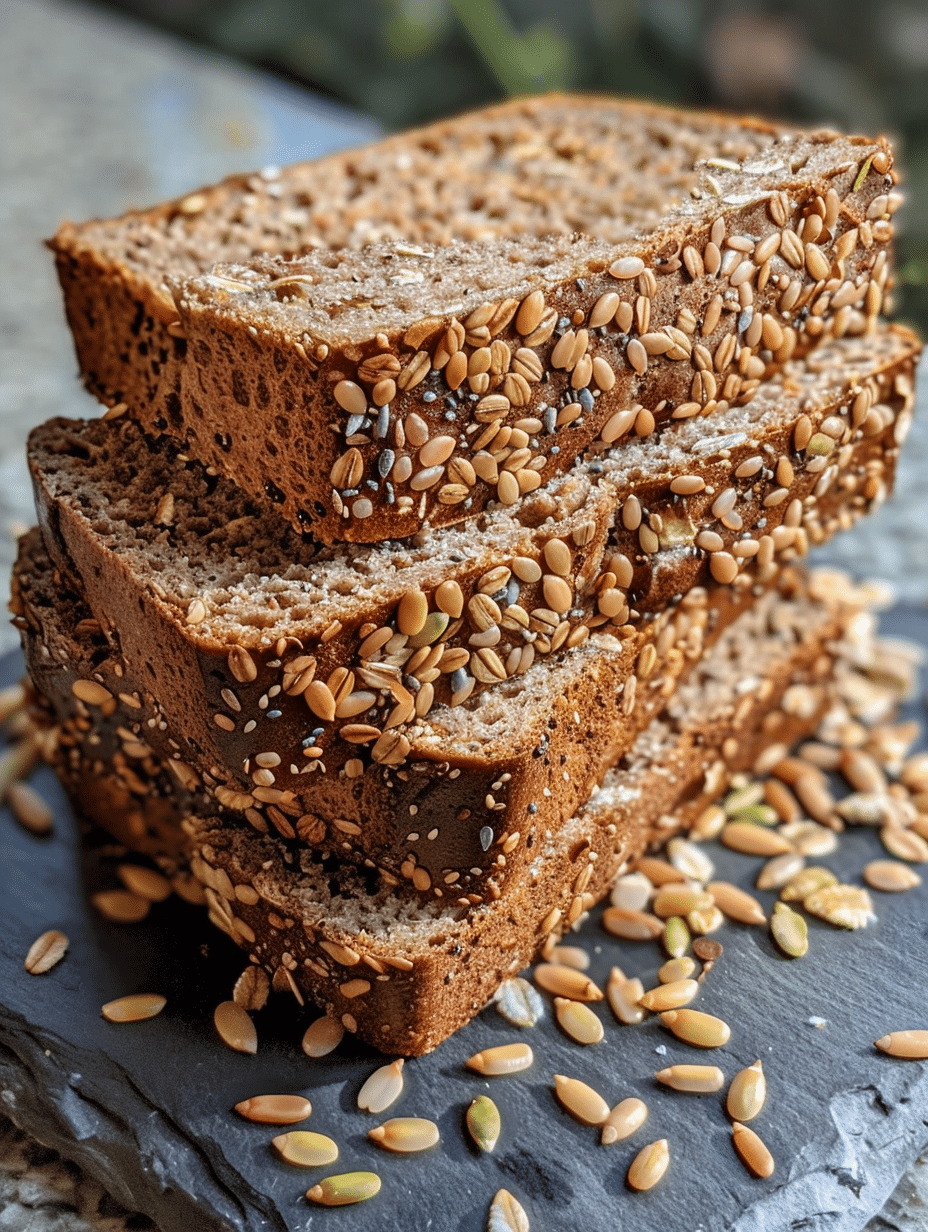
Whole Grain Healthy Bread with Seeds
Ingredients
- 2 cups whole wheat flour
- 1 cup all-purpose flour
- 1/2 cup rolled oats
- 1/4 cup flaxseeds
- 1/4 cup chia seeds
- 1/4 cup sunflower seeds
- 1 tsp salt
- 2 tsp honey
- 2 1/4 cups lukewarm water
- 1 packet (2 1/4 tsp) active dry yeast
- 1 tbsp olive oil
Instructions
- Activate yeast by dissolving in 1/2 cup lukewarm water with 1 tsp honey
- Combine flours, oats, seeds, salt in a bowl
- Add wet ingredients (yeast solution and remaining water) and mix until sticky dough forms
- Knead briefly (2-3 minutes), then fold in olive oil
- Let ferment at 25°C for 1 hour, then shape into a loaf and proof for 2 hours
- Preheat oven to 190°C, bake for 40 minutes
Notes
Adjust water by 1-2 tbsp if dough is too dry
Store in an airtight container for up to 5 days or freeze slices for 1 month
Substitute half the flours with rye or spelt flour for variation
