
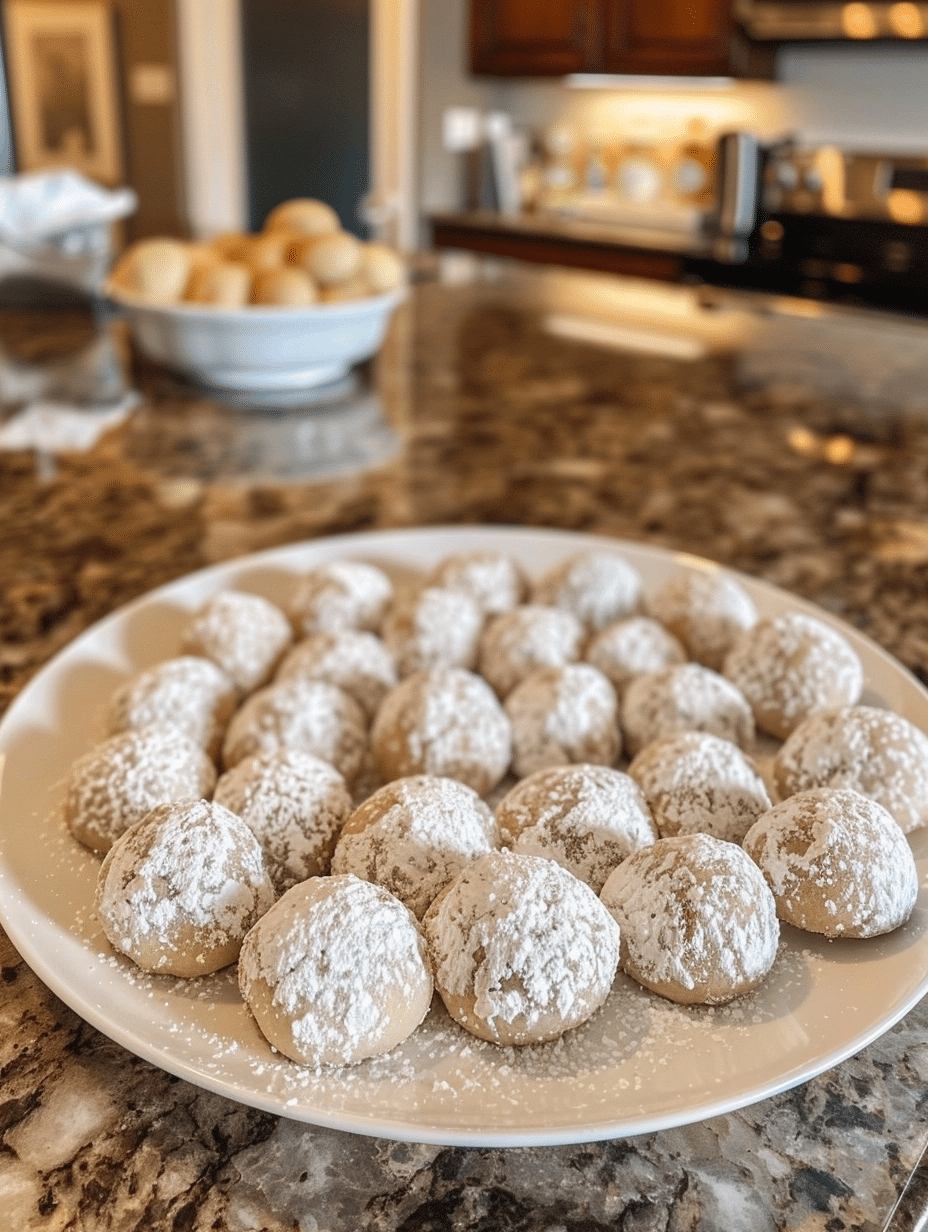
Mexican wedding cookies are a buttery, nutty shortbread-style confection rolled in powdered sugar, traditionally served at celebrations and special occasions throughout Mexico and the southwestern United States. These delicate treats feature a melt-in-your-mouth texture created by combining softened butter, ground nuts, and minimal mixing, resulting in a tender crumb that dissolves on the palate. The cookie has been a staple at weddings, holiday gatherings, and family celebrations for generations, earning its name from its prominent role in traditional wedding festivities. Made with simple, quality ingredients like pecans or walnuts and pure vanilla, these cookies deliver rich, toasted nut flavor balanced by subtle sweetness. Each cookie is individually portioned, shaped into small balls, and generously coated in powdered sugar for an elegant presentation that masks the golden-brown interior.
About Me and This Recipe
I’m Lila Bennett, a 34-year-old home baker based in Portland, Oregon, and my kitchen is almost always filled with the smell of something sweet. I fell in love with baking as a kid, sneaking tastes of cookie dough and watching simple ingredients turn into something comforting and delicious. What started with slightly overbaked cookies turned into years of experimenting with cakes, pancakes, and all kinds of desserts—learning through trial, error, and a lot of taste-testing.
My first encounter with Mexican wedding cookies happened at a neighbor’s holiday party when I was twelve years old. I bit into one and immediately understood why these cookies had such a devoted following—they were buttery, melt-in-your-mouth magic dusted in a snowfall of powdered sugar. Years later, when I opened my own small baking business, I knew I had to master this classic recipe. I’ve spent countless hours perfecting the technique, testing nut ratios, and experimenting with texture variations to create the version I’m sharing with you today.
This recipe reflects everything I’ve learned about creating tender, professional-quality cookies at home. The key is using softened butter, not overworking the dough, and baking at a lower temperature to prevent browning while allowing the nuts to toast naturally. I’ve made these cookies for weddings, anniversaries, and holiday parties, and they never fail to impress. Whether you’re a seasoned baker or just starting your kitchen journey, this recipe delivers consistent, delicious results.
Recipe Overview
| Metric | Value |
|---|---|
| Prep Time | 15 minutes |
| Cook Time | 14 minutes |
| Total Time | 29 minutes |
| Servings | 36 cookies |
| Difficulty Level | Easy to Intermediate |
| Cuisine | Mexican |
Why This Recipe Works
This Mexican wedding cookies recipe works because it uses a precise ratio of butter to flour that creates a tender, crumbly texture without requiring eggs or leavening agents. The combination of softened butter and finely ground nuts provides natural moisture and fat, resulting in cookies that stay soft for days while maintaining their structure. I discovered through experimentation that creaming the butter and sugar properly creates tiny air pockets that make each cookie delightfully light and almost melt-away in texture.
The lower baking temperature of 325°F is critical to the success of this recipe. Most cookies bake at 350-375°F, but wedding cookies need gentler heat to allow the cookies to cook through while staying pale golden rather than brown. This slow bake prevents the nuts from burning and keeps the cookies tender rather than crispy. I always watch for golden edges as my signal that they’re perfectly done—they’ll still feel slightly soft in the center when warm, which is exactly what you want.
Rolling warm cookies in powdered sugar immediately after baking ensures maximum coating adhesion. The residual heat helps the sugar cling to the cookie’s surface, creating that signature snowy appearance. I’ve found that rolling them again in powdered sugar after they cool completely gives an even more luxurious finish. This technique has become my signature touch when preparing these cookies for special occasions and client orders.
Ingredients
| Ingredient | Quantity | Notes and Alternatives |
|---|---|---|
| All-Purpose Flour | 2 cups | Use quality flour; whole wheat flour will create denser cookies |
| Unsalted Butter | 1 cup (2 sticks) | Must be softened to room temperature; salted butter will oversalt the dough |
| Granulated Sugar | 1/2 cup | White sugar works best; brown sugar will alter texture and color |
| Pecans (finely chopped) | 1 cup | Walnuts or almonds are traditional substitutes; nuts can be lightly toasted before chopping |
| Vanilla Extract | 1 teaspoon | Pure vanilla only; imitation will produce weaker flavor profile |
| Salt | 1/4 teaspoon | Enhances nut and vanilla flavors; do not omit |
| Powdered Sugar (for rolling) | 1 cup (plus extra) | Essential for coating; sift before rolling for smoother finish |
Step-by-Step Instructions
Preparation Phase
- Preheat your oven to 325°F, positioning the rack in the center for even heat distribution.
- Line two baking sheets with parchment paper or silicone baking mats to prevent sticking and ensure even baking.
- Sift the powdered sugar into a shallow bowl, breaking up any clumps so it coats the cookies evenly and smoothly.
- Finely chop the pecans or walnuts into small, uniform pieces, ensuring no large nut chunks remain in the dough.
Mixing Phase
- Combine softened butter and granulated sugar in a large mixing bowl, creaming together for 2-3 minutes until the mixture becomes light, fluffy, and pale in color.
- Add vanilla extract to the butter mixture, mixing on low speed until fully incorporated and fragrant.
- In a separate bowl, whisk together flour and salt to combine evenly and distribute salt throughout.
- Add the flour mixture to the butter mixture in three additions, folding gently by hand after each addition using a rubber spatula to avoid overworking the dough.
- Fold the chopped pecans into the dough with a final few gentle strokes until the nuts are evenly distributed throughout and no dry flour remains.
Shaping and Baking Phase
- Scoop the dough using a 1-inch cookie scoop or small measuring spoon, rolling each portion into a smooth ball between your palms.
- Place each dough ball on the prepared baking sheets, spacing them about 1 inch apart to allow for slight spreading during baking.
- Bake in the preheated 325°F oven for 12-15 minutes, watching carefully until the edges turn light golden brown while the centers remain pale.
- Remove from the oven and allow cookies to cool on the baking sheet for exactly 2-3 minutes before moving them to finish cooling.
Finishing Phase
- Working quickly while still warm, roll each cookie in the prepared powdered sugar, coating all sides completely and evenly.
- Transfer coated cookies to a wire rack to cool completely to room temperature, taking approximately 20-30 minutes.
- Once completely cool, roll the cookies in powdered sugar a second time for a luxurious, thick coating.
- Store in an airtight container for serving, gifting, or enjoying throughout the week.
Chef Tips for Perfect Results
- Butter Temperature Matters Most: Room-temperature butter creams properly and incorporates air for tender texture. Cold butter won’t cream, creating dense cookies; warm butter becomes oily and produces thin, crispy results instead of the desired tender crumb.
- Don’t Overmix the Dough: Mix only until ingredients are combined after adding flour. Overmixing develops gluten, resulting in tough, cake-like cookies that lose the delicate, melt-in-your-mouth quality that defines authentic Mexican wedding cookies.
- Toast Your Nuts Beforehand: Toasting pecans or walnuts in a 325°F oven for 8-10 minutes before chopping intensifies their flavor significantly. This technique adds depth and richness that raw nuts cannot provide, elevating the entire cookie experience.
- Use a Cookie Scoop for Consistency: A 1-inch cookie scoop ensures all cookies bake evenly and uniformly, preventing some from overdone while others remain underbaked. Consistent sizing also makes the cookies look more professional for gift-giving or party service.
- Watch for Golden Edges, Not Brown Centers: The cookies should look slightly underbaked when removed from the oven because they continue cooking from residual heat. Golden edges with pale centers indicate perfect doneness, resulting in cookies that are tender inside with just a hint of structure.
- Double-Roll for Elegance: Rolling warm cookies once, then again after cooling creates that signature snowy appearance seen in bakery versions. This technique catches light beautifully and signals quality and attention to detail that impresses guests and recipients.
Common Mistakes to Avoid
Mistake 1: Using Cold or Melted Butter
Cold butter won’t incorporate air into the dough, resulting in dense, hard cookies that taste more like shortbread than the desired tender texture. Melted butter creates oily, flat cookies that spread too much during baking. Fix this by letting butter sit at room temperature for 30-60 minutes until it’s soft enough to leave a slight indentation when pressed with your finger.
Mistake 2: Overmixing After Adding Flour
Mixing the dough too vigorously after flour is added develops gluten, creating tough, cake-like cookies that lack the delicate crumb structure. The dough should come together with just a few gentle folds. Stop mixing as soon as you don’t see dry flour; lumps are acceptable and will disappear naturally during baking.
Mistake 3: Baking at Too High Temperature
Baking above 325°F causes the cookies to brown too quickly on the outside before the insides cook through, resulting in crispy cookies instead of tender ones. Additionally, high heat causes the nuts to burn, producing bitter flavors. Stick to 325°F and trust the slower baking process; the cookies will be perfectly tender and golden.
Mistake 4: Skipping the Immediate Powdered Sugar Roll
If you wait too long to roll warm cookies in powdered sugar, the coating won’t adhere properly, resulting in bare spots and uneven coverage. The warmth of the cookie makes the sugar stick naturally. Roll within 2-3 minutes of removing from the oven, then roll again after cooling for maximum elegance and a thick, luxurious coating.
Mistake 5: Using Unsifted Powdered Sugar
Lumpy powdered sugar creates an uneven coating with visible clumps rather than a smooth, snowy finish. Always sift powdered sugar before rolling cookies in it to break up any clumps from moisture absorption during storage. This simple step transforms the final appearance from homemade to professionally finished.
Variations and Substitutions
| Ingredient | Substitution | Impact on Flavor |
|---|---|---|
| Pecans | Walnuts, almonds, or hazelnuts | Walnuts provide earthier flavor; almonds create nuttier profile; hazelnuts add rich, toasted complexity |
| Vanilla Extract | Almond extract or rum extract (alcohol-free) | Almond extract intensifies nut flavor dramatically; rum extract adds warmth and depth |
| All-Purpose Flour | Cake flour (reduce to 1.75 cups) | Creates even more tender, delicate crumb; reduces slight grittiness some report |
| Granulated Sugar | Coconut sugar (same quantity) | Adds subtle caramel notes and slight molasses undertone; cookies may be slightly darker |
| Powdered Sugar Coating | Cinnamon sugar or cocoa powder mixture | Cinnamon adds warmth; cocoa creates chocolate variation; both provide visual interest and flavor contrast |
| Butter | Coconut oil or ghee (same quantity, softened) | Coconut oil creates lighter, airier texture; ghee adds subtle nutty, complex depth |
Serving Suggestions and Pairings
Mexican wedding cookies shine in multiple serving contexts, from formal celebrations to casual coffee breaks. Serve these elegant treats with hot Mexican chocolate, traditional champurrado, or rich café de olla for an authentic pairing that honors the recipe’s cultural heritage. The mild sweetness and buttery texture complement the deep, complex spice notes found in these traditional beverages perfectly.
For holiday celebrations and gift-giving occasions, arrange Mexican wedding cookies in decorative boxes or clear cellophane bags tied with ribbon. They’re stunning on tiered cake stands at wedding receptions, anniversaries, quinceañeras, and formal tea parties. I always recommend placing them on small decorative napkins or doilies to enhance their elegant appearance and make serving easier for guests.
These cookies pair beautifully with coffee, both espresso-based drinks and simple black coffee. The buttery nut flavors cut through coffee’s bitterness while the powdered sugar provides gentle sweetness. They also complement afternoon tea service, fruity dessert wines, and cold milk for family gatherings. I often create dessert platters combining these cookies with churros, fruit, and chocolate sauce for comprehensive Mexican-inspired dessert experiences.
For casual entertaining, set out a plate of Mexican wedding cookies alongside fresh fruit, cheese, or small chocolates. These cookies work equally well at children’s birthday parties, holiday office parties, and dinner party dessert courses. Their individual portion size makes them perfect for pre-plated dessert presentations or self-serve buffet stations.
Storage and Reheating
| Method | Duration | Instructions |
|---|---|---|
| Room Temperature (Airtight Container) | 5-7 days | Store in an airtight container with parchment between layers to prevent sticking. Keep away from direct sunlight and humidity for maximum freshness and powdered sugar retention. |
| Refrigerator | 10-12 days | Place cookies in an airtight container on a shelf away from strong-smelling foods. Cookies may absorb moisture; refresh in a 275°F oven for 5 minutes before serving if needed. |
| Freezer (Baked Cookies) | 2-3 months | Layer cooled, fully coated cookies between parchment in a freezer-safe container. Thaw at room temperature for 30 minutes before serving. Re-dust with powdered sugar if coating dulls after thawing. |
| Freezer (Dough Balls) | 3 months | Freeze unbaked dough balls on a baking sheet, then transfer to a freezer bag. Bake from frozen, adding 2-3 minutes to baking time; roll in powdered sugar while still warm. |
| Reviving Stale Cookies | Immediate | Warm in a 275°F oven for 5-8 minutes to restore softness. Dust immediately with fresh powdered sugar while warm to refresh appearance and ensure even coating. |
Nutritional Information
Approximate values per cookie (based on 36 servings):
| Nutrient | Amount per Serving |
|---|---|
| Calories | 145 |
| Total Fat | 9g |
| Saturated Fat | 5g |
| Cholesterol | 20mg |
| Sodium | 45mg |
| Total Carbohydrates | 14g |
| Dietary Fiber | 0.5g |
| Sugars | 8g |
| Protein | 2g |
Frequently Asked Questions
Can I make Mexican wedding cookies without nuts?
Yes, you can substitute the 1 cup of chopped nuts with an additional 1 cup of all-purpose flour plus 2 tablespoons of unsalted butter, though the cookies will lack the signature toasted nut flavor and richness. The texture will be more similar to traditional shortbread—denser and slightly less melt-in-your-mouth than authentic wedding cookies. If you want to keep some nut character, try using just 1/2 cup nuts combined with 1/2 cup flour for a compromise that maintains flavor while reducing nut content. Those with severe nut allergies can add 1 teaspoon of almond extract to compensate for lost flavor depth.
How do I know when Mexican wedding cookies are done baking?
Mexican wedding cookies are perfectly done when the edges turn light golden brown while the centers remain pale or barely tinged with color, typically after 12-15 minutes at 325°F. The cookies should feel slightly soft and yield gently when pressed in the center, as they continue cooking from residual heat after removal from the oven. If the entire cookie appears brown or feels firm throughout, it’s overbaked and will be too crispy. Trust your eyes to watch for golden edges rather than relying solely on time, as every oven varies slightly in temperature accuracy.
Why are my Mexican wedding cookies spreading too much?
Spreading occurs when butter is too warm or melted, when the oven temperature is too high, or when the dough is overmixed and develops excess gluten. Always use softened butter that’s at room temperature, verify your oven temperature with an oven thermometer set to 325°F, and mix gently after adding flour to avoid overworking the dough. If cookies continue to spread excessively, refrigerate the scooped dough balls for 15-30 minutes before baking to allow them to firm up and hold their shape during the initial heat exposure.
Can I prepare Mexican wedding cookie dough ahead of time?
Yes, prepare the dough up to 3 days in advance by wrapping it tightly in plastic wrap and refrigerating until ready to bake. Alternatively, scoop the dough into balls, freeze them on a baking sheet, then transfer to a freezer bag for up to 3 months of storage. Frozen dough balls can be baked directly from frozen without thawing, though you’ll need to add 2-3 minutes to the baking time and watch carefully for golden edges. This make-ahead flexibility makes Mexican wedding cookies perfect for busy schedules and advance party preparation.
What’s the best way to serve Mexican wedding cookies at a party?
Arrange Mexican wedding cookies on tiered cake stands, small plates, or decorative trays lined with doilies or parchment paper for elegant presentation. Pair them with coffee, Mexican chocolate, or champagne depending on the formality of your event. Individual serving bowls, small bags, or boxes make excellent options for guest takeaway, and the cookies store well enough to be prepared a full week before your event. For buffet-style service, place cookies on platters at the dessert station alongside complementary treats like churros or flan.
Can I double this Mexican wedding cookies recipe?
Yes, you can easily double all ingredients by multiplying each measurement by two, creating 72 cookies instead of 36. Mix the doubled batch in two separate portions rather than one large batch to ensure even incorporation and proper creaming of butter and sugar. Bake on multiple sheets simultaneously using two oven racks if your oven allows, rotating the trays halfway through for even browning. The baking time remains approximately 12-15 minutes per batch, though the lower rack may bake slightly faster than the upper rack due to proximity to the heating element.
Final Thoughts
Mexican wedding cookies represent centuries of culinary tradition, combining simple ingredients into something extraordinary that brings people together. This recipe delivers professional-quality results through understanding proper technique, respecting ingredient quality, and embracing patience in the baking process. Whether you’re baking for your first wedding, a holiday celebration, or simply craving these buttery treasures, these cookies will impress with their elegant appearance and melt-in-your-mouth texture that lingers long after the last bite.
I encourage you to make this recipe your own by experimenting with nut varieties, trying different powdered sugar coatings, or sharing them with loved ones who deserve something special. The joy of baking these cookies lies not just in the eating, but in the care and attention you bring to each batch. Start baking today and discover why Mexican wedding cookies have remained beloved for generations—their signature buttery perfection transcends time and trends.
Mexican Wedding Cookies
Ingredients
- 2 1/4 cups all-purpose flour
- 1 cup butter, softened
- 1 1/2 cups finely ground pecans or walnuts
- 1/4 tsp salt
- 1 tsp pure vanilla extract
- 2-3 cups powdered sugar (for coating)
Instructions
- Preheat oven to 300°F (150°C)
- In a large bowl, whisk together flour, ground nuts, and salt
- Add softened butter and vanilla extract. Mix until just combined
- Form dough into 1-inch balls and place on parchment-lined baking sheets
- Bake 14 minutes or until golden brown but tender
- Let cool slightly, then roll each cookie in powdered sugar
- Store in an airtight container at room temperature
Notes
For a crisper texture, freeze dough balls 15 minutes before baking
Cookies stay fresh up to 5 days when properly stored
