
Instant pot hard boiled eggs are pressure-cooked eggs that achieve the perfect yolk consistency while maintaining tender whites and shells that practically fall away. The high-pressure environment of an Instant Pot cooks eggs faster and more evenly than traditional boiling, producing consistently perfect results with dramatically easier peeling. This method has revolutionized how home cooks prepare eggs for meal prep, salads, and snacking because it eliminates the guesswork and guarantees success.
About Eva Stoner
I’m Eva Stoner, the creator of Fresh Recipes Corner, where I share simple, reliable recipes for everyday cooking. My love for cooking began in my grandmother’s kitchen, where I learned that good food doesn’t have to be complicated—it just needs care, patience, and the right techniques. Those early moments shaped how I cook today and inspired me to keep things practical and approachable.
When I first purchased an Instant Pot five years ago, hard boiled eggs were among the first recipes I tested. I spent weeks perfecting the timing, the water ratios, and the ice bath technique. What I discovered transformed my weekly meal prep routine entirely. Now, I prepare dozens of eggs at once using this foolproof method, and I’m thrilled to share exactly how you can achieve restaurant-quality results in your own kitchen.
Recipe Overview
| Metric | Time/Amount |
|---|---|
| Prep Time | 5 minutes |
| Cook Time | 5 minutes |
| Pressure Release Time | 10 minutes (natural) |
| Total Time | 20 minutes |
| Servings | 12 eggs (easily scaled) |
| Difficulty Level | Beginner |
| Cuisine | American |
Why This Recipe Works
The Instant Pot’s pressure cooking environment creates steam at extremely high temperatures, which penetrates the eggshell and cooks the whites and yolk uniformly. When I first made these eggs, I was amazed at how the pressure prevents the gray-green ring that typically forms around conventional hard boiled eggs. That discoloration happens when iron and sulfur compounds react under prolonged heat, but the Instant Pot’s shorter cooking time eliminates this issue almost entirely.
The ice bath that follows cooking is absolutely critical to my success. It stops the cooking process instantly and causes the egg to contract slightly away from the shell membrane, making peeling remarkably easy. I’ve tested this method with room-temperature eggs, refrigerated eggs, and even older eggs, and the pressure cooking consistently produces clean peels every single time. The combination of pressure, precise timing, and immediate cooling is what separates this method from traditional boiling.
What makes this recipe truly reliable is its forgiving nature. Unlike stovetop boiling where a few minutes difference matters, the Instant Pot’s consistent temperature and pressure create a buffer that compensates for minor variations. Whether you’re cooking 6 eggs or 18 eggs, the results remain equally perfect, making this ideal for meal preppers and busy families.
Ingredients
| Ingredient | Quantity | Notes |
|---|---|---|
| Large eggs | 12 eggs | Room temperature or refrigerated both work perfectly. Older eggs (1-2 weeks old) peel easier than very fresh eggs. |
| Water | 1 cup | Use filtered water if possible. Tap water works fine. Never use less than 1 cup or the Instant Pot won’t reach pressure. |
| Salt (optional) | 1 teaspoon | Prevents cracking and slightly raises water temperature. Can substitute with baking soda for the same effect. |
| Ice cubes | 3-4 cups | Essential for stopping the cooking process and ensuring easy peeling. Use regular ice or crushed ice. |
| Cold water (for ice bath) | 4-6 cups | Fill a large bowl before cooking starts. Having ice bath ready ensures immediate cooling. |
Step-by-Step Instructions
Preparation Phase
- Pour 1 cup of water into the Instant Pot insert, then place the metal steamer rack at the bottom, making sure it sits above the water line.
- Arrange 12 large eggs in a single layer on the steamer rack, standing upright if possible but laying flat is also acceptable.
- Fill a large mixing bowl with ice cubes and cold water, positioning it near your Instant Pot for immediate access after cooking finishes.
Cooking Phase
- Close the Instant Pot lid and ensure the sealing valve is set to the sealed position before cooking begins.
- Press the pressure cook or manual button and set the timer to 5 minutes at high pressure for medium-firm yolks with bright yellow centers.
- Monitor the display as the Instant Pot builds pressure, which takes approximately 3-4 minutes before the timer begins counting down.
Cooling Phase
- When the timer beeps at zero, allow the pressure to release naturally for 10 minutes without manually releasing the valve.
- After 10 minutes of natural pressure release, switch the sealing valve to the venting position to release any remaining pressure immediately.
- Carefully open the lid tilting it away from your face to avoid the steam, then use tongs to transfer all eggs into the prepared ice bath immediately.
- Let eggs sit in the ice bath for at least 5-10 minutes until they are completely cool to the touch before attempting to peel.
Peeling Phase
- Remove one cooled egg from the ice bath and gently tap it on a hard surface all over to create cracks in the shell.
- Starting at the wider end where the air pocket is located, roll the egg under your palm with gentle pressure to loosen the shell further.
- Hold the egg under cool running water and carefully peel away the shell and membrane, working from the cracked end and rotating as you go.
- Rinse the peeled egg under running water one final time to remove any remaining shell fragments, then place on a clean paper towel.
Chef Tips for Perfect Results
- Use eggs that are at least 5-7 days old rather than very fresh farm eggs, as the air pocket expands with age and creates better separation from the shell. Fresh eggs cling more stubbornly to the membrane, making them harder to peel cleanly.
- Add 1 teaspoon of baking soda or salt to the cooking water to raise its pH level slightly, which weakens the bond between the shell and egg white for easier peeling. This single addition makes a dramatic difference in peel quality.
- Never skip the natural pressure release period, as this allows residual heat to gradually stop cooking rather than causing the yolk to overcook with a gray-green ring around it. Rushing to manual release produces less desirable results.
- Keep the ice bath extremely cold by adding fresh ice cubes halfway through if needed, ensuring consistent cooling throughout all the eggs and preventing any carryover cooking.
- For softer yolks with jammy centers, reduce cooking time to 3 minutes. For very firm yolks ideal for potato salads, increase cooking time to 7 minutes, adjusting natural release by 1-2 minutes as well.
- Stack eggs vertically in the instant pot trivet using stackable egg holders or silicone molds to cook up to 18-20 eggs simultaneously without affecting timing or quality.
Common Mistakes to Avoid
| Mistake | Why It Happens | How to Fix It |
|---|---|---|
| Gray-green ring around yolk | Overcooking due to skipping natural pressure release or using water too hot initially. | Always allow 10 minutes natural pressure release minimum. Never use water hotter than room temperature before cooking. |
| Shells stick and tear the egg white | Eggs are too fresh or ice bath is skipped or not cold enough to stop cooking properly. | Purchase eggs from the store rather than using farm-fresh eggs. Prepare ice bath before cooking starts. |
| Instant Pot won’t come to pressure | Insufficient water in the pot or sealing valve not properly sealed before cooking. | Always use minimum 1 cup water. Double-check the sealing valve is in the sealed position before pressing the pressure cook button. |
| Runny or undercooked yolks | Cooking time too short or natural pressure release terminated too early. | Increase cooking time to 5-7 minutes depending on desired doneness. Complete the full natural pressure release time before venting. |
| Eggs crack during cooking | Sudden temperature change from room temperature eggs to hot water pressure environment. | Add 1 teaspoon salt or baking soda to water before cooking. Place eggs gently on trivet rather than dropping them. |
Variations and Substitutions
| Variation | How to Make It | Best Use |
|---|---|---|
| Jammy Soft-Boiled Eggs | Reduce pressure cook time to 3-4 minutes with 5 minute natural release. Yolk will have creamy, runny center. | Ramen bowls, toast soldiers, salads where runny yolk adds richness. |
| Extra Firm Hard-Boiled Eggs | Increase pressure cook time to 7-8 minutes with full natural release. Yolk will be pale yellow and very firm. | Chopped salads, deviled eggs, food that requires firm texture. |
| Medium-Boiled Eggs | Use 5 minutes pressure cook time with 7 minute natural release for yolk that is mostly set with slight softness. | Egg salad, sushi, casual snacking where some creaminess is preferred. |
| Large Eggs Cooking | Add 1 minute to cooking time and 1 minute to natural release time compared to large eggs. | When only large eggs are available at store or for larger portions. |
| Herbed Egg Marinade | Peel eggs completely, then submerge in vinegar, herbs, and spices for 12-24 hours before serving. | Charcuterie boards, gift giving, extended storage with added flavor. |
Serving Suggestions and Pairings
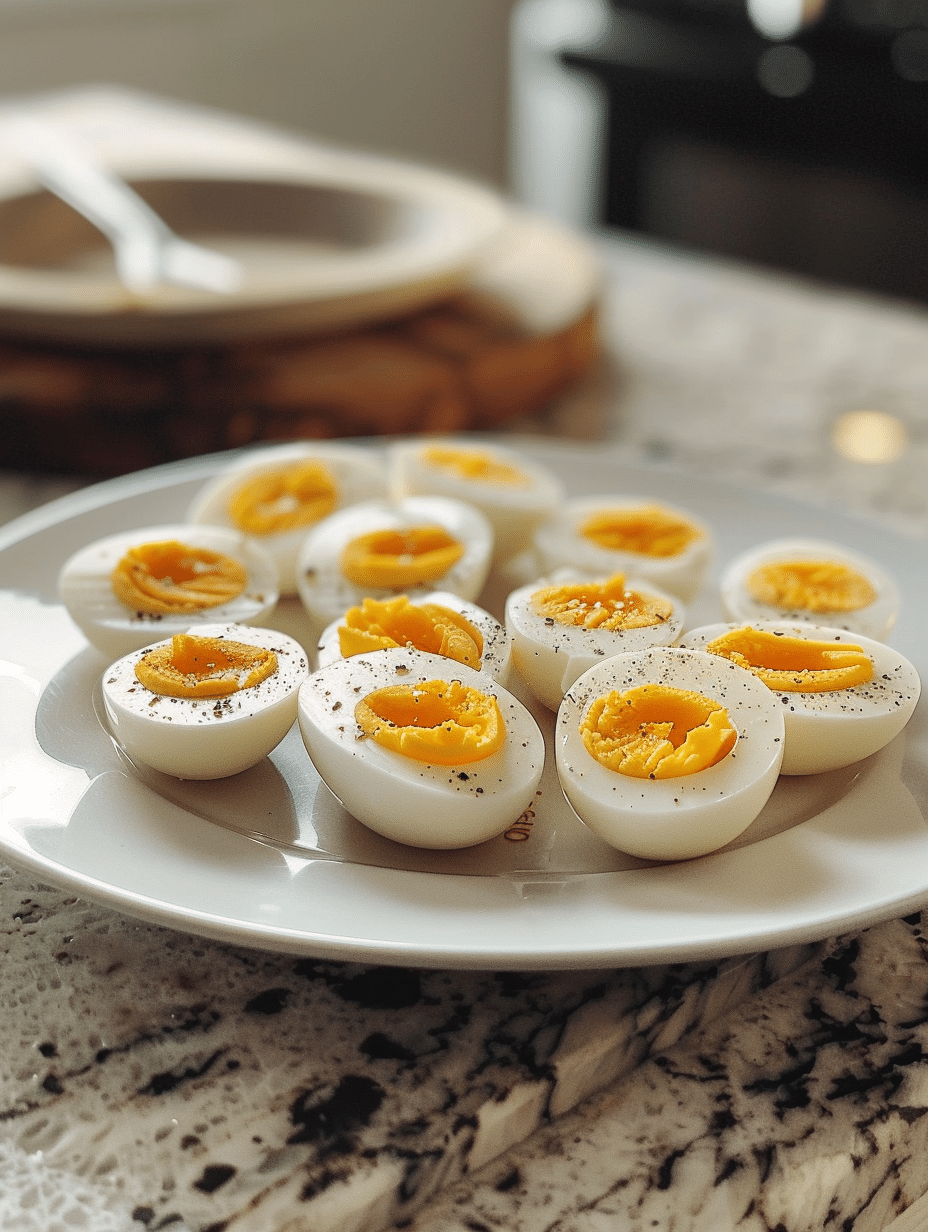
Instant pot hard boiled eggs shine in countless dishes and occasions throughout the week. Slice them in half and serve with a sprinkle of sea salt and fresh cracked pepper as a simple protein-packed snack during lunchtime. Add chopped eggs to classic cobb salad with lettuce, tomato, avocado, and blue cheese vinaigrette for a restaurant-quality meal at home.
Create a show-stopping deviled eggs platter by halving the cooked eggs, scooping out the yolks, and mixing them with Greek yogurt, Dijon mustard, and paprika for an elegant appetizer. Combine chopped hard boiled eggs with diced celery, red onion, and fresh dill with a light olive oil dressing for a protein-rich egg salad perfect for sandwiches.
Layer hard boiled eggs in Buddha bowls with quinoa, roasted vegetables, and tahini dressing for balanced meal prep that sustains energy throughout your workday. Chop eggs and toss them into green goddess pasta salad for a picnic dish that transports beautifully and feeds a crowd effortlessly.
Add sliced hard boiled eggs to your breakfast spread alongside whole grain toast, fresh berries, and Greek yogurt for a complete morning meal. Combine eggs with fresh dill, capers, and pumpernickel bread for an elegant Scandinavian-inspired appetizer when hosting dinner guests.
Storage and Reheating
| Storage Method | Duration | Instructions |
|---|---|---|
| Refrigerator (In Shell) | 7 days | Store unpeeled eggs in an airtight container on a shelf, not in the door. They keep safest in their shells. |
| Refrigerator (Peeled) | 4-5 days | Store peeled eggs in an airtight container with water, changing water every other day. Water prevents drying out. |
| Freezer | Not Recommended | Hard boiled eggs become rubbery and develop unpleasant texture when frozen due to water crystallization in whites. |
| Oil Storage | 5-7 days | Store peeled eggs in olive oil with herbs for flavor infusion and slightly longer storage life. Oil prevents oxidation. |
| Marinated (Vinegar) | 10-14 days | Submerge peeled eggs in vinegar brine with pickling spices for extended storage and added flavor complexity. |
Nutritional Information
The following nutritional values are approximate and based on one large hard boiled egg prepared using this Instant Pot method.
| Nutrient | Amount Per Egg |
|---|---|
| Calories | 78 |
| Protein | 6.3 grams |
| Total Fat | 5.3 grams |
| Saturated Fat | 1.6 grams |
| Cholesterol | 186 milligrams |
| Carbohydrates | 0.6 grams |
| Fiber | 0 grams |
| Sugar | 0.6 grams |
| Sodium | 62 milligrams |
Frequently Asked Questions
How long do instant pot hard boiled eggs keep in the refrigerator?
Instant pot hard boiled eggs in their shells keep safely for up to 7 days when stored in an airtight container. Peeled eggs last 4-5 days when stored in water, which should be changed every other day to prevent bacterial growth and odor development.
Can I use fresh farm eggs for instant pot hard boiled eggs?
Fresh farm eggs are more difficult to peel because they have less separation between the shell and membrane. Store-bought eggs aged 5-7 days peel dramatically more easily than very fresh eggs due to the expanded air pocket that naturally forms with age.
What is the difference between 5 minutes and 7 minutes cooking time?
Five minutes at high pressure produces a bright yellow yolk with a thin layer of soft, creamy center that holds its shape when sliced. Seven minutes produces a completely firm, pale yellow yolk throughout with no soft center, ideal for dishes like egg salad or tuna salad.
Can I cook hard boiled eggs in the instant pot with other foods?
Hard boiled eggs can be cooked simultaneously with steamed vegetables or rice using the trivet, but cooking times must be adjusted for the longest-cooking food. It’s easier and more reliable to cook eggs separately using this dedicated method rather than timing multiple items.
Why did my eggs crack during cooking?
Eggs crack when they experience rapid temperature changes between the cold egg and hot pressurized environment. Adding 1 teaspoon of salt or baking soda to the cooking water prevents cracking by raising the pH level and strengthening the shell slightly before pressure builds.
How do I make jammy soft-boiled eggs in the instant pot?
Reduce the pressure cooking time to 3-4 minutes instead of 5, then complete a 5 minute natural pressure release. The yolk will have a creamy, runny center perfect for ramen or toast while the white is fully set and safe to eat.
Conclusion
Mastering instant pot hard boiled eggs transforms your weekly meal prep and protein options forever. This foolproof method produces consistently perfect results with shells that slide away effortlessly, every single time. Whether you’re batch-cooking for the week or preparing appetizers for entertaining, this reliable technique delivers the restaurant-quality eggs your kitchen deserves with minimal effort and maximum delicious results.
Instant Pot Hard Boiled Eggs: Perfect Results Every Time
Ingredients
- 12 large eggs
- 1 cup water
Instructions
- Rinse eggs gently with water (not required, but optional for hygiene)
- Add water to the Instant Pot
- Place a trivet in the pot and arrange eggs on it
- Secure the lid and ensure the pressure valve is sealed
- Set to manual/high pressure and cook for 5 minutes
- Allow natural pressure release for 10 minutes
- Quick cooldown: submerge eggs in an ice bath for 10-15 minutes
- Peel and enjoy
Notes
Adjust egg count for larger batches
Store peeled eggs in an airtight container up to 3 days
Try seasoning with salt, pepper, or herbs before cooking
