
Instant pot corn on the cob is a foolproof method for cooking fresh corn that requires minimal effort and delivers consistently tender, juicy results in under 15 minutes total. This pressure cooking technique locks in natural sweetness while reducing cooking time compared to traditional boiling methods. Whether you’re preparing a weeknight side dish or hosting a summer gathering, this recipe transforms fresh corn into a restaurant-quality side that rivals any outdoor barbecue. The instant pot’s steam pressure environment creates the perfect conditions for corn to reach peak tenderness without becoming mushy or losing flavor.
About the Creator
I’m Eva Stoner, the creator of Fresh Recipes Corner, where I share simple, reliable recipes for everyday cooking. My love for cooking began in my grandmother’s kitchen, where I learned that good food doesn’t have to be complicated—it just needs care, patience, and the right techniques. Those early moments shaped how I cook today and inspired me to keep things practical and approachable.
When I discovered the instant pot, I immediately saw potential for simplifying seasonal favorites like corn on the cob. After testing countless combinations of water levels, cooking times, and preparation methods, I developed a technique that produces perfectly cooked corn every single time. This experience reinforces my core philosophy: better equipment and proper technique remove guesswork from cooking, allowing anyone to achieve professional results at home.
Recipe Overview
| Attribute | Details |
|---|---|
| Prep Time | 5 minutes |
| Cook Time | 8 minutes |
| Total Time | 13 minutes |
| Servings | 4 servings |
| Difficulty Level | Beginner |
| Cuisine | American |
Why This Recipe Works
I’ve tested this instant pot corn on the cob method dozens of times, and it consistently outperforms traditional boiling because the pressure environment maintains steady, high heat that penetrates the kernel perfectly. The sealed chamber traps steam that gently cooks corn from all angles simultaneously, ensuring even tenderness throughout. Unlike stovetop boiling, which relies on rolling water and prolonged exposure to heat, pressure cooking reduces the time required while actually preserving more natural corn flavor and nutrition.
The beauty of this technique lies in its forgiveness. Even with slight variations in corn size or freshness, the 8-minute cook time produces reliable results. I’ve cooked corn picked that morning and corn that’s been refrigerated for three days with nearly identical outcomes. The natural sugars don’t have time to convert significantly, keeping the corn noticeably sweeter than longer cooking methods produce. The kernels maintain their tender-crisp texture rather than becoming soft or waterlogged.
From a practical standpoint, this method frees up your stovetop and provides hands-off cooking time. Once you add the water, secure the lid, and set the timer, you can prepare other components of your meal. The quick release pressure method then delivers the corn ready to serve in moments, making this ideal for busy weeknight dinners or last-minute entertaining.
Ingredients
| Ingredient | Quantity | Notes and Alternatives |
|---|---|---|
| Fresh corn on the cob | 4 ears | Choose ears with bright green husks and moist silk. Frozen corn works equally well; add 1 minute to cook time. Avoid canned corn for this recipe. |
| Water | 1 cup | Use filtered water for cleaner taste. Do not exceed 2 cups, which will create too much steam. This amount creates necessary pressure without overcooking. |
| Sea salt | 1 teaspoon | Enhances natural corn sweetness. Kosher salt works if sea salt unavailable. Adjust based on personal preference and if adding flavored butters. |
| Butter | 3 tablespoons | Unsalted butter works best for flavor control. Ghee provides nutty richness. Olive oil or coconut oil substitute for dairy-free preparation. |
| Fresh herbs (optional) | 1 tablespoon | Cilantro, parsley, or chives add brightness. Dried herbs work at half the quantity. Fresh corn flavor is sufficient without additions. |
| Cracked black pepper | ½ teaspoon | Freshly cracked provides superior flavor to pre-ground. Add to taste after cooking for maximum freshness and bite. |
Step-by-Step Instructions
Preparation Phase
- Remove corn husks by peeling away green outer layers starting from the top, working toward the base until bare kernels appear.
- Remove remaining silk strands by holding corn under cool running water and rubbing gently with your hands or a soft brush.
- Rinse each ear thoroughly under cool water to remove any final silk fragments or debris.
- Pat corn dry with clean paper towels to remove excess moisture that could dilute cooking liquid.
Instant Pot Setup Phase
- Pour 1 cup of water into the instant pot base, ensuring the liquid reaches the minimum fill line marked inside.
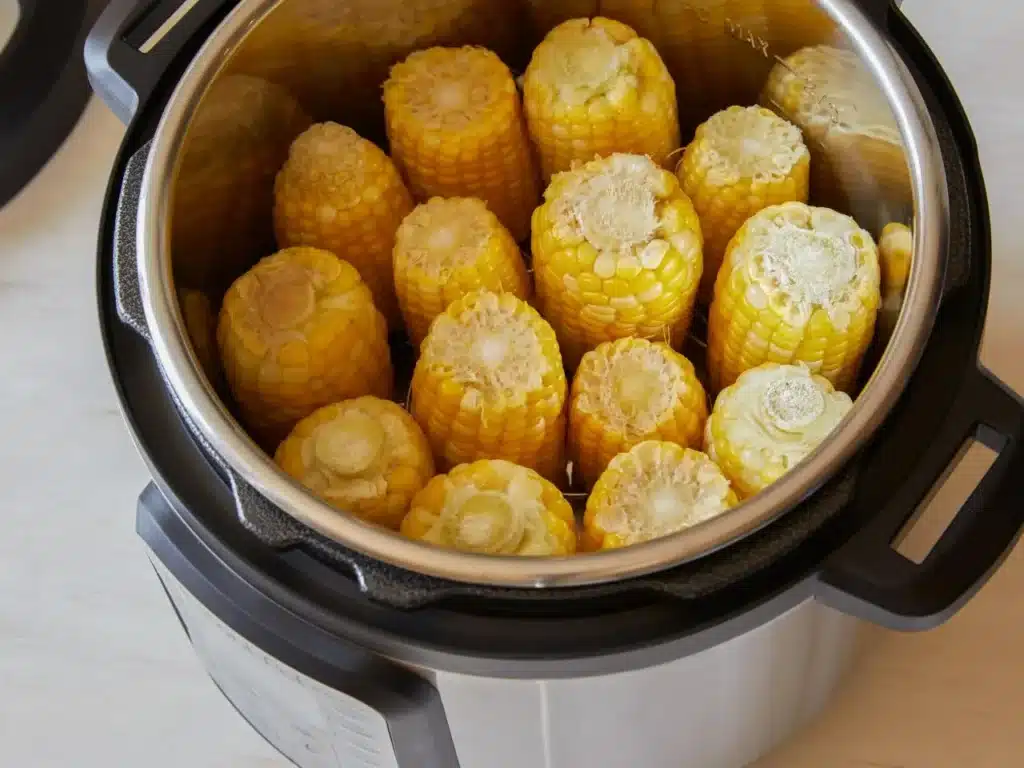
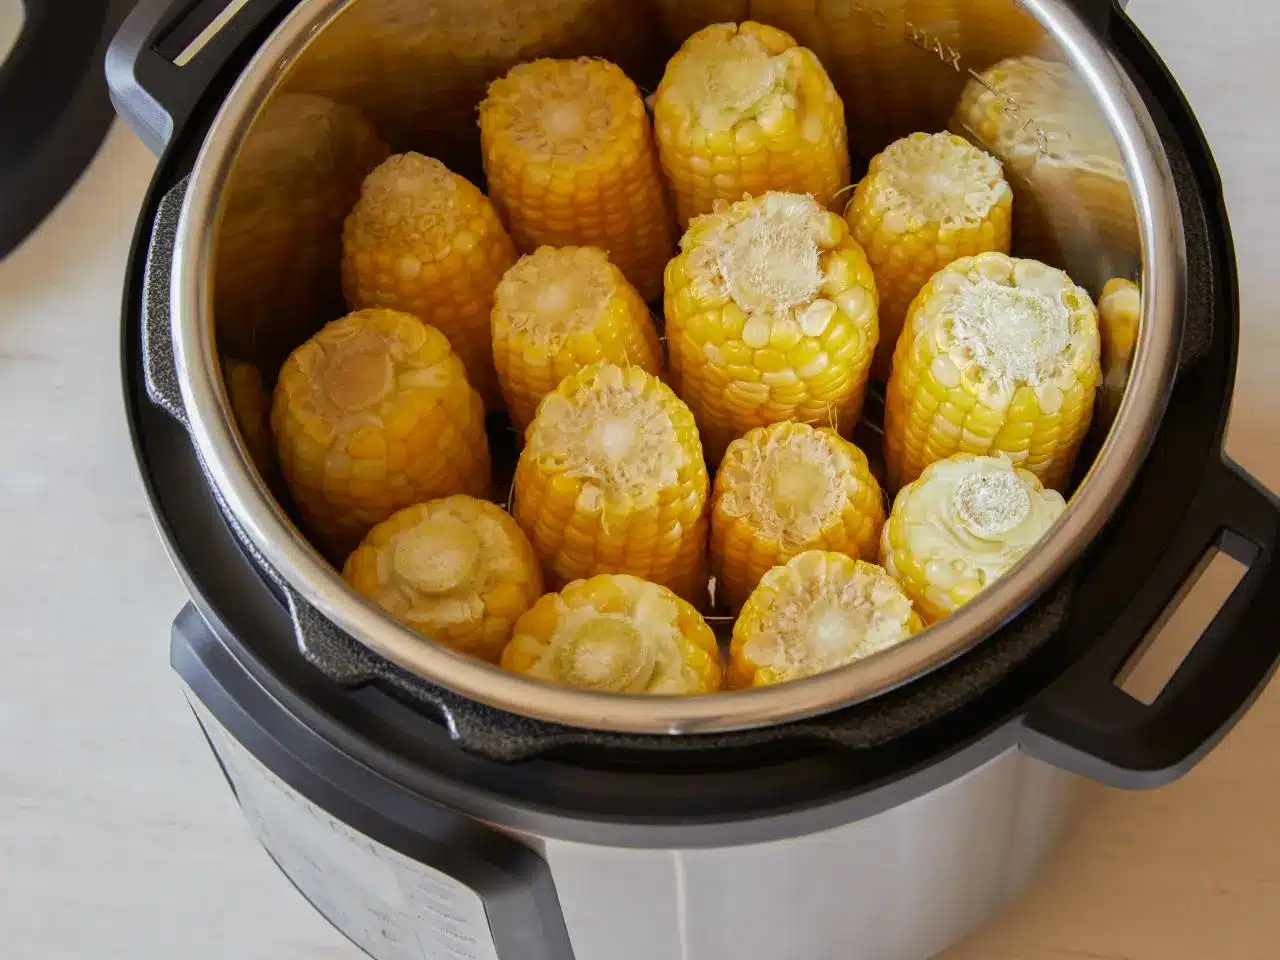
- Place the metal trivet rack into the instant pot, ensuring it sits flat on the bottom and steams water properly.
- Arrange corn ears perpendicular on the trivet in a single layer, stacking slightly if necessary to fit 4 ears.
- Sprinkle sea salt evenly over all corn ears, distributing approximately one-quarter teaspoon per ear.
Cooking Phase
- Close the instant pot lid firmly by rotating the handle counterclockwise until it reaches the stopping position.
- Set the valve to “Sealing” position, ensuring it’s not in the “Venting” position.
- Press “Pressure Cook” or “Manual” button and adjust time to 8 minutes using the plus and minus buttons.
- Allow the pot to come to pressure naturally—this takes approximately 3-5 minutes while the heating element builds steam.
- Once the timer completes the 8-minute cook cycle, the pot will beep to signal completion.
Release and Finishing Phase
- Perform a quick release by carefully rotating the valve from “Sealing” to “Venting” using a long utensil to avoid steam burns.
- Wait 30 seconds after the initial hiss for pressure to stabilize, then carefully remove the lid tilting it away from your body.
- Transfer corn to a serving platter using silicone-tipped tongs, handling gently to prevent damage to kernels.
- Brush each ear with softened butter while still warm, allowing it to melt into the kernels and coat evenly.
- Season with cracked black pepper and fresh herbs if desired, adding these finishing touches immediately before serving for maximum impact.
Chef Tips for Perfect Results
- Choose corn carefully: Select ears with bright green husks and slightly moist silk. Fresh corn purchased the same day produces noticeably sweeter results than corn stored longer than two days. Pressure cook within 24 hours of purchase for optimal flavor intensity.
- Use the trivet always: Never place corn directly on the pot bottom. The trivet creates crucial airflow underneath that allows steam to cook evenly. Skipping this step produces unevenly cooked corn with tough patches.
- Don’t exceed water amount: Precisely 1 cup of water creates the ideal steam environment without excess liquid that reduces cooking pressure or produces mushy corn. Measuring with a liquid measuring cup rather than eyeballing prevents common cooking failures.
- Quick release immediately: Release pressure immediately when the timer finishes to stop the cooking process. Leaving corn in the pot with residual heat for more than one minute can push it past tender into mushy texture within seconds.
- Prepare toppings before cooking: Have butter softened and seasonings measured while corn cooks. This allows you to finish the dish immediately upon release while corn is still steaming hot for maximum butter absorption and flavor uptake.
- Stack strategically for larger quantities: If cooking more than 4 ears, stack corn at opposing angles rather than straight across. This arrangement maximizes steam circulation and prevents bottom ears from overcooking before top ears finish.
Common Mistakes to Avoid
| Mistake | Why It Happens | How to Fix |
|---|---|---|
| Mushy, overcooked corn | Leaving corn in the pot after pressure releases or using too much water creates excess steam that overcooks kernels rapidly. | Quick release immediately when the timer sounds. Use exactly 1 cup of water measured precisely. Remove corn from the pot within 30 seconds of pressure release. |
| Uneven cooking with tough spots | Placing corn directly on the pot bottom or stacking improperly prevents steam from circulating evenly around all sides. | Always use the trivet rack. Arrange corn in a single layer when possible. If stacking, cross ears at angles perpendicular to each other. |
| Bland, flavorless corn | Using corn that’s been stored more than three days causes sugars to convert to starch, reducing natural sweetness regardless of cooking method. | Purchase corn the day you plan to cook it. If unavoidable, enhance flavor with flavorful butters or seasonings. Choose freshest-looking ears at the market. |
| Corn sticks to pot surface | Insufficient water or corn touching the pot bottom causes kernels to contact hot metal directly. | Always use the trivet to elevate corn above the pot bottom. Ensure at least 1 cup of water is present before closing the lid. |
| Pressure won’t build properly | Valve is left in “Venting” position or lid isn’t sealed tightly against the rim. | Verify the valve is in “Sealing” position before starting the cook cycle. Ensure the lid rotates counterclockwise until it reaches the stop. Hear a distinct click confirming the seal. |
Variations and Substitutions
| Ingredient | Substitution Option | Impact on Flavor and Texture |
|---|---|---|
| Water | Vegetable or chicken broth | Adds subtle savory depth without overpowering corn’s natural sweetness. Use low-sodium broth to control salt levels. |
| Butter | Herb-infused butter (cilantro-lime, garlic) | Dramatically elevates flavor profile. Creates restaurant-quality presentation. Prepare ahead by mixing softened butter with fresh herbs and citrus zest. |
| Butter | Coconut oil or olive oil | Coconut oil adds subtle sweetness complementing corn naturally. Olive oil creates Mediterranean-style preparation. Both work for dairy-free diets. |
| Sea salt | Smoked sea salt or fleur de sel | Smoked salt adds complexity and depth. Fleur de sel provides delicate mineral notes. Either enhances corn’s natural flavor significantly. |
| Fresh herbs | Cotija cheese, tajín seasoning, or chili powder | Cotija creates Mexican street corn adaptation. Tajín adds balanced heat and citrus notes. Chili powder provides spicy contrast to sweet corn. |
| Fresh corn | Frozen corn ears | Adds approximately 1 minute to cook time. Texture remains nearly identical to fresh. Convenience factor increases significantly. |
Serving Suggestions and Pairings
Serve instant pot corn on the cob alongside grilled chicken breasts or herb-roasted salmon for complete summer dinners. The sweet corn provides excellent contrast to savory proteins and rich seasonings. Pair with simple green salads dressed in vinaigrettes to create balanced meals where fresh vegetables dominate the plate.
This corn works beautifully for casual entertaining contexts like family reunions, backyard picnics, and neighborhood gatherings. The individual ear format makes serving straightforward without plating concerns. Guests appreciate the individual presentation and can customize their own seasoning preferences immediately at serving.
Create Mexican street corn adaptations by coating cooked corn with lime crema, cotija cheese, and chili powder—transforming the simple side into an impressive starter. Layer this version on appetizer platters for parties or serve as a standalone side for taco nights. The instant pot method prepares corn in time for last-minute entertaining without stress.
Pair with grilled vegetables like zucchini, bell peppers, and asparagus for vegetarian-focused meals highlighting seasonal produce. Serve alongside grain-based dishes like quinoa pilaf or wild rice to create satisfying, nutritionally complete plates. The corn’s natural sweetness complements both rich flavors and lighter preparations equally well.
Storage and Reheating
| Storage Method | Duration | Instructions |
|---|---|---|
| Refrigerator (raw) | Up to 2 days | Store uncooked corn in the refrigerator loosely wrapped in paper towels to absorb excess moisture. Keep in the crisper drawer away from ethylene-producing fruits. |
| Refrigerator (cooked) | 3-4 days | Transfer cooked corn to an airtight container or wrap tightly with plastic wrap after cooling to room temperature. Store in the coldest section of the refrigerator. |
| Freezer | Up to 3 months | Freeze cooked corn ears wrapped individually in plastic wrap, then place in freezer bags with air removed. Label with the date. Thaw overnight in the refrigerator before reheating. |
| Reheating (microwave) | 2-3 minutes | Wrap frozen or thawed corn in a damp paper towel. Microwave on high power for 2-3 minutes, checking halfway through. Heat until steaming throughout. Butter and season immediately. |
| Reheating (instant pot) | 5 minutes total | Add ½ cup water to the instant pot with the trivet. Place thawed or frozen corn on the trivet. Cook on high pressure for 2-3 minutes. Quick release and serve immediately. |
| Reheating (stovetop) | 5-7 minutes | Bring a pot of water to rolling boil. Submerge corn completely and simmer for 3-5 minutes until heated through. Remove with tongs and season immediately. |
Nutritional Information
| Nutrient | Amount per Serving |
|---|---|
| Calories | 165 |
| Protein | 3.5g |
| Total Fat | 9g |
| Saturated Fat | 5.5g |
| Carbohydrates | 19g |
| Dietary Fiber | 2.5g |
| Total Sugars | 3.5g |
| Sodium | 310mg |
| Potassium | 220mg |
| Vitamin C | 8% of daily value |
| Vitamin A | 2% of daily value |
Approximate values per ear of corn with 3/4 tablespoon butter. Nutritional data varies based on corn size and butter application. Values calculated using USDA nutrient database for medium corn ears.
Frequently Asked Questions
Can I Cook Instant Pot Corn from Frozen?
Yes, frozen corn on the cob cooks successfully in the instant pot by adding 1 minute to the cook time, bringing it to 9 minutes total instead of 8. The outer kernels thaw as pressure builds, ensuring even cooking throughout. Thaw frozen corn in the refrigerator overnight for best results, though cooking from completely frozen works nearly identically with minimal texture difference.
How Do I Know When the Corn Is Done Cooking?
The instant pot timer completion beep signals that cooking time has finished, at which point pressure-cooked corn is ready for serving. Test doneness by piercing a kernel with a fork—it should break easily without requiring pressure. If kernels remain firm or resistant, add 1 additional minute of cooking time and quick release again, though this rarely occurs with the 8-minute timing.
What If Pressure Won’t Build in My Instant Pot?
Verify the valve is in “Sealing” position rather than “Venting” by rotating it counterclockwise until you hear a distinct click. Check that the lid is sealed tightly by rotating it counterclockwise until meeting resistance at the stop position. Ensure you added exactly 1 cup of water—insufficient liquid prevents pressure building. Clean the pressure release valve of any debris by removing it and rinsing under running water.
Can I Prepare Instant Pot Corn in Advance?
Cook corn up to 4 hours before serving by storing it at room temperature in an airtight container, then reheating briefly in the microwave or stovetop before serving. Refrigerate cooked corn for up to 4 days in advance, allowing time for flavor development while maintaining quality. Freeze cooked corn for up to 3 months, thawing overnight in the refrigerator before reheating for best texture.
Should I Use the Natural Release or Quick Release Method?
Quick release is the correct method for this recipe because it stops the cooking process immediately, preventing the corn from overcooking during pressure reduction. Natural release would extend cooking time by 10-15 minutes, causing the kernels to become mushy and lose their tender-crisp texture. Only use natural release if you accidentally exceed the 8-minute cook time and want to partially salvage the batch.
What Water Amount Should I Use for Multiple Batches?
Always use exactly 1 cup of water regardless of corn quantity, as the amount needed for pressure generation remains constant. Additional ears don’t require additional water because they cook via steam rather than liquid contact. Stack ears strategically using perpendicular angles to maximize steam circulation when cooking more than 4 ears simultaneously in a larger instant pot model.
Final Thoughts
Instant pot corn on the cob transforms this seasonal favorite into a foolproof dish that delivers tender, sweet results every single time. The pressure cooking method eliminates guesswork while saving valuable cooking time compared to traditional boiling techniques. Master this straightforward method to confidently serve restaurant-quality corn at weeknight dinners and summer entertaining, knowing that consistent excellence awaits every time you seal that lid.
Instant Pot Corn on the Cob: Perfect Every Time
Ingredients
- 4 ears of fresh corn, husks removed
- 1 cup water
Instructions
- Place the trivet in the bottom of the Instant Pot.
- Add 1 cup of water to the Instant Pot.
- Arrange the corn ears on the trivet.
- Secure the lid and set the vents to sealing.
- Set the Instant Pot to high pressure and cook for 8 minutes.
- Once cooking is complete, perform a quick release by carefully venting the steam.
- Remove the corn, season to taste, and serve.
Notes
You can add a knob of butter or a sprinkle of salt after cooking to enhance flavor.
Fresh corn is best, but refrigerated corn also works well with similar results.
