
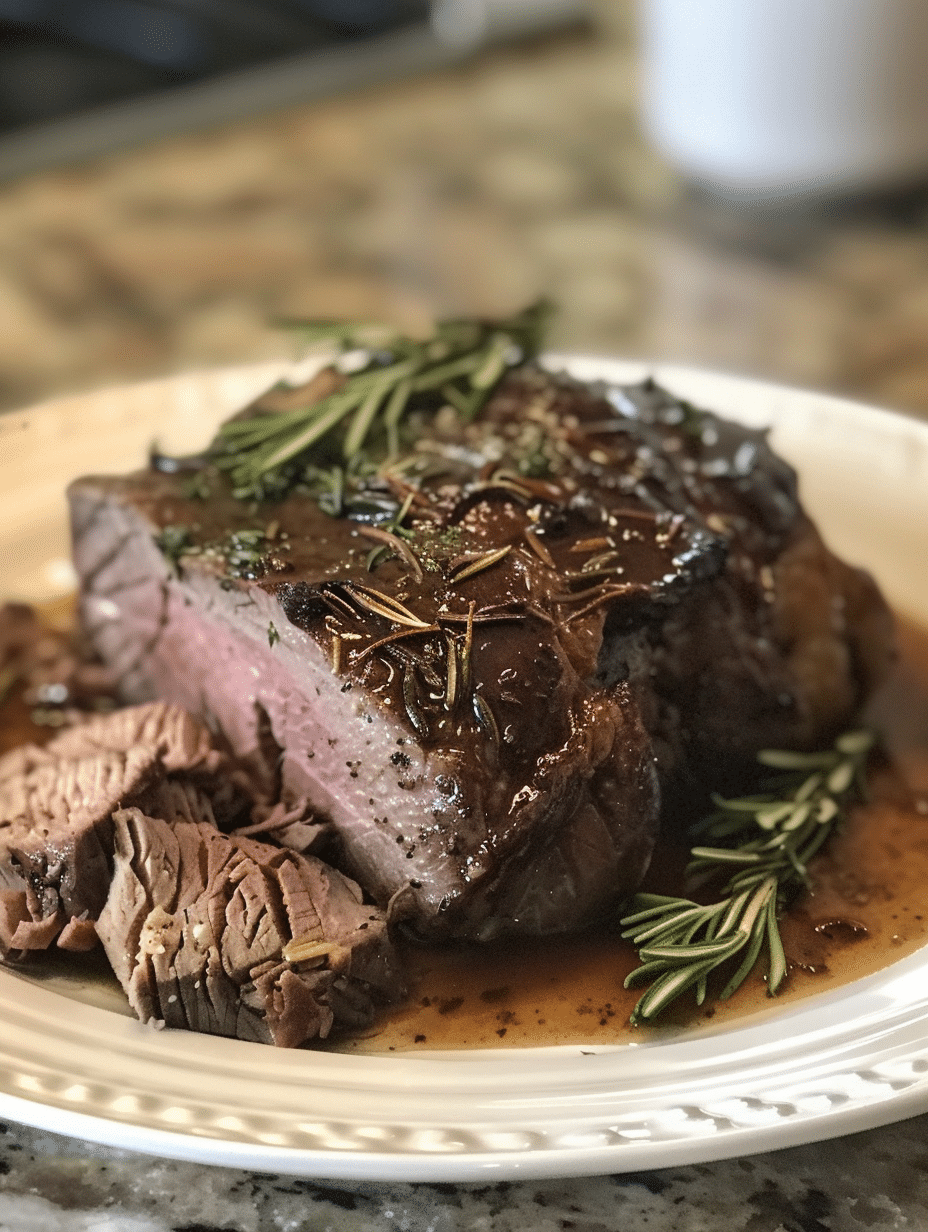
Instant Pot chuck roast is a perfectly seasoned, fork-tender beef dish that transforms tough cut meat into restaurant-quality comfort food in under two hours. This pressure cooker recipe uses high heat and steam to break down connective tissue, creating incredibly moist beef with a rich, savory sauce that rivals slow-cooker versions completed in eight hours. I developed this recipe after years of testing cooking times, liquid ratios, and flavor combinations in my Fresh Recipes Corner kitchen, and it has become my go-to method for feeding my family on busy weeknights and special occasions alike.
About the Creator
I’m Eva Stoner, the creator of Fresh Recipes Corner, where I share simple, reliable recipes for everyday cooking. My love for cooking began in my grandmother’s kitchen, where I learned that good food doesn’t have to be complicated—it just needs care, patience, and the right techniques. Those early moments shaped how I cook today and inspired me to keep things practical and approachable.
When I first got my Instant Pot, I was skeptical about pressure cooking beef. I worried the meat would be rubbery or the flavors would be muted. But after dozens of experiments with different cuts, liquid combinations, and seasoning approaches, I discovered that chuck roast is actually the perfect candidate for high-pressure cooking. My family now requests this dish monthly, and I’m thrilled to share exactly how I make it.
Recipe Overview
| Prep Time | Cook Time | Total Time | Servings | Difficulty | Cuisine |
|---|---|---|---|---|---|
| 15 minutes | 75 minutes | 90 minutes | 6-8 servings | Easy | American |
Why This Recipe Works
Chuck roast has excellent marbling and fat content that keeps it moist during pressure cooking, whereas leaner cuts can dry out. The connective tissue and collagen in this cut actually transform into gelatin under pressure, creating a naturally thickened sauce without flour or cornstarch. I always use a natural pressure release at the end, which allows residual steam to continue tenderizing the meat while gently bringing the temperature down.
This technique cuts cooking time to one-third of traditional slow-cooker methods while delivering superior texture and flavor concentration. The high heat also creates a fond on the bottom of the pot during searing, which adds deep umami notes to your sauce. I’ve found that a 35-minute high-pressure cook time is the sweet spot for three-pound roasts—any longer and the meat becomes slightly mushy, any shorter and it remains too firm.
The beauty of this Instant Pot chuck roast is its adaptability. You can build this recipe with pantry staples, customize vegetables to your preferences, and create a complete meal in one pot. Whether you’re cooking for a weeknight dinner or preparing food for meal prep, this method delivers consistent, restaurant-quality results.
Ingredients
| Ingredient | Quantity | Notes & Alternatives |
|---|---|---|
| Chuck roast (bone-in or boneless) | 3-3.5 pounds | Choose a roast with good marbling. Boneless cooks more evenly; bone-in adds more flavor. |
| Kosher salt | 1.5 teaspoons | Use fine sea salt if kosher salt unavailable. Reduces to 1 teaspoon if using salted broth. |
| Black pepper | 1 teaspoon | Freshly ground preferred. Pre-ground loses potency faster. |
| Garlic powder | 1 teaspoon | Optional: substitute 4-5 fresh garlic cloves, minced. |
| Onion powder | 0.75 teaspoon | Or substitute 1 large yellow onion, sliced into wedges. |
| Paprika (smoked) | 1 teaspoon | Adds depth; regular paprika works but is milder. Optional but recommended. |
| Beef broth (low-sodium) | 1.5 cups | Use unsalted for better salt control. Bone broth adds richness. |
| Olive oil | 2 tablespoons | For searing the roast. Avocado oil works in hotter temperatures. |
| Carrots | 4 medium, cut into 2-inch pieces | Cut into uniform sizes for even cooking. Baby carrots are convenient. |
| Celery | 3 stalks, cut into 2-inch pieces | Adds aromatic base. Omit if celery allergy present. |
| Potatoes (Yukon gold) | 1.5 pounds, cubed | Red potatoes hold shape better. Russets become softer. Omit for low-carb option. |
| Bay leaves | 2 | Optional but adds classic herbaceous note. Remove before serving. |
| Fresh thyme (or dried) | 3 sprigs (or 1 teaspoon dried) | Optional. Adds earthy, subtle flavor. Rosemary is stronger substitute. |
Step-by-Step Instructions
Phase 1: Prepare and Sear
- Pat dry the chuck roast with paper towels, removing excess surface moisture. This ensures better browning during searing and prevents steam buildup.
- Combine kosher salt, black pepper, garlic powder, onion powder, and smoked paprika in a small bowl. Rub this mixture evenly over all sides of the roast, coating thoroughly.
- Select the sauté function on your Instant Pot and heat for 3 minutes. The display should show “hot” before adding oil.
- Pour 2 tablespoons of olive oil into the pot. Once shimmer appears on the surface, carefully place the seasoned roast into the center.
- Sear for 4-5 minutes without moving the roast. Resist the urge to flip; this creates a flavorful crust through the Maillard reaction.
- Flip the roast and sear the opposite side for 4-5 minutes. Sear all four sides if the roast is compact, 2-3 minutes per side.
- Transfer the seared roast to a clean cutting board. Do not wash the pot; the browned bits will flavor your sauce.
Phase 2: Build the Braising Liquid
- Pour 1.5 cups of beef broth into the pot with the browned bits. Use a wooden spoon to scrape the fond from the bottom, stirring for 1-2 minutes until the liquid reaches a boil.
- Add 2 bay leaves and 3 sprigs fresh thyme (or 1 teaspoon dried thyme). These herbs infuse the braising liquid with depth.
- Return the seared chuck roast to the pot, positioning it fat-side up in the braising liquid. The meat should be mostly submerged, with the top slightly exposed.
Phase 3: Pressure Cook
- Close the Instant Pot lid and move the pressure release valve to the sealed position. Select the pressure cook or high-pressure function.
- Set the timer for 35 minutes at high pressure. The pot will take 10-15 minutes to reach pressure before cooking begins; this is normal.
- When the timer sounds, do not immediately release pressure. This is critical: allow a natural pressure release for 15 minutes. After 15 minutes, carefully move the pressure release valve to release any remaining steam.
Phase 4: Add Vegetables
- Open the lid and carefully remove the chuck roast, placing it on a cutting board. Tent with foil to keep warm while vegetables cook.
- Add 4 medium carrots (cut into 2-inch pieces), 3 celery stalks (cut into 2-inch pieces), and 1.5 pounds of Yukon gold potatoes (cubed) to the braising liquid. Stir gently to coat.
- Return the chuck roast to the pot on top of the vegetables. Close the lid and move the pressure valve to sealed.
- Set the timer for 8 minutes at high pressure. This cooks the vegetables until tender without overcooking the already-cooked meat.
- When the timer sounds, perform a quick pressure release by carefully moving the valve to the venting position. Wait 2 minutes before fully opening the lid.
Phase 5: Finish and Rest
- Remove the chuck roast to a cutting board and loosely tent with foil. This 5-minute rest allows juices to redistribute throughout the meat.
- Remove and discard the bay leaves. If using fresh thyme sprigs, remove those as well.
- Using a slotted spoon, transfer the cooked vegetables to a serving platter, arranging them around the edges.
- Slice or shred the chuck roast into large chunks using two forks or a knife, depending on your preferred texture.
- Arrange the meat in the center of the platter and pour 1-1.5 cups of the braising liquid over top, leaving excess liquid in the pot to use as gravy or save for storage.
Chef Tips for Perfect Results
- Select the right cut: Chuck roast with moderate to high marbling (visible white fat throughout the meat) delivers the juiciest results. Avoid lean, eye-of-round cuts, which dry out under pressure.
- Sear on both sides: The Maillard reaction during searing creates complex flavors that simply boiling cannot achieve. Allocate 10-12 minutes total to this step; it’s not optional.
- Respect natural pressure release: Rapid pressure release can cause meat fibers to contract suddenly, making the roast tough. Minimum 15 minutes natural release is non-negotiable.
- Cut vegetables uniformly: Carrots, potatoes, and celery should be roughly the same size so they cook evenly in the 8-minute second pressure cycle. Uneven pieces result in some mushy, some firm vegetables.
- Don’t skip the fond scraping: Those browned bits stuck to the pot contain concentrated beef flavor. Scraping them into the braising liquid deepens the final sauce significantly.
- Measure liquid precisely: Too much liquid dilutes flavors and prevents proper sauce reduction. Too little risks scorching. Use a measuring cup, never estimate.
Common Mistakes to Avoid
Mistake 1: Using Lean Cuts Like Sirloin or Eye of Round
Lean beef cuts lack the intramuscular fat and connective tissue that transform into gelatin under pressure. These cuts emerge dry and stringy rather than tender and moist. Chuck roast has a fat content of approximately 15-20%, which keeps the meat juicy during the pressure-cooking process. If you cannot find chuck roast, substitute with beef brisket, short ribs, or beef chuck stew meat from the same primal cut.
Mistake 2: Skipping the Searing Step
Some home cooks attempt to speed up the process by skipping searing and going directly to pressure cooking. This results in bland, one-dimensional flavors and pale, unappetizing meat. The searing creates umami-rich compounds through the Maillard reaction, adding depth that cannot be replicated by boiling alone. Allocate 10-12 minutes to searing; the flavor payoff justifies the time investment.
Mistake 3: Quick-Releasing Pressure Immediately
Rapid pressure release causes the internal pressure to drop suddenly, which causes muscle fibers to contract and squeeze out moisture. This turns a potentially perfect roast into a tough, dry piece of meat. Always allow minimum 15 minutes natural pressure release. You can set a timer and walk away; the pot will not open until you manually move the pressure valve.
Mistake 4: Overcrowding the Pot with Vegetables
Adding too many vegetables in the first cooking cycle creates excess steam, extending cook time and risking a “burn” error on the display. This is why the recipe adds vegetables in the second pressure cycle after the meat is already tender. If you add carrots and potatoes during the initial 35-minute cook, reduce the cooking time to 25-30 minutes and accept mushier vegetables.
Mistake 5: Not Removing the Roast Before Releasing Pressure
If you release pressure with the roast still inside the pot, the sudden pressure drop can cause the meat to seize and become firm again. Remove the roast to a resting area immediately after pressure release, before opening the lid fully. This five-minute rest allows residual carryover cooking to finish while preventing moisture loss from rapid temperature change.
Variations and Substitutions
| Ingredient | Substitution | Impact on Flavor Profile |
|---|---|---|
| Beef broth | Vegetable broth (unsalted) or bone broth | Vegetable broth is lighter; bone broth is richer and adds collagen. Both work well. |
| Smoked paprika | Hungarian paprika, cayenne pepper, or chili powder | Paprika is mild; cayenne adds heat. Chili powder adds southwestern notes. Use half the amount if using cayenne. |
| Yukon gold potatoes | Red potatoes, russets, or parsnips | Red potatoes hold shape better; russets become fluffy; parsnips add sweetness. |
| Fresh thyme | Rosemary, oregano, or Italian seasoning | Rosemary is more pungent; oregano is earthy; Italian seasoning is milder and more balanced. |
| Carrots and celery | Parsnips, turnips, or additional onions | Parsnips add sweetness; turnips add peppery notes; onions add sweetness and depth. |
| Chuck roast | Beef brisket, beef chuck stew meat, or short ribs | Brisket is leaner but still works; stew meat cooks faster (25 minutes); short ribs are meatier and richer. |
Serving Suggestions and Pairings
Instant Pot chuck roast shines as the centerpiece of a complete dinner. Serve it with creamy mashed potatoes and steamed green beans for a classic comfort meal, or pair it with crusty bread and a simple side salad for something lighter. I love serving this at family gatherings in the cooler months, particularly around Thanksgiving and Christmas when guests expect hearty, warming food.
For a low-carb variation, omit the potatoes and pair the roast with cauliflower mash or roasted Brussels sprouts. The rich braising liquid works beautifully as gravy over creamed cauliflower. During spring and summer, I serve this roast cold on sandwiches the next day, which showcases the tender, flavorful meat.
This recipe is ideal for meal-prep enthusiasts. Divide the cooked roast, vegetables, and sauce into separate containers and refrigerate for up to four days. Reheat portions in the microwave or on the stovetop, adding a splash of broth to restore the sauce consistency. The flavors actually deepen after 24 hours of refrigeration as the meat continues to absorb the braising liquid.
Storage and Reheating
| Storage Method | Duration | Instructions |
|---|---|---|
| Refrigerator | 4 days | Allow the roast and sauce to cool to room temperature. Transfer to an airtight container with the braising liquid. Store on the bottom shelf away from raw proteins. |
| Freezer | 3-4 months | Slice or cut the roast into chunks. Place in a freezer-safe container with braising liquid, leaving 1 inch headspace for expansion. Label with the date. Thaw in refrigerator overnight before reheating. |
| Microwave reheating | 5-7 minutes | Transfer a single portion to a microwave-safe bowl with 2-3 tablespoons braising liquid. Cover loosely and heat at 50% power for 5-7 minutes, stirring halfway through. This prevents overcooking the meat edges. |
| Stovetop reheating | 10-15 minutes | Place roast and vegetables in a skillet with 1/4 cup braising liquid. Heat over medium heat, stirring occasionally, until the meat is warmed through and vegetables are hot. Add extra broth if sauce is too thick. |
| Instant Pot reheating | 5 minutes | Use the sauté function to warm previously frozen portions. Add 1/4 cup broth and stir frequently. Once steam rises, turn off the heat and let rest 2 minutes. Fastest method for batch reheating. |
Nutritional Information
Approximate values per serving (based on 8 servings per recipe)
| Nutrient | Amount per Serving |
|---|---|
| Calories | 485 |
| Protein (g) | 42 |
| Fat (g) | 18 |
| Carbohydrates (g) | 32 |
| Fiber (g) | 4 |
| Sugar (g) | 3 |
| Sodium (mg) | 620 |
Note: These values exclude excess braising liquid. Adding additional gravy will increase sodium and calorie content. For more precise nutritional data, use a recipe calculator with your specific ingredient brands.
Frequently Asked Questions
Can I substitute chuck roast with a different cut of beef?
Beef brisket, beef chuck stew meat, and beef short ribs work well as substitutes. Sirloin, eye of round, and other lean cuts will become dry and tough under pressure. Chuck stew meat cooks faster (approximately 25 minutes instead of 35 minutes) because of its smaller pieces, so adjust your cook time accordingly to prevent overcooking.
How do I know when the chuck roast is done cooking?
Pierce the thickest part of the roast with a fork or knife. The meat should yield easily without resistance and shred apart with slight pressure. After the full pressure-cooking cycle and natural release, the roast is essentially always done for typical 3-pound roasts. If you detect firmness after the natural release, close the lid and cook for an additional 3-5 minutes at high pressure, then release pressure again.
Why does my Instant Pot display a “burn” error?
The burn error appears when the heating element detects food particles stuck to the bottom, preventing proper heat distribution. To avoid this: scrape the fond thoroughly into the liquid after searing, ensure you have at least 1.5 cups of liquid in the pot, and do not add vegetables during the first pressure cycle. If the error occurs, turn off the pot, stir the bottom layer vigorously to loosen stuck particles, and restart on pressure cook.
Can I prepare this chuck roast ahead of time?
Yes. Prepare the roast through step 9 (braising liquid preparation) up to 12 hours in advance. Cover the pot and refrigerate. When ready to cook, bring the ingredients to room temperature for 15 minutes, then proceed with the pressure cooking as directed. Alternatively, cook the entire recipe and refrigerate for up to 4 days, reheating as needed.
What is the best way to thicken the braising liquid into gravy?
The braising liquid naturally thickens to a light sauce consistency from the gelatin released by collagen during cooking. For a thicker gravy, remove 1 cup of liquid to a small saucepan and simmer over medium heat until it reduces by half, approximately 8-10 minutes. Alternatively, make a slurry by mixing 1 tablespoon cornstarch with 2 tablespoons cold water, stir into the simmering liquid, and cook for 1-2 minutes until thickened.
How many servings does this recipe yield?
This recipe comfortably serves 6-8 people as a main course with vegetables included. A 3-pound chuck roast yields approximately 2.25 pounds of cooked meat after cooking, with an additional 1.5-2 pounds of cooked vegetables and braising liquid. For smaller households or solo cooks, the recipe freezes exceptionally well in individual portions for future meals.
Conclusion
Instant Pot chuck roast delivers tender, flavorful beef with rich braising sauce in 90 minutes flat. This recipe proves that pressure cooking creates superior results compared to traditional slow-cooker methods, delivering the perfect balance of efficiency and restaurant-quality flavor. Follow the step-by-step instructions, respect the natural pressure release, and you’ll master this dish immediately.
Whether you’re cooking for your family, meal prepping for the week, or hosting a gathering, this chuck roast impresses every time. The deep, savory notes from the seared crust and the tender, juicy meat showcasing every bit of the braising liquid’s complexity makes this recipe a permanent addition to my cooking rotation. Your family will ask you to make this again and again.
Instant Pot Chuck Roast: Tender, Flavorful Comfort Food
Ingredients
- 3 lb chuck roast
- 1 tsp salt
- 1 tsp black pepper
- 1 tsp garlic powder
- 2 tbsp olive oil
- 1 onion, sliced
- 2 carrots, chopped
- 3 potatoes, peeled and cubed
- 4 cups beef broth
- 1 bay leaf
Instructions
- Sauté chuck roast in olive oil using the sauté function until browned on all sides.
- Add onion, carrots, potatoes, salt, pepper, garlic powder, and bay leaf. Sauté 3 minutes.
- Pour in beef broth, ensuring it covers the meat. Seal the Instant Pot.
- Set to High Pressure for 35 minutes. Allow natural pressure release for 15 minutes.
- Release remaining pressure and shred meat directly in the pot. Serve with vegetables and sauce.
Notes
Natural pressure release prevents toughness.
Substitute root vegetables like parsnips or turnips for variety.
Store leftovers in an airtight container for up to 3 days.
