
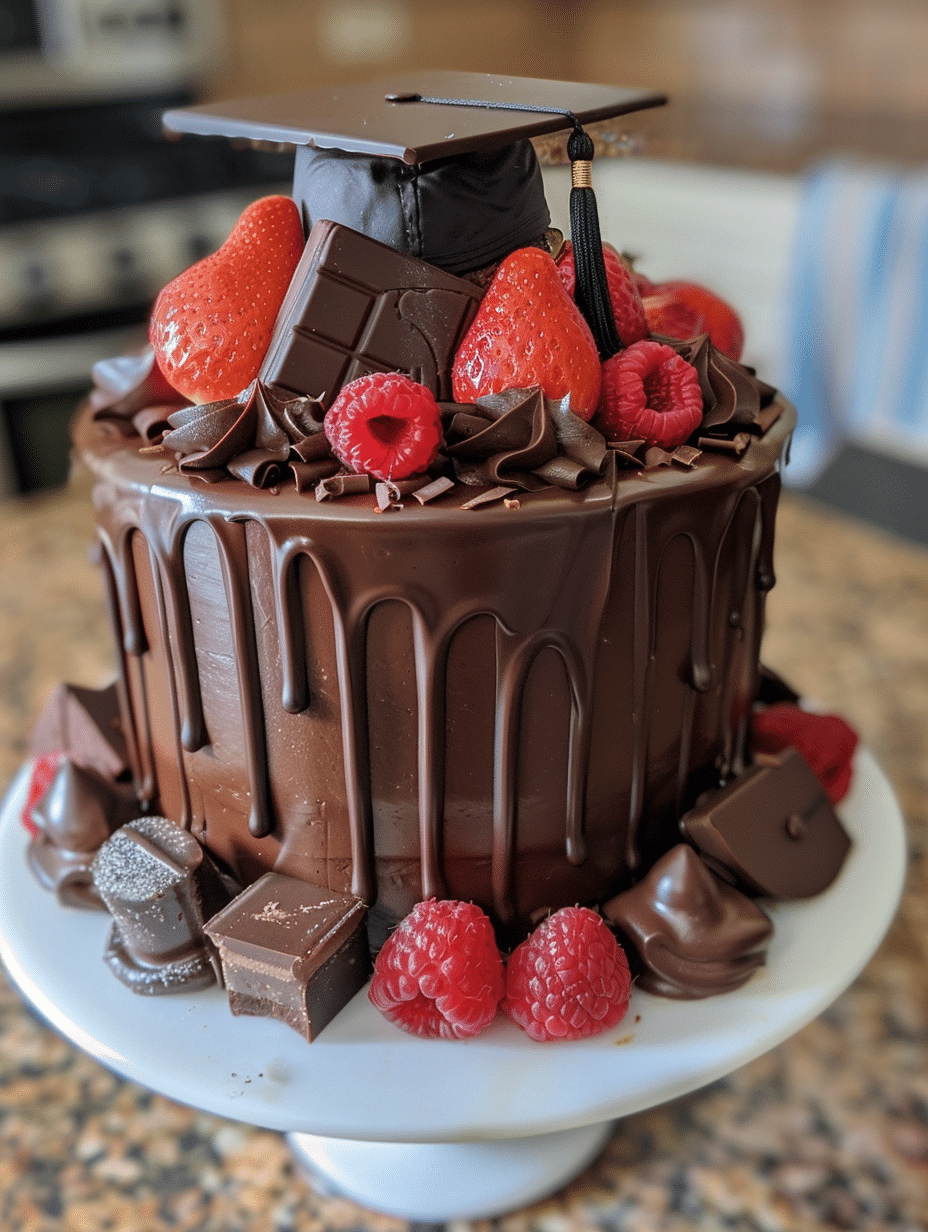
A graduation cake is a decorated layer cake specifically designed to celebrate academic achievement and milestone moments. This classic dessert combines moist vanilla cake layers with silky buttercream frosting and customizable decorations that reflect school colors, graduation year, or personal achievements. Graduation cakes serve as centerpiece desserts at parties, receptions, and family gatherings marking the transition from one educational chapter to the next. The beauty of this cake lies in its versatility, allowing bakers to create simple two-layer designs or elaborate multi-tiered masterpieces with fondant accents, edible printing, and personalized piping. Whether you’re celebrating high school completion, college graduation, or postgraduate success, a homemade graduation cake delivers flavor, emotion, and memorable taste that store-bought versions rarely match.
About the Baker Behind This Recipe
I’m Lila Bennett, a 34-year-old home baker based in Portland, Oregon, and my kitchen is almost always filled with the smell of something sweet. I fell in love with baking as a kid, sneaking tastes of cookie dough and watching simple ingredients turn into something comforting and delicious. What started with slightly overbaked cookies turned into years of experimenting with cakes, pancakes, and all kinds of desserts—learning through trial, error, and a lot of taste-testing.
My first graduation cake was for my younger sister’s high school graduation in 2009. I wanted to create something as special as her achievement, but I had no formal training. I spent two weekends perfecting a simple vanilla cake recipe, learning how to level layers properly, and practicing buttercream swirls on parchment paper. That cake may have been imperfect in technique, but it was perfect in intention. Since then, I’ve baked graduation cakes for family members, friends, and eventually started receiving requests from colleagues and community members. Each cake taught me something new about working with different frosting consistencies, decorating techniques, and creative designs that celebrate individual achievements.
Today, I guide home bakers through the entire process—from batter preparation to final decoration—with confidence and practical advice earned through countless kitchen experiments. This graduation cake recipe reflects years of refining the formula for reliable flavor, stable structure, and decorative beauty. I’ve learned that the best graduation cakes aren’t necessarily the most complicated; they’re the ones baked with genuine care and served with pride.
Recipe Overview
| Metric | Value |
|---|---|
| Prep Time | 25 minutes |
| Bake Time | 35 minutes |
| Total Time | 1 hour 15 minutes (plus cooling) |
| Servings | 12-16 people |
| Difficulty Level | Intermediate |
| Cuisine | American Celebration Dessert |
Why This Graduation Cake Recipe Works
This graduation cake recipe succeeds because it balances ease of preparation with professional-looking results. The vanilla cake base uses oil instead of butter, which guarantees incredible moisture and a tender crumb that stays fresh for two to three days. I learned this substitution while researching why box-mix cakes often taste better than homemade versions—oil distributes more evenly through the batter than solid butter, creating uniform texture throughout.
The buttercream frosting ratio of one part butter to three parts powdered sugar provides stability for decorating while maintaining smooth, spreadable consistency. I’ve tested countless ratios over the years, and this proportion never splits, never becomes grainy, and whips to the perfect cloud-like texture within two minutes. The heavy cream addition improves piping consistency for borders and details without compromising structure. This specific formula has never failed me across different kitchen temperatures, humidity levels, or decorating techniques.
Additionally, this recipe accommodates various decoration styles without requiring advanced skills. Whether you use simple spatula swirls, piped stars, or fondant toppers, the frosting holds its shape beautifully. The two-layer structure is manageable for home bakers while looking impressive enough for special celebrations. The cake itself is neutral enough to pair with any color scheme, flavor additions, or decorative elements your graduation celebration requires.
Ingredients
| Ingredient | Quantity | Notes & Alternatives |
|---|---|---|
| All-purpose flour | 2 cups | Spoon and level method for accuracy. Do not scoop directly from bag. Cake flour creates softer crumb but requires 2.25 cups. |
| Granulated sugar | 1.5 cups | Standard white sugar only. Do not substitute with brown sugar or coconut sugar, which alter crumb structure. |
| Baking powder | 2 tsp | Aluminum-free preferred. Check expiration date—old baking powder reduces rise. Baking soda requires acid addition and reduces tenderness. |
| Salt | 0.5 tsp | Fine sea salt or table salt. Enhances sweetness and vanilla flavor. Do not omit. |
| Vegetable oil | 0.5 cup | Canola, sunflower, or neutral-flavored oil. Not olive oil. Oil creates moisture; butter creates dryness. Do not substitute. |
| Large eggs | 3 whole eggs | Room temperature (68°F). Cold eggs create lumpy batter. Separate eggs only if recipe specifies. |
| Whole milk | 1 cup | Full-fat milk essential for richness. Skim milk results in dense crumb. Almond milk adds vegetable flavoring. |
| Vanilla extract | 2 tsp | Pure vanilla only. Imitation creates chemical aftertaste. Madagascar or Tahitian varieties enhance complexity. |
| Unsalted butter (frosting) | 4 cups (8 sticks) | Softened to 68-72°F, not melted. Cold butter won’t whip; warm butter becomes greasy. Cut into 1-tablespoon cubes before beating. |
| Powdered sugar | 6 cups | Sift before measuring to remove lumps. Unsifted sugar creates grainy frosting. Measure by weight for consistency (30 oz). |
| Heavy whipping cream | 3 tbsp | Improves piping consistency without thinning too much. Whole milk reduces stability. Increase to 4 tbsp for softer frosting. |
| Vanilla extract (frosting) | 2 tsp | Pure vanilla essential. Adds depth to buttercream without cloying sweetness. |
Step-by-Step Instructions
Preparation Phase
- Preheat your oven to exactly 350°F, positioning the rack in the middle position approximately 8 inches below the heating element. Allow 15 minutes for full temperature stabilization.
- Grease two 8-inch round cake pans thoroughly using softened butter, coating bottom and sides with no gaps. Flour the greased pans, tapping out excess.
- Line the bottom of each pan with parchment paper circles cut to fit precisely. This ensures even moisture distribution during baking.
- Gather all ingredients and arrange on your work surface, ensuring eggs and milk are at room temperature (not cold from refrigerator).
Dry Ingredient Mixing Phase
- Sift flour, sugar, baking powder, and salt into a large mixing bowl using a wire whisk, making three passes to incorporate air and remove lumps.
- Create a well in the center of the dry mixture using the back of a spoon, leaving approximately 2 inches of depth for wet ingredients.
Wet Ingredient Combination Phase
- Pour vegetable oil, eggs (cracked individually into a separate bowl first), milk, and vanilla extract into the well simultaneously.
- Beat on medium speed with an electric mixer for exactly 2 minutes, scraping down bowl sides every 30 seconds to incorporate all flour particles.
- Verify batter consistency: it should fall from a spoon in thick ribbons, not pour like water or cling like cement.
Baking Phase
- Divide batter evenly between prepared pans by eye or measuring cup (approximately 2.5 cups per pan), smoothing the surface with a spatula.
- Place pans on the preheated oven’s middle rack, ensuring 2 inches clearance from oven walls on all sides.
- Bake for 30-35 minutes until a wooden toothpick inserted in the center emerges with zero crumbs or light batter smear (no batter clinging).
- Test both pans’ centers separately—bake approximately 2-3 minutes longer if one pan isn’t finished.
- Remove from oven and cool in pans for exactly 15 minutes, allowing the structure to set without becoming brittle.
- Invert pans onto cooling racks lined with parchment paper, gently wiggling to release cakes. Peel away parchment if attached.
- Cool cakes completely to room temperature before frosting, approximately 45-60 minutes (touch the bottom; it should feel cool to the touch).
Buttercream Frosting Phase
- Cut softened butter into 1-tablespoon cubes and place in a large mixing bowl, ensuring no pieces are melted or greasy.
- Beat butter on medium speed for 3-4 minutes until completely pale, fluffy, and nearly doubled in volume (this aerates the frosting).
- Sift powdered sugar through a fine mesh sieve directly onto the butter in three additions, beating on low speed between each addition.
- After adding all sugar, increase mixer speed to medium-high and beat for 2 minutes until light, fluffy, and pale white (not yellow).
- Add heavy cream and vanilla extract, beating on medium speed for 1 minute until fully incorporated and achieving spreadable, pipeable consistency.
- Test consistency: frosting should hold stiff peaks when beaters are lifted but not be dry or grainy. Add 1 tablespoon cream if too thick; add 2 tablespoons powdered sugar if too soft.
Assembly and Decoration Phase
- Place the first cake layer on a cake board, turntable, or serving plate, using a dollop of frosting underneath to prevent sliding.
- Spread 1 full cup of frosting on top of the first layer using an offset spatula, working from the center outward in circular motions.
- Place the second cake layer on top, gently pressing down to ensure level positioning (use a cake level tool if available for precision).
- Apply a thin crumb coat of frosting over the entire cake (top and sides), using approximately 0.5 cups of frosting to seal in crumbs.
- Refrigerate the crumb-coated cake for 30 minutes, allowing the frosting to firm and stabilize the structure.
- Apply the final frosting layer over the cooled crumb coat, using 1.5-2 cups frosting for smooth coverage. Use an offset spatula dipped in hot water for a polished finish.
- Decorate with piped borders, school colors, graduation year, or name using a piping bag fitted with desired tips (round, star, or petal tips work well).
- Refrigerate the completed graduation cake for at least 30 minutes before serving, allowing decorations to set and frosting to firm.

Chef Tips for Perfect Graduation Cake Results
- Room Temperature Ingredients: Eggs and milk should register 68-72°F before mixing. Cold ingredients create lumpy batter with dense crumb structure. Remove items from the refrigerator 30-45 minutes before baking. This single step eliminates most texture problems home bakers experience.
- Use a Kitchen Scale: Measuring flour by volume (cups) varies by 15-25% depending on scooping method. A digital scale measuring grams guarantees consistency across batches. Two cups flour equals approximately 240 grams; measure accurately for foolproof results.
- Don’t Overmix the Batter: Mix on medium speed for exactly 2 minutes. Overmixing (beyond 2.5 minutes) develops gluten strands that create tough, dense crumb instead of tender structure. Use a timer and stop immediately when time expires.
- Invest in Cake Strips: Wet fabric strips wrapped around pan sides cool the edges evenly with the center, preventing doming or shrinkage. Alternatively, wrap pans with wet paper towels secured with rubber bands. This simple technique eliminates the need for cake leveling.
- Test for Doneness Properly: Insert a toothpick in the cake’s center at the 30-minute mark. The pick should emerge with no batter clinging—a few moist crumbs are acceptable; thick batter is not. If not done, test every minute thereafter to prevent overbaking past the 35-minute maximum.
- Chill Before Final Frosting: Refrigerating the crumb coat for 30 minutes prevents loose crumbs from mixing into the final frosting layer. Cold cake frosting also adheres more smoothly, creating a professional appearance without visible texture. This step separates amateur-looking cakes from bakery-quality results.
Common Mistakes to Avoid
Mistake 1: Using Cold Eggs and Milk
Cold ingredients (below 65°F) don’t emulsify smoothly with oil and dry ingredients, creating an uneven, curdled-looking batter that bakes into dense layers. The oil can’t fully distribute through cold liquid, leaving pools of separated fat. Fix this by removing eggs and milk from the refrigerator 45 minutes before baking, or place eggs in a warm water bath for 5 minutes. Check ingredients with a thermometer: aim for 68-72°F exactly. This modification alone transforms grainy texture into silky, tender crumb.
Mistake 2: Measuring Flour by Scooping Directly
Scooping a dry measuring cup directly into a flour bag compacts the flour, packing 50+ grams into a cup instead of the standard 30 grams. This excess flour creates dry, dense cakes that crumble rather than slice cleanly. Always spoon flour into the measuring cup and level off with a knife, or better yet, use a digital scale. Weighing flour at 240 grams per two-cup measurement guarantees perfect hydration balance every time, regardless of how flour is stored or compacted.
Mistake 3: Overmixing After Wet Ingredients Are Added
Mixing beyond two minutes develops gluten strands that trap too much air, creating a bouncy, unstable crumb that peaks in the center and falls during cooling. These cakes also develop tough texture instead of tender moistness. Use a timer and mix on medium speed only. Stop immediately when the timer sounds, even if you see a few flour streaks. Two minutes is the exact window for hydration without overdeveloping gluten structure in cake batters.
Mistake 4: Not Cooling Completely Before Frosting
Applying frosting to warm cakes causes it to melt, slide off, and become oily. Warm cakes also continue setting and shrinking, destabilizing the frosting layers. Allow cakes to cool to room temperature—touch the bottom layer; it should feel cool to your palm. This typically requires 45-60 minutes on a cooling rack. Patient cooling prevents frosting disasters and results in professional appearance where decorations remain exactly where piped.
Mistake 5: Not Using a Crumb Coat
Applying final frosting directly to cake without a crumb coat first embeds loose crumbs into the frosting, creating an unattractive grainy finish. A crumb coat—a thin frosting layer chilled for 30 minutes—seals the cake surface and creates a smooth base for decorative frosting. This intermediate step takes only 10 minutes of active time but results in bakery-quality appearance that looks intentional and professional rather than homemade and rustic.
Variations and Substitutions
| Ingredient | Substitution Option | Impact on Flavor & Texture |
|---|---|---|
| All-purpose flour | Cake flour (use 2.25 cups) | Creates more tender, delicate crumb with finer structure. Slightly less sturdy for stacking but more elegant texture. Reduces protein content from 10% to 7%. |
| Vegetable oil | Melted coconut oil (slightly reduce to 0.45 cup) | Adds subtle coconut flavor and maintains moisture. Creates firmer texture when cooled (coconut oil hardens at room temperature). Use refined coconut oil to minimize coconut flavor. |
| Whole milk | Buttermilk (reduce baking powder to 1.5 tsp, add 0.25 tsp baking soda) | Enhances tanginess and creates more tender crumb through acid reaction. Slightly denser structure. Avoid regular milk substitution; requires baking soda adjustment. |
| Vanilla extract | Almond extract (use 1 tsp only) OR Lemon extract (use 1.5 tsp) | Almond creates warm, nutty background; lemon adds brightness and sophistication. Both reduce vanilla sweetness perception. Do not exceed suggested amounts or flavors become medicinal. |
| Granulated sugar | Do not substitute with brown sugar or coconut sugar | Brown sugar alters browning rate and adds moisture that requires flour adjustment. Coconut sugar affects rise and creates denser crumb. Stick with white granulated for predictable results. |
| Butter in frosting | Use only unsalted butter; salted butter creates unbalanced sweetness | Salted butter varies in salt content (0.5-1.5%), making frosting unpredictably salty. Unsalted allows precise salt control. Cannot adequately substitute with coconut oil or shortening without losing signature buttercream flavor. |
| Heavy cream | Half-and-half or whole milk (use same quantity) | Reduces frosting richness and stability slightly. Half-and-half creates acceptable texture; whole milk results in soft frosting that’s difficult to pipe. Heavy cream provides optimal structure for decoration. |
Serving Suggestions and Pairings
Serve graduation cake at room temperature (approximately 68-70°F) for optimal flavor and texture. Cold cake tastes muted; room-temperature cake delivers full vanilla complexity and creamy frosting richness. Remove from refrigeration 30 minutes before serving to allow frosting to soften slightly.
Pair graduation cake with fresh beverage accompaniments: cold whole milk, hot coffee with cream, or specialty iced tea. The cake’s vanilla-forward sweetness complements dark roasted coffee particularly well, as coffee’s bitterness balances cake sweetness. Sparkling cider or non-alcoholic fruit punch works beautifully for full celebration atmospheres without requiring alcoholic beverages.
Presentation contexts for graduation cakes include backyard graduation parties (cutting cake at sunset on picnic tables), formal reception halls (tiered display on cake tables with decorative pedestals), intimate family gatherings (casual kitchen presentation), and outdoor celebrations under tents (protected from direct sun). Graduation cakes serve as the formal conclusion to graduation dinner menu or welcome the casual after-dinner celebration atmosphere.
Accompany cake serving with light side options: fresh berries in bowls, whipped cream dollops, or fruit compote. These fresh additions cut through frosting richness and provide textural contrast. Alternatively, serve cake alone as the featured dessert without additional accompaniments, allowing the cake’s quality and decoration to command attention.
Storage and Reheating Instructions
| Storage Method | Duration | Instructions |
|---|---|---|
| Room Temperature (Covered) | Up to 1 day | Place frosted cake on cake stand and cover loosely with cake dome or large mixing bowl (don’t wrap tightly; frosting needs air circulation). Keep in cool room away from direct sunlight and heat sources. Frosting remains soft; cake stays moist. |
| Refrigerator (Covered) | 3-4 days | Cover frosted cake with plastic wrap, pressing gently onto frosting surface to prevent moisture absorption. Store in coldest section (back of main shelf, not on door). Remove 30 minutes before serving to bring to room temperature and restore optimal texture. |
| Freezer (Unfrosted Layers) | 3 months | Cool cakes completely. Wrap each layer individually in plastic wrap, then aluminum foil, removing as much air as possible. Label with date. Thaw at room temperature for 2 hours before unwrapping. Frost after thawing. |
| Freezer (Frosted Cake) | 2 months | Flash-freeze assembled, frosted cake uncovered for 4 hours until frosting hardens completely. Wrap entire cake in plastic wrap then aluminum foil. Thaw in refrigerator overnight (8-12 hours). Bring to room temperature before serving (approximately 30 minutes). Don’t thaw at room temperature; frosting may slide. |
| Individual Slices | 3 days (refrigerator) or 1 month (freezer) | Wrap slices individually in plastic wrap. Refrigerate or freeze in airtight container separated by parchment paper. Thaw slices at room temperature for 30 minutes before serving. |
Nutritional Information
Approximate values per serving (based on 14 servings). Calculations include both cake and frosting layers distributed evenly.
| Nutrient | Amount per Serving |
|---|---|
| Calories | 520 kcal |
| Total Fat | 28g |
| Saturated Fat | 16g |
| Trans Fat | 0.5g |
| Cholesterol | 85mg |
| Sodium | 180mg |
| Total Carbohydrates | 64g |
| Dietary Fiber | 0g |
| Total Sugars | 52g |
| Protein | 4g |
| Calcium | 65mg |
| Iron | 1.2mg |
| Potassium | 95mg |
Note: Approximate values based on USDA FoodData Central and ingredient analysis. Actual nutritional content varies based on specific ingredient brands and preparation methods. Values do not include optional decorative elements (fondant, edible glitter, etc.).
Frequently Asked Questions
Can I Make the Graduation Cake Layers the Day Before?
Yes, baked cake layers stay fresh for two full days when stored properly. Cool layers completely, wrap each layer individually in plastic wrap, then store in an airtight container at room temperature away from heat and direct sunlight. The next day, unwrap layers and frost immediately. This advance preparation reduces stress on the celebration day and allows you to complete frosting and decoration fresh.
How Can I Tell When the Graduation Cake Is Fully Baked?
Insert a wooden toothpick into the very center of each cake layer at the 30-minute mark. The pick should emerge clean or with only one to two moist crumbs clinging—not wet batter. The cake should also spring back when gently pressed in the center, and the edges should appear slightly set and pulling away from the pan sides. If the toothpick shows wet batter, bake an additional 1-2 minutes and test again.
Why Is My Buttercream Frosting Grainy or Curdled?
Grainy frosting results from cold butter pieces that haven’t fully emulsified with sugar, or from lumpy powdered sugar not sieved before adding. To fix this, ensure butter is softened to exactly 68-72°F before beating—not cold from the refrigerator or melted. Sift powdered sugar through a fine mesh sieve to remove all lumps. If frosting is already grainy, gently warm the bowl over a water bath (not direct heat) while mixing, or add one tablespoon of softened butter at a time and beat until smooth.
Can I Use Box Mix Cake with Homemade Graduation Frosting?
Box mix cakes work with homemade buttercream frosting from this recipe. Follow box mix preparation instructions exactly, then cool completely before frosting. Box cakes typically bake in 25-30 minutes instead of 35 minutes due to different batter formulation. The homemade buttercream provides superior flavor, texture, and decoration capability compared to canned frosting, elevating box cakes to semi-homemade quality.
What Decorations Work Best for Graduation Cake Design?
Piped buttercream stars or rosettes create classic, professional appearance without requiring advanced skills. Alternatively, write the graduation year or graduate’s name directly on the frosted cake using a piping bag with round tip. Edible markers (food-grade) allow drawing school logos or simple designs without piping. Fondant toppers (purchased or homemade) can feature graduation caps, diplomas, or personalized messages. School-color frosting creates instant visual celebration without additional decorations. Choose one to three complementary decoration styles; overly decorated cakes appear cluttered rather than elegant.
How Do I Transport a Frosted Graduation Cake to the Party Location?
Transport the frosted cake in a vehicle’s coolest location (floor of air-conditioned car rather than hot trunk), using a non-slip cake carrier or placing the cake board on a sturdy, flat surface secured with non-slip drawer liner. Avoid placing the cake on car seats where it can slide during turns. Refrigerate the cake for at least one hour before transport to firm frosting and decorations. If traveling more than 15 minutes, place the cake in an insulated container with ice packs placed away from direct frosting contact. Upon arrival, remove from transport 30 minutes before serving to allow frosting to soften.
Final Thoughts on Homemade Graduation Cake
A homemade graduation cake transforms an academic milestone into a memorable, delicious celebration that store-bought versions cannot replicate. This recipe delivers reliable results through careful ingredient selection, proper technique, and decorative flexibility that accommodates any skill level. Whether you’re celebrating your child’s high school completion, college graduation, or personal academic achievement, baking a graduation cake from scratch demonstrates genuine care and pride in the accomplishment. The tender vanilla layers, silky buttercream, and customizable decorations create a dessert as special as the person being honored. Follow the step-by-step process, embrace the chef tips that prevent common mistakes, and don’t hesitate to personalize colors, flavors, or designs that celebrate individual achievement. Your graduation cake will be delicious, beautiful, and unforgettable.
Graduation Cake
Ingredients
- 1 1/2 cups all-purpose flour
- 3/4 cup unsalted butter, softened
- 1 1/2 cups granulated sugar
- 2 eggs
- 1 tsp vanilla extract
- 1 1/2 tsp baking powder
- 3/4 cup whole milk
- 2 cups powdered sugar
- 1/4 tsp almond extract (non-alcoholic alternative)
- 1/2 cup unsalted butter, softened
- 1/4 cup whole milk (adjust for desired consistency)
- 1/2 tsp salt
- Fondant or edible glitter for decoration
Instructions
- Preheat oven to 350°F (180°C)
- Whisk flour, baking powder, and salt in a bowl
- Beat butter and sugar until light and fluffy
- Add eggs one at a time, blending thoroughly
- Mix in vanilla extract
- Alternate adding dry ingredients and milk, beginning and ending with dry ingredients
- Divide batter evenly among 3 8-inch round pans
- Bake 30-35 minutes, or until golden and springy
- Cool layers completely on wire racks
- In a separate bowl, cream butter until smooth
- Gradually add powdered sugar and salt
- Beat in almond extract and 1/4 cup milk; adjust for consistency
- Apply frosting between layers and top with final decorative touch using fondant or piping
Notes
For stability, refrigerate frosted cake before adding heavy fondant decorations
Add food-coloring gels to match school colors
Edible numbers and letters can be made with fondant or purchased
Store iced cake in airtight container at room temperature for up to 2 days
