
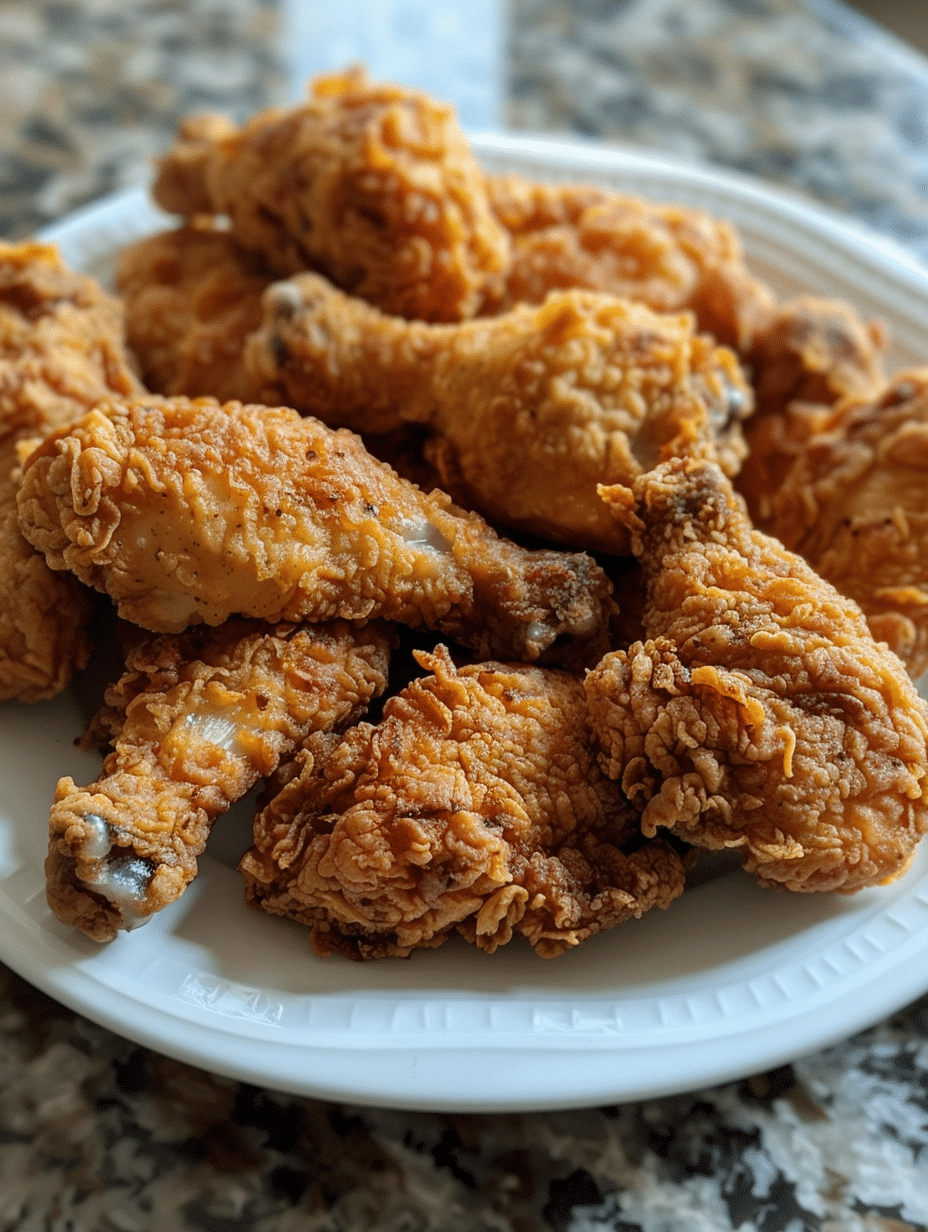
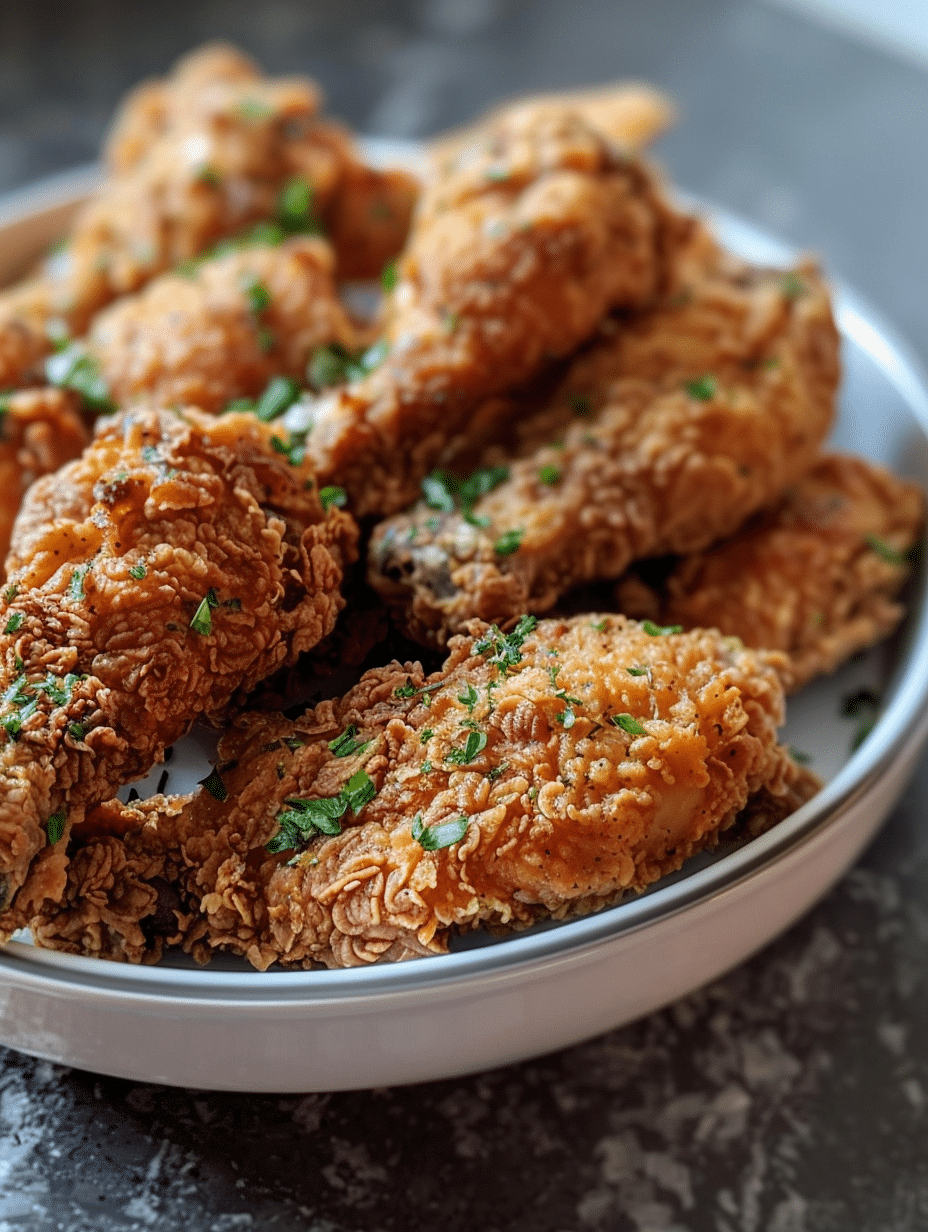
Air fryer fried chicken delivers restaurant-quality results with a golden, crispy exterior and tender, juicy meat inside. This method uses hot circulating air instead of deep frying, producing the same delicious crust without excess oil or kitchen mess. I’ve perfected this recipe through years of testing, and it consistently delivers perfectly cooked chicken every single time. The cooking process takes just 25 minutes, making it ideal for weeknight dinners when you need satisfying food fast.
About the Author and Recipe Origin
I’m Eva Stoner, creator of Fresh Recipes Corner, where I share dependable recipes designed for everyday home cooks. My passion for cooking developed in my grandmother’s kitchen, where I discovered that exceptional food requires care and technique, not complicated ingredients. Those formative years taught me to focus on straightforward methods that deliver consistent results. I created this air fryer fried chicken recipe because my family requested it weekly, and I wanted to prove that air-fried chicken rivals traditional deep-fried versions.
Recipe Overview
| Aspect | Details |
|---|---|
| Prep Time | 15 minutes |
| Cook Time | 25 minutes |
| Total Time | 40 minutes |
| Servings | 4 servings |
| Difficulty Level | Easy |
| Cuisine | American |
Why This Recipe Works
I chose this specific combination of flour blend and seasonings after testing dozens of variations. The paprika and garlic powder create authentic fried chicken flavor without overwhelming heat. Buttermilk tenderizes the chicken while adding subtle tang that enhances the overall taste profile. The 380-degree temperature setting crisps the coating perfectly without burning it, while the chicken inside stays moist and tender.
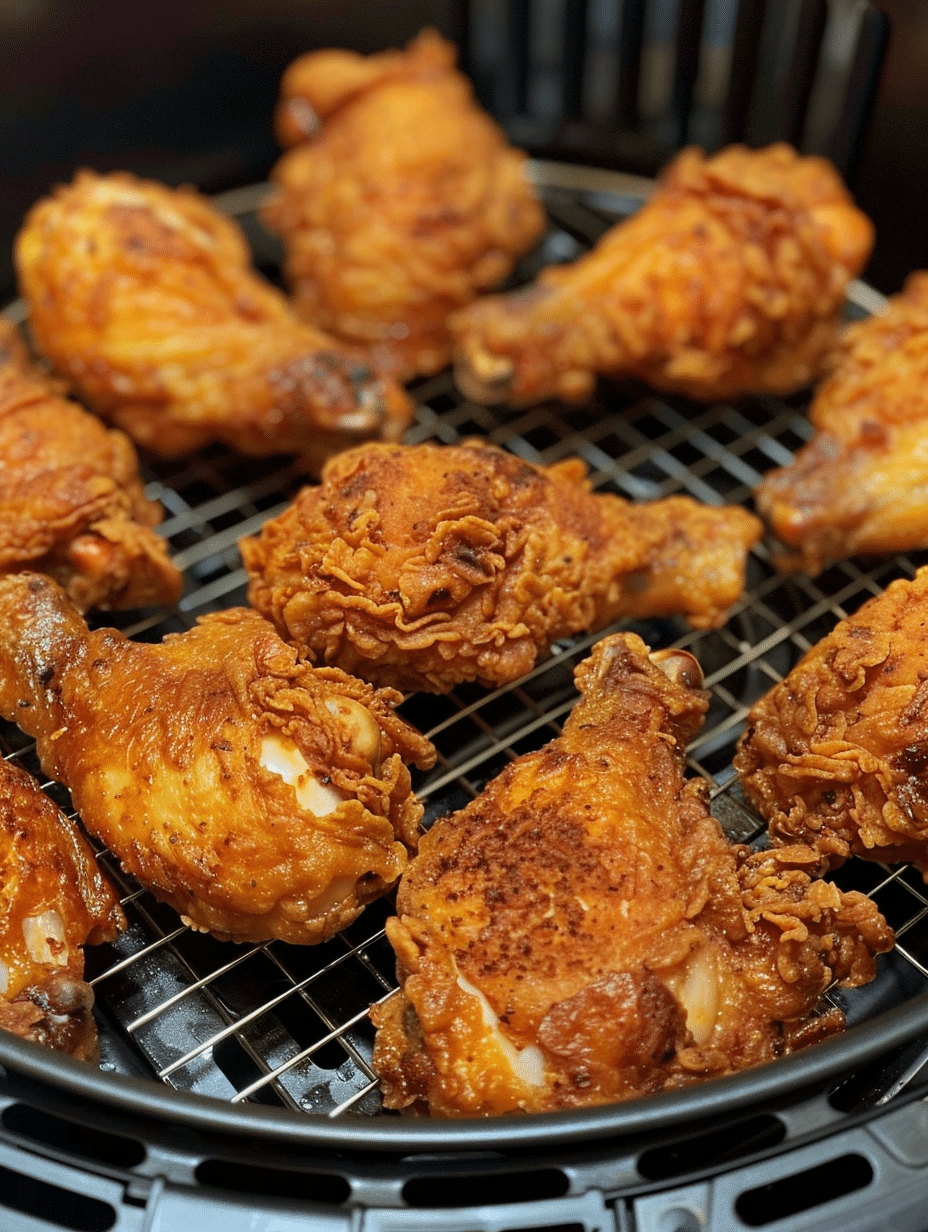
The key to success lies in proper coating technique and air fryer positioning. When you coat chicken thoroughly and place pieces skin-side up in a single layer, hot air circulates completely around each piece. This consistent airflow produces even browning and prevents soggy patches. My first batch failed because I overcrowded the basket, but spacing pieces correctly transformed the results immediately.
Using cooking spray instead of dunking chicken in oil achieves crispness while keeping total fat content reasonable. The light spray activates the flour coating and helps it brown beautifully. I discovered through repeated testing that two light coats work better than one heavy application, creating a more uniformly golden exterior.
Ingredients
| Ingredient | Quantity | Notes and Alternatives |
|---|---|---|
| Chicken breasts | 1.5 lbs | Use bone-in, skin-on for juicier results. Boneless works fine but dries slightly faster. |
| Chicken thighs | 0.5 lb | Dark meat stays more tender. Use breast-only if preferred, adjusting cooking time to 18-22 minutes. |
| All-purpose flour | 1 cup | Cornstarch mixed with flour (ratio 3:1) adds extra crispness. Gluten-free all-purpose flour works identically. |
| Garlic powder | 2 teaspoons | Use fresh minced garlic if preferred (3 cloves), though powder distributes more evenly. |
| Paprika | 2 teaspoons | Smoked paprika adds depth. Use sweet paprika for milder flavor profile. |
| Onion powder | 1 teaspoon | Adds savory dimension. Substitute with finely minced dried onions if available. |
| Cayenne pepper | 1 teaspoon | Reduces to 0.5 teaspoon for mild heat. Omit entirely for no spice. |
| Salt | 1 teaspoon | Use kosher salt for more even seasoning distribution. Fine sea salt works equally well. |
| Black pepper | 0.5 teaspoon | Freshly ground pepper provides superior flavor versus pre-ground. |
| Eggs | 2 large | Acts as binding agent for flour coating. No adequate substitute exists. |
| Buttermilk | 0.25 cup | Tenderizes meat and adds subtle tang. Substitute with plain yogurt or milk mixed with lemon juice. |
| Cooking spray | As needed | Olive oil spray, avocado oil spray, or coconut oil spray all work well. |
Step-by-Step Instructions
Preparation Phase
- Pat chicken pieces completely dry using paper towels, removing any excess moisture from the surface.
- Combine flour, garlic powder, paprika, onion powder, cayenne pepper, salt, and black pepper in a shallow bowl, stirring until evenly distributed.
- Whisk eggs with buttermilk in a second shallow bowl until fully incorporated and smooth.
- Set up your coating station with the egg mixture on one side and the seasoned flour mixture on the other.
Coating Phase
- Dip each chicken piece into the egg and buttermilk mixture, ensuring complete coverage on all sides.
- Transfer the coated chicken to the seasoned flour mixture, pressing gently so the coating adheres evenly.
- Flip the chicken and coat the other side thoroughly, shaking off excess flour before placing on a clean plate.
- Allow coated chicken to rest for 5 minutes on the plate, letting the coating set slightly.
Air Frying Phase
- Preheat your air fryer to 380 degrees Fahrenheit for 3-5 minutes while you prepare the basket.
- Arrange chicken pieces in the air fryer basket in a single layer, skin-side up if applicable, leaving small gaps between pieces.
- Spray the chicken lightly with cooking spray on the top side using 2-3 short bursts.
- Air fry for 12-13 minutes without opening the basket, allowing the coating to set properly.
- Open the basket and flip each chicken piece using tongs, being careful not to dislodge the coating.
- Spray the newly exposed side lightly with cooking spray using another 2-3 short bursts.
- Air fry for an additional 10-12 minutes until the coating turns golden brown and the internal temperature reaches 165 degrees Fahrenheit when measured with a meat thermometer.
- Transfer cooked chicken to a paper towel-lined plate and allow to rest for 5 minutes before serving.
Chef Tips for Perfect Results
- Use a meat thermometer to verify doneness accurately. Insert it into the thickest part of the largest piece without touching bone for precise reading.
- Don’t skip the resting period after coating. This allows the flour to hydrate and adhere more firmly, preventing coating separation during cooking.
- Flip chicken exactly halfway through cooking time for even browning on both sides. Mark your phone timer to remind you.
- Use bone-in, skin-on chicken pieces when possible. They retain moisture better than boneless options and develop more authentic fried chicken texture.
- Apply cooking spray in short bursts from 6 inches away rather than holding the button down. This prevents over-saturating the coating and creates more consistent crispness.
- Let the air fryer preheat fully. Three to five minutes ensures the basket reaches proper temperature and eliminates moisture that could make coatings soggy.
Common Mistakes to Avoid
Mistake 1: Overcrowding the Air Fryer Basket causes uneven cooking and steamed rather than fried chicken. Hot air must circulate completely around each piece. Solution: Cook in two batches if needed, leaving visible gaps between all pieces.
Mistake 2: Skipping the Drying Step traps moisture on the chicken surface, preventing coating adhesion. Wet chicken produces soggy breading instead of crispy coating. Solution: Pat chicken thoroughly with paper towels before dipping in buttermilk mixture.
Mistake 3: Using Too Much Cooking Spray creates greasy, heavy coating that doesn’t crisp properly. Over-saturated flour becomes dense rather than light and crunchy. Solution: Use light two-second bursts from 6 inches away, applying spray twice rather than once heavily.
Mistake 4: Not Flipping Halfway Through results in one side browned and the other pale or undercooked. The side facing down experiences less direct air circulation. Solution: Set a timer for the midpoint and flip every piece using tongs.
Mistake 5: Cooking at Incorrect Temperature either burns the exterior before cooking the interior or leaves it pale and undercooked. Some air fryers run hotter or cooler than displayed settings indicate. Solution: Check internal temperature with a thermometer and adjust temperature up or down by 10 degrees if needed.
Variations and Substitutions
| Ingredient | Substitution Option | Impact on Flavor and Texture |
|---|---|---|
| All-purpose flour | Cornstarch or potato starch | Creates extremely crispy, almost shatteringly crunchy coating. Use ratio of 2 parts flour to 1 part starch. |
| Buttermilk | Plain yogurt or milk with lemon juice | Yogurt produces slightly tangier flavor. Lemon milk mixture works identically for moisture and binding. |
| Paprika | Smoked paprika or chili powder | Smoked paprika adds woodsy depth. Chili powder increases heat level and adds slight sweetness. |
| Cayenne pepper | Black pepper or white pepper | Removes heat entirely while maintaining peppery notes. White pepper produces slightly cleaner flavor. |
| Regular chicken pieces | Turkey breast or pork tenderloin | Turkey produces similar texture and requires identical cooking time. Pork stays moist but cooks faster by 2-3 minutes. |
| Cooking spray | Olive oil or avocado oil brush | Brushed oil creates heavier coating but with richer flavor. Requires more careful application to avoid over-saturation. |
Serving Suggestions and Pairings
Air fryer fried chicken pairs beautifully with classic sides that complement its crispy-meets-juicy texture. Serve with creamy coleslaw featuring cool, tangy dressing that balances the richness of the fried coating. Mac and cheese provides comfort food appeal, while steamed corn on the cob adds sweetness and textural contrast.
For casual family dinners, prepare a simple green salad with vinaigrette dressing to cut through the richness. Roasted sweet potato fries or regular french fries create the beloved chicken and fries pairing in a healthier format. Biscuits or cornbread absorb any drippings and extend the meal satisfaction.
Picnic settings call for adding pickles, fresh tomato slices, and lettuce on soft rolls for fried chicken sandwiches. Serve chilled with lemon wedges and your choice of dipping sauces including ranch, hot sauce, or honey mustard. This recipe also works wonderfully for game day entertaining when guests expect casual, shareable foods.
For elegant presentations, serve smaller chicken pieces as appetizers with sophisticated dipping options like sriracha aioli or curried yogurt sauce. Plate individually with microgreens and lemon wedges for restaurant-quality plating. This versatility allows the same basic recipe to span from weeknight casual to special occasion worthy.

Storage and Reheating
| Method | Duration | Storage Instructions |
|---|---|---|
| Refrigerator | Up to 4 days | Cool completely, transfer to airtight container, store on middle shelf. Ensure no condensation develops inside container. |
| Freezer | Up to 3 months | Cool completely, arrange pieces on baking sheet and freeze 2 hours before transferring to freezer bag. This prevents clumping. |
| Air Fryer Reheating | 5-7 minutes at 350°F | Place chicken in single layer without thawing. Check internal temperature reaches 165°F before serving. |
| Oven Reheating | 12-15 minutes at 375°F | Cover with foil to prevent over-browning. Place on baking sheet for even heating. |
| Microwave (Not Recommended) | 2-3 minutes on 50% power | Place on paper towel. This method softens the coating considerably but works in emergencies. |
Nutritional Information
| Nutrient | Amount Per Serving |
|---|---|
| Calories | 285 |
| Protein | 38g |
| Total Fat | 8g |
| Saturated Fat | 2g |
| Carbohydrates | 12g |
| Dietary Fiber | 0g |
| Sugars | 0g |
| Sodium | 580mg |
| Cholesterol | 125mg |
Approximate values based on USDA database for 4-serving recipe. Values vary by exact ingredient brands and preparation method.
Frequently Asked Questions
Can I use chicken thighs only instead of mixed pieces?
Yes, using only chicken thighs produces excellent results with juicier meat than all-breast versions. Dark meat naturally contains more fat, keeping it moist throughout cooking. Use the same seasonings and cooking time of 25 minutes, though thighs may cook 1-2 minutes faster depending on size.
How do I know when air fryer fried chicken is done cooking?
Insert a meat thermometer into the thickest part without touching bone. Chicken is safely cooked when internal temperature reaches 165 degrees Fahrenheit. The coating should appear golden brown, not light yellow or pale. Visual appearance alone isn’t sufficient because coating browns faster than meat cooks through.
Why is my air fryer fried chicken coating coming off during cooking?
This happens when chicken wasn’t properly dried before coating or when the resting period was skipped. Solution: Pat chicken completely dry with paper towels and let the coated chicken rest 5 minutes before air frying. The flour needs time to hydrate and grip the meat surface. Additionally, ensure you’re not moving the basket too frequently during cooking.
Can I prepare the coated chicken ahead of time?
Yes, coated chicken keeps refrigerated for up to 8 hours before air frying. Place coated pieces on a baking sheet and refrigerate uncovered for 1 hour until the coating sets firm. Then transfer to an airtight container. This advance preparation actually improves coating adhesion. Add 1-2 minutes to cooking time if cooking from cold.
What should I do if the outside is brown but the inside seems undercooked?
Lower your air fryer temperature by 10 degrees and cook longer. Each air fryer model runs slightly different temperatures despite identical settings. If coating browns too quickly, the exterior over-crisps before the interior reaches safe temperature. Conversely, if the inside cooks but coating stays pale, raise temperature by 10 degrees next time.
Is air fryer fried chicken healthier than deep-fried chicken?
Air fryer fried chicken contains significantly less fat and calories than traditional deep-fried versions. This recipe uses only light cooking spray, while deep frying requires submerging chicken in several cups of oil. You’re reducing total fat by 60-70 percent while maintaining nearly identical flavor and texture through rapid air circulation.
Final Thoughts
Air fryer fried chicken transforms weeknight dinners into memorable meals without requiring advanced cooking skills or excessive cleanup. This recipe produces the crispy, golden coating and juicy interior you crave while taking just 25 minutes from start to finish. Once you master the basic technique, you’ll understand why this recipe appears on my table repeatedly throughout every season. Cook this soon and discover why air fryer fried chicken has become the new standard for home cooking.
Air Fryer Fried Chicken
Ingredients
- 6 boneless, skinless chicken breasts
- 2 cups all-purpose flour
- 1/2 cup gluten-free flour (optional for texture)
- 1 teaspoon paprika
- 1 teaspoon garlic powder
- 1 teaspoon salt
- 1/2 teaspoon black pepper
- 1 cup buttermilk
- Cooking spray (for oil-free coating)
Instructions
- 1. Pat chicken dry and cut into 1-inch strips for even cooking.
- 2. In a bowl, mix flour, paprika, garlic powder, salt, and pepper.
- 3. Dredge chicken strips in buttermilk, then coat thoroughly in the flour mixture.
- 4. Lightly spray both sides with cooking spray to enhance crispiness.
- 5. Place chicken in a single layer in the air fryer basket (skin-side up if using). Cook at 380°F for 15 minutes, flip, and cook 10 more minutes.
- 6. Let rest 5 minutes before serving.
Notes
Toss extra flour with a splash of hot sauce for spice.
Serve with honey mustard or ranch dressing.
