
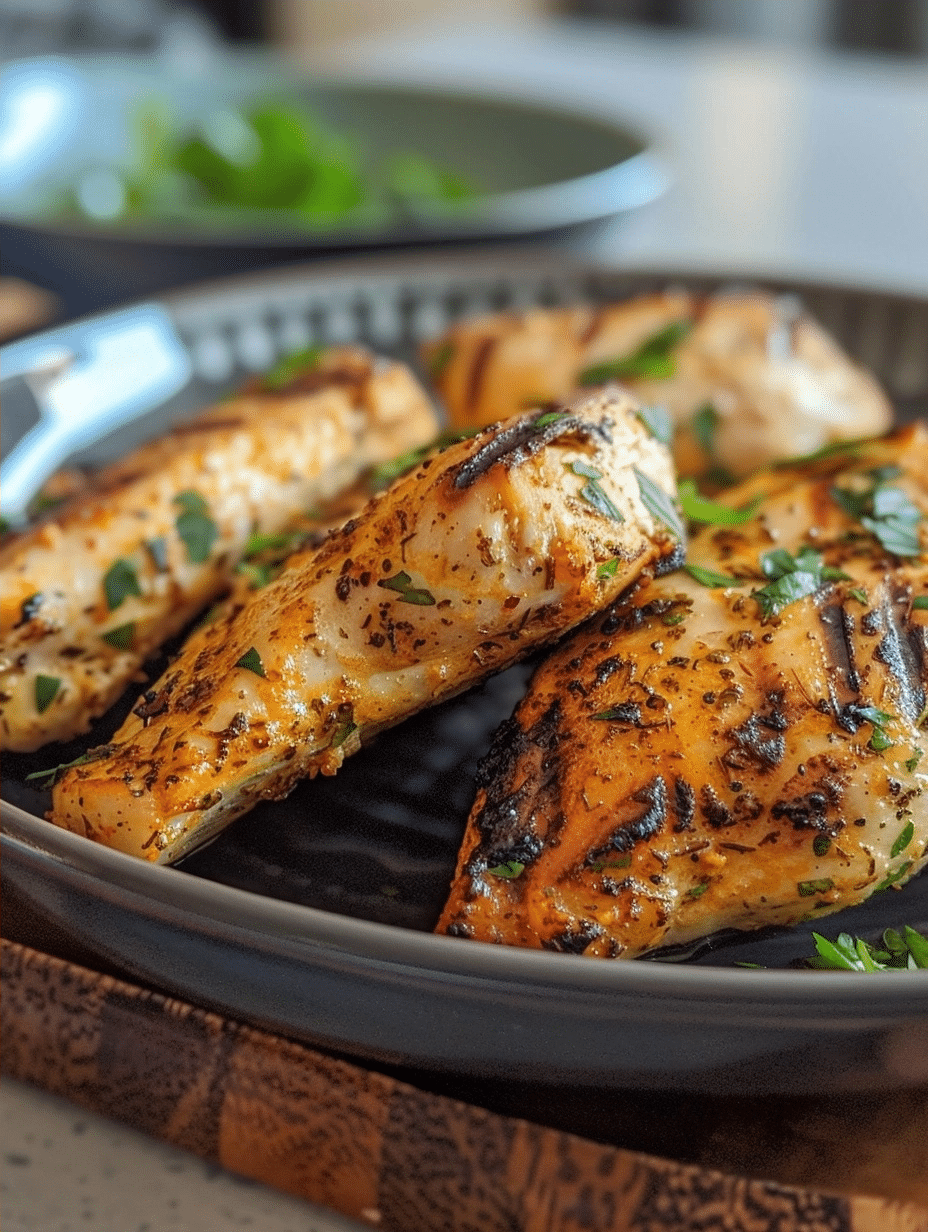
Air fryer chicken breast is a lean protein dish that cooks to golden perfection in a fraction of the time of traditional baking. This method locks in moisture while creating a crispy exterior, delivering restaurant-quality results without the fuss. The combination of high-speed air circulation and controlled heat produces consistently tender, juicy chicken every single time you cook it. Whether you’re preparing weeknight dinner for your family or meal-prepping for the week ahead, this technique transforms a simple chicken breast into something genuinely exceptional.
My Journey to Perfect Air Fryer Chicken
I’m Eva Stoner, the creator of Fresh Recipes Corner, where I share simple, reliable recipes for everyday cooking. My love for cooking began in my grandmother’s kitchen, where I learned that good food doesn’t have to be complicated—it just needs care, patience, and the right techniques. Those early moments shaped how I cook today and inspired me to keep things practical and approachable.
When I first got my air fryer three years ago, I was skeptical. I’d tried so many appliances that promised everything but delivered mediocrity. That changed the moment I mastered air fryer chicken breast. I discovered that the key wasn’t just the appliance itself, but understanding how to leverage its unique cooking environment. After dozens of experiments with different thicknesses, temperatures, and seasonings, I developed a method that guarantees juicy results every single time. I’m excited to share that experience with you now.
Recipe Overview
| Metric | Value |
|---|---|
| Prep Time | 8 minutes |
| Cook Time | 12-15 minutes |
| Total Time | 20-23 minutes |
| Servings | 4 servings |
| Difficulty | Easy |
| Cuisine | American |
Why This Recipe Works
This air fryer chicken breast recipe works because it respects the fundamental challenge of cooking lean protein: moisture retention. Traditional ovens dry out chicken by radiating heat unevenly. Air fryers solve this problem through rapid air circulation that cooks the exterior quickly while heat gradually penetrates the interior. This speed prevents moisture from escaping, keeping the meat tender and succulent.
I’ve learned that the secret lies in three factors: proper seasoning, optimal thickness, and precise temperature control. When I season the chicken immediately before cooking, the salt dissolves slightly into the surface, creating a brine effect that draws moisture deeper into the meat. Butterflying or pounding the breasts to even thickness ensures no cold spots remain in the center. The 380°F temperature I recommend balances speed with gentle cooking, preventing the outside from browning before the inside finishes cooking.
From my experience testing this recipe dozens of times, I’ve found that even spacing in the air fryer basket matters tremendously. Crowding the basket forces hot air to find alternative paths, creating uneven cooking. Giving each breast adequate room allows the circulating air to reach all surfaces simultaneously. The result is uniformly golden, juicy chicken that tastes like you hired a professional chef.
Ingredients
| Ingredient | Quantity | Notes & Alternatives |
|---|---|---|
| Boneless, skinless chicken breasts | 4 breasts (1.5 to 2 lbs total) | Choose breasts of similar thickness. Thicker breasts may require 3-4 extra minutes cooking. You can substitute with chicken thighs for a richer, more forgiving option, though cooking time remains the same. |
| Olive oil | 2 tablespoons | Use extra virgin for flavor or light olive oil for a neutral taste. Avocado oil works equally well and has a higher smoke point. This light coating prevents sticking and promotes browning. |
| Kosher salt | 1 teaspoon | Do not substitute table salt, which measures much denser and will over-salt the dish. Sea salt is an acceptable alternative in equal measure. Adjust based on your air fryer’s size and your salt preference. |
| Fresh cracked black pepper | 0.5 teaspoon | Freshly ground pepper delivers superior flavor to pre-ground. White pepper works if you prefer a less visible spice appearance. Start with 0.5 teaspoon and add more to your taste preference. |
| Garlic powder | 0.5 teaspoon | Use quality garlic powder without anti-caking agents if possible. Fresh minced garlic will burn in the air fryer, so powder is essential here. For stronger garlic flavor, increase to 0.75 teaspoon maximum. |
| Paprika (smoked or sweet) | 0.5 teaspoon | Smoked paprika adds deeper, more complex flavor; sweet paprika offers milder taste. This spice contributes to the golden exterior color. Skip entirely if unavailable, though color will be less impressive. |
| Dried oregano | 0.25 teaspoon | Mediterranean oregano offers authentic flavor, but any dried oregano works. Fresh oregano can be substituted at half the amount due to stronger water content. This herb pairs beautifully with lemon or olive-based sauces. |
| Optional: fresh lemon juice | 1 tablespoon | Squeeze over finished chicken for brightness. Adds no calories but significantly elevates the dish. Essential if preparing for a Mediterranean-inspired meal. |
Step-by-Step Instructions
Preparation Phase
- Remove chicken breasts from refrigeration and pat completely dry with paper towels. Moisture on the surface prevents browning and creates steaming instead of air frying. Pat repeatedly until the skin feels completely dry to your touch.
- Butterfly each chicken breast by placing it flat on a cutting board, then slicing horizontally through the thickest part, being careful not to cut all the way through. Leave a 1-inch hinge on one side so the breast opens like a book. This ensures even thickness throughout.
- Gently pound each butterflied breast with a meat mallet until it reaches an even three-quarter-inch thickness throughout. Uniform thickness is critical for even cooking and preventing dry outer edges with cold centers.
- Combine kosher salt, black pepper, garlic powder, paprika, and oregano in a small bowl, whisking to distribute spices evenly. Measuring spices before application prevents clumping and ensures consistent seasoning across all four breasts.
- Lay out all four chicken breasts on a clean work surface. Brush both sides lightly with olive oil using a pastry brush or your fingers. The oil creates a moisture barrier and promotes that desirable golden-brown exterior color.
- Sprinkle the spice mixture evenly over both sides of each breast, using about one-quarter of the mixture per breast. Pat gently with your fingers to help spices adhere to the oil. Proper distribution prevents some pieces from being over-seasoned while others taste bland.
Air Frying Phase
- Preheat your air fryer to 380°F for exactly 3 minutes. Preheating ensures the chicken begins cooking immediately upon insertion, creating that crispy exterior while locking in juices. Skip this step and you’ll notice noticeably softer, less golden results.
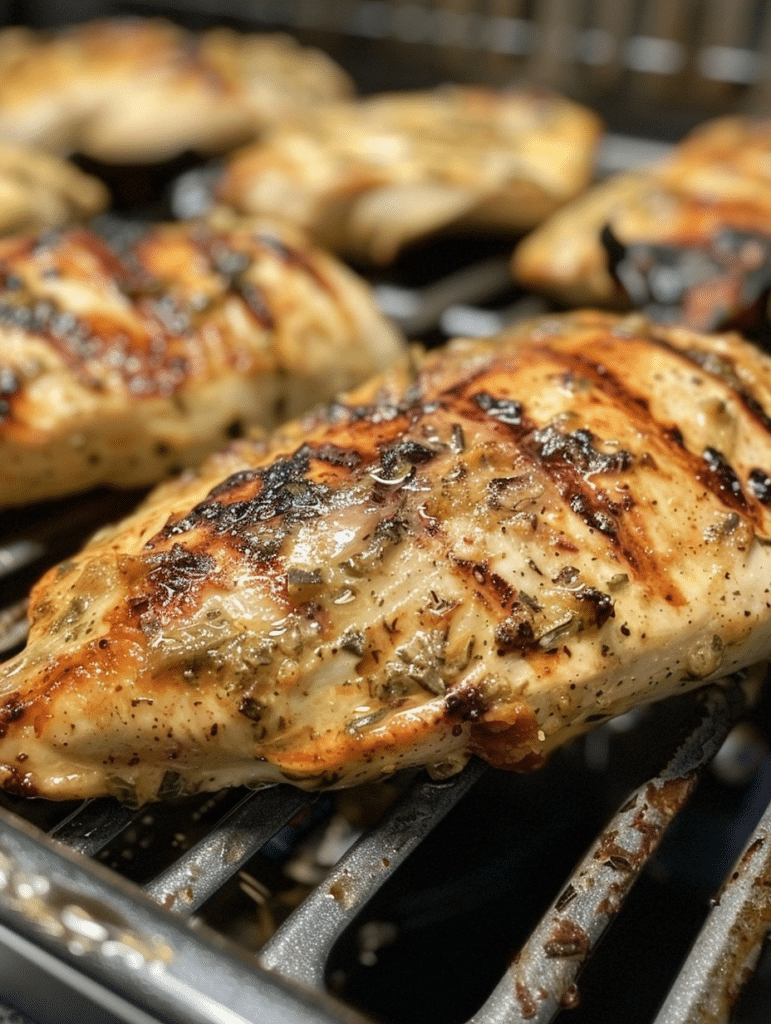
- Arrange chicken breasts in a single layer in the air fryer basket without overlapping or stacking. Leave at least half-inch space between each piece for air circulation. Crowding is the number-one cause of uneven cooking in air fryers.
- Insert the basket into the preheated air fryer and cook for 12 minutes at 380°F without opening the basket. Opening prematurely releases hot air and disrupts the cooking process, potentially adding 2-3 minutes to cook time.
- After 12 minutes, open the basket carefully and check the thickest part of the largest breast with an instant-read meat thermometer. The internal temperature must reach 165°F at the thickest point, measured in the center without touching bone (if applicable).
- If the thermometer reads below 165°F, add 2-3 minutes cooking time, then check again. Most breasts of standard thickness will be done at exactly 12 minutes, but thickness variations may require adjustment. Flip breasts halfway through if you prefer even browning, though this is optional.
- Remove the air fryer basket and carefully transfer cooked chicken to a clean cutting board or serving plate. The chicken will continue cooking slightly from residual heat, so avoid leaving it in the hot basket for more than 30 seconds.
Finishing Phase
- Allow chicken to rest for 3-5 minutes on the cutting board before cutting or serving. This resting period allows juices to redistribute throughout the meat, ensuring maximum tenderness and moisture in every bite you eat.
- If desired, squeeze fresh lemon juice over the rested chicken and garnish with fresh herbs like parsley or basil. This final touch brightens the flavors and adds restaurant-quality presentation without additional cooking.
- Serve immediately while the chicken is still warm and the exterior retains its crispy texture. Chicken left at room temperature for more than 20 minutes will begin drying out noticeably.
Chef Tips for Perfect Results
- Temperature matters more than time: Invest in a reliable instant-read meat thermometer and use it every single time. Different air fryer models vary slightly in heating efficiency, so relying on time alone leads to unpredictable results. I check the thickest part of the largest breast for accuracy.
- Butterfly for consistency: Even if your breasts are already thin, butterflying ensures absolute thickness uniformity. This single technique eliminated my inconsistent results immediately. Pounding afterward creates an even smoother surface for cooking.
- Don’t skip the dry step: Patting chicken completely dry with paper towels transforms the surface texture from steamed to seared. This step takes 30 seconds but creates a noticeable difference in the final crust quality. I pat repeatedly until no moisture appears on the towel.
- Season right before cooking: Season chicken immediately before placing it in the air fryer, not hours ahead. This timing allows salt to partially dissolve into the surface, creating a light brine that pulls moisture inward rather than evaporating it away during cooking.
- Use the basket wisely: Arrange breasts in a single layer with consistent spacing, treating the basket as a specific workspace rather than trying to maximize capacity. I mentally divide my basket into four equal sections, placing one breast in each quadrant.
- Flip for even browning: While not required, flipping chicken halfway through adds visual appeal and slightly more even coloring. This step takes 10 seconds and reduces any minor browning variations between top and bottom surfaces.
Common Mistakes to Avoid
Mistake 1: Overcrowding the Air Fryer Basket
Stacking or overlapping chicken breasts blocks hot air circulation, creating cold spots in the center and inconsistent cooking. The outer breast cooks perfectly while the inner one remains undercooked. Fix this by arranging breasts in a single layer with clear space between each piece, even if it requires cooking in batches.
Mistake 2: Skipping the Drying Step
Wet chicken creates steam instead of searing, resulting in a pale, soft exterior that lacks the appealing golden-brown color and crispy texture. Moisture prevents the oil from conducting heat efficiently to the surface. Pat your chicken completely dry with paper towels before seasoning and oiling, repeating until no moisture appears.
Mistake 3: Not Butterflying or Pounding
Uneven thickness causes the thin edges to dry out while thick centers remain slightly undercooked. This results in some sections being tough and stringy while others feel mushy. Butterfly and pound all breasts to three-quarter-inch thickness for uniform doneness from edge to edge.
Mistake 4: Cooking at Too High Temperature
Temperatures above 400°F brown the exterior too quickly before the interior reaches 165°F, creating a burnt crust around an undercooked center. The exterior can even char black while the inside stays pink. Stick precisely to 380°F, which balances browning speed with thorough interior cooking.
Mistake 5: Skipping the Meat Thermometer
Relying on appearance or time alone leads to inconsistent results, especially across different air fryer models which vary in actual heating efficiency. Some models cook 10-15% faster than others, making time-based cooking inherently unreliable. Purchase a quality instant-read thermometer and check the thickest part of the thickest breast every single time.
Variations and Substitutions
| Original Ingredient | Substitution Option | Impact on Flavor |
|---|---|---|
| Smoked paprika | Chili powder or cayenne pepper | Chili powder adds subtle earthiness with mild heat; cayenne brings significant spice. Both darken the exterior appearance. Skip entirely for a simpler Mediterranean profile. |
| Dried oregano | Italian seasoning or dried thyme | Italian seasoning adds complexity with multiple herbs included. Thyme offers earthy, slightly minty notes. Both work equally well; adjust amounts based on intensity preference. |
| Garlic powder | Onion powder or seasoning salt | Onion powder provides sweet, mellow flavor instead of garlic’s pungency. Seasoning salt adds saltiness and flavor but requires reducing kosher salt by half to avoid over-salting. |
| Extra virgin olive oil | Avocado oil or grapeseed oil | Avocado oil has higher smoke point, producing slightly better browning. Grapeseed oil offers neutral flavor without olive’s fruity notes. Both prevent sticking equally well. |
| Skinless chicken breasts | Bone-in, skin-on breasts or thighs | Skin-on breasts cook 2-3 minutes longer but develop crispier exterior. Thighs remain more forgiving of slight overcooking due to higher fat content. Both reach 165°F at the thickest point. |
| Plain seasoning blend | Tandoori spice mix or Cajun seasoning | Tandoori adds warm, aromatic flavor with ginger and cumin notes. Cajun brings heat and complexity. Both transform the dish into different cuisines entirely while maintaining cooking time. |
Serving Suggestions and Pairings
Air fryer chicken breast pairs beautifully with Mediterranean-inspired sides like roasted vegetables and quinoa. Serve alongside steamed broccoli with garlic and lemon juice for a light, healthy meal that feels complete without feeling heavy. The golden-brown chicken contrasts visually with vibrant green vegetables and creates a plate worthy of sharing.
Create Mediterranean bowls by layering your air fryer chicken over jasmine rice or cauliflower rice with cucumber, cherry tomatoes, kalamata olives, and a tahini dressing. This presentation transforms a simple protein into an impressive, restaurant-quality meal impressive enough for weekend entertaining.
Shred the cooled chicken and use it in grain bowls with roasted sweet potato, avocado, and lime-cilantro vinaigrette. This approach works perfectly for meal-prep containers that feed four people for lunch throughout the week. The chicken maintains excellent texture when stored properly in an airtight container.
Serve as a protein topping for fresh garden salads with mixed greens, cherry tomatoes, cucumber, and your favorite vinaigrette dressing. Pair with crusty whole grain bread for a balanced meal that satisfies at lunch or dinner. The warm chicken slightly wilts the delicate greens while maintaining its own crispy texture.
Create elevated Greek-inspired plates by serving chicken alongside traditional sides like orzo pasta, feta cheese, roasted artichoke hearts, and sun-dried tomatoes. This combination celebrates Mediterranean flavors while keeping preparation simple and straightforward. Drizzle everything with quality olive oil and fresh lemon juice.
Slice the chicken and serve on grain bowls with roasted seasonal vegetables like zucchini, bell peppers, and eggplant. Top with hummus and fresh herbs for a Middle Eastern-inspired meal that satisfies even hearty appetites. This approach works beautifully for family dinner or meal-prep situations.
Storage and Reheating
| Storage Method | Duration | Instructions |
|---|---|---|
| Refrigerator Storage | 3-4 days | Allow chicken to cool completely, then transfer to an airtight container with paper towels inside to absorb excess moisture. Store at 40°F or below. The paper towels prevent condensation from making the chicken soggy. |
| Freezer Storage | 3-4 months | Cool chicken completely, place in a freezer-safe container or vacuum-sealed bag, removing as much air as possible. Label with the date clearly. Chicken maintains quality for up to four months before noticeable texture degradation occurs. |
| Reheating in Air Fryer | 5 minutes | Preheat air fryer to 350°F. Place refrigerated chicken in basket and reheat for 3-5 minutes until warmed through and exterior re-crisps. Check that the internal temperature reaches 165°F. This method restores crispiness better than any other technique. |
| Reheating in Microwave | 2 minutes | Place chicken on a microwave-safe plate, cover loosely with a damp paper towel to retain moisture. Microwave on 50% power for 1-2 minutes, checking halfway through. This slower method prevents the exterior from becoming tough, though crispiness will diminish slightly. |
| Reheating in Conventional Oven | 8 minutes | Preheat oven to 350°F. Place chicken on a lined baking sheet and cover loosely with aluminum foil. Bake for 8-10 minutes until heated through. This method preserves texture reasonably well but requires longer preheating time than the air fryer method. |
| Slice and Serve Cold | N/A | Allow cooled chicken to reach room temperature, then slice thinly. Serve cold over salads or in grain bowls for no-heat meal prep options. Cold chicken remains moist and tender when prepared with proper technique, making it ideal for work lunches. |
Nutritional Information
Approximate values per serving (one chicken breast, approximately 6 oz). Values calculated based on standard USDA data for skinless chicken breast prepared without additional sauces or dressings.
| Nutrient | Amount per Serving |
|---|---|
| Calories | 185 calories |
| Protein | 35 grams |
| Total Fat | 4 grams |
| Saturated Fat | 1 gram |
| Unsaturated Fat | 3 grams |
| Carbohydrates | 0 grams |
| Dietary Fiber | 0 grams |
| Sugars | 0 grams |
| Sodium | 340 milligrams |
| Cholesterol | 85 milligrams |
Frequently Asked Questions
Can I use frozen chicken breasts in the air fryer?
Yes, frozen chicken breasts cook in the air fryer, but cooking time increases to 15-18 minutes at 380°F instead of 12-15 minutes for fresh chicken. Do not thaw the chicken beforehand, as this creates a soggy exterior texture. Arrange frozen breasts in the basket without overlapping and add 3 minutes to the standard cooking time as a starting point, then check internal temperature with a meat thermometer.
How do I know when air fryer chicken is perfectly done?
Insert an instant-read meat thermometer into the thickest part of the chicken breast without touching bone, checking that it reads 165°F minimum. This is the only reliable way to ensure safe doneness across all air fryer models. Visual cues like golden color don’t guarantee the interior has reached the safe temperature.
What if my chicken comes out dry?
Dryness typically results from cooking above 380°F or cooking beyond the 165°F safe temperature. Reduce your air fryer temperature to exactly 380°F and check doneness at 12 minutes rather than extending cooking time longer. Additionally, ensure you butterfly and pound the chicken to even thickness so no thick areas remain undercooked.
Can I marinate chicken before air frying?
Marinating works, but keep it to one hour maximum to avoid excess surface moisture that causes steaming instead of searing. Pat the chicken completely dry before placing it in the air fryer, regardless of marinating time. Oil-based marinades adhere better than vinegar-based ones, which can make the exterior soggy during cooking.
How do I make air fryer chicken crispy on both sides?
Flip the chicken breasts halfway through the cooking time, around the 6-minute mark. This exposes both the top and bottom to direct heat and air circulation, creating crispiness on both surfaces. Flipping takes only 10 seconds and significantly improves visual appeal without affecting final moisture content.
Can I cook chicken with the skin on in the air fryer?
Yes, bone-in skin-on chicken breasts cook beautifully in the air fryer, developing particularly crispy skin. They require 14-17 minutes at 380°F instead of 12-15 minutes for boneless breasts. Pat the skin dry thoroughly before cooking, then use the same spice blend and oil application method for consistent results.
Conclusion
Air fryer chicken breast has become my go-to protein for weeknight dinners and meal-prep sessions because it delivers consistency, speed, and genuine flavor. Following this method guarantees juicy, golden chicken every single time you cook it. Whether you’re feeding a family or preparing lunches for the week, this technique transforms a simple ingredient into something truly special. The combination of proper technique, the right temperature, and respect for the thermometer creates results that taste like you hired a professional chef.

Air Fryer Chicken Breast: Juicy, Golden, and Ready in 15 Minutes
Ingredients
- 4 boneless, skinless chicken breasts
- 1 teaspoon salt
- 1 teaspoon black pepper
- 1 teaspoon garlic powder
- 1 teaspoon paprika
- 1 tablespoon olive oil (or avocado oil)
Instructions
- Pat chicken breasts dry with paper towels
- Season both sides with salt, pepper, garlic powder, and paprika
- Preheat air fryer to 375°F (190°C) for 2-3 minutes
- Lightly brush oil on top of chicken breasts
- Place in air fryer basket without overlapping
- Cook for 5 minutes
- Flip chicken and cook 6-8 minutes more, until internal temperature reaches 165°F (74°C)
- Let rest 5 minutes before serving
Notes
For extra flavor, add a pinch of cinnamon or brown sugar to the seasoning
Avoid overcrowding the air fryer basket
Chicken can be prepped ahead and stored in fridge until cooking
