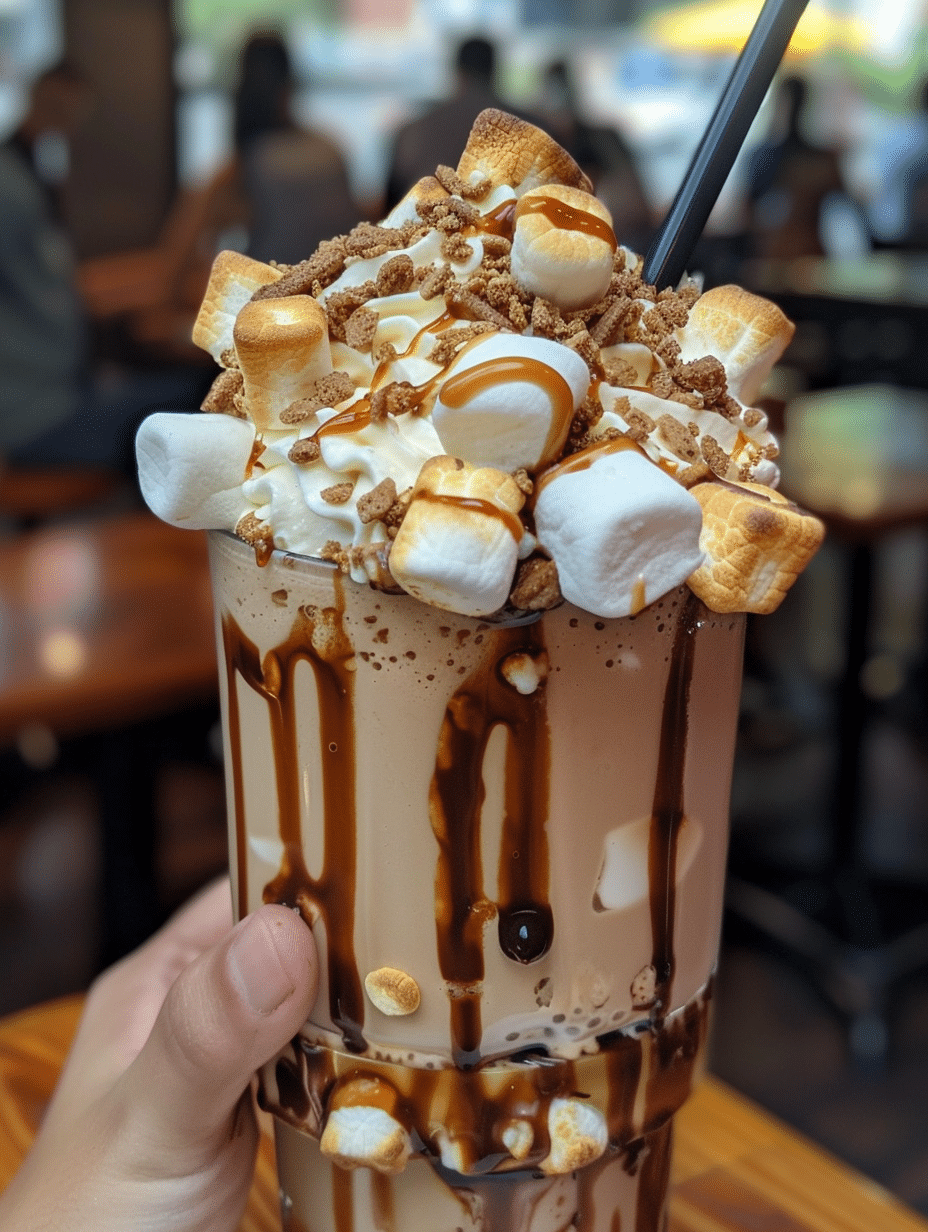
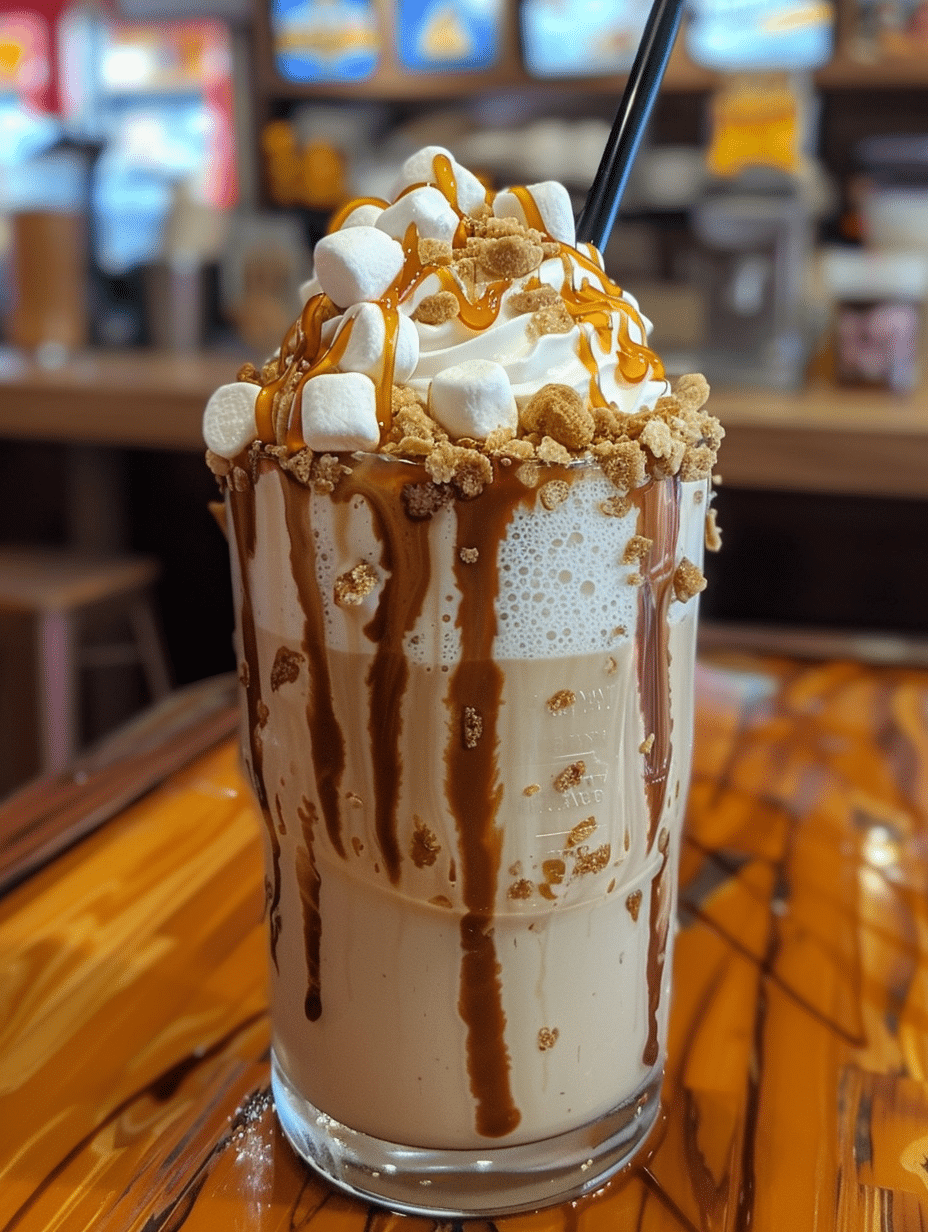
A toasted marshmallow milkshake is a creamy, indulgent beverage that captures the warmth of campfire desserts in a glass. This drink blends vanilla ice cream, fresh milk, and toasted marshmallow flavoring into a smooth, drinkable treat that tastes like melted s’mores without the crackers. I developed this recipe at Fresh Recipes Corner to bring that beloved toasted marshmallow taste to milkshake lovers everywhere. The combination of buttery vanilla notes and deep marshmallow richness makes every sip feel like a nostalgic comfort from childhood, yet sophisticated enough for adult palates. Whether you’re craving a weekend indulgence or need an impressive dessert beverage for guests, this toasted marshmallow milkshake delivers restaurant-quality flavor in your own kitchen.
About the Author and Fresh Recipes Corner
I’m Maya Collins, a 29-year-old from Austin, Texas, and a co-creator at Fresh Recipes Corner, where I focus on simple, refreshing drinks you can make anytime. I started by mixing juices in my mom’s kitchen just for fun, and over time it turned into a real passion. I love working with fruits, herbs, and natural ingredients to create mocktails, smoothies, and soft drinks that are easy but full of flavor.
My journey into beverage creation began during college summers when I’d experiment with different flavor combinations for friends and family gatherings. What started as a hobby evolved into a deep appreciation for how quality ingredients and proper technique can elevate an ordinary drink into something memorable. At Fresh Recipes Corner, my expertise spans cold beverages, classic American milkshakes, nostalgic dessert drinks, and creative flavor innovations. This toasted marshmallow milkshake recipe reflects my commitment to balancing authenticity with accessibility—it’s restaurant-quality yet achievable for home cooks of all skill levels.
Recipe Overview
| Attribute | Value |
|---|---|
| Prep Time | 5 minutes |
| Cook Time | 3 minutes (toasting marshmallows) |
| Total Time | 8 minutes |
| Servings | 2 servings |
| Difficulty Level | Easy |
| Cuisine | American Classic |
Why This Recipe Works
This toasted marshmallow milkshake recipe works because it combines the natural creaminess of premium ice cream with toasted marshmallow’s complex flavor profile. When you toast marshmallows properly, their exterior caramelizes and develops deeper, more complex sugars that transform a basic marshmallow into something with caramel and burnt-sugar notes. I discovered that blending these toasted marshmallows directly into the shake preserves these nuanced flavors better than using marshmallow syrup alone.
The secret to achieving authentic toasted marshmallow flavor lies in the toasting technique. I use a kitchen torch or broiler to carefully toast 6-8 large marshmallows until they’re golden-brown and slightly charred on the outside. This step takes just three minutes but creates an entirely different taste experience compared to using raw marshmallows. The toasted exterior becomes soft and gooey inside, creating natural sweetness that blends smoothly into the milk and ice cream base.
What makes this recipe stand out is the balance between richness and drinkability. Too much ice cream makes it too thick; too little makes it taste watered down. My formula uses exactly three scoops of vanilla ice cream per two servings, which creates the perfect consistency for sipping through a thick shake straw. The addition of a pinch of sea salt rounds out the sweetness and enhances the toasted marshmallow flavor, similar to how salt improves caramel.
Ingredients
| Ingredient | Quantity | Notes and Alternatives |
|---|---|---|
| Large marshmallows | 8 | Use fresh, pillowy marshmallows; avoid stale ones. Can substitute with marshmallow fluff if toasting is impossible, though flavor will be milder. |
| Vanilla ice cream | 3 scoops (approximately 1.5 cups) | Use high-quality vanilla with real vanilla beans for deeper flavor. Substitute with French vanilla for added richness or use dairy-free ice cream for lactose-free option. |
| Whole milk | 1 cup | Use cold milk for best texture. Can substitute with 2% milk, almond milk, or oat milk; dairy-free options work well and create slightly lighter shake. |
| Butter | 1 tablespoon | Adds richness and helps carry toasted marshmallow flavor. Can reduce to 1 teaspoon for lighter version or use coconut oil as dairy-free alternative. |
| Sea salt | Pinch (1/8 teaspoon) | Enhances sweetness and deepens toasted flavor. Use fine sea salt; avoid coarse salt which won’t blend smoothly. |
| Vanilla extract | 1/2 teaspoon | Amplifies vanilla notes. Use pure vanilla extract; avoid imitation for best quality. Substitute with 1/4 teaspoon of vanilla bean paste for intensity. |
| Whipped cream | For topping (optional) | Adds luxe texture and visual appeal. Use fresh whipped cream or canned; top with toasted marshmallow pieces for garnish. |
Step-by-Step Instructions
Phase 1: Prepare Your Marshmallows
- Place 8 large marshmallows on a small baking sheet lined with aluminum foil or on a heat-safe plate.
- Use a kitchen torch to carefully toast each marshmallow on all sides until the exterior turns golden-brown with light charring, rotating gently for 30 seconds per side. Alternatively, place the baking sheet 4-5 inches under a preheated broiler for 2-3 minutes, watching carefully to prevent burning.
- Allow the toasted marshmallows to cool for exactly 1 minute on the baking sheet before handling, as they will be extremely hot.
- Break the toasted marshmallows into roughly 1-inch pieces, allowing the warm interior to slightly soften the exterior for easier blending.
Phase 2: Blend the Shake
- Pour 1 cup of cold whole milk into your blender first, creating a base liquid that prevents ice cream from sticking to the blender bottom.
- Add 3 scoops (approximately 1.5 cups) of vanilla ice cream directly over the milk, breaking larger scoops into halves for faster blending.
- Add the 1 tablespoon of butter and the pinch of sea salt, which will melt during blending and distribute evenly throughout the shake.
- Add 1/2 teaspoon of pure vanilla extract for enhanced vanilla notes that complement the toasted marshmallow flavor.
- Add the cooled, broken toasted marshmallow pieces on top of the other ingredients.
Phase 3: Blend and Serve
- Blend on medium speed for 20-30 seconds until all marshmallow pieces are fully incorporated and the mixture is smooth and creamy with no visible chunks.
- If the shake is too thick, add 2-3 tablespoons of additional cold milk and blend for another 10 seconds; if too thin, add one additional small scoop of ice cream.
- Pour the shake into two tall chilled glasses, filling each glass approximately three-quarters full.
- Top each shake with fresh whipped cream and 2-3 pieces of toasted marshmallow for garnish if desired, creating visual appeal and extra flavor in every spoonful.
- Insert thick milkshake straws into each glass and serve immediately while the shake is cold and the whipped cream is fluffy.
Chef Tips for Perfect Results
- Toast marshmallows just before blending: Toasted marshmallows lose their exterior crispness within 5-10 minutes as they cool and firm up. Toast them no more than 5 minutes before you plan to blend, ensuring the best texture contrast and deepest caramelized flavor in your final shake.
- Use a kitchen torch for precision control: A culinary torch gives you superior control over the toasting process compared to a broiler, allowing you to toast each marshmallow individually and achieve consistent golden-brown color. Keep the torch flame 2-3 inches away and move it constantly to prevent burning.
- Chill your glasses before serving: Place your serving glasses in the freezer for 5 minutes while you prepare the ingredients. Cold glasses keep the shake cold longer and create a more pleasant, restaurant-quality drinking experience.
- Break toasted marshmallows into consistent pieces: Cut toasted marshmallows into roughly equal-sized pieces (approximately 1-inch cubes) before blending so they break down evenly and distribute their flavor uniformly throughout the shake without creating any grainy texture.
- Add salt before sweetness: The pinch of sea salt is crucial and should never be skipped, even though it sounds counterintuitive. Salt suppresses bitterness, enhances sweetness perception, and deepens the toasted marshmallow’s caramelized notes similar to how salt improves salted caramel.
- Blend in stages if your blender has low power: If your blender struggles, blend the milk, ice cream, butter and salt first for 15 seconds, then add marshmallows and blend another 20 seconds. This prevents the motor from straining and ensures smooth, even incorporation.
Common Mistakes to Avoid
Mistake 1: Using raw marshmallows instead of toasted ones. Raw marshmallows taste one-dimensional and lack the complex caramel and burnt-sugar notes that make this drink special. Always toast your marshmallows using a torch or broiler to develop their full flavor potential and transform them into something truly memorable.
Mistake 2: Burning the marshmallows completely black. Heavy charring creates bitter, acrid flavors that overpower the sweet toasted notes and make the shake taste unpleasant. Aim for a golden-brown exterior with just slight darkening at the peaks; if flames appear, immediately move the torch away or remove from the broiler.
Mistake 3: Using too much ice cream, creating an overly thick shake. A shake should be drinkable through a straw, not spoon-able like soft serve. Stick to exactly 3 scoops per 2 servings; if you add more, you’ll create something too dense to enjoy. If your shake is too thick, add milk in 2-tablespoon increments until it reaches ideal consistency.
Mistake 4: Skipping the butter and salt. These two ingredients seem optional but are absolutely essential for enhancing toasted marshmallow flavor and creating restaurant-quality depth. Butter carries the toasted flavors and adds richness; salt rounds sweetness and emphasizes caramelization. Without them, the shake tastes one-note and overly sweet.
Mistake 5: Blending for too long, creating an airy, frothy shake. Over-blending incorporates excess air and creates a shake that’s foamy rather than creamy, with a texture more like a smoothie than a proper milkshake. Blend for exactly 20-30 seconds until smooth; if you continue beyond that, you’ll break down the ice cream’s natural creaminess and ruin the mouthfeel.
Variations and Substitutions
| Ingredient | Substitution | Impact on Flavor and Texture |
|---|---|---|
| Vanilla ice cream | Salted caramel ice cream | Creates deeper, more complex sweetness with reduced need for added salt. Shift becomes less “toasted marshmallow” and more “salted caramel s’mores.” |
| Whole milk | Oat milk or almond milk | Creates slightly lighter, more delicate texture while maintaining creaminess. Almond adds subtle nuttiness; oat milk adds mild sweetness that complements toasted notes. |
| Butter | Coconut oil | Adds subtle coconut undertone while maintaining richness. Works particularly well if adding toasted coconut flakes to the shake. |
| Vanilla extract | 1/4 teaspoon vanilla bean paste | Creates more intense, authentic vanilla flavor with visible vanilla bean specks for visual appeal and deeper complexity. |
| Sea salt | Smoked sea salt | Adds subtle smokiness that enhances the toasted character, creating more campfire-like depth and intrigue. |
| Standard toasting | Broiled under oven heat instead of torch | Creates more even toasting across marshmallows but less precise control over individual toasting. Requires careful monitoring to prevent burning. |
Serving Suggestions and Pairings
Serve your toasted marshmallow milkshake as an indulgent dessert beverage after a summer dinner party, pairing it beautifully with grilled fruit skewers or berry tarts for a complete experience. At casual gatherings, offer it as a nostalgic alternative to traditional desserts; guests will appreciate the fun, interactive element of the toasted marshmallow flavor.
For outdoor events or backyard s’mores parties, this shake provides an air-conditioned alternative to traditional s’mores, allowing guests to enjoy similar flavors without a campfire. Pair it with chocolate chip cookies, graham crackers, or brownie bites for complementary textures and flavors. The shake also works wonderfully as a special treat after movie nights, particularly when paired with classic cinema snacks or homemade popcorn.
Consider serving toasted marshmallow milkshakes at retro diners, ice cream socials, or 1950s-themed parties where nostalgic dessert drinks are expected. The shake also makes an impressive offering at bridal showers or baby showers, served in vintage glassware with personalized toppings. For holiday parties, top the shake with peppermint whipped cream or crushed candy canes to create a festive seasonal variation.
During warm-weather entertaining, prepare the base ingredients ahead of time but toast marshmallows just before blending to ensure maximum flavor. You can easily scale this recipe up to serve 6-8 people by blending in batches or using a larger blender, making it perfect for summer entertaining or casual gatherings with friends.
Storage and Make-Ahead Guidelines
| Method | Duration | Instructions |
|---|---|---|
| Prepared shake (refrigerated) | Up to 4 hours | Pour finished shake into an airtight container and refrigerate. The shake will gradually separate and become thinner; stir well or reblend for 5 seconds before serving. Texture quality declines after 2 hours, so consume as close to preparation time as possible. |
| Marshmallows (toasted, at room temperature) | Up to 12 hours | Store toasted marshmallows in an airtight container at room temperature. They will gradually firm up but remain usable for shake blending. Avoid refrigeration as it speeds up hardening. Reheat gently in a 200-degree oven for 30 seconds before blending if they’ve become too firm. |
| Ice cream base (unmixed) | Up to 3 days | Combine milk, butter, salt, and vanilla extract in a sealed container; refrigerate until ready to blend. Keep separate from ice cream until blending time. This preparation saves time when making multiple shakes for groups. |
| Marshmallows (untoasted) | Up to 4 weeks | Store unopened bags of fresh marshmallows in a cool, dry pantry. Once opened, transfer to an airtight container to prevent hardening from air exposure. Check for staleness by testing firmness before using. |
| Finished shake (frozen) | Not recommended | Freezing destroys the creamy texture of a milkshake, creating an icy, granular consistency upon thawing. If you must freeze, blend it with additional liquid before serving to restore drinkability. |
Nutritional Information
Approximate values per serving (based on standard ingredient measurements; values may vary based on specific brands and portion sizes).
| Nutrient | Amount per Serving |
|---|---|
| Calories | 385 calories |
| Total Fat | 14 grams |
| Saturated Fat | 8 grams |
| Cholesterol | 45 milligrams |
| Sodium | 165 milligrams |
| Total Carbohydrates | 52 grams |
| Dietary Fiber | 0 grams |
| Sugars | 48 grams |
| Protein | 6 grams |
This toasted marshmallow milkshake is a treat-level dessert beverage best enjoyed occasionally as part of a balanced diet. The nutritional profile reflects premium ingredients including full-fat ice cream and whole milk; lighter versions using dairy-free or reduced-fat options will have lower calorie and fat content. Marshmallows are primarily sugar, so this shake is naturally high in carbohydrates and should be consumed mindfully by those monitoring sugar intake.
Frequently Asked Questions
Can I make a toasted marshmallow milkshake without a kitchen torch?
Yes, you can broil marshmallows under your oven’s heating element as an effective torch alternative. Place marshmallows on a baking sheet 4-5 inches below the broiler and watch carefully for 2-3 minutes until they turn golden-brown, being vigilant to prevent burning. Broiling works well but offers less precise control than a torch, making it slightly more challenging to achieve even toasting on each marshmallow.
What type of marshmallows should I use for this toasted marshmallow milkshake recipe?
Use large, fresh, pillowy marshmallows from the grocery store baking aisle rather than specialty brands or mini marshmallows. Fresh marshmallows have optimal moisture and toasting properties; stale marshmallows will shred rather than caramelize. Premium brands like Jet-Puffed or store brands in sealed packages work equally well as long as the marshmallows are recently purchased and still soft.
How do I know when marshmallows are properly toasted for this shake?
Properly toasted marshmallows should have a deep golden-brown exterior with slightly darkened peaks when removed from heat or flame. The interior will be warm and gooey while the exterior is crispy, creating ideal texture contrast. If your marshmallows are completely black or charred throughout, they’re over-toasted and will create bitter flavors that ruin the shake.
Can I prepare this toasted marshmallow milkshake the night before?
You should not prepare the finished shake more than 4 hours in advance, as separation and texture degradation occur as the shake sits. However, you can prep individual components the night before: chill your glasses, prepare the milk-butter-salt mixture, and store toasted marshmallows separately. Blend everything fresh just before serving for optimal taste and texture.
Is this milkshake recipe suitable for people with dairy allergies?
You can make a dairy-free version by substituting dairy ice cream with coconut, oat, or almond-based dairy-free ice cream, replacing whole milk with oat milk or coconut milk, and using coconut oil instead of butter. The final shake will be slightly less creamy but still delicious and rich enough to be satisfying. Test your dairy-free substitutes first, as brands vary significantly in texture and flavor quality.
What’s the best way to serve this shake to multiple guests at once?
Make two shakes at a time using this exact recipe, serving them immediately while they’re cold and fresh. If serving more than four people, blend the shakes in batches rather than attempting to quadruple the recipe in one blender, which can strain your motor. Alternatively, prepare individual shake components in advance and set up a self-serve shake-blending station where guests add their own preferences and toppings.
Final Thoughts
This toasted marshmallow milkshake recipe brings genuine s’mores nostalgia to your glass with remarkable simplicity and authentic flavor. By properly toasting the marshmallows, you transform ordinary ingredients into something with caramel complexity and memorable depth. Make this special shake whenever you crave that warm, comforting taste of campfire desserts, knowing you’ve created it with fresh, quality ingredients and expert technique from your own kitchen.
Toasted Marshmallow Milkshake
Ingredients
- 1 1/2 cups whole milk
- 2 cups vanilla ice cream
- 1/4 cup toasted marshmallow syrup (homemade or store-bought)
- 1/2 tsp cocoa powder
- 1/2 tsp vanilla extract
Instructions
- Toast marshmallows over a gas flame or in a skillet until golden brown
- Let toasted marshmallows cool completely for safer blending
- In a blender, combine milk, vanilla ice cream, cooled toasted marshmallow syrup, cocoa powder, and vanilla extract
- Blend until smooth and creamy, adding a splash of milk if needed for desired consistency
- Pour into chilled glasses and top with additional toasted marshmallows if desired
Notes
For non-dairy version, substitute vegan ice cream and almond/coconut milk
Store leftovers in the fridge for up to 48 hours
Adjust sweetness to taste by adding a pinch of sea salt for balance