
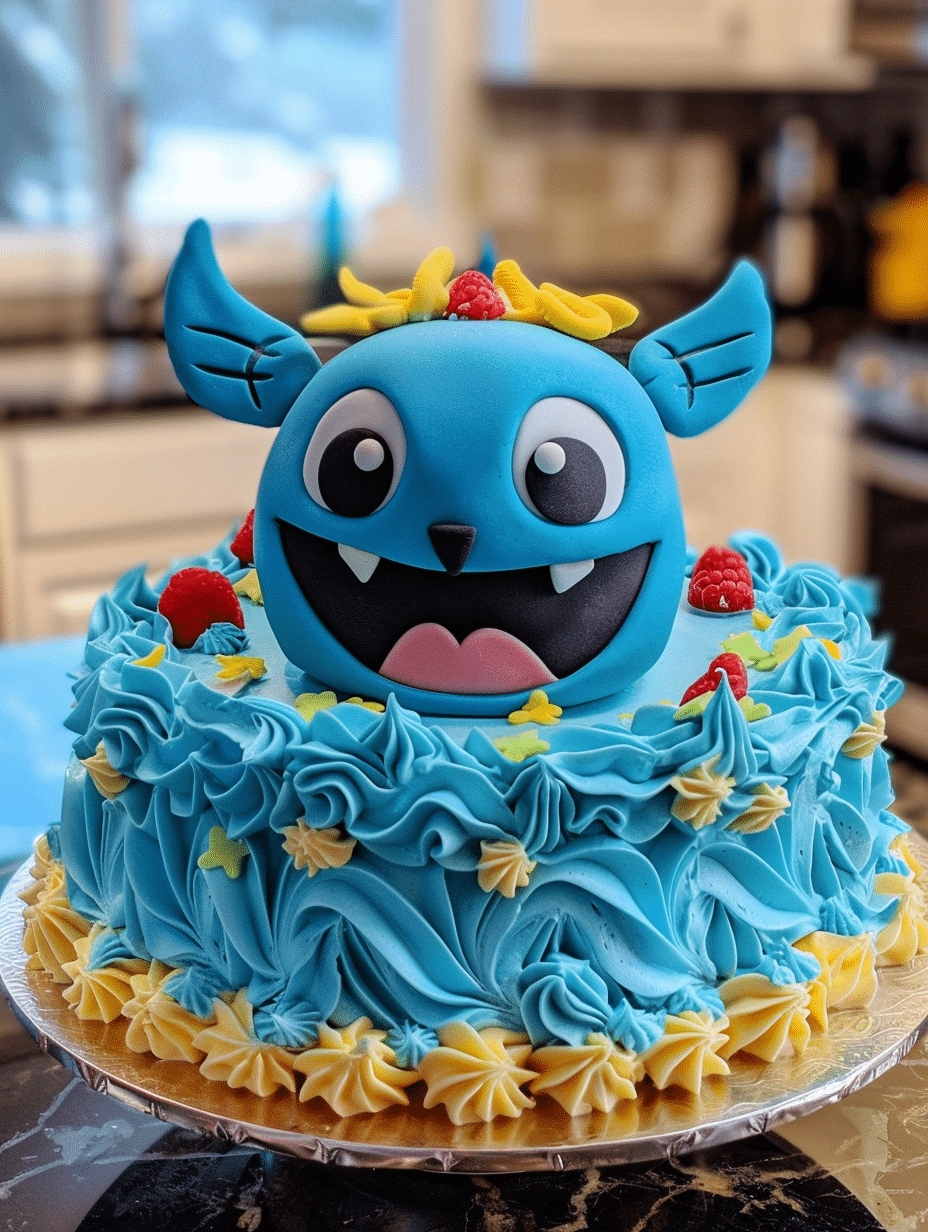
A stitch cake is a multi-layered chocolate or vanilla cake decorated to resemble Disney’s beloved character Stitch, featuring vibrant blue buttercream frosting, fondant details, and custom embellishments that bring this alien character to life. This eye-catching dessert combines classic cake-baking techniques with creative decorating, making it perfect for themed birthday parties, Disney fan celebrations, and special occasions. The cake typically features a rich chocolate or vanilla base, smooth buttercream frosting tinted in signature blue and black colors, and carefully crafted fondant accents that capture Stitch’s distinctive facial features and personality. Whether you’re a novice baker or experienced cake decorator, this recipe provides clear instructions to create a show-stopping centerpiece that delights both children and adults.
The Baker Behind This Recipe
I’m Lila Bennett, a 34-year-old home baker based in Portland, Oregon, and my kitchen is almost always filled with the smell of something sweet. I fell in love with baking as a kid, sneaking tastes of cookie dough and watching simple ingredients turn into something comforting and delicious. What started with slightly overbaked cookies turned into years of experimenting with cakes, pancakes, and all kinds of desserts—learning through trial, error, and a lot of taste-testing.
When my niece turned seven and declared her favorite movie was Lilo and Stitch, I knew I had to create something special for her birthday. My first stitch cake attempt was humble, but it sparked something in me. Over the past five years, I’ve refined this recipe through countless kitchen experiments, learning how to balance flavors, perfect frosting consistency, and master fondant decorating techniques. Today, I’ve created versions for twenty-plus celebrations, and I’m excited to share what I’ve learned with you.
Recipe Overview
| Metric | Details |
|---|---|
| Prep Time | 45 minutes |
| Cook Time | 35 minutes |
| Total Time | 2 hours 20 minutes (including cooling) |
| Servings | 12-16 slices |
| Difficulty Level | Intermediate |
| Cuisine | American Dessert |
Why This Recipe Works
The foundation of this stitch cake relies on a deeply flavored chocolate layer cake that provides structural stability and rich taste. I developed this recipe specifically because standard cake bases often fall apart under heavy frosting applications or slide when supporting fondant decorations. The cocoa powder adds moisture and flavor depth that prevents the sponge from drying out, even after a full day of sitting at room temperature decorated.
From my experience decorating over fifty themed cakes, I’ve discovered that American-style buttercream is superior for character cakes because it holds intricate details better than Swiss or Italian meringue varieties. The butter-to-sugar ratio in this recipe creates a frosting that’s sturdy enough to support fondant work while remaining smooth and spreadable. This consistency prevents the cake from shifting during decoration and maintains Stitch’s facial features without melting or collapsing.
The two-layer design simplifies construction for home bakers while providing enough height to capture Stitch’s dimensional appearance. I’ve learned through countless kitchen failures that thinner layers cool faster, frost more evenly, and decorate more predictably than thick single-layer cakes. This recipe eliminates the guesswork by designing proportions that work consistently across different oven types and kitchen environments.
Ingredients
| Ingredient | Quantity | Notes & Alternatives |
|---|---|---|
| All-purpose flour | 2 cups | Cake flour creates lighter crumb; use 2.25 cups if substituting |
| Granulated sugar | 1.75 cups | Do not substitute with brown sugar as it affects texture |
| Unsweetened cocoa powder | 0.75 cup | Dutch-process cocoa deepens color but use same quantity |
| Baking soda | 2 teaspoons | Essential for cocoa activation; no substitute acceptable |
| Baking powder | 1 teaspoon | Aluminum-free prevents metallic aftertaste |
| Salt | 1 teaspoon | Enhances chocolate flavor; use fine sea salt |
| Large eggs | 2 eggs | Room temperature binds better than cold eggs |
| Whole milk | 1 cup | 2% milk works; non-dairy alternatives affect rise |
| Vegetable oil | 0.5 cup | Creates moist crumb; butter produces denser cake |
| Vanilla extract | 2 teaspoons | Use pure extract for authentic flavor |
| Hot water | 1 cup | Activates cocoa and creates tender structure |
| Unsalted butter (for frosting) | 3 cups (6 sticks) | Must be softened to 65-70°F for smooth frosting |
| Powdered sugar | 6 cups | Sift before measuring to eliminate lumps |
| Milk (for frosting) | 0.5 cup | Adjust quantity for desired consistency |
| Vanilla extract (for frosting) | 2 teaspoons | Reinforces vanilla foundation |
| Blue gel food coloring | 3-4 tablespoons | Gel produces vibrant color without excess liquid |
| Black gel food coloring | 2 tablespoons | For eyes, mouth, and facial definition |
| White fondant | 1 pound | Homemade or store-bought; knead until smooth |
| Decorative candies | As needed | Gumdrops, M&Ms, or licorice pieces enhance character |
Step-by-Step Instructions
Preparing the Cake Pans
- Preheat your oven to 350°F and position the rack in the center of the oven.
- Grease two 8-inch round cake pans with butter or cooking spray, ensuring complete coverage on all interior surfaces.
- Line the bottom of each pan with parchment paper, then grease the parchment paper as well.
- Dust both pans lightly with all-purpose flour, tapping out any excess flour from the sides.
Mixing the Dry Ingredients
- In a large mixing bowl, combine 2 cups all-purpose flour, 1.75 cups granulated sugar, 0.75 cup unsweetened cocoa powder, 2 teaspoons baking soda, 1 teaspoon baking powder, and 1 teaspoon salt.
- Whisk these dry ingredients together for 30 seconds until evenly distributed and no cocoa powder clumps remain.
- Create a well in the center of the dry mixture by pushing ingredients toward the sides of the bowl.
Combining Wet and Dry Ingredients
- Add 2 large room-temperature eggs, 1 cup whole milk, 0.5 cup vegetable oil, and 2 teaspoons vanilla extract to the well you created.
- Using an electric mixer on medium speed, beat the mixture for exactly 2 minutes, scraping down the bowl halfway through mixing.
- The batter should appear smooth and well-combined with no visible flour streaks.
- Add 1 cup hot water to the batter and stir until the mixture becomes thin and pourable, resembling thick chocolate milk.
Baking the Cake Layers
- Divide the batter evenly between the two prepared cake pans, pouring slowly to ensure equal distribution.
- Tap the pans gently on the counter three times to release large air bubbles.
- Place both pans on the center oven rack with at least 2 inches of space between them for air circulation.
- Bake for 30 to 35 minutes, or until a wooden toothpick inserted in the center of each cake comes out with one or two moist crumbs attached.
- The cake edges should pull slightly away from the pan sides and the tops should spring back when lightly touched.
- Remove pans from the oven and place on a wire cooling rack for exactly 10 minutes.
- Run a thin knife around the inside edges of each pan, then invert the cakes onto cooling racks to cool completely, approximately 1 hour.
Making the Buttercream Frosting
- In a stand mixer bowl, combine 3 cups softened unsalted butter cut into tablespoon-sized pieces.
- Beat the butter on medium speed for 3 minutes until pale, fluffy, and resembling whipped cream.
- Reduce mixer speed to low and add 6 cups sifted powdered sugar in three equal additions.
- After each sugar addition, mix on low speed for 30 seconds, then increase to medium speed for 15 seconds.
- Add 0.5 cup milk and 2 teaspoons vanilla extract after all sugar has been incorporated.
- Increase mixer speed to medium-high and beat for 2 minutes until frosting becomes light, fluffy, and spreadable.
- If frosting is too thick, add milk one tablespoon at a time; if too thin, add powdered sugar one tablespoon at a time.
Tinting the Frosting
- Divide the white buttercream into three separate bowls for easier color control.
- Add 3 to 4 tablespoons blue gel food coloring to the largest bowl, reserving about 1 cup white frosting for fondant details.
- Mix the blue frosting thoroughly with a spatula or electric mixer until color is completely uniform with no streaks.
- In a small bowl, combine 2 tablespoons of the remaining white frosting with 0.5 tablespoon black gel coloring for facial details.
- Stir the black frosting until completely blended and deep black in color.
Assembling the Cake
- Place the first completely cooled cake layer flat-side up on a cake board, turntable, or serving plate.
- Using a serrated cake knife, level the top of the first layer by gently sawing away any doming, creating a flat surface.
- Spread a thin crumb coat layer of blue buttercream approximately 0.25 inches thick over the first cake layer.
- Position the second cake layer on top, flat-side down, pressing gently to secure.
- Apply a thin crumb coat of blue buttercream to the top and sides of the entire cake, then refrigerate for 15 minutes.
- Apply a second layer of blue buttercream to the entire exterior, creating a smooth, even finish using an offset spatula or bench scraper.
Decorating with Fondant
- Knead 1 pound white fondant on a clean surface dusted lightly with powdered sugar until smooth and pliable.
- Roll the fondant to approximately 0.125 inches thick using a fondant roller or rolling pin.
- Cut fondant into shapes representing Stitch’s body features, such as large oval for body, smaller circles for eyes, and triangular shapes for ears.
- Carefully transfer fondant pieces to the frosted cake, securing each piece with a small dot of white frosting or buttercream.
- Use a fondant tool or toothpick to create texture and definition on the fondant pieces.
Adding Facial Details
- Transfer the black buttercream to a small piping bag fitted with a round tip.
- Pipe black dots for pupils in the center of Stitch’s white fondant eyes.
- Pipe a curved black line to create Stitch’s characteristic smile or mouth expression.
- Add black outlines around the fondant pieces to enhance dimension and definition.
- Place decorative candies on the cake to represent Stitch’s antennae bumps or additional character details.
Final Touches and Chilling
- Step back and assess your stitch cake design, adding any additional decorative elements as desired.
- Cover the cake loosely with a cake dome or plastic wrap if not serving immediately.
- Refrigerate the completed cake for at least 1 hour before serving to set the frosting and allow flavors to meld.
- Remove from refrigeration 15 minutes before serving to allow frosting to soften slightly for easier slicing.
Chef Tips for Perfect Results
- Temperature matters for buttercream success: Ensure your butter is precisely 65-70°F before beating. Cold butter creates grainy frosting; warm butter results in a greasy, separated mixture. Cut cold butter into small pieces and let it sit at room temperature for 20-30 minutes.
- Use gel food coloring exclusively: Liquid food coloring adds excess moisture to buttercream, causing separation and poor consistency. Gel coloring provides vibrant color without compromising frosting texture.
- Level your cake layers with confidence: A serrated cake knife and gentle sawing motion removes doming without crushing the crumb. Practice on your first layer to build technique confidence.
- Create a crumb coat before final frosting: This thin preliminary layer traps loose crumbs, resulting in a cleaner, more professional final appearance on your stitch cake.
- Work with fondant at room temperature: Fondant becomes sticky when warm and brittle when cold. Keep unused fondant wrapped tightly in plastic wrap to maintain workability.
- Chill between decoration steps: Refrigerating the cake for 15-minute intervals between frosting applications prevents layers from shifting or sliding during decoration.
Common Mistakes to Avoid
Mistake 1: Opening the Oven Door Too Early
Why this happens: Home bakers often check cakes within the first 15 minutes, assuming they’re not cooking properly. The problem: Opening the oven door drops internal temperature by 25°F, causing the cake center to collapse as rising agents lose effectiveness. How to fix it: Trust your timer and resist checking until at least 25 minutes have passed. Use oven light rather than opening the door for visual inspection.
Mistake 2: Frosting a Warm Cake
Why this happens: Impatience leads bakers to frost partially cooled cakes to save time. The problem: Warm cake causes frosting to melt and slide off, creating an uneven, unprofessional appearance that compromises Stitch’s facial features. How to fix it: Cool cakes completely on wire racks for a full hour minimum. Test cake temperature by holding your hand on the side of the pan; you should feel no warmth whatsoever.
Mistake 3: Measuring Flour by Scooping Directly from the Bag
Why this happens: It seems efficient to scoop flour directly into measuring cups. The problem: This packing method compacts flour, resulting in 20-30% more flour per cup than the recipe intends, creating dense, dry cake that’s difficult to frost. How to fix it: Spoon flour from the bag into a measuring cup, then level off with a knife for accurate portions. Better yet, weigh flour using a kitchen scale for absolute precision.
Mistake 4: Using Cold Butter for Buttercream
Why this happens: Bakers remove cold butter from the refrigerator and begin beating immediately. The problem: Cold butter doesn’t blend smoothly with powdered sugar, creating grainy, separated frosting that won’t spread evenly or hold decorative details. How to fix it: Cut butter into tablespoon pieces and leave on the counter for 25-30 minutes before beating, allowing it to soften to the ideal consistency.
Mistake 5: Applying Fondant to Uncooled Frosting
Why this happens: Eager decorators place fondant pieces on freshly applied frosting. The problem: Warm frosting causes fondant to slide around, distorting Stitch’s facial expression and wasting decorative time. How to fix it: Refrigerate the fully frosted cake for 20-30 minutes until the frosting becomes firm to the touch before adding fondant decorations.
Variations and Substitutions
| Original Ingredient | Substitution Option | Impact on Flavor & Texture |
|---|---|---|
| All-purpose flour | Cake flour | Creates more tender, delicate crumb; use 2.25 cups instead of 2 cups |
| Vegetable oil | Coconut oil | Adds subtle coconut flavor and creates slightly lighter texture |
| Unsweetened cocoa powder | Dutch-process cocoa | Deepens chocolate color and mellow flavor without acidity |
| Whole milk | Buttermilk | Increases tanginess and enhances chocolate depth with chemical leavening boost |
| Vanilla extract | Almond extract | Creates almond-chocolate flavor profile; use only 1 teaspoon due to intensity |
| White fondant | Modeling chocolate | More flexible and pliable; holds detail better but requires room temperature work |
| Blue buttercream | Purple buttercream | Creates alternative character interpretation with 3 tablespoons blue plus 1 tablespoon red coloring |
| Chocolate cake base | Vanilla cake base | Lighter flavor allows blue frosting to become the dominant taste profile |
Serving Suggestions and Pairings
Serve your stitch cake at Disney-themed birthday celebrations where the presentation becomes the centerpiece of the party experience. Pair this cake with vanilla ice cream or coconut ice cream to complement the chocolate base while providing temperature contrast. At summer gatherings, serve cold milk alongside slices to balance the rich chocolate frosting. For formal occasions, present small slices on dessert plates with fresh raspberries or blueberries to echo Stitch’s blue coloring.
This cake works exceptionally well for children’s parties, requiring only simple vanilla wafer cookies or fruit as supporting sides. At holiday celebrations combining Disney themes, serve alongside other character cakes or themed desserts as a showpiece. For office celebrations or casual family dinners, pair with coffee or hot chocolate to enhance the chocolate flavor profile. Consider offering the cake with whipped cream on the side for guests who prefer lighter accompaniments to the rich buttercream frosting.
At outdoor summer celebrations, ensure adequate shade and cooling mechanisms if serving the stitch cake in temperatures above 75°F, as chocolate cake becomes increasingly fragile in heat. Indoor air-conditioned venues work best for this detailed decoration to prevent frosting and fondant from melting or losing definition. Serve within 3 hours of removal from refrigeration to maintain optimal frosting texture and appearance.
Storage and Reheating
| Storage Method | Duration | Instructions |
|---|---|---|
| Room temperature (covered) | 3-4 hours | Place cake under a cake dome or cover loosely with plastic wrap to prevent drying while protecting from dust and insects |
| Refrigerator | 3-4 days | Store in an airtight container or cover tightly with plastic wrap on a shelf away from strong-smelling foods |
| Freezer (unfrosted) | 3 months | Wrap cooled cake layers individually in plastic wrap and aluminum foil before freezing in an airtight container |
| Freezer (frosted) | 2 months | Freeze uncovered for 4 hours until frosting is firm, then wrap entire cake in plastic wrap and place in airtight container |
| Thawing frozen cake | 4 hours | Move to refrigerator and thaw for 4 hours, or leave at room temperature for 2-3 hours until completely thawed |
| Refreshing slices | 15 seconds | Microwave individual slices on 50% power for 10-15 seconds to slightly warm frosting without drying crumb |
Nutritional Information
Approximate values per serving (based on 14 servings). Nutritional information varies based on specific brands and exact measurements.
| Nutrient | Amount per Serving |
|---|---|
| Calories | 520 |
| Total Fat | 28g |
| Saturated Fat | 16g |
| Trans Fat | 0.5g |
| Cholesterol | 65mg |
| Sodium | 320mg |
| Total Carbohydrates | 68g |
| Dietary Fiber | 1g |
| Sugars | 56g |
| Protein | 4g |
Frequently Asked Questions
Can I substitute all-purpose flour with self-rising flour for this stitch cake?
No, do not use self-rising flour as it contains added baking powder and salt that will create an overly risen, potentially collapsed cake with incorrect flavor balance. All-purpose flour combined with the specific baking soda and baking powder measurements provides the precise leavening needed for this recipe’s chemistry.
How do I know when the cake is fully baked and not underbaked?
A toothpick inserted in the center should come out with only one or two moist crumbs, never with wet batter clinging to it. The cake should pull slightly away from the pan sides, and the top should spring back when gently touched with a finger.
What should I do if my buttercream frosting is too soft and slides off the cake?
Your butter was likely too warm or you added too much milk. Refrigerate the frosting for 20-30 minutes until it firms up, then stir gently before applying. For future batches, ensure butter is 65-70°F and add milk one tablespoon at a time.
Can I make this cake a day ahead for a party?
Yes, bake and cool the cake layers one day ahead, then frost and decorate the morning of your event. This timing prevents the fondant from drying excessively while allowing the cake to absorb flavors for improved taste.
How do I get smooth, wrinkle-free fondant on my stitch cake decorations?
Work with fondant at room temperature, knead it thoroughly until completely smooth, and dust your work surface with powdered sugar rather than flour. Use a fondant smoother tool or your palm to gently press out wrinkles immediately after placing fondant on the frosted cake.
Is it possible to make this stitch cake recipe with a vanilla cake base instead of chocolate?
Yes, replace the cocoa powder with additional all-purpose flour (add 0.75 cup flour instead of cocoa) and reduce the baking soda to 1 teaspoon while keeping other ingredients identical. Vanilla cake creates a lighter flavor that allows the blue buttercream and decorations to dominate.
Conclusion
Creating a stitch cake combines classic baking skills with creative decoration to produce a show-stopping dessert that delights Disney fans and cake enthusiasts alike. This recipe guides you through every step from preparing pans through final fondant placement, eliminating confusion and ensuring consistent, beautiful results. The chocolate base paired with vibrant blue frosting and carefully crafted fondant details captures Stitch’s personality while remaining achievable for home bakers at intermediate skill levels. Serve this stitch cake at your next celebration and watch guests marvel at your creative baking accomplishment
Stitch Cake
Equipment
- two 8-inch round cake pans
- electric mixer
- wire cooling rack
- offset spatula
- cake turntable
- fondant roller
- piping bag with round tip
Ingredients
- 2 cups all-purpose flour
- 1.75 cups granulated sugar
- 0.75 cup unsweetened cocoa powder
- 2 tsp baking soda
- 1 tsp baking powder
- 1 tsp salt
- 2 large eggs
- 1 cup whole milk
- 0.5 cup vegetable oil
- 2 tsp vanilla extract
- 1 cup hot water
- 3 cups unsalted butter, softened
- 6 cups powdered sugar
- 0.5 cup milk for frosting
- 2 tsp vanilla extract for frosting
- 4 tbsp blue gel food coloring
- 2 tbsp black gel food coloring
- 1 lb white fondant
- 1 decorative candies as needed
Instructions
- Preheat oven to 350°F and prepare two 8-inch round cake pans with grease, parchment paper, and flour.
- Combine flour, sugar, cocoa powder, baking soda, baking powder, and salt in a large bowl.
- Whisk dry ingredients thoroughly and create a well in the center.
- Add eggs, milk, vegetable oil, and vanilla extract to the dry ingredients.
- Beat with an electric mixer for 2 minutes until smooth.
- Stir in hot water until the batter becomes thin and pourable.
- Divide batter evenly between prepared cake pans.
- Tap pans gently to release large air bubbles.
- Bake for 30-35 minutes until a toothpick comes out with a few moist crumbs.
- Cool cakes in pans for 10 minutes, then transfer to wire racks and cool completely.
- Beat softened butter until pale and fluffy.
- Add powdered sugar gradually and continue mixing.
- Add milk and vanilla extract, then beat until smooth and fluffy.
- Divide frosting and color most of it blue using gel food coloring.
- Create black frosting using a small amount of buttercream and black gel coloring.
- Level the cake layers if necessary and place the first layer on a serving board.
- Spread blue buttercream over the first layer and add the second layer on top.
- Apply a thin crumb coat and chill for 15 minutes.
- Cover the entire cake with a smooth layer of blue buttercream.
- Knead and roll out the white fondant until smooth.
- Cut fondant pieces to create Stitch’s ears, eyes, face, and body details.
- Attach fondant pieces to the cake using small amounts of frosting.
- Pipe pupils, mouth, and facial outlines with black buttercream.
- Add decorative candies and final decorative accents.
- Refrigerate the finished cake for at least 1 hour before serving.
