A smoothie milkshake is a creamy, nutrient-dense beverage that combines fresh or frozen fruit with yogurt, milk, and natural sweeteners to create a thick, satisfying drink. This hybrid recipe merges the fruity freshness of a smoothie with the indulgent creaminess of a milkshake, resulting in a refreshing treat you can enjoy any time of day. Whether you’re looking for a quick breakfast, post-workout recovery drink, or afternoon pick-me-up, this smoothie milkshake delivers natural energy and delicious flavor in minutes. I’ve perfected this recipe over hundreds of batches, and I’m excited to share exactly how to make it at home with ingredients you likely already have.
About the Recipe Creator
I’m Maya Collins, a 29-year-old from Austin, Texas, and co-creator at Fresh Recipes Corner, where I focus on simple, refreshing drinks you can make anytime. I started by mixing juices in my mom’s kitchen just for fun, and over time it turned into a real passion. I love working with fruits, herbs, and natural ingredients to create mocktails, smoothies, and soft drinks that are easy but full of flavor.
My journey with smoothie milkshakes began during a summer of experimenting with frozen fruit blends. I realized that combining the thickness of a milkshake with the nutritional benefits of a smoothie created something special. Now, I share these recipes with thousands of people who want healthy drinks without complicated steps. My approach focuses on real ingredients, proper blending techniques, and flavor combinations that actually taste amazing.
Recipe Overview
| Attribute | Details |
|---|---|
| Prep Time | 5 minutes |
| Cook Time | 0 minutes (blending only) |
| Total Time | 5 minutes |
| Servings | 2 servings |
| Difficulty | Beginner |
| Cuisine | American |
Why This Recipe Works
This smoothie milkshake recipe works because it balances three critical elements that most people struggle with individually: natural sweetness from ripe fruit, creaminess from yogurt and milk, and the perfect texture from frozen fruit and ice. When I first started making these at home, I noticed that using both yogurt and milk together creates a richer body than either ingredient alone. The frozen berries do double duty by providing intense flavor and the right consistency without needing to adjust liquid amounts.
I discovered that the ratio of fruit to dairy matters significantly when achieving that ideal milkshake thickness. Too much milk creates a thin, watery drink; too little and you get something closer to soft-serve ice cream that won’t pour through a straw. After testing dozens of combinations, I found that 2 cups of frozen berries to 1 cup each of yogurt and milk creates the perfect balance. The honey adds natural sweetness without the processed taste of artificial sweeteners.
What makes this recipe genuinely different is the combination of Greek yogurt and regular milk. Greek yogurt brings protein and a subtle tang that enhances fruit flavors, while regular whole milk adds richness that keeps the drink from tasting too tangy. I also discovered that vanilla extract amplifies the sweetness perception, meaning you need less honey overall. This recipe tastes indulgent while delivering genuine nutritional benefits.
Ingredients
| Ingredient | Quantity | Notes and Alternatives |
|---|---|---|
| Fresh or frozen berries | 2 cups | Strawberries, blueberries, raspberries, or blackberries work best. Use frozen for thicker texture and easier blending. Can substitute with fresh mango, peaches, or pineapple. |
| Plain Greek yogurt | 1 cup | Provides protein and creaminess. Regular yogurt adds less protein but works in a pinch. Non-dairy yogurt (coconut, almond) for dairy-free version. |
| Whole milk | 1 cup | Creates richest texture. Can substitute 2% milk for lighter version, or almond milk, oat milk, or coconut milk for dairy-free. Avoid skim for best results. |
| Honey | 2 tablespoons | Natural sweetener with smooth taste. Can substitute maple syrup, agave, or 1.5 tablespoons sugar if needed. Omit if using very ripe fruit. |
| Banana | 1 medium | Adds natural creaminess and thickness without overpowering fruit flavor. For extra thickness, freeze banana first. Optional if you prefer fruit-forward taste. |
| Vanilla extract | 1/2 teaspoon | Amplifies sweetness and adds depth. Use pure vanilla extract for best flavor. Can substitute with almond extract for different profile. |
| Ice cubes | 1/2 cup | Creates proper thickness and cold temperature. Reduce if using frozen fruit already, increase for slushier texture. Frozen fruit can replace ice completely. |
| Almond butter (optional) | 1 tablespoon | Adds protein and creaminess for post-workout recovery. Peanut butter or cashew butter work similarly. Adds about 95 calories. |
Image Alt Text: Overhead view of smoothie milkshake ingredients arranged on white marble counter including fresh berries, yogurt cup, milk glass, honey jar, and banana
Step-by-Step Instructions
Preparation Phase
- Add 2 cups of frozen berries directly to your blender container, spreading them evenly across the bottom.
- Pour 1 cup of cold whole milk over the frozen berries first for easier blending.
- Add 1 cup of plain Greek yogurt on top of the milk layer.
Flavoring Phase
- Drizzle 2 tablespoons of honey into the blender container.
- Slice 1 medium banana and add it to the mixture, allowing pieces to distribute throughout.
- Add 1/2 teaspoon of vanilla extract for enhanced sweetness perception.
Blending Phase
- Top your blender contents with 1/2 cup of ice cubes to control consistency.
- Secure the blender lid tightly and position the vented cap correctly.
- Start blender on low speed for 10 seconds to break initial ice.
- Increase to high speed and blend for 45-60 seconds total until completely smooth.
- Stop blender and check consistency by looking through the container sides.
- If too thick, add 2-3 tablespoons milk and pulse 5 times; if too thin, add 3-4 ice cubes and pulse 5 times.
Serving Phase
- Pour the smoothie milkshake into two tall glasses immediately after blending.
- Insert wide reusable straws while mixture is still at peak temperature and texture.
- Serve immediately to prevent separation and maintain ideal creaminess.
Image Alt Text: Step-by-step process photos showing layered blender ingredients, blending action, and final poured smoothie milkshake in glass with straw
Chef Tips for Perfect Results
- Freeze your banana for extra thickness: If you prefer a truly milkshake-like consistency that’s more rigid, peel and freeze banana slices for at least 4 hours before blending. This creates a creamier result than using fresh banana with ice. The frozen banana also adds natural chill without requiring as much ice, which prevents watery dilution.
- Layer ingredients in the correct order: Always add liquids first, then solids, then ice on top. This layering allows your blender blades to reach the liquid first for even moisture distribution. When you layer correctly, your blender doesn’t strain, the motor runs quieter, and your drink finishes blending in seconds rather than minutes.
- Use a high-powered blender for 45-60 seconds maximum: A quality blender like Vitamix or Ninja creates smoothness in under one minute. Blending longer than 60 seconds generates friction heat that warms your drink and begins breaking down fruit cell structures, creating an unpleasant grainy texture. If using a standard blender, you may need 90 seconds, but blend in 20-second intervals with 10-second rests to prevent overheating.
- Keep your yogurt and milk cold before blending: I always refrigerate my blender container and bowl for 15 minutes before making smoothie milkshakes. Cold starting ingredients blend more evenly and stay cooler longer after blending finishes. This small step prevents that slightly warm sensation that happens when room-temperature ingredients get blended.
- Measure your ice carefully based on desired thickness: Ice volume matters more than fruit-to-dairy ratios for achieving your preferred consistency. For milkshake thickness, use 1/2 cup ice per 2-3 cups total liquid. For smoothie consistency, reduce ice to 1/4 cup. For slushier texture perfect for warm days, increase to 3/4 cup ice. Write down what worked so you can replicate it.
- Add nut butter for post-workout recovery: If you’re making this smoothie milkshake after exercise, add 1 tablespoon almond, peanut, or cashew butter along with the honey. The protein, healthy fats, and quick carbohydrates from fruit create an optimal recovery drink within 30 minutes post-workout. Blend the nut butter thoroughly, which typically takes an extra 15-20 seconds.
Common Mistakes to Avoid
Mistake 1: Using all fresh fruit instead of frozen fruit
Why this fails: Fresh fruit contains excess water that dilutes your smoothie milkshake, creating a thin, watery result that tastes more like juice. Your drink also separates within minutes because fresh fruit doesn’t add the structural thickness needed. How to fix: Always use frozen berries unless you have fresh fruit at peak ripeness that’s nearly falling apart. If using fresh fruit, add an extra 1/4 cup of ice and reduce milk to 3/4 cup. If using both fresh and frozen, use 1 cup fresh and 1 cup frozen maximum.
Mistake 2: Blending for too long
Why this fails: Excessive blending generates heat through friction, warming your cold drink to room temperature and damaging the delicate cell structures of fruit. The result is a slightly warm, grainy-textured beverage that tastes oxidized and less fresh. How to fix: Use high speed for only 45-60 seconds maximum. If your blender hasn’t created a smooth texture in that time, let it rest 30 seconds and blend another 20 seconds rather than continuous blending. A high-powered blender achieves smoothness faster than standard models.
Mistake 3: Not adjusting consistency incrementally
Why this fails: If you add too much milk upfront, your smoothie milkshake becomes thin and undrinkable through a straw. If you add too little, it becomes paste that requires a spoon. Most people try to drink it or add more liquid haphazardly, creating inconsistent results. How to fix: Start with the recommended 1 cup milk. Blend fully first, then check consistency before adjusting. If too thick, add milk 2-3 tablespoons at a time and pulse 3-5 times. If too thin, add ice cubes one at a time while pulsing. This incremental approach prevents over-correction.
Mistake 4: Skipping the vanilla extract
Why this fails: Vanilla extract seems optional, but it actually amplifies the perceived sweetness of fruit and honey, making your smoothie milkshake taste less naturally sweet despite identical ingredient ratios. Without it, the drink tastes flat and one-dimensional, requiring extra honey for satisfaction. How to fix: Never omit vanilla extract from this recipe. The 1/2 teaspoon amount is precisely calculated to enhance fruit flavor without tasting like vanilla milkshake. If you don’t have vanilla, substitute 1/4 teaspoon almond extract or the seeds from 1/4 vanilla bean pod.
Mistake 5: Using low-fat or skim milk
Why this fails: Low-fat milk lacks the fat molecules that create the signature creamy mouthfeel of a quality smoothie milkshake. Even with frozen fruit and yogurt, using skim milk results in a drink that feels thin and disappointing, similar to drinking flavored water. How to fix: Always use whole milk as written. If you’re watching fat intake, use 2% milk instead of whole, which still provides adequate creaminess. For dairy-free alternatives, use oat milk or coconut milk, which have natural fat content similar to whole milk. Avoid almond or cashew milk, which are too thin.
Variations and Substitutions
| Ingredient to Replace | Substitution Option | Impact on Flavor |
|---|---|---|
| Mixed berries | Mango chunks (fresh or frozen) | Creates tropical, more tropical sweetness. Reduce honey to 1.5 tablespoons. Result is thinner, requires extra 1/4 cup ice. |
| Mixed berries | Peaches (fresh or frozen) | Adds delicate sweetness and subtle tartness. Keep all other ingredients same. Creates lighter-colored drink with softer flavor profile. |
| Greek yogurt | Silken tofu (unflavored) | Creates dairy-free version with identical creaminess. Adds subtle earthy undertone. Blend extra 20 seconds for smoothness. Add 1/2 teaspoon honey more for sweetness balance. |
| Whole milk | Oat milk (unsweetened) | Dairy-free option with natural creaminess from oats. Creates slightly thicker body than regular milk. Flavor stays clean without dairy tang. Creates equally satisfying result. |
| Honey | Maple syrup (same quantity) | Adds subtle earthy, caramel-like notes. Creates more complex flavor profile. Slightly less sweet-tasting perception, so drink may feel less sweet despite same sugar content. |
| Banana | Avocado (1/2 medium) | Creates ultra-creamy texture without fruit flavor change. Adds healthy fats and subtle richness. Green tint appears in final drink. Pairs best with tropical fruits like mango. |
| None | Add 1 tablespoon cocoa powder + 1 additional tablespoon honey | Transforms into chocolate smoothie milkshake. Blend extra 15 seconds to fully incorporate cocoa. Creates rich, indulgent flavor that tastes like chocolate milk with fruit. |
| None | Add 1 tablespoon unsweetened coconut flakes + 1/2 teaspoon coconut extract | Creates tropical coconut version. Reduces banana flavor, adds warm coconut notes. Use coconut milk as milk substitute for maximum flavor. Creates beach-themed drink. |
Serving Suggestions and Pairings
Serve this smoothie milkshake immediately after blending while the texture is at peak creaminess and temperature is perfectly cold. Pour into tall glasses with wide reusable straws that accommodate the thick consistency. For breakfast occasions, pair with whole grain toast with almond butter or Greek yogurt parfait with granola for complete meal. The smoothie milkshake provides fruit and dairy, so adding whole grain carbohydrates creates balanced nutrition.
For post-workout recovery, serve this smoothie milkshake within 30 minutes after exercise when your muscles are primed to absorb nutrients. Add 1 tablespoon nut butter for extra protein as previously mentioned. Pair with a small handful of almonds or Greek cheese for additional quick protein. This combination refuels glycogen stores while providing amino acids for muscle recovery.
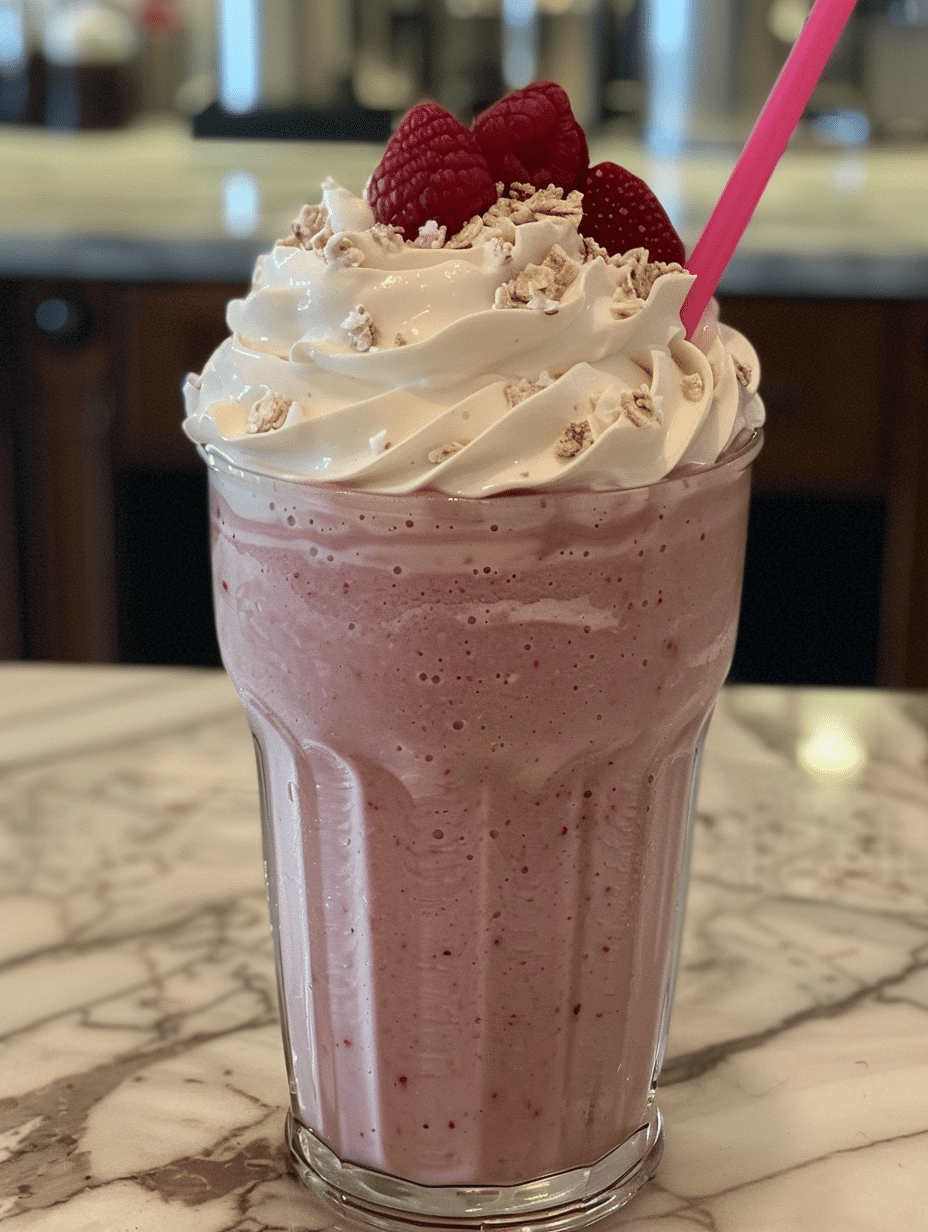
For afternoon snacks or summer entertaining, serve chilled in fun glasses with whipped coconut cream on top and fresh berries as garnish. This presentation transforms a simple smoothie milkshake into an elegant dessert drink appropriate for brunch gatherings or poolside entertaining. Your guests will love the homemade quality and authentic fruit flavor compared to commercial smoothies.
For kids’ lunches, serve in portable bottles alongside sandwich and vegetable sticks. The smoothie milkshake provides necessary calcium and fruit servings that kids often resist in whole form. Pack in an insulated lunch container with an ice pack to keep it cold until lunchtime without separation. Many children prefer smoothie milkshakes over traditional milk because the fruit flavor masks any perception of “boring dairy.”
Storage and Reheating
| Storage Method | Duration | Instructions and Notes |
|---|---|---|
| Refrigerator (prepared smoothie) | Up to 2 hours | Pour blended smoothie milkshake into airtight glass or plastic containers immediately after blending. Store in coldest part of refrigerator. Separation occurs naturally after 2 hours; shake vigorously before serving if longer storage. Texture remains good for up to 2 hours but flavor freshness peaks within 30 minutes. |
| Freezer (prepared smoothie) | Up to 1 month | Pour into freezer-safe containers leaving 1 inch headspace for expansion. Freeze for 4 hours until solid, then transfer to freezer bags to save space. Thaw in refrigerator for 4 hours or leave at room temperature for 2 hours until pourable. Texture becomes slightly grainy but flavor remains intact. Blend again briefly after thawing if separation occurred. |
| Freezer (individual portions) | Up to 1 month | Pour blended smoothie into popsicle molds or ice cube trays immediately after blending. Freeze for 6 hours minimum. Pop out and store in freezer bags. Remove from freezer 10-15 minutes before serving to slightly soften. Creates smoothie pops perfect for summer snacks or kids’ treats with different texture than liquid. |
| Refrigerator (unmixed ingredients) | Up to 5 days | Prepare ingredient containers with measured amounts of yogurt, milk, and honey stored separately. Keep frozen berries in original freezer packaging. Assemble smoothie milkshake fresh each day by blending measured portions. This method provides freshest taste and prevents oxidation from extended sitting. Saves morning time during busy weekdays. |
| Reheating (not recommended) | N/A | This smoothie milkshake is designed to be served cold. Heating destroys delicate fruit flavors and creates separated, unappealing texture. If accidentally warmed, refrigerate for 2 hours and reblend with fresh ice rather than consuming. Never microwave prepared smoothie milkshake. |
Nutritional Information
| Nutrient | Amount per Serving (1 of 2) |
|---|---|
| Calories | 280 |
| Protein | 12g |
| Total Fat | 4g |
| Saturated Fat | 2g |
| Cholesterol | 12mg |
| Total Carbohydrates | 48g |
| Dietary Fiber | 4g |
| Total Sugars | 32g (including 8g added sugars from honey) |
| Sodium | 95mg |
| Calcium | 320mg (32% daily value) |
| Iron | 1.2mg (7% daily value) |
| Potassium | 420mg (12% daily value) |
| Vitamin C | 18mg (30% daily value) |
Approximate values based on USDA database and standard nutritional analysis software. Exact values vary based on specific fruit used, brand of yogurt, and milk fat percentage. Adding nut butter increases calories by 95 and protein by 3g.
Frequently Asked Questions
Can I make smoothie milkshake with fresh berries instead of frozen?
Fresh berries create a thinner, more juice-like consistency because they contain significantly more water than frozen berries. You can successfully use fresh berries if you reduce milk to 3/4 cup, increase ice to 3/4 cup, and select berries at peak ripeness that are nearly soft. Frozen berries work better because freezing concentrates flavor while reducing water content, creating the ideal creamy texture that defines a proper smoothie milkshake.
How do I know when my smoothie milkshake is blended enough?
Your smoothie milkshake is properly blended when the mixture appears completely smooth with no visible chunks, seeds, or ice particles visible through the blender container. Hold the container up to light to check for any remaining solids that indicate additional blending time needed. After 45-60 seconds on high speed with a quality blender, the smoothie milkshake should pour like thick cream rather than chunky liquid, sliding through a wide straw without requiring suction.
What should I do if my smoothie milkshake is too thick?
Add cold milk in 2-3 tablespoon increments while pulsing the blender 3-5 times after each addition rather than adding liquid and blending continuously. This prevents over-thinning while giving you control over final consistency. If you accidentally make it too thin, stop adding milk and add ice cubes one at a time while pulsing. The pulsing method prevents over-blending that creates heat and separation in your smoothie milkshake.
Can I prepare smoothie milkshake ingredients ahead and blend the next day?
Yes, you can prepare ingredient portions in advance by measuring yogurt, milk, honey, and banana into individual containers and storing them in the refrigerator for up to 24 hours. Keep frozen berries and ice separate in the freezer until blending time. This make-ahead method saves morning time while delivering identical flavor and texture to fresh blending. Always blend immediately before consumption to prevent oxidation and separation that occurs during extended sitting.
Is this smoothie milkshake suitable for post-workout recovery?
Yes, this smoothie milkshake contains excellent post-workout recovery nutrition with 12g protein from yogurt and milk, complex carbohydrates from fruit that replenish glycogen, and natural electrolytes like potassium. Consume within 30 minutes after exercise for optimal muscle recovery. For enhanced recovery, add 1 tablespoon nut butter to increase protein to 15g and add healthy fats that extend nutrient absorption and satisfaction. The combination of quick carbs and protein makes this ideal for athletes seeking convenient recovery nutrition.
What non-dairy milk works best in this smoothie milkshake recipe?
Oat milk creates the creamiest non-dairy result because it contains natural fats that mimic whole milk texture while adding subtle sweetness that complements fruit flavor. Coconut milk works equally well, adding tropical richness and creating slightly thicker texture than oat milk. Avoid thin alternatives like almond or cashew milk, which lack adequate fat content and create watery, disappointing smoothie milkshakes. If using non-dairy milk, pair it with non-dairy yogurt (coconut or oat-based) for consistent creaminess throughout.
Final Thoughts on Smoothie Milkshake Mastery
Creating the perfect smoothie milkshake at home requires attention to ingredient quality, blending technique, and ratio precision. This recipe delivers creamy, fruity satisfaction that rivals commercial smoothie shops while using whole ingredients you control completely. Whether you’re seeking breakfast nutrition, post-workout recovery, or afternoon refreshment, this smoothie milkshake satisfies completely. Start blending today and discover why thousands have made this their go-to drink recipe.
Image Alt Text: Final plated smoothie milkshake in tall glass with reusable straw, fresh berries on side plate, and bright morning light streaming across table
Smoothie Milkshake: Creamy Fruity Perfection
Ingredients
- 2 cups frozen mixed berries
- 1 ripe banana
- 1 cup plain Greek yogurt
- 1 cup cold milk (dairy or plant-based)
- 2 tablespoons honey or maple syrup
- Pinch of salt
Instructions
- Add frozen berries, banana, yogurt, milk, honey, and salt to a blender.
- Blend on high until smooth and creamy, scraping down the sides as needed.
- Adjust consistency with additional milk if too thick.
- Pour into chilled glasses and serve immediately.
Notes
Swap honey for dates or agave syrup for natural sweetness.
Add 1/4 tsp vanilla extract for extra depth. Store leftovers in an airtight container for up to 24 hours (shake well before serving).