A salted caramel milkshake is a creamy frozen beverage that combines rich vanilla ice cream, smooth caramel sauce, and a touch of sea salt for sophisticated flavor depth. This dessert drink blends in minutes and delivers café-quality results from your kitchen. The sweet-salty contrast creates an irresistibly smooth texture that tastes indulgent yet simple to recreate. I’ve perfected this recipe over years of blending variations, and the balance between caramel sweetness and subtle saltiness makes it my go-to summer treat.
About Me and Fresh Recipes Corner
I’m Maya Collins, a 29-year-old from Austin, Texas, and co-creator at Fresh Recipes Corner. My focus centers on simple, refreshing drinks you can make anytime without complicated equipment or rare ingredients. I started by mixing juices in my mom’s kitchen just for fun, and over time it transformed into a genuine passion project. Today, I love working with fruits, herbs, and natural ingredients to create mocktails, smoothies, and soft drinks that are easy yet full of authentic flavor.
My background gives me hands-on experience in beverage crafting, recipe testing, and flavor balancing. Every recipe I share has been tested multiple times in real kitchens, not just professional ones. That experience informs my approach to this salted caramel milkshake, ensuring reliability and delicious results for home cooks at any skill level.
Recipe Overview
| Prep Time | 5 minutes |
| Blend Time | 2-3 minutes |
| Total Time | 7-8 minutes |
| Servings | 2 milkshakes |
| Difficulty Level | Very Easy |
| Cuisine Type | American Dessert |
Why This Recipe Works
I developed this salted caramel milkshake recipe after testing dozens of ratios to find the perfect balance between sweetness and salt. The combination of quality vanilla ice cream and homemade caramel sauce creates a foundation that tastes genuinely luxurious. Store-bought caramel is convenient, but freshly made sauce adds depth that elevates the entire drink. The sea salt finishes the flavor profile by enhancing sweetness and preventing the milkshake from becoming one-dimensional or cloying.
What makes this approach work reliably is the order of blending and the precise measurements I’ve honed over years. Adding cold milk first prevents the blender from overworking the ice cream, which keeps the texture smooth rather than gummy. The caramel sauce mixes evenly when the base is already combined, ensuring consistent flavor in every sip. This method produces a milkshake that stays silky for minutes after blending, giving you time to enjoy it properly.
The recipe also works because it respects ingredient quality. Premium vanilla ice cream and real caramel make a noticeable difference compared to artificial versions. When you use fewer ingredients, each one matters significantly. This is why I never skip the real butter and heavy cream in the homemade caramel component. The investment of a few extra minutes pays dividends in flavor complexity and satisfaction.
Ingredients
| Ingredient | Quantity | Notes and Alternatives |
|---|---|---|
| Vanilla ice cream | 2 cups (packed) | Use premium brands like Häagen-Dazs or make homemade. Softer ice cream blends easier; frozen rock-hard blocks need 30 seconds at room temperature first. |
| Whole milk | 1 cup cold | Use cold milk from the refrigerator. For a richer shake, substitute half-and-half or whole milk blended with 2 tablespoons heavy cream. |
| Caramel sauce | 3 tablespoons | Homemade is best. Store-bought brands like Ghirardelli work in a pinch. Avoid chocolate-caramel blends; use pure caramel only. |
| Sea salt | 1/4 teaspoon | Fine sea salt works best; coarse salt may create gritty texture. Kosher salt is an acceptable substitute but use only 1/8 teaspoon due to larger crystal size. |
| Vanilla extract (optional) | 1/2 teaspoon | Adds depth if your ice cream lacks vanilla flavor. Pure vanilla extract is superior to imitation versions. |
| Whipped cream topping | 2 tablespoons per shake | Optional but recommended for presentation and extra indulgence. Use canned or freshly whipped. |
| Caramel drizzle for rim | 1 tablespoon | Optional. Use same caramel sauce or purchase pre-made sauce in a bottle with a drizzle tip for easy application. |
Image suggestion: Overhead shot of measured ingredients in small bowls on a marble counter, with vanilla ice cream visible in glass bowl, cold milk bottle, and caramel sauce in a small white ramekin.
Step-by-Step Instructions
Preparation Phase
- Gather a blender, two serving glasses, measuring cups, and a spoon. Place both glasses in the freezer for 2 minutes to chill them slightly, which keeps the shake colder longer.
- Pour 1 cup of cold milk directly into the blender pitcher first. This prevents the ice cream from sticking to the bottom and ensures even blending.
- Add 2 cups of vanilla ice cream (loosely packed) on top of the milk. If your ice cream is rock-hard from the freezer, let it sit at room temperature for 30 seconds until slightly softened but not melting.
- Measure 3 tablespoons of caramel sauce. If using homemade caramel, make sure it’s cooled to room temperature so it doesn’t cook the ice cream unevenly.
- Measure 1/4 teaspoon of fine sea salt into a small bowl. Have it ready beside the blender.
Blending Phase
- Secure the blender lid firmly onto the pitcher, ensuring it’s locked completely before turning on power.
- Start the blender on medium-low speed for 10 seconds to break up the ice cream chunks without creating air pockets or separating the mixture.
- Increase speed to medium for 5 seconds, then add the caramel sauce by pouring it slowly into the blender through the top hole while the motor runs.
- Add 1/2 teaspoon vanilla extract (if using) through the same opening while blending continues at medium speed.
- Sprinkle the sea salt gradually into the blender while blending at medium speed for 5 seconds. Adding salt slowly prevents clumping and ensures even distribution throughout the shake.
- Blend on medium speed for 15-20 additional seconds until the mixture reaches a smooth, pourable consistency with no visible ice cream chunks. Stop blending as soon as this texture is achieved to prevent over-mixing, which creates a thin, watery shake.
Serving Phase
- Remove the chilled glasses from the freezer and place them on a stable counter or table surface. If you didn’t pre-chill them, use room-temperature glasses instead; they’ll work fine but the shake will melt slightly faster.
- Carefully pour the blended shake from the pitcher into both chilled glasses, dividing equally. Fill each glass about three-quarters full, leaving room for whipped cream topping.
- If desired, drizzle a small amount of caramel sauce around the inside rim of each glass for visual appeal. Use a spoon or squeeze bottle to apply the caramel in thin lines down the sides.
- Top each shake with 2 tablespoons of whipped cream. Use a spoon or piping bag to create a dome or swirl on top.
- Sprinkle a tiny pinch of sea salt (just 2-3 grains per shake) directly on top of the whipped cream for garnish and flavor reinforcement.
- Insert a wide milkshake straw into each shake and serve immediately. Serve within 5 minutes for optimal texture and temperature.
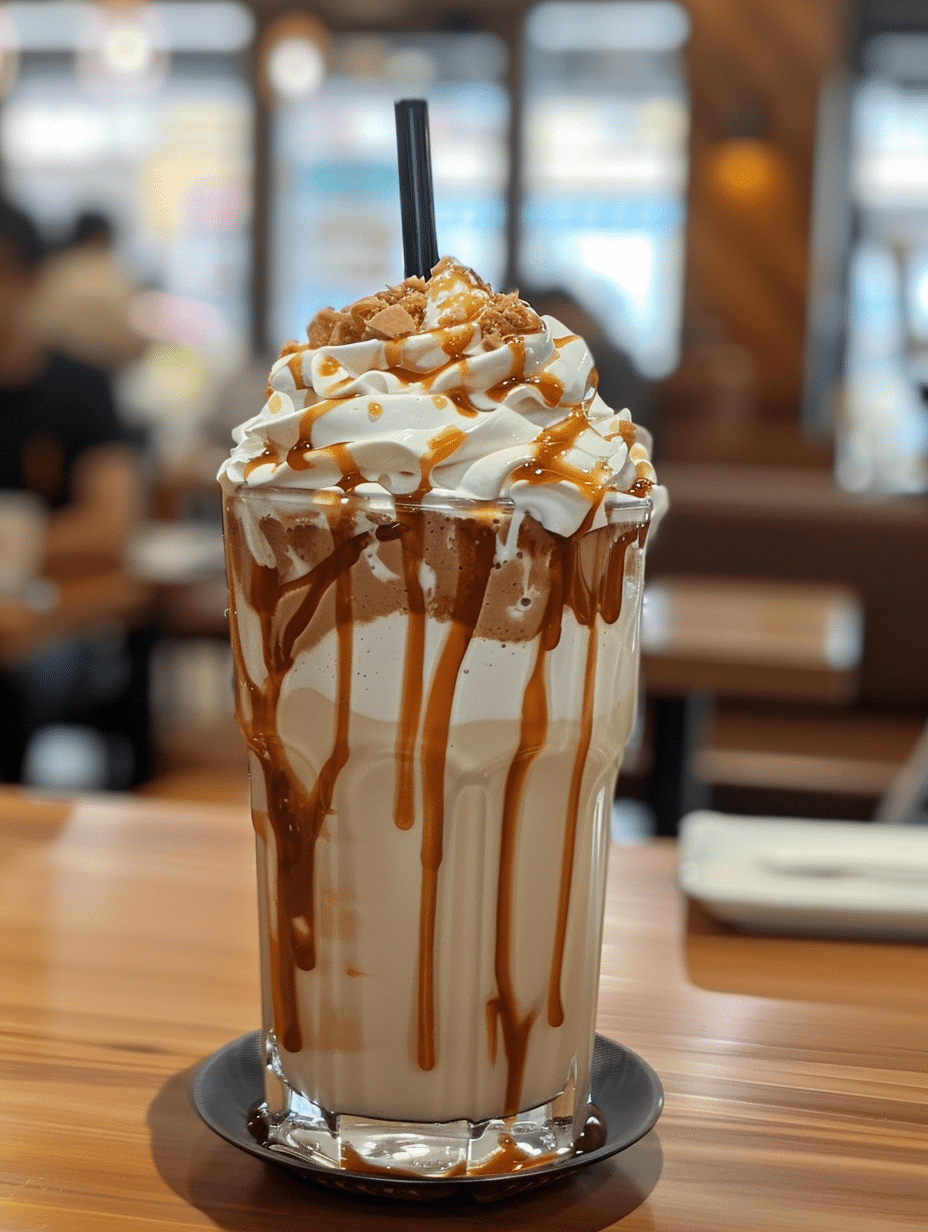
Image suggestion: Close-up of two finished salted caramel milkshakes in tall glasses with whipped cream, caramel drizzle, and straws, condensation on glass exterior.
Chef Tips for Perfect Results
- Chill your glasses. Placing serving glasses in the freezer for just 2-3 minutes before pouring keeps the milkshake at optimal temperature. This single step extends enjoyment time by several minutes without requiring ice.
- Use cold milk from the start. Warm or room-temperature milk will melt the ice cream too quickly during blending, creating a thin, watery texture instead of the thick, creamy consistency you want.
- Don’t over-blend. Blend only until smooth and pourable, typically 20-30 seconds total. Over-blending separates the mixture and incorporates too much air, resulting in a thin consistency that looks and tastes less satisfying.
- Add caramel gradually while blending. This ensures even distribution throughout the shake rather than creating pockets of concentrated caramel at the bottom of the glass that never fully mix.
- Make homemade caramel for superior flavor. Homemade takes only 10 minutes and uses just three ingredients: butter, sugar, and heavy cream. The depth and richness far exceed store-bought versions, justifying the minimal extra effort.
- Taste and adjust salt after blending. If the shake seems too sweet, add one more tiny pinch of salt and blend for 3 seconds. Some caramel brands are sweeter than others, so personal adjustment ensures perfect balance.
Common Mistakes to Avoid
Mistake 1: Using Ice Cream That’s Too Hard
Blending rock-hard ice cream straight from the freezer overworks your blender motor and creates chunks that never fully incorporate. The shake ends up with a gritty texture rather than smooth creaminess. Fix this by removing ice cream from the freezer 30 seconds before blending, allowing it to soften slightly. It should yield slightly to finger pressure but not begin melting. This small delay prevents frustration and guarantees a silky result.
Mistake 2: Adding Warm or Room-Temperature Milk
Warm milk melts the ice cream instantly during blending, creating a thin liquid instead of a thick milkshake. The final drink tastes watered down and lacks the luxurious texture that defines great milkshakes. Always use milk directly from the refrigerator, ideally at 35-40 degrees Fahrenheit. If your kitchen is very warm, refrigerate the milk pitcher for 15 minutes before use.
Mistake 3: Over-Blending the Mixture
Continuing to blend after the shake reaches smooth consistency incorporates excessive air and breaks down the emulsion, making the shake thinner and more liquid. The perfect blending window is just 20-30 seconds of total motor time. Stop immediately when no visible ice cream chunks remain. This precision approach protects texture and prevents the disappointment of a thin drink that’s nothing like what you envisioned.
Mistake 4: Ignoring the Salt Entirely
Salt is not optional; it’s essential to the salted caramel milkshake identity. Without it, the drink becomes just a sweet caramel milkshake lacking the sophisticated flavor complexity that makes this recipe special. The salt balances sweetness and enhances caramel notes. Use at least 1/4 teaspoon, though you can add up to 1/2 teaspoon if you prefer a more pronounced salty-sweet contrast. Start with 1/4 teaspoon and adjust upward rather than downward.
Mistake 5: Pouring All Caramel Sauce in at Once
Dumping all the caramel into the blender at once creates a layer that doesn’t mix evenly, leaving some sips too sweet and others lacking caramel flavor. Pour it gradually through the top while blending at medium speed, allowing each portion to fully incorporate before adding more. This technique takes only 10 extra seconds but dramatically improves consistency and balance throughout the shake.
Variations and Substitutions
| Ingredient | Substitution | Impact on Flavor |
|---|---|---|
| Vanilla ice cream | Salted caramel ice cream | Creates intensified salted caramel flavor; reduce added salt to 1/8 teaspoon to prevent over-salting. Use this substitution for caramel-lovers seeking maximum caramel depth. |
| Vanilla ice cream | Butter pecan ice cream | Adds nutty undertones that complement caramel beautifully. The nuttiness creates a more complex flavor profile. Works exceptionally well in fall seasons. |
| Whole milk | Oat milk or almond milk | Creates a slightly lighter shake with subtle nutty (almond) or creamy (oat) undertones. Texture remains thick and smooth with either option. |
| Whole milk | Half-and-half | Produces an ultra-rich, indulgent shake that tastes like liquid dessert. Use only 3/4 cup since half-and-half is denser than milk. |
| Sea salt | Fleur de sel (French sea salt) | Delivers more delicate, subtle salinity with slight minerality. Creates a sophisticated flavor that appeals to refined palates. Use same quantity. |
| Caramel sauce | Dulce de leche | Introduces a deeper, slightly more caramel-like sweetness with Latin American character. Creates richer, more intense flavor. Blend may require extra 5 seconds. |
| Vanilla extract | Rum extract (alcohol-free) | Adds subtle spiced warmth without any alcohol. Creates sophisticated depth. Use same quantity (1/2 teaspoon). |
| Caramel sauce | Salted butterscotch sauce | Produces butterscotch-forward flavor with different sweetness character. Creates slightly less caramel-focused but equally delicious alternative. |
Serving Suggestions and Pairings
Serve this salted caramel milkshake as a standalone dessert drink after lunch or dinner, especially during warm summer months when cold, sweet beverages satisfy cravings most effectively. The rich flavor makes it satisfying as a complete treat without requiring additional dessert.
Pairing with Foods: Pair this milkshake with lightly salted pretzels or buttered popcorn for a sweet-salty snack combination that amplifies the salted caramel theme. Serve alongside fresh apple slices or pear wedges to add tartness that balances sweetness. For a fuller snack experience, pair with chocolate chip cookies, which complement caramel’s richness without competing for attention.
Occasion Ideas: This milkshake works perfectly for birthday celebrations, casual dinner parties, or summer picnics. Serve it at children’s parties as a special treat that feels more exciting than standard lemonade. Offer it at bridal showers or baby showers alongside other refreshments. Create a “milkshake bar” at home by preparing the base and allowing guests to customize with toppings like nuts, chocolate chips, or caramel drizzle.
Time of Day: Serve this shake as an afternoon treat between lunch and dinner, or as a post-dinner indulgence. It works best when consumed within 5-10 minutes of blending while texture and temperature remain optimal. Avoid serving immediately after meals as it’s quite rich and may feel too heavy.
Image suggestion: Styled flat-lay of two milkshakes with pretzels, apple slices, and cookies arranged artfully around them on a wooden surface.
Storage and Make-Ahead Guidance
| Component | Storage Method | Duration | Instructions |
|---|---|---|---|
| Finished milkshake | Refrigerator (covered) | 2-3 hours maximum | Cover with plastic wrap to prevent absorption of refrigerator odors. The shake will separate and become thin; stir vigorously before serving. Texture degrades significantly after 2 hours, so immediate consumption is strongly recommended. |
| Homemade caramel sauce | Airtight container in refrigerator | 14 days | Cool completely before storing. Transfer to glass jar or plastic container. Warm gently in microwave (20-second intervals) before using if it thickens during storage. Never allow bacteria entry by using clean spoons. |
| Pre-measured ingredients | Individual bowls, refrigerator | 24 hours | Measure milk, ice cream, caramel, and salt into separate small bowls. Cover each with plastic wrap. In the morning, blend all components in the prepared sequence. This cuts preparation time to just 2 minutes for weekday breakfasts. |
| Blended shake (to freeze) | Freezer in glasses | 4-6 hours | Pour blended shake into serving glasses immediately after blending. Cover loosely with plastic wrap. The shake will freeze into a slush consistency. Thaw at room temperature for 10 minutes before drinking, or consume as frozen slush using a spoon. |
Nutritional Information
Approximate values per serving (1 milkshake). Calculations based on standard ingredients; values vary by brand and exact quantities used.
| Nutrient | Amount per Serving |
|---|---|
| Calories | 420-480 |
| Total Fat | 18-22g |
| Saturated Fat | 11-14g |
| Trans Fat | 0-0.5g |
| Cholesterol | 65-85mg |
| Sodium | 140-180mg |
| Total Carbohydrates | 52-62g |
| Dietary Fiber | 0g |
| Sugars | 45-55g |
| Protein | 6-8g |
| Calcium | 200-250mg (20-25% Daily Value) |
| Potassium | 250-300mg |
Notes on Nutrition: This salted caramel milkshake is a treat dessert drink, not a health food. It provides calcium and protein from dairy components but is high in sugars and calories. The whipped cream topping adds approximately 50 extra calories and 5g additional fat per serving. If reducing sugar intake, use half the caramel sauce or substitute sugar-free caramel alternatives, though flavor intensity will decrease.
Frequently Asked Questions
Can I use dairy-free ice cream instead of traditional vanilla ice cream?
Yes, dairy-free ice cream works well in this recipe and produces a creamy milkshake with similar texture. Coconut, oat, or almond-based ice creams blend smoothly and don’t compromise the final result. Use the same quantity (2 cups) and follow identical blending instructions. The flavor remains delicious, though it may taste slightly different due to the different fat composition in plant-based products. Choose high-quality dairy-free brands for best results.
What’s the best way to make homemade caramel sauce for this milkshake?
Combine 1 cup granulated sugar, 6 tablespoons unsalted butter, and 1/2 cup heavy cream in a heavy-bottomed saucepan over medium heat. Stir constantly until sugar dissolves completely, then stop stirring and allow the mixture to bubble undisturbed for 5-7 minutes until it turns deep amber color. Remove from heat immediately and stir in the cream carefully (it will bubble). Cool to room temperature before using in the milkshake. This homemade sauce tastes dramatically better than store-bought versions and takes just 15 minutes total.
How can I make this milkshake less sweet if it’s too sweet for my taste?
Reduce the caramel sauce from 3 tablespoons to 2 tablespoons, or add an extra 1/4 teaspoon sea salt to balance sweetness. Adding more salt enhances and highlights caramel flavors while reducing the perception of sweetness. You can also blend in 1/4 cup plain Greek yogurt (in place of the same amount of milk) to add tartness that offsets sugar. Each adjustment changes the flavor profile slightly, so experiment gradually to find your ideal balance.
Can I prepare this salted caramel milkshake the night before serving?
Pre-blended shakes do not store well; the texture separates within 2-3 hours regardless of refrigeration. Instead, measure all ingredients into separate small bowls the night before, cover them, and refrigerate overnight. In the morning, blend everything together in just 2 minutes for a fresh shake with perfect texture. This make-ahead approach saves time while guaranteeing optimal results.
What’s the ideal serving temperature for this milkshake?
Serve this milkshake immediately after blending, when it’s between 35-40 degrees Fahrenheit with smooth, pourable consistency. Pre-chilling your serving glasses in the freezer for 2-3 minutes extends the ideal temperature window by several minutes. If the shake sits at room temperature for more than 10 minutes, it begins separating and becomes thin. Never freeze pre-blended shake unless you specifically want a frozen slush texture.
What if my salted caramel milkshake comes out too thin or watery?
A thin milkshake results from over-blending or using warm milk. For immediate rescue, add 2-3 ice cubes and blend for just 5 seconds, which will thicken the consistency significantly. For future batches, reduce blending time to 15-20 seconds and always use cold milk directly from the refrigerator. If your ice cream is very soft, use an extra 1/2 cup of ice cream or reduce milk by 2 tablespoons. These adjustments guarantee a thick, luxurious shake every time.
Final Thoughts
This salted caramel milkshake recipe delivers café-quality results at home in under 10 minutes with just seven simple ingredients. The balance between sweet caramel and subtle sea salt creates a sophisticated flavor that feels indulgent yet simple. Use cold milk, quality ice cream, and homemade caramel sauce when possible for maximum flavor impact. Serve immediately in chilled glasses, and you’ll enjoy a creamy, thick milkshake that rivals professional versions. Make this recipe your own by experimenting with ice cream flavors or caramel variations until you achieve your perfect salted caramel milkshake.
Image suggestion: Single finished salted caramel milkshake on white marble background, garnished with whipped cream and caramel drizzle, soft natural lighting from side.
Salted Caramel Milkshake
Ingredients
- Vanilla ice cream (2 cups)
- Caramel sauce (1/2 cup)
- Milk (1 cup, cold)
- Sea salt (1/4 teaspoon for two milkshakes)
- Caramel drizzle for topping (optional)
- Sea salt flakes for garnish (optional)
Instructions
- Add 1 cup cold milk and 2 cups vanilla ice cream to a blender
- Blend until smooth, about 2-3 minutes
- Add 1/2 cup caramel sauce and continue blending
- Add 1/4 teaspoon sea salt and blend for 10-15 seconds to incorporate
- Pour milkshakes into glasses and top with caramel drizzle and sea salt flakes
Notes
Adjust sea salt to taste – start with 1/16 teaspoon per shake and add according to preference.
For optimal texture, serve immediately after blending.
Can substitute 1/2 cup vanilla ice cream with 1/2 cup whipped cream for a lighter version.