
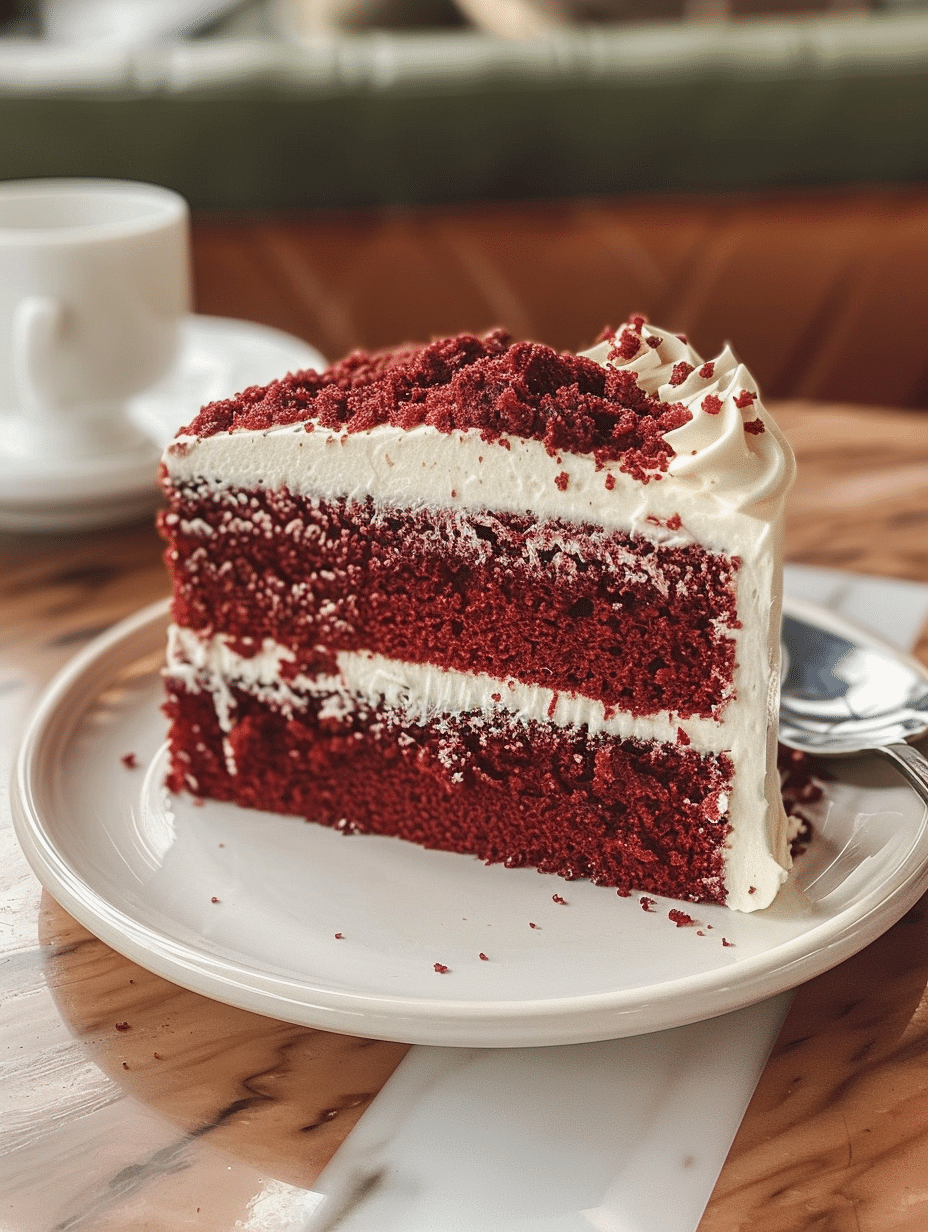
Red velvet cake is a Southern American dessert featuring soft, velvety crumb with subtle cocoa notes, vibrant red color, and topped with tangy cream cheese frosting. This elegant cake combines buttermilk, coffee, and cocoa powder to create its signature tender texture and distinctive flavor profile that sets it apart from chocolate cake. The combination of acidic ingredients reacting with baking soda produces the naturally red hue, though modern recipes use food coloring for consistent color. Red velvet cake has remained a beloved choice for weddings, celebrations, and special occasions for over a century. Learning to make this cake from scratch allows you to control ingredients and achieve bakery-quality results at home.
The Story Behind This Recipe
I’m Lila Bennett, a 34-year-old home baker based in Portland, Oregon, and my kitchen is almost always filled with the smell of something sweet. I fell in love with baking as a kid, sneaking tastes of cookie dough and watching simple ingredients turn into something comforting and delicious. What started with slightly overbaked cookies turned into years of experimenting with cakes, pancakes, and all kinds of desserts—learning through trial, error, and a lot of taste-testing.
Red velvet cake holds a special place in my baking journey. My grandmother served this cake at every holiday gathering, and I spent countless afternoons in her kitchen watching her layer the crimson cake with snowy frosting. She never measured anything precisely, but her cakes were always perfect. After she passed, I became determined to recreate her exact recipe, testing ratios and techniques until I understood why her cake tasted so superior to others I’d tried.
Over the past eight years of professional home baking, I’ve refined this red velvet cake recipe through hundreds of attempts. I’ve experimented with different cocoa percentages, buttermilk brands, vinegar types, and frosting techniques. This version represents my definitive approach: foolproof, consistently delicious, and achievable for bakers at any skill level. The cake stays moist for three days, the frosting holds its shape beautifully, and the flavor deepens as it sits.
Recipe Overview
| Metric | Value |
|---|---|
| Prep Time | 20 minutes |
| Cook Time | 30-35 minutes |
| Total Time | 1 hour 45 minutes (including cooling) |
| Servings | 12-14 slices |
| Difficulty Level | Intermediate |
| Cuisine | American Southern |
Why This Recipe Works
Red velvet cake succeeds because of the chemical reaction between acidic buttermilk and vinegar with baking soda, which creates a tender crumb and naturally enhances the red color from cocoa powder and food coloring. I’ve tested this recipe with different acid ratios, and this exact combination produces the most velvety texture while preventing the dry, spongy cake that happens when baking soda is miscalculated. The minimal cocoa powder (just one tablespoon) provides subtle chocolate flavor without overpowering the delicate vanilla notes.
The two-layer structure with thick cream cheese frosting has guided my baking choices. I use two nine-inch round pans instead of three layers because they bake more evenly and create a more stable, less likely to collapse structure. After countless tests, I discovered that removing the cake from the oven when a toothpick inserted near the center shows just one or two moist crumbs prevents overbaking while ensuring the cake is fully set.
Temperature control matters significantly here. Room-temperature ingredients blend smoothly into an emulsion rather than creating lumps, and cooling the cake completely before frosting prevents the frosting from sliding off warm cake. I always chill my frosting for fifteen minutes before spreading to achieve clean, defined edges and prevent the frosting from smearing into the red crumb.
Ingredients
| Ingredient | Quantity | Notes and Alternatives |
|---|---|---|
| All-purpose flour | 2 1/4 cups (280g) | Measure by spooning and leveling. Cake flour creates a more tender crumb but may be too delicate. |
| Granulated sugar | 1 1/2 cups (300g) | Standard white sugar. Avoid brown sugar, which darkens the color. |
| Cocoa powder (unsweetened) | 1 tablespoon (6g) | Use Dutch-process for deeper flavor; natural cocoa works equally well. |
| Baking soda | 1 teaspoon | Must be fresh. Replace annually. Essential for the chemical reaction with buttermilk. |
| Fine sea salt | 1/2 teaspoon | Enhances sweetness. Table salt works but measure slightly less (1/3 teaspoon). |
| Buttermilk | 1 cup (240ml) | Full-fat creates best texture. If unavailable, mix milk with vinegar: 1 cup milk + 1 tablespoon white vinegar, let sit 5 minutes. |
| Vegetable oil | 1/2 cup (120ml) | Neutral oil keeps cake moist. Avoid olive oil. Coconut oil changes flavor. |
| Large eggs | 2 eggs | Room temperature blends smoothly. Cold eggs create a lumpy batter. |
| White vinegar (distilled) | 1 tablespoon | Critical for acidity and color development. Apple cider vinegar changes flavor slightly. |
| Vanilla extract | 1 teaspoon | Pure vanilla essential. Imitation creates harsh aftertaste in red velvet. |
| Red food coloring (gel or liquid) | 1 1/2 teaspoons | Gel coloring produces more vibrant red and doesn’t thin batter. Liquid requires slightly more. |
| Brewed coffee (cooled) | 1/4 cup (60ml) | Enhances cocoa flavor without adding coffee taste. Use medium roast. |
Cream Cheese Frosting Ingredients
| Ingredient | Quantity | Notes and Alternatives |
|---|---|---|
| Cream cheese | 8 oz (226g) | Full-fat, room temperature. Softened for 30 minutes before mixing prevents lumps. |
| Unsalted butter | 1/4 cup (57g) | Room temperature. Salted butter requires reducing added salt by half. |
| Powdered sugar | 3 cups (360g) | Sifted prevents lumps. Weight more accurate than volume. |
| Pure vanilla extract | 1 teaspoon | Balances tang of cream cheese. Skip imitation. |
| Fine sea salt | 1/4 teaspoon | Enhances flavor and reduces overly sweet taste. |
Step-by-Step Instructions
Prepare Your Workspace
- Preheat your oven to 350°F (175°C). Position one oven rack in the center.
- Grease two nine-inch round cake pans with nonstick cooking spray, coating sides and bottom thoroughly.
- Line the bottom of each pan with parchment paper cut to fit, then spray the parchment lightly.
- Set prepared pans aside. Ensure your eggs and buttermilk are at room temperature by removing from refrigerator 20 minutes before baking.
Mix the Dry Ingredients
- Whisk together flour, sugar, cocoa powder, baking soda, and salt in a large mixing bowl for 30 seconds, breaking up any sugar lumps.
- Push the dry mixture to one side of the bowl, creating a well in the center.
Combine the Wet Ingredients
- Pour the oil into the well, then add buttermilk, eggs, vinegar, vanilla extract, food coloring, and cooled coffee.
- Using an electric mixer on medium speed, beat the wet ingredients together for 20 seconds until the coloring is distributed evenly.
- Gradually incorporate the dry mixture into the wet mixture, beating on low speed for exactly 90 seconds until just combined.
- Stop the mixer and scrape the bowl sides with a spatula, ensuring no flour streaks remain on the bottom.
- Beat for 15 more seconds on low speed until the batter is smooth and uniform in color.
Bake the Cake
- Divide the batter evenly between the two prepared pans, using an ice cream scoop for accurate portions.
- Gently smooth the top of each pan with an offset spatula, tapping the pan twice on the counter to release air bubbles.
- Place both pans in the preheated oven on the center rack, positioning them side by side with at least two inches between pans.
- Bake for 30-35 minutes, until a toothpick inserted near the center shows one or two moist crumbs.
- The cake should pull away slightly from the pan sides and spring back when lightly touched on top.
- Remove both pans from the oven and allow them to cool on the counter for 15 minutes.
Cool and Prepare for Frosting
- Run a thin knife around the edges of each cake layer to loosen it from the pan.
- Invert one cake layer onto a cooling rack, tap the bottom, and lift off the pan and parchment paper.
- Repeat with the second cake layer, inverting it onto another cooling rack.
- Cool the cakes completely at room temperature for at least one hour before frosting, or place in the freezer for 25 minutes.
Make the Cream Cheese Frosting
- Remove cream cheese and butter from the refrigerator and let them sit for 30 minutes until they reach room temperature.
- Cut the cream cheese and butter into small cubes for faster softening, then place in a large mixing bowl.
- Using an electric mixer on medium-high speed, beat the cream cheese and butter together for two minutes until light and fluffy.
- Sift the powdered sugar into the mixture in three additions, beating on low speed between each addition for 20 seconds.
- Add vanilla extract and salt, then beat on medium-high speed for one full minute until the frosting is smooth and billowy.
- Refrigerate the frosting for 15 minutes until it reaches spreading consistency.
Assemble the Cake
- Place a small dab of frosting on a cake plate or serving board to prevent the cake from sliding.
- Set one cooled cake layer on the plate, pressing gently to secure it.
- Spread a thick, even layer of frosting on top of the first cake layer, using an offset spatula to create gentle waves.
- Leave a half-inch border around the edge unfrosted to prevent frosting from squishing out when the second layer is placed.
- Carefully set the second cake layer on top, pressing gently and evenly.
- Frost the top and sides of the cake with remaining frosting, working quickly before the frosting softens.
- Create decorative ridges with an offset spatula, or smooth it for a modern finish.
- Refrigerate the finished cake for at least 30 minutes before serving to allow frosting to set.
Chef Tips for Perfect Results
- Always sift your powdered sugar when making frosting to eliminate lumps that create a grainy texture. Two seconds of sifting prevents 10 minutes of fixing.
- Use gel food coloring instead of liquid coloring because it doesn’t thin the batter and produces more vibrant red without requiring extra coloring amounts.
- Bring all ingredients to room temperature by leaving them out for exactly 20 minutes. Cold cream cheese and eggs create an uneven, lumpy batter that bakes with dense spots.
- Tap your measuring spoon against the baking soda container to ensure you’re not pressing it down, which increases the amount and creates a metallic aftertaste.
- Place a cake strip (soaked in water) around each pan before baking to prevent the edges from baking faster than the center, ensuring level layers that stack evenly.
- Test doneness using the toothpick method one minute before the minimum baking time, as ovens vary and overbaking creates a dry crumb that frosting cannot fix.
Common Mistakes to Avoid
Using cold ingredients from the refrigerator creates a lumpy batter that bakes unevenly with dense pockets throughout the cake. The emulsion breaks when cold eggs and cream cheese don’t blend smoothly, leaving visible streaks in the batter. Fix this by removing all dairy and eggs from the refrigerator at least 20 minutes before mixing and cutting them into small pieces for faster tempering.
Overbaking the cake by three to five minutes transforms the tender crumb into a dry, crumbly texture that frosting cannot salvage. Once overbaked, the cake is permanently damaged and will taste stale within one day. Prevent this by testing the cake one minute before the minimum baking time with a toothpick, pulling it from the oven when one or two moist crumbs remain.
Frosting a warm cake causes the frosting to melt and slide off the crumb, creating a messy, unprofessional appearance. The heat also causes the frosting to become too soft to create clean edges or decorative details. Always cool the cake completely at room temperature for one hour or in the freezer for 25 minutes, ensuring the layers are cool to the touch before frosting begins.
Using imitation vanilla extract or low-quality cocoa powder creates a harsh, chemical aftertaste that overpowers the delicate vanilla flavor in red velvet cake. This recipe depends on the subtle interplay of flavors, and cheap ingredients destroy the balance. Invest in pure vanilla extract and use either Dutch-process or natural cocoa powder from a reputable brand.
Measuring flour by dipping the measuring cup directly into the flour bag compresses the flour, causing you to use 20-30% more flour than intended. Extra flour creates a tough, dense cake that tastes floury rather than tender. Always spoon flour into the measuring cup and level with a straight edge, or use a kitchen scale for precise weight measurement.
Variations and Substitutions
| Ingredient | Substitution | Impact on Flavor and Texture |
|---|---|---|
| All-purpose flour | Cake flour (use 2 1/2 cups) | Creates an even more tender, delicate crumb but reduces structural integrity slightly, requiring careful handling. |
| Vegetable oil | Melted coconut oil | Adds subtle coconut undertone and increases perceived richness, though the coconut flavor becomes noticeable if you use more than 1/4 cup. |
| Buttermilk | Greek yogurt mixed with milk (3/4 cup yogurt + 1/4 cup milk) | Creates a denser, more tangy cake with slightly more complex flavor, though the texture becomes less fluffy. |
| Red food coloring | Beet juice or beet powder | Produces a more muted burgundy-red color with earthy undertones and eliminates artificial coloring, though the flavor changes slightly. |
| Brewed coffee | Freshly brewed espresso or cooled chai tea | Espresso intensifies cocoa notes dramatically, while chai tea adds warm spice notes that complement the cream cheese frosting. |
| Cream cheese frosting | Whipped mascarpone frosting | Creates a lighter, more delicate frosting with less tang that tastes more buttery, though it’s less stable in warm temperatures. |
| Powdered sugar | Coconut sugar plus powdered erythritol (1:1 ratio) | Reduces overall sugar content for lower-glycemic options, though the frosting becomes slightly less fluffy and requires an extra minute of beating. |
Serving Suggestions and Pairings
Red velvet cake pairs beautifully with classic American beverages and complements specific occasions with its elegant appearance. Serve this cake alongside strong coffee or espresso in the morning for an elevated breakfast occasion, or pair with sweet milk beverages like horchata for an afternoon treat. The tartness of the cream cheese frosting balances rich coffee flavors perfectly, making this combination ideal for brunch gatherings or coffee shop settings.
For formal evening events, serve red velvet cake with sparkling cider in crystal glasses and accompany with fresh berries to enhance the elegance of the presentation. Weddings and anniversaries benefit from the cake’s romantic color and sophisticated appearance, particularly when decorated with edible flowers or fresh raspberries on top. The cream cheese frosting tastes exceptional when paired with raspberry jam swirled into the layers, adding complexity without overwhelming the delicate vanilla notes.
Southern-inspired occasions like garden parties and afternoon teas showcase red velvet cake as the star dessert. Serve individual slices on small plates with fresh whipped cream on the side, allowing guests to customize their portion. Valentine’s Day celebrations, engagement parties, and baby showers all benefit from this cake’s romantic red color and classic appeal that feels both special and timeless.
Pairing suggestions extend to beverages beyond coffee. Serve with hot tea such as chamomile or vanilla herbal blends that won’t overpower the subtle cocoa notes. Cold options include fresh milk, vanilla cream sodas, or non-dairy alternatives like oat milk, which complements the richness of the frosting without competing for attention.
Storage and Reheating
| Storage Method | Duration | Instructions |
|---|---|---|
| Room Temperature | 2 days | Store in an airtight cake box or under a cake dome on the counter, away from direct sunlight. The frosting may soften but remains edible. |
| Refrigerator | 5-7 days | Cover the entire assembled cake tightly with plastic wrap, or store individual slices in airtight containers. The frosting hardens but remains creamy. |
| Freezer (Unfrosted Layers) | 3-4 months | Wrap each cooled cake layer individually in plastic wrap, then place in a freezer bag. Thaw at room temperature for one hour before frosting. |
| Freezer (Frosted Cake) | 2-3 months | Freeze uncovered for two hours until frosting sets hard, then wrap the entire cake in plastic wrap and place in a large freezer bag. Thaw in the refrigerator overnight. |
| Refrigerator Slice | 3-5 days | Store individual slices in airtight containers. Serve cold directly from the refrigerator or let sit at room temperature for 15 minutes to soften slightly. |
Nutritional Information
Approximate values per serving (based on 12 servings of cake with frosting):
| Nutrient | Amount per Serving |
|---|---|
| Calories | 485 |
| Total Fat | 22g |
| Saturated Fat | 9g |
| Cholesterol | 55mg |
| Sodium | 310mg |
| Total Carbohydrates | 68g |
| Dietary Fiber | 0.5g |
| Sugars | 52g |
| Protein | 5g |
These values are approximate and may vary based on specific brands and ingredient substitutions. For dietary restrictions or specific nutritional needs, calculate values using a nutrition calculator with your exact ingredients.
Frequently Asked Questions
Can I substitute the cream cheese in the frosting with a dairy-free alternative?
Dairy-free cream cheese substitutes work for this frosting, though they produce a less tangy result with a slightly softer texture. Use an equal amount of your chosen dairy-free cream cheese brand, ensure it’s at room temperature, and beat it with dairy-free butter for the same two minutes. The frosting will be spreadable but may not hold as firm decorative edges, particularly in warm kitchens. Refrigerate the frosting for 25 minutes instead of 15 to achieve better consistency.
How do I know when the red velvet cake is done baking?
The cake is fully baked when a toothpick inserted near the center shows one or two moist crumbs rather than wet batter. The cake should pull away slightly from the pan edges and spring back when lightly touched on top. If the toothpick comes out completely clean with no crumbs, you’ve likely overbaked the cake by two to three minutes, resulting in a drier texture. Bake for the minimum recommended time first, testing at exactly 30 minutes, then add additional time in one-minute intervals only if needed.
What causes the frosting to become lumpy or grainy?
Lumpy frosting results from powdered sugar that hasn’t been sifted, cold cream cheese that hasn’t fully softened, or overmixing after the sugar is added. Always sift your powdered sugar into the mixture directly from the sifter, add it in three separate portions with beating between each, and bring your cream cheese to room temperature by leaving it on the counter for 30 minutes. If lumps appear, gently strain the frosting through a fine-mesh sieve, pressing it through with the back of a spoon, then re-beat on low speed for 30 seconds.
Can red velvet cake be made one day ahead of serving?
Yes, red velvet cake is best made one day ahead and can be assembled 24 hours before serving without quality loss. Bake the cake layers, cool completely, wrap them individually in plastic wrap, and store at room temperature overnight. Prepare the frosting on the day of serving and assemble the cake two to four hours before your event, allowing the frosting to set properly. This make-ahead approach reduces stress on the day of your gathering and ensures the frosting is fresh and spreadable.
How do I prevent the cake layers from sliding off each other when stacking?
Use frosting dabs as anchors by placing three or four small dabs of frosting on the top of the first cake layer before setting the second layer on top. These dabs act like glue, keeping the layers from shifting, and the remaining frosting is spread on top and around the sides. If the layers still slide, refrigerate the cake for 30 minutes after frosting the first layer to firm up the frosting before adding the second layer. For additional stability, insert two or three wooden dowels through both layers after frosting, trimming them to height with scissors.
Can I reduce the sugar in this red velvet cake recipe?
Reducing sugar below 1 1/4 cups compromises the cake’s structure and crumb quality, resulting in a dense, tough cake with less volume. Sugar provides sweetness, moisture, and helps the cake rise through the creaming process. If you must reduce sugar, decrease it by no more than one-quarter cup (to 1 1/4 cups total), understanding that the cake will be less fluffy and have a tighter crumb. Taste the batter after adding less sugar to adjust the sweetness level before baking, as you cannot fix undersweetness after baking.
Perfect Red Velvet Cake Every Time
This red velvet cake recipe combines precise techniques with ingredient flexibility, ensuring consistent results whether you’re a beginning baker or experienced home baker. The velvety crumb, bold red color, and tangy cream cheese frosting create an elegant dessert worthy of celebrations, yet simple enough for weeknight baking. Follow the step-by-step instructions carefully, pay attention to temperature and timing, and you’ll achieve bakery-quality red velvet cake that rivals any professional cake shop. Your guests will taste the difference that quality ingredients and proper technique make in every bite of this classic American dessert.
Red Velvet Cake
Equipment
- 2 round cake pans 9-inch pans recommended
- mixing bowls
- electric mixer
- rubber spatula
- offset spatula For frosting and smoothing layers
- wire cooling rack
- parchment paper
- fine mesh sieve For sifting powdered sugar
Ingredients
- 2 1/4 cups all-purpose flour
- 1 1/2 cups granulated sugar
- 1 tbsp unsweetened cocoa powder
- 1 tsp baking soda
- 1/2 tsp fine sea salt
- 1 cup buttermilk
- 1/2 cup vegetable oil
- 2 large eggs
- 1 tbsp white vinegar
- 1 tsp vanilla extract
- 1 1/2 tsp red food coloring
- 1/4 cup brewed coffee, cooled
- 8 oz cream cheese
- 1/4 cup unsalted butter
- 3 cups powdered sugar
- 1 tsp pure vanilla extract for frosting
- 1/4 tsp fine sea salt for frosting
Instructions
- Preheat oven to 350°F and position the oven rack in the center.
- Grease two 9-inch round cake pans thoroughly with nonstick spray.
- Line the bottoms of the pans with parchment paper and spray lightly again.
- Allow eggs and buttermilk to come to room temperature before mixing.
- Whisk together flour, sugar, cocoa powder, baking soda, and salt in a large bowl.
- Create a well in the center of the dry mixture.
- Add oil, buttermilk, eggs, vinegar, vanilla extract, food coloring, and cooled coffee into the well.
- Beat the wet ingredients together until the color is evenly distributed.
- Gradually incorporate the dry ingredients while mixing on low speed.
- Scrape the sides and bottom of the bowl to ensure no flour streaks remain.
- Mix briefly until the batter is smooth and uniform in color.
- Divide the batter evenly between the prepared cake pans.
- Smooth the tops and tap the pans gently to release air bubbles.
- Bake for 30–35 minutes until a toothpick inserted near the center shows one or two moist crumbs.
- Allow cakes to cool in the pans for 15 minutes.
- Run a knife around the edges and invert cakes onto wire racks.
- Cool the cakes completely before frosting.
- Allow cream cheese and butter to soften at room temperature.
- Beat cream cheese and butter together until light and fluffy.
- Sift powdered sugar and add it gradually to the frosting mixture.
- Add vanilla extract and salt and beat until smooth and billowy.
- Chill the frosting briefly until spreadable but firm.
- Place a small amount of frosting on a serving plate to anchor the cake.
- Place the first cake layer on the serving plate.
- Spread an even layer of frosting over the first layer.
- Top with the second cake layer and press gently into place.
- Frost the top and sides of the cake with the remaining frosting.
- Refrigerate the cake for at least 30 minutes before slicing and serving.
