
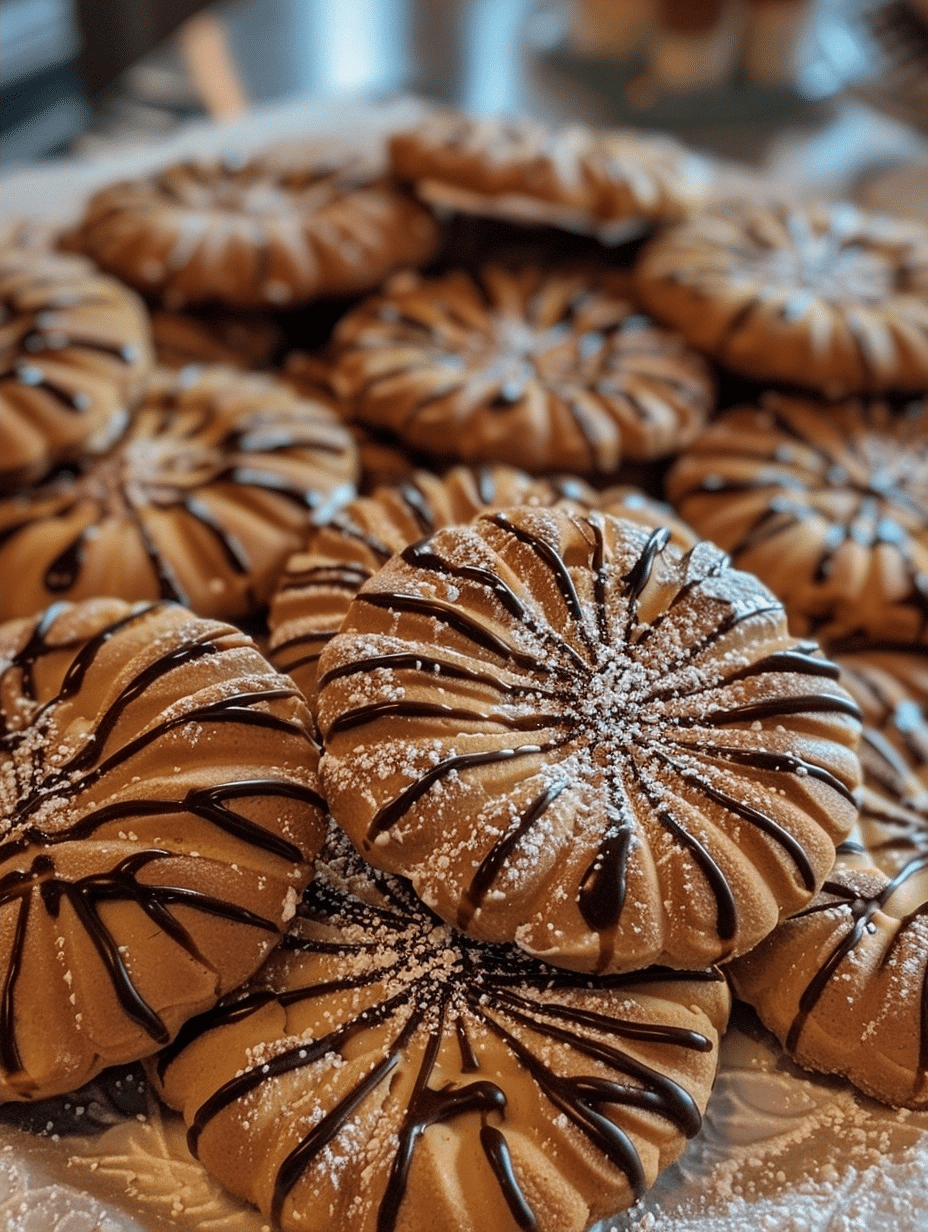
Pizelle cookies are delicate Italian waffle cookies made with a special pizelle maker that imprints beautiful patterns onto thin, crispy wafers. These traditional treats combine simple ingredients like eggs, sugar, butter, and flour with distinctive anise flavoring to create an authentic confection enjoyed across Italy and Italian-American communities. The result is a cookie that shatters delicately between your teeth with a subtle sweetness and aromatic spice that lingers pleasantly. Unlike rolled cookies or drop cookies, pizelles require timing precision and a dedicated pizelle maker, but the effort transforms basic batter into elegant cookies worthy of any holiday table or coffee service.
My Journey with Pizelle Cookies
I’m Lila Bennett, a 34-year-old home baker based in Portland, Oregon, and my kitchen is almost always filled with the smell of something sweet. I fell in love with baking as a kid, sneaking tastes of cookie dough and watching simple ingredients turn into something comforting and delicious. What started with slightly overbaked cookies turned into years of experimenting with cakes, pancakes, and all kinds of desserts—learning through trial, error, and a lot of taste-testing.
My introduction to pizelle cookies came during a holiday baking class where an Italian baker demonstrated the technique. I was immediately captivated by how quickly batter transformed into crispy, patterned wafers. After purchasing my first pizelle maker five years ago, I’ve refined my technique through countless batches, understanding how temperature control, batter consistency, and timing affect the final texture. Today, pizelles are a staple in my Christmas baking rotation and a recipe I teach regularly at baking workshops throughout Portland.
Recipe Overview
| Metric | Details |
|---|---|
| Prep Time | 15 minutes |
| Cook Time | 20 minutes (24 cookies) |
| Total Time | 35 minutes |
| Servings | 12 people (2 cookies per serving) |
| Difficulty Level | Intermediate |
| Cuisine | Italian |
| Best For | Holiday gifting, coffee service, special occasions |
Why This Recipe Works
This pizelle cookies recipe succeeds because it balances the technical requirements of the pizelle maker with ingredient ratios perfected through years of testing. The combination of beaten eggs and sugar creates structure and lift, while butter and milk contribute richness and the proper batter consistency. I’ve discovered that using both vanilla and anise extracts delivers the authentic Italian flavor profile without requiring hard-to-find ingredients or alcohol.
During my first attempts, I made two critical errors: too-thick batter that wouldn’t spread evenly in the maker, and insufficient sugar-egg beating that resulted in dense cookies lacking the delicate crumb structure pizelles should have. After adjusting these elements, my success rate improved dramatically. The batter texture should resemble thick pancake batter that flows slightly when poured but holds its shape initially.
The timing and temperature are equally important factors. Your pizelle maker’s readiness indicator ensures consistent results across all 24 cookies in a batch. I’ve learned that allowing the plates to fully preheat prevents sticking and ensures the distinctive pattern develops properly, creating those signature crosshatch marks that define authentic pizelles.
Ingredients
| Ingredient | Quantity | Notes & Alternatives |
|---|---|---|
| All-purpose flour | 2 cups | Use unbleached flour for slightly richer flavor. Cake flour creates more delicate cookies but requires reducing to 1¾ cups. |
| Baking powder | 1.5 teaspoons | Ensures cookies have slight lift and crispness. Do not substitute with baking soda without adjusting acid content. |
| Salt | 0.5 teaspoon | Enhances sweetness and balances anise flavor. Use fine sea salt or table salt; omit if using salted butter. |
| Large eggs | 4 | Room temperature eggs beat more easily and incorporate air better. Cold eggs require 5 extra minutes of beating. |
| Granulated sugar | 1 cup | Creates crispy exterior. Superfine sugar produces slightly more delicate texture but not required. |
| Unsalted butter, melted | 6 tablespoons | Salted butter works but reduce added salt to 0.25 teaspoon. Ghee creates nuttier flavor profile. |
| Vanilla extract | 2 teaspoons | Pure vanilla essential; imitation substitutes work but use same quantity. Vanilla paste creates deeper flavor. |
| Anise extract or anise liqueur flavor (alcohol-free) | 1 teaspoon | Authentic Italian flavoring. Alternatively, use 0.5 teaspoon fennel seeds ground fine or omit for plain pizelles. |
| Whole milk | 2 tablespoons | Achieves proper batter consistency. Almond milk or oat milk substitutes work identically. |
| Powdered sugar for dusting | Optional | Light dusting adds elegance for gift presentations. Omit for plain cookies. |
Step-by-Step Instructions
Preparation Phase
- Preheat your pizelle maker according to manufacturer instructions, typically requiring 2-3 minutes until the indicator light signals readiness for use.
- Whisk together flour, baking powder, and salt in a medium mixing bowl, ensuring even distribution of leavening agent throughout dry ingredients.
Mixing Phase
- Beat eggs and sugar together in a large bowl for 2-3 minutes until the mixture becomes light, fluffy, and pale in color, indicating sufficient air incorporation.
- Stir melted butter, vanilla extract, and anise extract into the egg mixture until fully combined and no streaks of butter remain visible.
- Gradually fold the flour mixture into the wet ingredients using a rubber spatula, working gently with minimal strokes to avoid deflating the aerated egg mixture.
- Add milk and stir until batter reaches a slightly thick consistency resembling traditional pancake batter that flows slowly when poured.
Cooking Phase
- Lightly brush oil or cooking spray on both interior sides of the pizelle maker plates to prevent sticking and ensure easy release.
- Pour approximately 1 tablespoon of batter into the center of the pizelle maker, positioned to allow slight spreading when the lid closes.
- Close the lid gently and press down with steady, even pressure for 30-40 seconds until the maker’s indicator signals cooking completion.
- Open the maker slowly and use a wooden stick, fork, or specialized pizelle cone to carefully remove the hot, delicate wafer from the plates.
- Roll each hot pizelle immediately around a wooden dowel or cone form to create a tube shape for presentation, or lay flat on a cooling rack to maintain wafer shape.
- Transfer cooled pizelles to a wire cooling rack or plate, ensuring they don’t overlap while cooling completely.
- Repeat the cooking process with remaining batter until all mixture is completely used, typically yielding 24 individual cookies.
Chef Tips for Perfect Results
- Beat Your Eggs Thoroughly: Spend a full 3 minutes beating eggs and sugar before adding other ingredients. This creates the light, airy structure that gives pizelles their signature delicate crunch rather than dense texture.
- Monitor Batter Temperature: If batter cools during cooking, it thickens and won’t spread properly in the maker. Keep batter at room temperature and stir occasionally between cookies to maintain consistency.
- Use a Parchment Paper Holder: Place a piece of parchment paper under your cooling rack to catch any drips, preventing sticky residue on your work surface and making cleanup significantly faster.
- Time Your Rolling Precisely: Roll pizelles while they’re hot and flexible (within 10 seconds of removal), not when they’ve cooled and become brittle. If they cool too quickly, briefly return them to the maker for 5-10 seconds to soften.
- Test the Maker’s Temperature: Before cooking your final recipe, bake one test cookie to ensure even heating and proper browning. Adjust heat settings if your maker has a temperature dial.
- Store in Airtight Containers: Keep cooled pizelles in airtight containers to maintain their crispy texture for up to 2 weeks, preventing moisture absorption from air exposure.
Common Mistakes to Avoid
Mistake 1: Batter Too Thick Overly thick batter won’t spread across the maker plates, resulting in incomplete cookies with rough edges. If your batter seems thicker than pancake batter, add milk one teaspoon at a time until it reaches the proper consistency. This adjustment typically requires only 1-2 additional teaspoons.
Mistake 2: Insufficient Egg-Sugar Beating Rushing through the beating phase produces dense, heavy cookies rather than delicate wafers. Your mixer should beat the egg-sugar combination for a minimum of 3 full minutes, creating visible pale color and increased volume. Under-beaten eggs create inadequate structure.
Mistake 3: Overcrowding the Pizelle Maker Pouring more than 1 tablespoon of batter causes overflow and burning on the exterior while leaving the interior undercooked. Stick to the measured amount consistently for uniform results across all batches.
Mistake 4: Attempting to Roll Cooled Cookies Pizelles become brittle within seconds of cooling and will crack or break when you try to roll them. You must work quickly, rolling each cookie while still hot and flexible. If cookies cool too fast, return them to the maker for brief reheating.
Mistake 5: Neglecting Proper Plate Oiling Ungreased or insufficiently oiled maker plates cause cookies to stick, tearing when you attempt removal. Lightly oil the plates before every 2-3 cookies rather than just at the beginning, maintaining consistent non-stick protection throughout your baking session.
Variations and Substitutions
| Ingredient | Substitution | Impact on Flavor & Texture |
|---|---|---|
| Anise extract | Ground fennel seeds (0.5 tsp) or omit entirely for plain pizelles | Fennel provides earthier anise note; plain pizelles become mild-flavored with emphasis on vanilla and butter. |
| All-purpose flour | Cake flour (use 1.75 cups) or pastry flour (use 1.875 cups) | Cake flour produces noticeably more delicate, tender cookies; pastry flour creates similar results with slightly more structure. |
| Vanilla extract | Almond extract (use 1 teaspoon) or omit for classic plain version | Almond extract introduces subtle nuttiness; plain versions highlight anise and butter more prominently. |
| Granulated sugar | Coconut sugar (same amount) or turbinado sugar (same amount) | Coconut sugar adds subtle caramel note; turbinado creates crunchy surface texture without flavor change. |
| Butter | Ghee (same amount) or coconut oil (same amount) | Ghee creates deeper, toasted butter flavor; coconut oil produces slightly less rich cookies with coconut undertone. |
| Milk | Almond milk, oat milk, or vegetable-based milk (same amount) | All milk alternatives produce virtually identical results with no detectable flavor change in final cookies. |
Serving Suggestions and Pairings
Holiday Gatherings: Arrange pizelle cookies on a tiered cake stand dusted with powdered sugar for elegant holiday dessert displays. They pair beautifully with hot mulled cider, spiced tea, or traditional Italian hot chocolate for festive gatherings.
Coffee Service: Serve crispy pizelles alongside espresso, cappuccino, or strong brewed coffee during morning gatherings. The delicate cookies complement bold coffee flavors without overwhelming the palate, making them ideal for coffee breaks.
Italian Cream Filling: Sandwich cooled flat pizelles with whipped mascarpone mixed with honey and lemon zest for an elegant dessert reminiscent of Italian pastry traditions.
Wedding and Shower Favors: Bundle individual pizelle cookies in cellophane bags tied with ribbon for sophisticated party favors. Their elegant appearance and distinctive flavor make them memorable gifts from special occasions.
Dessert Platter Addition: Include pizelles on mixed Italian dessert platters alongside biscotti, cantucci, and amaretti cookies. Their crispy texture contrasts beautifully with denser, chewier cookies.
Dunking in Dessert Wine Alternative: Serve pizelles with Italian sparkling cider or sweet non-alcoholic fruit juices, allowing guests to gently dunk cookies for a softened texture variation.
Storage and Reheating
| Storage Method | Duration | Instructions |
|---|---|---|
| Room Temperature Container | Up to 2 weeks | Store cooled pizelles in an airtight container or glass jar with a sealed lid, keeping them in a cool, dry location away from direct sunlight and heat sources. Layer cookies with parchment paper if stacking. |
| Freezer Storage | Up to 3 months | Place cooled cookies in a freezer-safe container with parchment layers between cookies, or wrap individually in plastic wrap before placing in freezer bags. Label with date for easy tracking. |
| Refrigerator Storage | Up to 1 week | Store in an airtight container on a refrigerator shelf, not door where temperature fluctuates. Cookies may absorb moisture, slightly softening the crispy texture. |
| Unbaked Batter Storage | Up to 2 days | Cover batter with plastic wrap and refrigerate, bringing to room temperature for 30 minutes before cooking. Batter may thicken slightly during storage, requiring additional milk to reach proper consistency. |
| Crisp Reactivation | After thawing | Spread thawed pizelles on a baking sheet and warm in a 300°F oven for 5-7 minutes to restore original crispness if they’ve softened during storage. |
Nutritional Information
| Nutrient | Amount per Serving (2 cookies) |
|---|---|
| Calories | 185 kcal |
| Total Fat | 6.8g |
| Saturated Fat | 3.2g |
| Trans Fat | 0g |
| Cholesterol | 35mg |
| Sodium | 142mg |
| Total Carbohydrate | 28.4g |
| Dietary Fiber | 0.3g |
| Total Sugars | 18.9g |
| Protein | 3.2g |
Approximate values based on USDA data and standard ingredient measurements. Values may vary slightly based on specific brands and preparation methods used.
Frequently Asked Questions
Can I Make Pizelle Cookies Without a Pizelle Maker?
You cannot create authentic pizelle cookies without a specialized pizelle maker, as the distinctive pattern imprint and crispy wafer texture depend on the maker’s design. Traditional pizelle makers feature two embossed plates that imprint intricate patterns while cooking both sides simultaneously. If you don’t own a pizelle maker, you could prepare a similar Italian waffle cookie using a Belgian waffle maker, though the pattern and thickness will differ from true pizelles. For authentic results, a pizelle maker costs between 25-75 dollars and typically lasts 10+ years with proper care.
How Do I Know When My Pizelle Cookies Are Done Cooking?
Most modern pizelle makers include an indicator light that signals when cookies have finished cooking, typically after 30-40 seconds. When you don’t see an indicator light, listen for a slight sizzle to stop and watch for light golden-brown coloring on the edges visible through the maker’s transparent lid. Open the maker gently after 35 seconds for the first test cookie, observing the browning level to determine if you need additional cooking time for subsequent batches.
Why Are My Pizelle Cookies Breaking or Cracking When I Roll Them?
Cookies break when they’ve cooled too much before rolling because they lose their flexibility and become brittle. You must roll each cookie within 10 seconds of removing it from the maker while it’s still hot and pliable. If cookies cool too quickly, briefly return the unrolled cookie to the maker for 5-10 seconds of reheating to soften it, then immediately roll onto your form before it cools again.
Can I Prepare Pizelle Cookie Batter the Day Before?
Yes, you can prepare batter up to 24 hours in advance by covering it tightly with plastic wrap and refrigerating it. Before cooking, remove the batter from the refrigerator 30 minutes before beginning to allow it to reach room temperature, which typically ensures proper spreading in the maker. Cold batter may be thicker than fresh batter, requiring the addition of 1-2 tablespoons of milk to restore the proper pancake-batter consistency.
What’s the Best Way to Serve Pizelle Cookies at Special Occasions?
Display rolled pizelle cookies upright in tall glasses or small vases for dramatic presentation at events, or stack flat pizelles on tiered cake stands dusted with powdered sugar for elegance. For coffee service, arrange them on small plates alongside cups of espresso, cappuccino, or traditional Italian hot chocolate. Package individual cookies in clear cellophane bags tied with ribbons for sophisticated party favors or holiday gifts that feel both special and professional.
How Should I Adjust This Recipe at High Altitude?
At elevations above 3,000 feet, increase the baking powder to 2 teaspoons to compensate for reduced atmospheric pressure, and reduce sugar by 2 tablespoons to prevent excessive spreading. Add 1 tablespoon additional flour to create more structure, and increase milk to 3 tablespoons to restore proper batter consistency. The cooking time may decrease slightly, so monitor your first test cookie carefully to establish the proper duration for your specific pizelle maker and altitude.
Final Thoughts on Pizelle Cookies
Pizelle cookies represent a timeless Italian tradition that transforms simple ingredients into sophisticated, elegant treats worthy of any occasion. The technique requires patience and precision, but the reward is a distinctly flavored cookie with crispy texture and aromatic anise notes that transport you straight to an Italian bakery. Once you master this recipe, pizelles become your signature cookie for holiday gifting, special gatherings, and coffee service. I encourage you to bake these delicate wafers soon and experience why Italian families have cherished them for generations.
Pizelle Cookies Recipe: Crispy Italian Waffle Treats
Ingredients
- 4 large egg whites
- 1/2 cup granulated sugar
- 1 cup unsalted butter, softened
- 1/4 teaspoon anise extract
- 1/4 teaspoon vanilla extract
- 1/2 cup all-purpose flour
- 2 tablespoons milk
Instructions
- Preheat pizelle maker according to manufacturer's instructions.
- In a mixing bowl, beat egg whites and sugar until light and fluffy.
- Fold in softened butter until smooth and shiny.
- Mix in anise and vanilla extracts.
- Sift flour into the batter and gently incorporate while adding milk for a thin, pourable consistency.
- Using a small amount of batter at a time, spread onto the heated pizelle iron.
- Cook for 1–2 minutes until golden and crisp.
- Lift cookies off the iron and stack them on parchment paper to cool.
- Repeat with remaining batter, working quickly before the iron cools.
