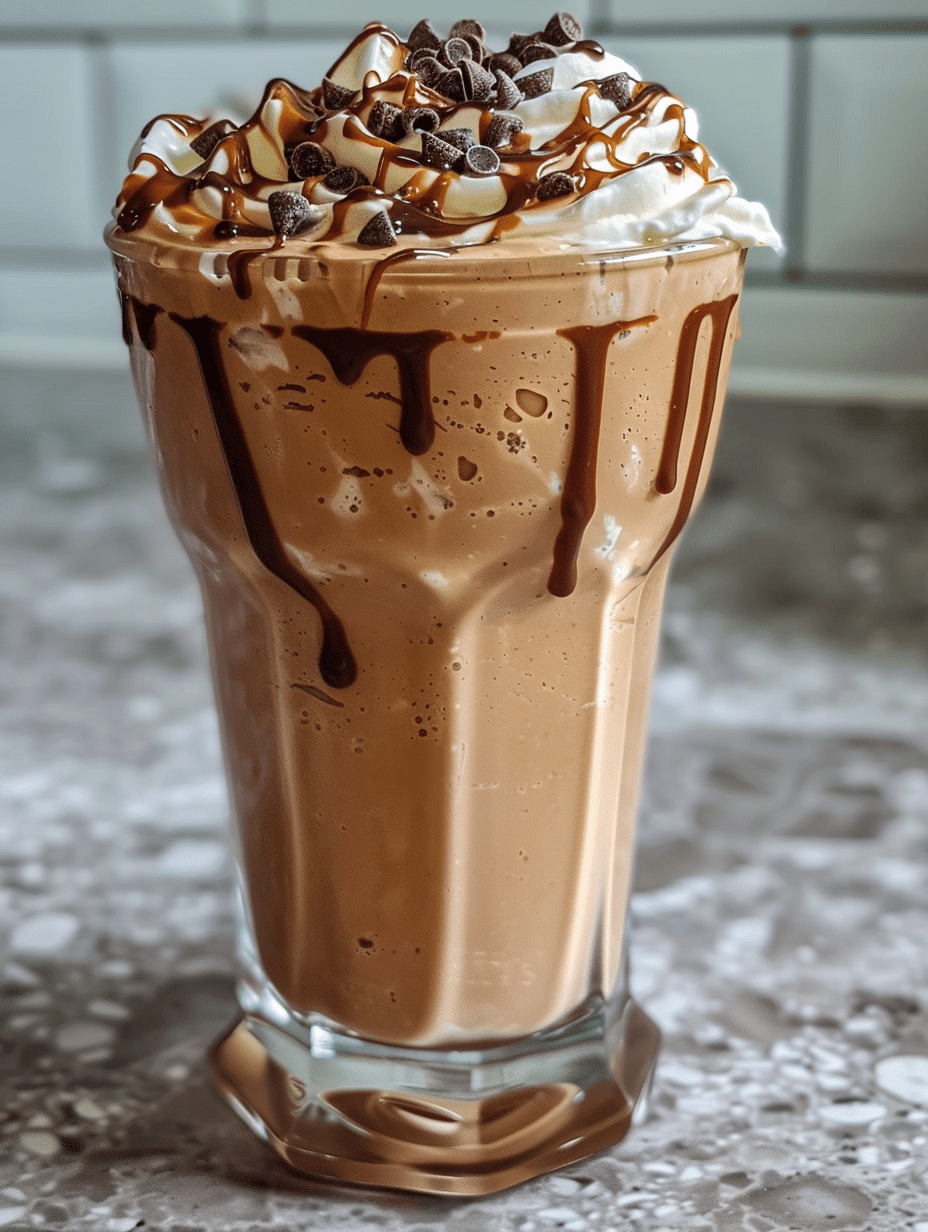
A Nesquik milkshake is a classic, indulgent chocolate beverage made with Nesquik powder, cold milk, and ice for a smooth, refreshing drink. This iconic milkshake combines the rich, chocolatey flavor of Nesquik with creamy milk to create a nostalgic treat that appeals to kids and adults alike. Whether you’re serving it at a party, enjoying it as an afternoon pick-me-up, or treating yourself to dessert in a glass, this milkshake delivers consistent, delicious results every time.
My Journey with Nesquik Milkshakes
I’m Maya Collins, a 29-year-old from Austin, Texas, and a co-creator at Fresh Recipes Corner, where I focus on simple, refreshing drinks you can make anytime. I started by mixing juices in my mom’s kitchen just for fun, and over time it turned into a real passion. I love working with fruits, herbs, and natural ingredients to create mocktails, smoothies, and soft drinks that are easy but full of flavor.
Growing up, Nesquik milkshakes were my favorite summertime treat. I’d watch my grandmother blend cold milk with that distinctive chocolate powder, and the transformation seemed like pure magic. Years later, I realized that perfecting this simple recipe meant understanding the balance between powder ratio, milk temperature, and blending technique. Through countless experiments in my kitchen, I’ve learned how to elevate this childhood favorite into something truly exceptional while keeping it effortlessly simple.
Recipe Overview
| Prep Time | Cook Time | Total Time | Servings | Difficulty | Cuisine |
|---|---|---|---|---|---|
| 5 minutes | 0 minutes | 5 minutes | 2 servings | Very Easy | American |
Why This Recipe Works
I discovered that the magic of a perfect Nesquik milkshake lies in the precise ratio of powder to milk and the order in which ingredients hit the blender. When you add Nesquik powder first, it disperses evenly throughout the cold milk, creating a smooth, consistent texture without any gritty residue. The cold milk temperature is absolutely crucial because it transforms the drink from lukewarm to truly refreshing in seconds.
From my experience making hundreds of these milkshakes, I’ve learned that ice quantity determines whether you get a drinkable beverage or a frozen slush. Too little ice and your shake lacks that signature thick, creamy mouthfeel. Too much ice and you’re essentially drinking a Slurpee instead of a milkshake. The sweet spot is one full cup of ice for every two servings, which gives you that perfect balance of cold, creamy texture.
What makes this particular method work so well is that it respects the chemistry of chocolate powder. Nesquik contains sugar and cocoa solids that need proper hydration. By using cold milk and blending for exactly 45 seconds, you achieve complete dissolution without overworking the mixture, which can create air bubbles that lighten the shake’s luxurious mouthfeel.
Ingredients
| Ingredient | Quantity | Notes |
|---|---|---|
| Nesquik Powder (Chocolate) | 3 tablespoons | Use original chocolate flavor for classic taste. For extra richness, use rich chocolate variety. Double-check ingredient list for allergens. |
| Whole Milk | 2 cups (cold) | Whole milk creates creamier texture than skim. For lighter version, use 2% milk. For dairy-free option, substitute with cashew or oat milk. |
| Ice Cubes | 1 cup | Use crushed ice for smoother consistency. Standard ice cubes work fine. Avoid pre-melted or cloudy ice. |
| Vanilla Extract (Optional) | 1/2 teaspoon | Enhances chocolate flavor depth. Omit if you prefer pure chocolate taste. Use pure vanilla extract for best results. |
| Whipped Cream (Topping) | 2 tablespoons per serving | Optional garnish for presentation. Store-bought or homemade both work. Use aerosol whipped cream for quick assembly. |
Step-by-Step Instructions
Preparation Phase
- Gather all ingredients and ensure milk is cold from the refrigerator for at least two hours before blending.
- Fill a tall blender pitcher with one cup of ice cubes, breaking larger pieces if necessary.
- Pour two cups of cold milk directly into the blender over the ice.
Blending Phase
- Add exactly three tablespoons of Nesquik chocolate powder directly into the blender with milk and ice.
- Add one half teaspoon of vanilla extract for enhanced chocolate flavor if desired.
- Cover the blender with the lid, securing it firmly before starting the motor.
- Blend on high speed for exactly 45 seconds until chocolate powder fully dissolves and mixture reaches uniform consistency.
- Stop the blender and check mixture by looking through the side to ensure no powder residue remains visible on the bottom.
Serving Phase
- Pour the Nesquik milkshake equally into two tall glasses, filling each glass three-quarters full.
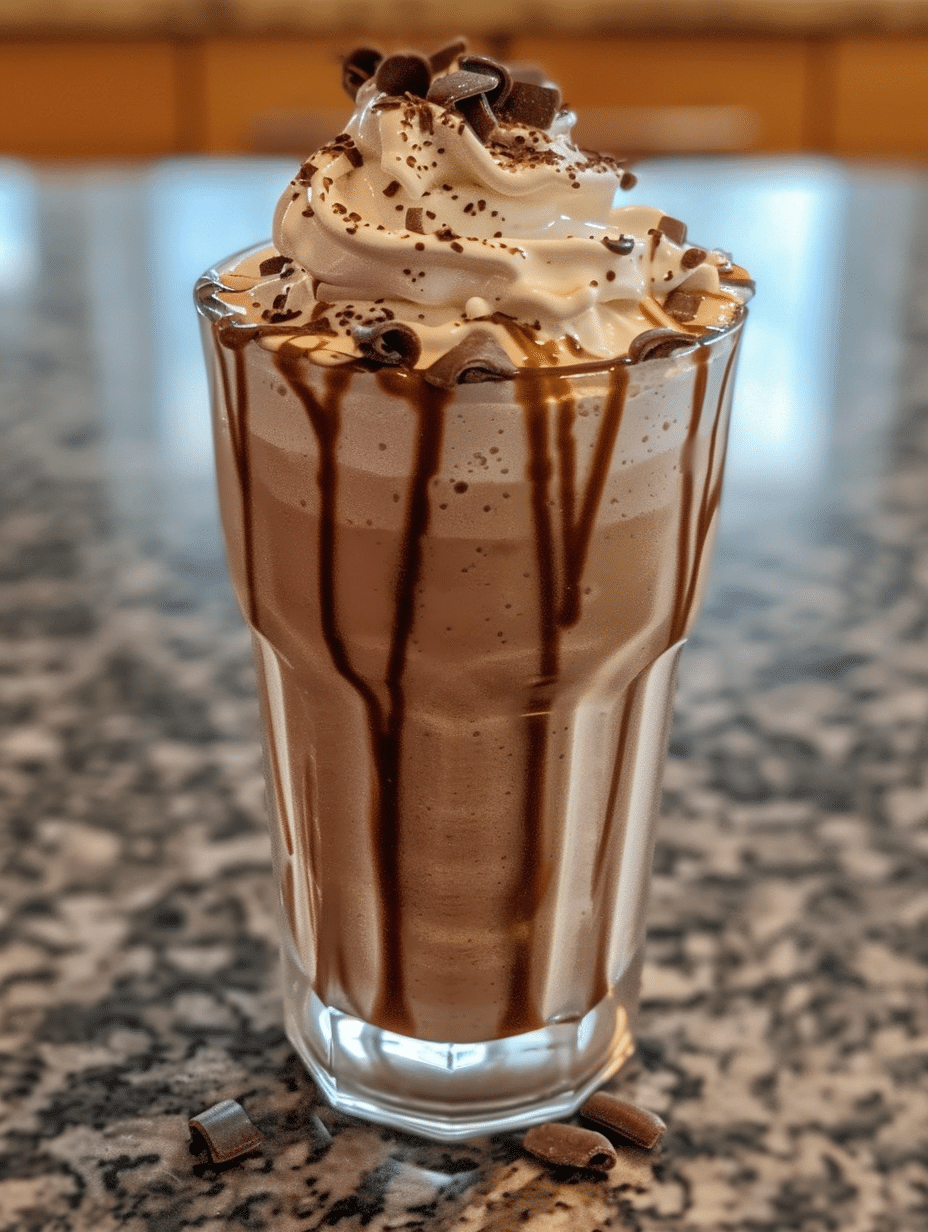
- Top each shake with a generous dollop of whipped cream for a classic presentation.
- Insert a tall milkshake straw into each glass and serve immediately while the shake is still perfectly cold.
Chef Tips for Perfect Results
- Temperature matters more than you’d think: use milk that has been refrigerated for at least two hours, and never use room-temperature milk, as this dramatically reduces the shake’s thickness and cooling power.
- Don’t skip the vanilla extract if you want that professional milkshake shop flavor; just one-half teaspoon adds incredible depth to the chocolate without making the shake taste like vanilla.
- Blend for exactly 45 seconds, not longer, because over-blending incorporates too much air and creates a lighter, less luxurious texture that lacks the signature creamy mouthfeel.
- Measure Nesquik powder with a tablespoon and level it off with a knife rather than scooping directly from the container, which compacts the powder and throws off your ratio.
- Use crushed ice instead of cubes when possible because smaller pieces blend more evenly and create a smoother final texture without requiring extra blending time.
- Serve immediately after blending because letting the shake sit allows ice to melt, causing the mixture to separate and become thinner than intended.
Common Mistakes to Avoid
Mistake 1: Using warm or room-temperature milk. Warm milk compromises the entire structure of your milkshake because the shake depends on cold temperature to maintain thickness and provide that refreshing contrast to the sweet chocolate. Fix this by refrigerating your milk for at least two hours before blending and keeping it in a cold location until the moment you use it.
Mistake 2: Adding too much Nesquik powder without adjusting milk volume. Excessive powder creates a grainy, overly thick shake that coats your mouth unpleasantly and tastes almost chalky. Stick to exactly three tablespoons of powder per two cups of milk, which maintains proper ratio and ensures smooth chocolate flavor without texture issues.
Mistake 3: Blending for too long or at too high a speed initially. Over-blending incorporates excessive air into the mixture, making your shake frothy and light instead of dense and creamy like professional milkshakes. Always blend for exactly 45 seconds on high speed, then stop immediately to check consistency.
Mistake 4: Forgetting to secure the blender lid properly before starting. A loose lid causes the shake to spray everywhere and creates a dangerous mess that wastes your ingredients and frustrates the entire process. Always press the lid down firmly until you hear or feel it click into place.
Mistake 5: Letting the shake sit before serving. Even a few minutes of sitting allows ice to melt and the shake to separate, becoming thinner and less satisfying with each passing minute. Always serve within one minute of blending for maximum thickness and cold temperature.
Variations and Substitutions
| Ingredient | Substitution | Impact on Flavor |
|---|---|---|
| Whole Milk | Oat Milk or Cashew Milk | Creates slightly nuttier undertone while maintaining creaminess. Dairy-free option perfect for vegan diets. |
| Whole Milk | 2% Milk | Lighter texture with less richness. Slightly less creamy but still satisfying. Better for lighter serving preference. |
| Nesquik Chocolate | Nesquik Rich Chocolate | Deeper, more intense chocolate flavor. Perfect for serious chocolate lovers who want maximum cocoa presence. |
| Vanilla Extract | Almond Extract (1/4 teaspoon) | Adds subtle almond notes that complement chocolate beautifully. Use sparingly to avoid overpowering chocolate. |
| Ice Cubes | Frozen Banana Slices | Adds natural sweetness and creamier texture. Creates thicker shake without dilution as ice melts. |
| Whipped Cream Topping | Chocolate Whipped Cream | Intensifies chocolate experience. Makes shake feel more decadent and restaurant-quality. |
Serving Suggestions and Pairings
Serve your Nesquik milkshake at a family gathering with warm chocolate chip cookies for a truly indulgent treat that appeals to all ages. This classic combination works perfectly because the cookies’ crispy texture provides a satisfying contrast to the shake’s smooth, creamy mouthfeel. For a birthday party, make multiple Nesquik milkshakes in large batches and serve them in a beverage station where guests can customize with whipped cream, chocolate chips, or sprinkles.
Pair a Nesquik milkshake with classic American diner fare like burgers, french fries, and sandwiches for an authentic retro experience that transports you back to the 1950s. The cool, creamy shake perfectly balances the richness of fried foods and cuts through savory flavors with its sweet chocolate profile. For afternoon tea time, serve smaller portions of Nesquik milkshake with scones and berries, creating a modern twist on traditional refreshments that kids absolutely love.
During hot summer months, serve Nesquik milkshakes at backyard barbecues as a cooling dessert drink that requires no cooking and takes just minutes to prepare. The shake’s sweet chocolate flavor complements grilled foods without competing for attention. For a movie night at home, make Nesquik milkshakes for the whole family and serve them in vintage glass milkshake glasses with fun striped straws for a cinema experience.
Storage and Reheating
| Method | Duration | Instructions |
|---|---|---|
| Immediate Serving | Best within 1 minute | Blend and serve immediately while shake is ice-cold and perfectly thick. This maintains ideal texture and temperature. |
| Refrigerator Storage | Up to 2 hours | Cover shake with plastic wrap and refrigerate. Shake will gradually separate and become thinner as ice melts. Re-blend for 15 seconds if needed before serving. |
| Freezer Storage (Pre-Made Mix) | Up to 1 week | Combine milk and Nesquik powder in airtight container but do NOT add ice. When ready, thaw in refrigerator and blend with fresh ice. |
| Freezer as Popsicle | Up to 2 weeks | Pour blended shake into popsicle molds immediately after blending. Freeze for 6-8 hours until completely solid. Perfect frozen treat variation. |
Nutritional Information
Approximate values per serving (one milkshake from recipe serving 2)
| Nutrient | Amount per Serving |
|---|---|
| Calories | 220 calories |
| Protein | 8 grams |
| Fat | 8 grams |
| Carbohydrates | 32 grams |
| Sugars | 28 grams |
| Fiber | 0 grams |
| Sodium | 180 milligrams |
| Calcium | 300 milligrams |
These values come from standard Nesquik powder nutrition facts and whole milk composition. Values vary slightly depending on specific milk brand and Nesquik variety used. This information is approximate and for reference only.
Frequently Asked Questions
Can I make a Nesquik milkshake without a blender?
Yes, you can make a Nesquik milkshake without a blender using a mason jar and vigorous shaking. Pour cold milk and Nesquik powder into a mason jar with ice, seal the lid tightly, and shake vigorously for two to three minutes until powder dissolves completely. The result will be slightly less smooth than blended version but still delicious and satisfying.
What’s the difference between a Nesquik milkshake and a chocolate milk?
A Nesquik milkshake includes ice blended with milk and Nesquik powder, creating a thick, creamy texture perfect for sipping with a straw. Chocolate milk is simply Nesquik powder stirred into cold milk without ice, resulting in a thinner, more liquid beverage. Milkshakes are dessert drinks while chocolate milk is a breakfast or snack beverage.
How do I make my Nesquik milkshake thicker?
Increase the amount of ice to one and one-half cups and reduce milk to one and three-quarter cups for a noticeably thicker shake. Alternatively, add one-half frozen banana or use frozen milk cubes instead of regular ice. Blend for the full 45 seconds to ensure complete incorporation without creating excess air.
Can I prepare Nesquik milkshake ingredients ahead of time?
Yes, you can mix milk and Nesquik powder in advance and store covered in the refrigerator for up to two hours before adding ice and blending. This works well for meal prep or party planning. However, add ice only immediately before blending to maintain proper texture and prevent dilution.
Is Nesquik milkshake safe for people with dairy allergies?
No, traditional Nesquik milkshake contains milk which is unsuitable for dairy-allergic individuals. However, you can substitute regular milk with dairy-free alternatives like oat milk, cashew milk, almond milk, or coconut milk while keeping everything else identical. Always check Nesquik powder ingredient label for potential dairy cross-contamination.
What type of blender works best for making Nesquik milkshakes?
A standard counter-top blender with at least 500 watts of power handles Nesquik milkshakes perfectly. Immersion blenders work but produce less smooth results and require more effort. High-powered blenders like Vitamix create exceptionally smooth texture but aren’t necessary for this simple recipe.
Final Thoughts on Nesquik Milkshakes
Making the perfect Nesquik milkshake comes down to respecting three key principles: proper milk temperature, correct powder ratio, and precise blending time. From my years of experimenting at Fresh Recipes Corner, I can confidently say that this simple recipe delivers restaurant-quality results every single time when you follow the instructions exactly. Whether you’re introducing your kids to this classic treat or revisiting a childhood favorite, your homemade Nesquik milkshake will taste like pure chocolate heaven.
Nesquik Milkshake
Equipment
- blender
- measuring spoons
- measuring cup
- tall serving glasses
Ingredients
- 3 tbsp Nesquik chocolate powder
- 2 cups cold whole milk
- 1 cup ice cubes
- 1/2 tsp vanilla extract (optional)
- 4 tbsp whipped cream, for topping
Instructions
- Gather all ingredients and ensure the milk has been refrigerated for at least two hours.
- Add one cup of ice cubes to a blender pitcher.
- Pour two cups of cold milk into the blender over the ice.
- Add three tablespoons of Nesquik chocolate powder.
- Add one-half teaspoon vanilla extract if using.
- Secure the blender lid firmly before blending.
- Blend on high speed for exactly 45 seconds until smooth and fully combined.
- Check that no chocolate powder remains visible at the bottom of the blender.
- Pour the milkshake evenly into two tall glasses.
- Top each milkshake with whipped cream.
- Serve immediately with a straw while cold.