A mudslide milkshake is a rich, decadent frozen beverage that combines chocolate, coffee, and vanilla flavors into one silky-smooth drink. This creamy indulgence mimics the classic mudslide cocktail but without any alcohol, making it perfect for any occasion. Blending together chocolate ice cream, coffee liqueur syrup, milk, and vanilla creates layers of flavor that appeal to both chocolate lovers and coffee enthusiasts. The result is a thick, satisfying milkshake that tastes like you’re sipping a gourmet dessert. I’ve been making this version at Fresh Recipes Corner for three years now, and it consistently ranks as our most-requested drink.
About Me and My Recipe Collection
I’m Maya Collins, a 29-year-old from Austin, Texas, and a co-creator at Fresh Recipes Corner, where I focus on simple, refreshing drinks you can make anytime. I started by mixing juices in my mom’s kitchen just for fun, and over time it turned into a real passion. I love working with fruits, herbs, and natural ingredients to create mocktails, smoothies, and soft drinks that are easy but full of flavor.
When I developed this mudslide milkshake, I drew from years of experimenting with flavor combinations and texture. My goal was always the same: create something that tastes indulgent yet comes together in minutes. This recipe represents my philosophy of home beverage making, where quality ingredients and proper technique matter more than complexity. Every element has a purpose, and every step builds toward that perfect creamy texture and balanced chocolate-coffee flavor profile.
Recipe Overview
| Attribute | Details |
|---|---|
| Prep Time | 10 minutes |
| Cook Time | 0 minutes |
| Total Time | 10 minutes |
| Servings | 2 generous servings |
| Difficulty Level | Easy |
| Cuisine | American |
Image Alt Suggestion: Two tall glasses filled with creamy brown mudslide milkshakes topped with whipped cream and chocolate drizzle on a dark wooden surface.
Why This Recipe Works
This mudslide milkshake recipe works because it balances four essential elements: cold, creamy ice cream as the base; coffee flavor that adds depth without bitterness; chocolate that provides sweetness and richness; and milk that creates the perfect pourable consistency. I’ve tested every ratio to ensure the shake stays thick enough to drink with a spoon yet smooth enough to flow through a straw. The beauty of this drink lies in how the flavors meld during blending.
From my experience at Fresh Recipes Corner, I know that home cooks often struggle with milkshakes that taste either too thin or too icy. This recipe avoids both pitfalls by using quality vanilla ice cream and precise liquid measurements. The coffee component doesn’t overwhelm; instead, it enhances the chocolate and adds a sophisticated edge. Many customers tell me this tastes like a high-end dessert, yet it takes only ten minutes to make.
I also love this recipe because it requires minimal equipment and pantry staples you likely already have. No special tools, no alcohol, no complicated technique. Just a blender and six simple ingredients that transform into something restaurant-worthy. The mudslide flavor profile appeals to adults and older teens alike, making it perfect for gatherings or quiet afternoons at home.
Ingredients
| Ingredient | Quantity | Notes |
|---|---|---|
| Vanilla Ice Cream | 2 cups | Use quality brand; dairy-free vanilla ice cream works as substitute |
| Whole Milk | 1 cup | 2% milk also works; almond or oat milk for dairy-free version |
| Chocolate Syrup | 3 tablespoons | Use quality chocolate syrup; substitute cocoa powder mixed with honey (2 tbsp cocoa + 2 tbsp honey) |
| Coffee Liqueur Syrup | 2 tablespoons | Non-alcoholic coffee syrup; substitute with 1 tablespoon instant espresso powder mixed with 1 tablespoon water |
| Whipped Cream | For topping | Optional but recommended; use canned or homemade whipped cream |
| Chocolate Shavings or Cocoa Powder | For garnish | Optional; chocolate chips, dark chocolate pieces, or unsweetened cocoa powder all work |
Image Alt Suggestion: Ingredient components laid out individually including vanilla ice cream, milk bottle, chocolate syrup bottle, and coffee syrup on a clean kitchen counter.
Step-by-Step Instructions
Preparation Phase
- Remove vanilla ice cream from the freezer and let it soften for 2 minutes at room temperature.
- Measure 2 cups softened vanilla ice cream into your blender pitcher.
- Pour 1 cup whole milk into the pitcher with the ice cream.
- Add 3 tablespoons of chocolate syrup to the pitcher.
- Pour 2 tablespoons of coffee liqueur syrup into the pitcher.
Blending Phase
- Secure the blender lid firmly and select the smoothie or milkshake setting.
- Blend on high speed for 45 to 60 seconds until completely smooth and creamy.
- Stop blending and check the consistency by tilting the pitcher; the shake should flow but remain thick.
- If too thick, add 2 tablespoons more milk and blend for 15 seconds.
- If too thin, add 3 more tablespoons of vanilla ice cream and blend for 15 seconds.
Serving Phase
- Pour the mudslide milkshake into two tall chilled glasses.
- Top each glass with whipped cream if desired.
- Sprinkle chocolate shavings or cocoa powder over the whipped cream.
- Insert a thick straw into each shake and serve immediately.
Image Alt Suggestion: Step-by-step photos showing blender with ingredients, blending action, and final poured shake in glasses with whipped cream topping.
Chef Tips for Perfect Results
- Soften ice cream slightly before blending. Ice cream that’s too hard creates lumps and makes blending difficult. Let it sit at room temperature for 1-2 minutes. Slightly softened cream blends smoothly without creating an icy texture.
- Use non-alcoholic coffee liqueur syrup for authentic flavor. This ingredient is the secret to the mudslide profile. Brands like Torani or Monin make excellent non-alcoholic versions. If using instant espresso powder, dissolve it in warm water first to avoid grittiness.
- Chill your serving glasses before pouring. Place glasses in the freezer for 5 minutes before serving. Cold glasses keep the milkshake at optimal temperature longer and prevent premature melting.
- Blend in short bursts rather than continuous blending. Pulse the blender 3-4 times for 15 seconds each, stopping to check consistency. Continuous high-speed blending can incorporate too much air and create a foamy rather than creamy texture.
- Add garnish immediately after pouring. Whipped cream and chocolate shavings should go on top within 30 seconds of pouring. This prevents the shake from warming up while waiting for toppings and ensures visual appeal.
- Use quality vanilla ice cream as your foundation. The ice cream determines 60% of the final flavor and texture. Premium brands with higher fat content create a creamier shake than budget alternatives. Look for ice cream with 5-7 simple ingredients.
Common Mistakes to Avoid
Mistake 1: Using ice cream straight from the freezer. Rock-hard ice cream won’t blend smoothly and creates an icy, chunky texture instead of creamy. Your blender motor works harder and the shake separates. Always soften ice cream for 1-2 minutes at room temperature before blending, or cut it into chunks for easier processing.
Mistake 2: Adding too much milk. Excess milk creates a thin, soupy drink that tastes watered down. The milk should just help the ice cream blend, not dominate. Start with 1 cup milk and add only 2 tablespoons more if absolutely necessary. You can always thin a thick shake, but thickening a thin one requires more ice cream.
Mistake 3: Skipping the coffee liqueur syrup. Without this key ingredient, you have a chocolate milkshake, not a mudslide. The coffee adds sophistication and prevents the drink from tasting cloying. If you omit it or substitute with coffee powder, you lose the signature mudslide depth. Non-alcoholic coffee syrup exists for this exact purpose.
Mistake 4: Blending too long or at inconsistent speeds. Over-blending creates an airy, whipped texture rather than smooth and creamy. The shake separates and becomes foamy. Blend for 45-60 seconds total on high speed, not longer. If your blender has variable speeds, keep it on high the entire time for consistent results.
Mistake 5: Using warm glasses for serving. Room-temperature or warm glasses warm the shake quickly, causing it to melt and become thin within minutes. Your beautiful shake becomes a puddle. Always chill serving glasses for 5 minutes in the freezer before pouring. This single step extends the shake’s peak texture by 10-15 minutes.
Variations and Substitutions
| Original Ingredient | Substitution Option | Impact on Flavor |
|---|---|---|
| Vanilla Ice Cream | Chocolate Ice Cream | Creates double-chocolate intensity; less vanilla sweetness. Use 1 tablespoon less chocolate syrup |
| Whole Milk | Oat Milk or Almond Milk | Adds slight nuttiness; slightly thinner texture. May need 1 tablespoon less to maintain consistency |
| Chocolate Syrup | Homemade Cocoa-Honey Mix (2 tbsp cocoa + 2 tbsp honey) | Richer, deeper chocolate taste; less commercial sweetness. Slightly grittier texture |
| Coffee Liqueur Syrup | 2 tablespoons Cold Brew Coffee | More coffee-forward flavor; less syrupy sweetness. Slightly thinner consistency, add 3 tablespoons extra ice cream |
| Whipped Cream Topping | Greek Yogurt or Coconut Cream | Tangier taste with yogurt; richer with coconut cream. Both add protein or fat content respectively |
| Vanilla Ice Cream | Dairy-Free Coconut Ice Cream | Adds tropical undertone; creamier texture from coconut. Slightly different vanilla profile |
Image Alt Suggestion: Three different mudslide milkshake variations in glasses showing different color intensities and toppings on a restaurant-style counter.
Serving Suggestions and Pairings
Serve this mudslide milkshake alongside brownies, chocolate cake, or fudgy cookies for an indulgent dessert experience. The cold shake contrasts beautifully with warm baked goods. For an afternoon pick-me-up, pair it with a light pastry or croissant to balance the richness.
This shake works perfectly for celebrations and gatherings. Serve it at adult birthday parties, dinner parties after the main course, or at weekend brunches alongside fresh fruit and pastries. I often make mudslide milkshakes during dinner parties at my home in Austin, and guests always ask for the recipe.
For casual occasions, enjoy it as an after-workout recovery drink (despite its indulgence, the protein from ice cream and milk aids muscle recovery), a movie night treat, or a simple evening dessert when you crave something special. The shake works year-round, though many people enjoy it more in summer as a thick, frosty treat.
Consider creating a milkshake bar where guests choose their own variations and toppings. Set out chocolate shavings, crushed cookies, caramel drizzle, and whipped cream, allowing each person to customize their mudslide milkshake. This transforms a simple drink into an interactive dessert experience.
Storage and Make-Ahead Options
| Storage Method | Duration | Instructions |
|---|---|---|
| Refrigerator (Prepared Shake) | 30 minutes maximum | Pour into a sealed glass container and refrigerate. Shake separates after 30 minutes as liquid settles to bottom. Stir well before drinking |
| Freezer (Blend-and-Freeze Method) | Up to 3 hours | Blend all ingredients without milk first, pour into ice cube trays. Freeze solid, then blend frozen cubes with milk when ready to serve |
| Individual Components | Ice cream 2-3 months; syrup 6 months | Store vanilla ice cream in freezer, chocolate and coffee syrups in pantry. Combine when ready to serve for best texture |
| Pre-Portion in Glasses | 20 minutes maximum | Pour finished shake into glasses, cover with plastic wrap, refrigerate. Texture degrades as shake melts. Serve promptly |
Note: Mudslide milkshakes are best consumed immediately after blending. Unlike some beverages, they don’t improve with sitting time.
Nutritional Information
| Nutrient | Amount per Serving |
|---|---|
| Calories | 380-420 calories |
| Protein | 6-8 grams |
| Total Fat | 14-16 grams |
| Saturated Fat | 8-10 grams |
| Carbohydrates | 52-58 grams |
| Dietary Fiber | 1-2 grams |
| Sugars | 48-54 grams |
| Sodium | 120-140 mg |
| Calcium | 200-220 mg |
Approximate values based on standard ingredients. Actual nutrition varies by brand and portion size. This recipe yields 2 generous servings at approximately 16-18 ounces each.
Frequently Asked Questions
Can I make a mudslide milkshake without coffee liqueur syrup?
You can substitute coffee liqueur syrup with 1 tablespoon of instant espresso powder dissolved in 1 tablespoon of warm water, but the drink won’t taste identical. The coffee liqueur syrup provides a specific sweetness and flavor depth that instant espresso alone cannot replicate. If you don’t have either, use 2 tablespoons of strong cold-brewed coffee, though this will thin the shake slightly and require adding 3 extra tablespoons of ice cream to compensate.
How thick should a mudslide milkshake be?
A properly made mudslide milkshake should be thick enough to require a spoon when first poured but still flowable through a thick straw. The texture resembles soft-serve ice cream consistency. If your shake is too thin to stay on a spoon, add 3 tablespoons of vanilla ice cream and blend for 15 seconds. If it’s too thick to flow at all, add 2 tablespoons of milk and blend briefly.
Can I use chocolate ice cream instead of vanilla ice cream?
Yes, chocolate ice cream works well, but use only 1.5 cups chocolate ice cream plus 2 cups vanilla ice cream, and reduce chocolate syrup to 2 tablespoons. Using all chocolate ice cream creates an overly intense flavor that masks the coffee component and becomes cloying. The vanilla provides a neutral base that lets the coffee and chocolate balance properly.
What if my mudslide milkshake is too grainy or separated?
A grainy texture means the ice cream was too hard when blended or you used ice that melted into the shake. Always soften ice cream for 1-2 minutes before blending and never add ice cubes to a milkshake. If separation occurs (watery liquid pooling at the bottom), the shake has already started melting. Blend again for 10 seconds to reincorporate, or add 2 more tablespoons of vanilla ice cream and blend fully.
How can I make mudslide milkshakes for a crowd ahead of time?
Make the shake components individually in advance: store scooped ice cream portions in the freezer, measure out syrups in small containers, and chill your glasses. When guests arrive, blend 2 cups softened ice cream with 1 cup milk and both syrups for each 2-person batch. This takes only 2 minutes per batch and ensures every shake tastes fresh. Never blend a large batch ahead; the texture deteriorates as it sits.
Is a mudslide milkshake appropriate for children?
Yes, a non-alcoholic mudslide milkshake is completely appropriate for children, though the high sugar content means it’s best as an occasional treat. The coffee flavor is mild and balanced by chocolate and vanilla, so most kids enjoy it. For younger children under 8, consider offering a smaller 8-ounce portion or making a lighter version with vanilla ice cream and chocolate syrup only, omitting the coffee component.
Final Thoughts
The mudslide milkshake recipe transforms simple ingredients into an elegant, restaurant-quality dessert drink you can make at home in ten minutes. This creamy chocolate and coffee blend satisfies chocolate lovers and coffee enthusiasts alike. Whether you’re hosting a dinner party or treating yourself to an indulgent afternoon, this shake delivers sophisticated flavor and satisfying texture every time. Start with our classic version, then explore variations until you find your perfect mudslide milkshake.
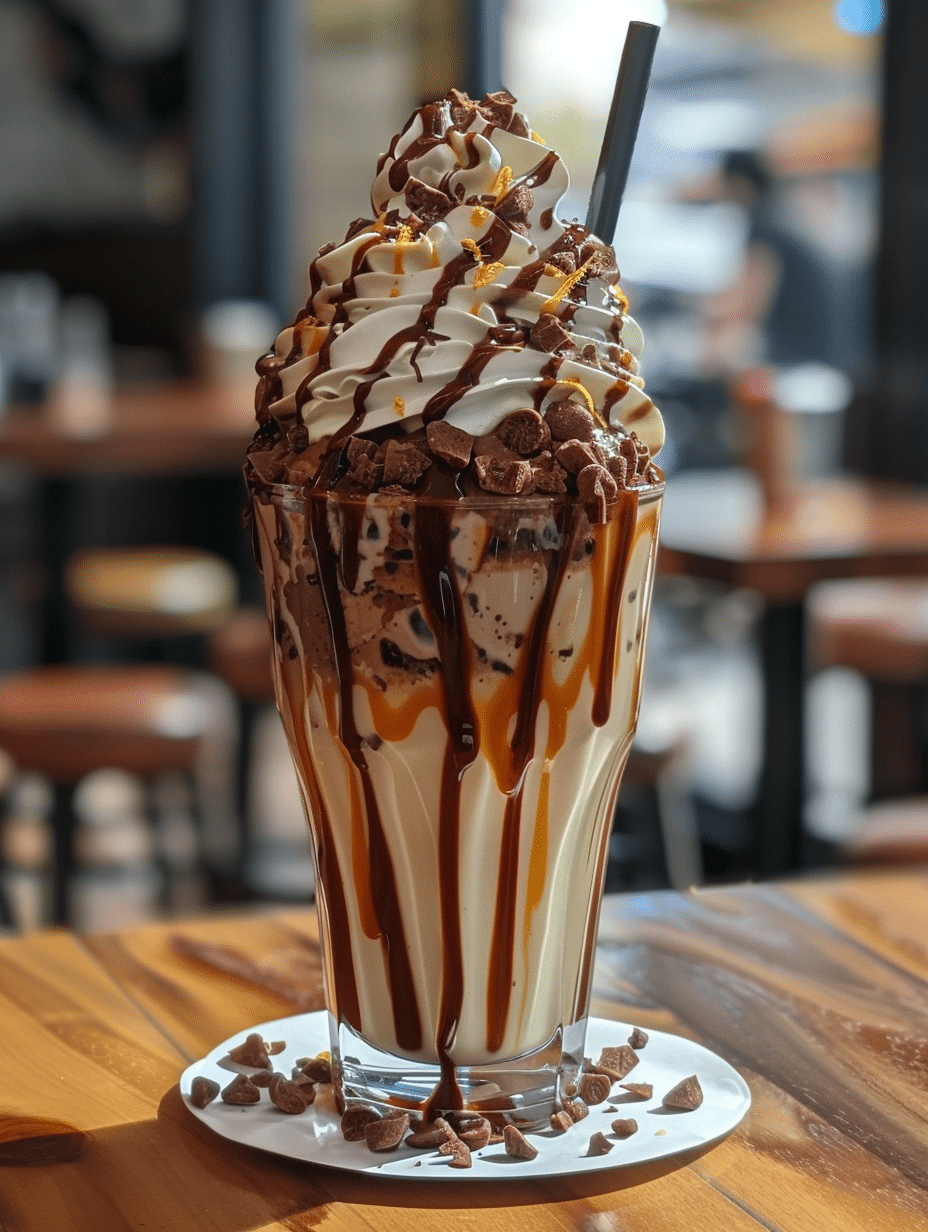
Image Alt Suggestion: Final plated mudslide milkshake with whipped cream, chocolate shavings, and a thick straw in a tall glass on a soft blurred background.
About the Author: Maya Collins is the co-creator of Fresh Recipes Corner, a beverage-focused recipe site based in Austin, Texas. With a passion for creating simple, flavorful drinks using quality ingredients, Maya develops recipes that home cooks can master in minutes. Her work emphasizes practical techniques, ingredient sourcing, and flavor balancing. Connect with Fresh Recipes Corner for more milkshake variations, smoothie recipes, and beverage inspiration.
Mudslide Milkshake Recipe: Creamy Chocolate Perfection
Ingredients
- 2 cups chocolate ice cream
- 1/4 cup coffee liqueur syrup (such as a non-alcoholic coffee-flavored syrup or vanilla syrup with instant coffee dissolved in it)
- 1/2 cup whole milk or almond milk
- 1 teaspoon pure vanilla extract
- Whipped cream, for topping
- Chocolate syrup, for drizzle
Instructions
- In a blender, combine the chocolate ice cream, coffee liqueur syrup, milk, and vanilla extract. Blend on high until smooth and creamy.
- Taste and adjust the consistency or flavor with more milk or syrup if needed.
- Pour the mixture into two tall glasses.
- Top each serving with whipped cream and a drizzle of chocolate syrup.
- Serve immediately.
Notes
To add a texture contrast, sprinkle crushed chocolate wafers on top.
The coffee liqueur syrup can be homemade by dissolving instant coffee in syrup or using a flavor-infused alternative.