
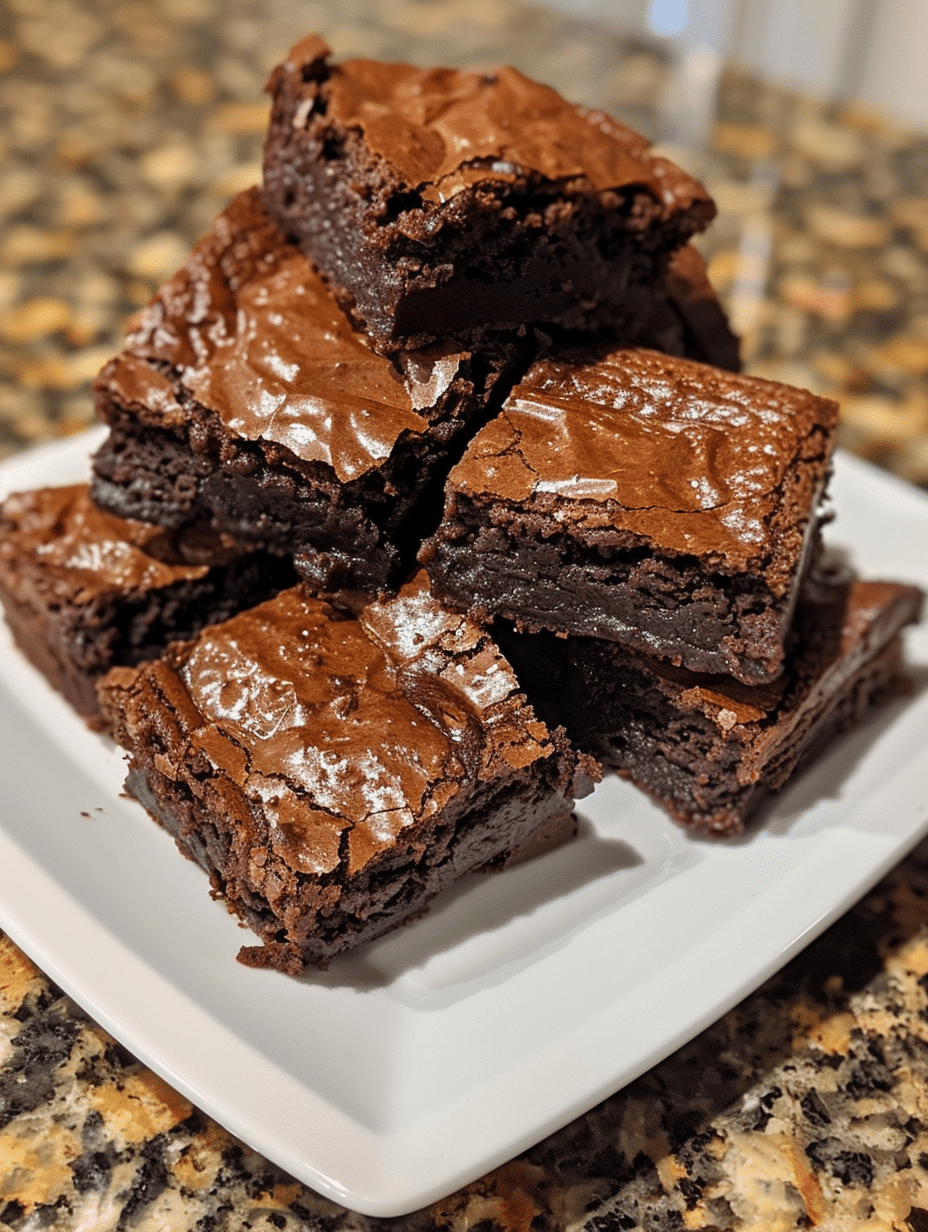
A milk chocolate brownie recipe creates dense, fudgy bars with smooth chocolate richness and a tender crumb throughout. This recipe combines melted milk chocolate, butter, and simple pantry staples to deliver brownies that rival bakery quality without special equipment. The result is a homemade dessert that stays moist for days and satisfies any chocolate craving with authentic bakery flavor and texture.
About Me: Your Guide to Perfect Brownies
I’m Lila Bennett, a 34-year-old home baker based in Portland, Oregon, and my kitchen is almost always filled with the smell of something sweet. I fell in love with baking as a kid, sneaking tastes of cookie dough and watching simple ingredients turn into something comforting and delicious. What started with slightly overbaked cookies turned into years of experimenting with cakes, pancakes, and all kinds of desserts—learning through trial, error, and a lot of taste-testing.
Over fifteen years of baking, I’ve perfected countless brownie recipes, but milk chocolate brownies hold a special place in my heart. They’re approachable for beginners yet impressive enough for entertaining. I’ve tested this formula dozens of times, adjusting ratios and techniques to create brownies that are consistently fudgy, never cake-like, and always crowd-pleasing. My version skips unnecessary steps while maintaining professional results.
Recipe Overview
| Attribute | Details |
|---|---|
| Prep Time | 15 minutes |
| Cook Time | 28 minutes |
| Total Time | 43 minutes (plus cooling) |
| Servings | 16 brownies |
| Difficulty | Easy to Intermediate |
| Cuisine | American Dessert |
Why This Recipe Works
This milk chocolate brownie recipe succeeds because it balances structure with moisture through precise ingredient ratios. The combination of melted butter and quality milk chocolate creates a naturally fudgy crumb without requiring excessive cocoa powder or complicated techniques. I discovered that using both eggs as a binder and incorporating just enough flour creates brownies that are dense yet tender, never gummy or overly cakey.
What makes this formula reliable is the straightforward one-bowl mixing method I developed after testing numerous approaches. Unlike recipes requiring double boilers or multiple steps, this approach melts chocolate and butter together in minutes using gentle heat. The result delivers consistent texture every single time, whether you’re a beginner or experienced baker. I’ve taught this recipe to friends and family members who claimed they couldn’t bake, and they’ve all succeeded with beautiful results.
The baking temperature and time are calibrated to pull brownies from the oven when they’re still slightly underbaked in the center. This technique ensures they continue cooking residually as they cool, setting to perfect fudgy texture rather than drying out. After years of experimenting, I’ve found that 325°F for 28 minutes is the ideal sweet spot for milk chocolate brownies in a standard 8×8 pan.
Ingredients
| Ingredient | Quantity | Notes and Alternatives |
|---|---|---|
| Milk chocolate | 8 oz (about 1.5 cups chips) | Use chopped bars or chips. Avoid melting chocolate chips with wax coating—choose quality couverture or break bars into pieces. |
| Unsalted butter | 6 oz (1.5 sticks or 170g) | Room temperature works best. Salted butter acceptable if you omit the salt addition. |
| Granulated sugar | 1 cup (200g) | Brown sugar adds chewiness and deeper flavor; use 3/4 cup dark brown sugar plus 1/4 cup granulated. |
| Large eggs | 2 eggs | Room temperature ensures smooth incorporation. Cold eggs can cause lumps. |
| Vanilla extract | 1 teaspoon | Use pure vanilla only. Imitation works in a pinch but lacks depth. |
| All-purpose flour | 3/4 cup (90g) | Measure by spooning into cup then leveling. Do not pack. For gluten-free, use 1-to-1 gluten-free flour blend. |
| Unsweetened cocoa powder | 1/4 cup (25g) | Dutch-processed cocoa adds depth; natural cocoa is slightly more acidic and bright. |
| Baking powder | 1/2 teaspoon | Creates slight rise and prevents dense texture. Do not omit. |
| Fine sea salt | 1/2 teaspoon | Enhances chocolate flavor and balances sweetness. Kosher salt works; use slightly less due to larger crystals. |
Step-by-Step Instructions
Phase 1: Prepare and Preheat
- Preheat your oven to 325°F and position the rack to the center. Line an 8×8-inch baking pan with parchment paper, allowing edges to overhang by 1 inch on two sides for easy removal later.
- Chop the milk chocolate into small, evenly-sized pieces about the size of chocolate chips. Breaking chocolate bars into chunks ensures faster, more even melting.
Phase 2: Melt and Combine
- Combine chopped milk chocolate and unsalted butter in a medium heatproof bowl. Place the bowl over a pot of gently simmering water (double boiler method), ensuring the bowl bottom doesn’t touch the hot water.
- Stir the chocolate and butter frequently with a silicone spatula until completely melted and smooth, about 5 minutes. Remove from heat and let cool for 2 minutes.
- Add granulated sugar to the melted chocolate mixture and stir vigorously for 1 minute. This initial mixing incorporates air and begins dissolving the sugar slightly.
Phase 3: Build the Batter
- Crack the eggs into a small bowl and whisk them together gently until the whites and yolks are just combined. Add eggs to the chocolate mixture one at a time, stirring thoroughly after each addition until no streaks remain.
- Stir in vanilla extract completely. The batter should look smooth and glossy at this stage.
- In a separate small bowl, whisk together the all-purpose flour, unsweetened cocoa powder, baking powder, and fine sea salt. Stir this dry mixture into the chocolate batter gently until just combined, about 15-20 strokes.
- Pour the batter into your prepared 8×8-inch pan and smooth the top with a spatula or offset knife. The batter should spread evenly and be about 1 inch thick.
Phase 4: Bake and Cool
- Bake in the preheated 325°F oven for 28 minutes, until a toothpick inserted into the center comes out with a few moist crumbs attached—not clean, but not completely wet either. The top should look set but slightly soft.
- Remove the brownies from the oven and let them rest in the pan at room temperature for 10 minutes. This allows the structure to set slightly without continuing to cook.
- Lift the entire brownie block from the pan using the parchment overhang and transfer to a wire cooling rack. Let cool completely, about 45 minutes, before cutting into 16 squares using a sharp knife and a gentle sawing motion.
Chef Tips for Perfect Results
- Use quality milk chocolate with at least 30% cocoa solids for authentic flavor and proper melting behavior. Grocery store chocolate chips formulated with wax often don’t melt into a smooth, silky texture.
- Ensure eggs are at room temperature by removing them from the refrigerator 30 minutes before baking. Cold eggs won’t incorporate smoothly and can create lumpy batter with uneven texture.
- Avoid overmixing the batter after adding flour. Stop stirring as soon as you see no more white streaks. Overmixing develops gluten, creating tough, cakey brownies instead of fudgy ones.
- Insert your toothpick test into the exact center of the brownie pan, not near the edges where brownies are more cooked. This ensures accurate doneness assessment for that perfect fudgy center.
- Cool brownies completely before cutting for clean edges without crumbling. A sharp knife dipped in hot water and wiped clean between each cut prevents dragging and tearing.
- Store cooled brownies in an airtight container at room temperature for up to five days. This allows them to continue settling and may actually improve texture and moisture distribution.
Common Mistakes to Avoid
Mistake 1: Overbaking
Baking brownies past 30 minutes creates a cake-like texture instead of fudgy centers. Fix this by checking at 25 minutes and removing brownies when a toothpick shows moist crumbs, trusting residual heat to finish cooking as they cool. Set a timer and check early rather than risk overdone brownies that can’t be salvaged.
Mistake 2: Using Low-Quality Chocolate
Cheap chocolate containing wax and additives won’t melt smoothly and produces grainy, waxy brownies lacking authentic chocolate flavor. Purchase chocolate from the baking section or specialty stores, reading labels to confirm cocoa butter as the fat source. This single change dramatically improves final results.
Mistake 3: Mixing Wet and Dry Ingredients Too Thoroughly
Vigorous stirring after adding flour develops gluten networks that toughen brownies significantly. Mix dry ingredients into wet batter using only 15-20 gentle strokes until no white flour streaks remain. Some small lumps are acceptable and actually desirable for maintaining fudgy texture.
Mistake 4: Cutting Brownies While Warm
Slicing warm brownies causes them to crumble and fall apart because the structure hasn’t fully set. Always wait until brownies cool completely to room temperature, then at least one hour more if possible. This patience results in clean, attractive squares that look as good as they taste.
Mistake 5: Skipping the Parchment Paper
Baking without parchment causes brownies to stick stubbornly to the pan, resulting in torn, crumbly pieces. Line your pan generously with parchment, allowing a 1-inch overhang on two opposite sides. This creates convenient handles for lifting the entire batch out at once.
Variations and Substitutions
| Ingredient | Substitution | Impact on Flavor |
|---|---|---|
| Milk chocolate | Dark chocolate (50-60% cocoa) or white chocolate | Dark chocolate creates deeper, more intense flavor. White chocolate produces milder, sweeter brownies that appeal to younger palates. |
| All-purpose flour | 1-to-1 gluten-free flour blend or almond flour (use 2/3 cup) | Gluten-free blend maintains similar texture. Almond flour creates nuttier, denser brownies with grittier crumb. |
| Granulated sugar | Brown sugar (use 3/4 cup packed) or coconut sugar | Brown sugar increases chewiness and adds molasses depth. Coconut sugar creates slightly earthier notes and reduces sweetness perception slightly. |
| Vanilla extract | Espresso powder (1/2 teaspoon) or almond extract (3/4 teaspoon) | Espresso amplifies chocolate notes dramatically without tasting like coffee. Almond extract adds subtle nutty flavor that complements milk chocolate. |
| Cocoa powder | Additional melted milk chocolate (1 oz) or omit entirely | Extra chocolate intensifies flavor richness. Omitting cocoa powder creates sweeter, less complex brownies but maintains fudgy texture. |
| Butter | Coconut oil or vegetable oil (use slightly less, about 5 oz) | Coconut oil adds subtle tropical notes and creates slightly lighter crumb. Vegetable oil produces identical texture but neutral flavor. |
Serving Suggestions and Pairings
Serve milk chocolate brownies at room temperature with cold whole milk or hot black coffee for classic pairings that complement the chocolate’s richness. The brownie’s fudgy center contrasts beautifully with coffee’s slight bitterness, creating balanced flavor profiles.
For elegant entertaining, plate individual brownies with a quenelle of vanilla ice cream and a light drizzle of salted caramel sauce. This presentation elevates simple brownies into restaurant-quality desserts suitable for dinner parties or holiday gatherings. The cold ice cream melts into warm brownie centers, intensifying the fudgy experience.
Pack brownies in boxes or gift bags for thoughtful homemade presents during the holiday season. Include a handwritten note suggesting serving suggestions or storing tips. Friends and family appreciate the personal touch and authentic homemade quality far more than store-bought alternatives.
Pair brownies with fresh raspberries or strawberries to cut through richness with bright acidity. The fruit’s tartness and juiciness provide textural contrast and palate cleansing between bites, making brownies feel lighter and more balanced.
Serve brownies at bake sales, potlucks, or picnics where handheld desserts are practical. Their sturdy structure holds up well during transport, and their crowd-pleasing chocolate flavor appeals to broad audiences regardless of age or preference.
Storage and Reheating
| Method | Duration | Instructions |
|---|---|---|
| Room Temperature Container | 5 days | Store cut brownies in an airtight container or resealable bag. Layer with parchment paper between pieces if stacking. Keep away from direct sunlight and heat sources. |
| Refrigerator | 10 days | Place brownies in an airtight container on a middle shelf. Cold temperatures slow oxidation and preserve moisture longer than room temperature storage. |
| Freezer (Uncut) | 3 months | Wrap the entire brownie block tightly in plastic wrap, then aluminum foil. Label with the date. Thaw at room temperature for 2 hours before slicing and serving. |
| Freezer (Individual Brownies) | 3 months | Wrap each brownie individually in plastic wrap and place in a freezer bag. Remove portions as needed and thaw at room temperature for 30 minutes for quick access to fresh brownies. |
| Microwave Reheating | N/A | Place one brownie on a microwave-safe plate and heat for 15-20 seconds at 50% power. This restores fudgy texture and warmth without overcooking or creating hot spots. |
| Oven Reheating | N/A | Place brownies on a baking sheet and warm in a 300°F oven for 5-8 minutes. This method gently restores moisture and texture better than microwave reheating. |
Nutritional Information
Approximate values per brownie serving (recipe makes 16 brownies):
| Nutrient | Amount per Serving |
|---|---|
| Calories | 215 cal |
| Total Fat | 12g |
| Saturated Fat | 7g |
| Cholesterol | 28mg |
| Sodium | 95mg |
| Total Carbohydrates | 28g |
| Dietary Fiber | 1g |
| Sugars | 24g |
| Protein | 3g |
Note: Nutritional information is calculated using standard USDA ingredient databases and may vary based on specific brands and precise measurements used.
Frequently Asked Questions
Can I substitute dark chocolate for milk chocolate in this brownie recipe?
Yes, dark chocolate works well as a direct substitute using the same 8-ounce quantity. The result will be darker, more intensely chocolatey brownies with slightly less sweetness than milk chocolate versions. Use dark chocolate between 50-65% cocoa content for best results, as anything higher than 70% creates bitter, overly strong brownies that may overpower other flavors.
How do I know when milk chocolate brownies are done baking?
Insert a toothpick into the exact center of the brownie pan at the 28-minute mark. The brownies are done when the toothpick comes out with a few moist crumbs clinging to it, but not completely wet batter. The surface should look set but still soft to the touch, indicating residual cooking will occur as the brownies cool.
Why are my brownies coming out cakey instead of fudgy?
Cakiness results from overbaking, using too much flour, or overmixing after adding flour. Measure flour by spooning into a cup and leveling without packing, mix dry ingredients minimally until just combined, and remove brownies when a toothpick shows moist crumbs rather than clean. If you’ve been baking longer than 30 minutes, your oven may run hot and you should reduce temperature by 10-15 degrees.
Can I make milk chocolate brownies ahead of time for a party?
Brownies can be baked up to three days ahead and stored in an airtight container at room temperature or five days in the refrigerator. For longer storage, wrap cooled brownies tightly in plastic wrap and freeze for up to three months. Thaw frozen brownies at room temperature for two hours before serving, which actually refreshes their fudgy texture.
What’s the best way to cut brownies for clean, attractive squares?
Allow brownies to cool completely to room temperature, then refrigerate for at least one hour before cutting. Use a sharp chef’s knife dipped in hot water and wiped clean between each cut. Cut slowly with a gentle sawing motion rather than pressing down, which prevents dragging and tearing the delicate structure.
Can I add mix-ins like nuts or chocolate chunks to this recipe?
You can add up to one cup total of mix-ins such as chopped walnuts, pecans, white chocolate chips, or dark chocolate chunks without significantly altering bake time. Fold mix-ins into the batter just before pouring into the pan. Note that nuts add texture but can sometimes burn slightly at the edges, so use raw nuts rather than roasted for better flavor control.
Final Thoughts
This milk chocolate brownie recipe delivers bakery-quality results using straightforward techniques and accessible ingredients. The fudgy centers, rich chocolate flavor, and tender crumb make these brownies perfect for everyday indulgence or special occasions. Follow the precise timing and temperature guidelines, use quality chocolate, and you’ll create brownies that rival any professional bakery.
I’ve shared this recipe with hundreds of home bakers, and the consistent feedback is that these brownies become their go-to for confidence and reliability. Whether you’re baking for family, friends, or yourself, this recipe delivers consistent excellence every single time you pull those rich, fudgy squares from your oven.
Milk Chocolate Brownies
Equipment
- 8×8-inch baking pan
- parchment paper
- heatproof bowl
- saucepan
- silicone spatula
- wire cooling rack
Ingredients
- 8 oz milk chocolate
- 6 oz unsalted butter
- 1 cup granulated sugar
- 2 large eggs
- 1 tsp vanilla extract
- 3/4 cup all-purpose flour
- 1/4 cup unsweetened cocoa powder
- 1/2 tsp baking powder
- 1/2 tsp fine sea salt
Instructions
- Preheat the oven to 325°F and line an 8×8-inch baking pan with parchment paper, leaving overhang on two sides.
- Chop the milk chocolate into small, evenly sized pieces.
- Combine the chopped milk chocolate and butter in a heatproof bowl over gently simmering water.
- Stir frequently until completely melted and smooth, then cool for 2 minutes.
- Add the sugar and stir vigorously for 1 minute.
- Whisk the eggs lightly and add them one at a time to the chocolate mixture, stirring after each addition.
- Stir in the vanilla extract until the batter is smooth and glossy.
- Whisk together the flour, cocoa powder, baking powder, and salt in a separate bowl.
- Fold the dry ingredients into the chocolate mixture until just combined.
- Pour the batter into the prepared pan and smooth the top evenly.
- Bake for 28 minutes until a toothpick inserted in the center comes out with a few moist crumbs.
- Let the brownies rest in the pan for 10 minutes after baking.
- Lift the brownies out using the parchment paper and transfer to a wire rack.
- Cool completely for about 45 minutes, then cut into 16 squares and serve.
