
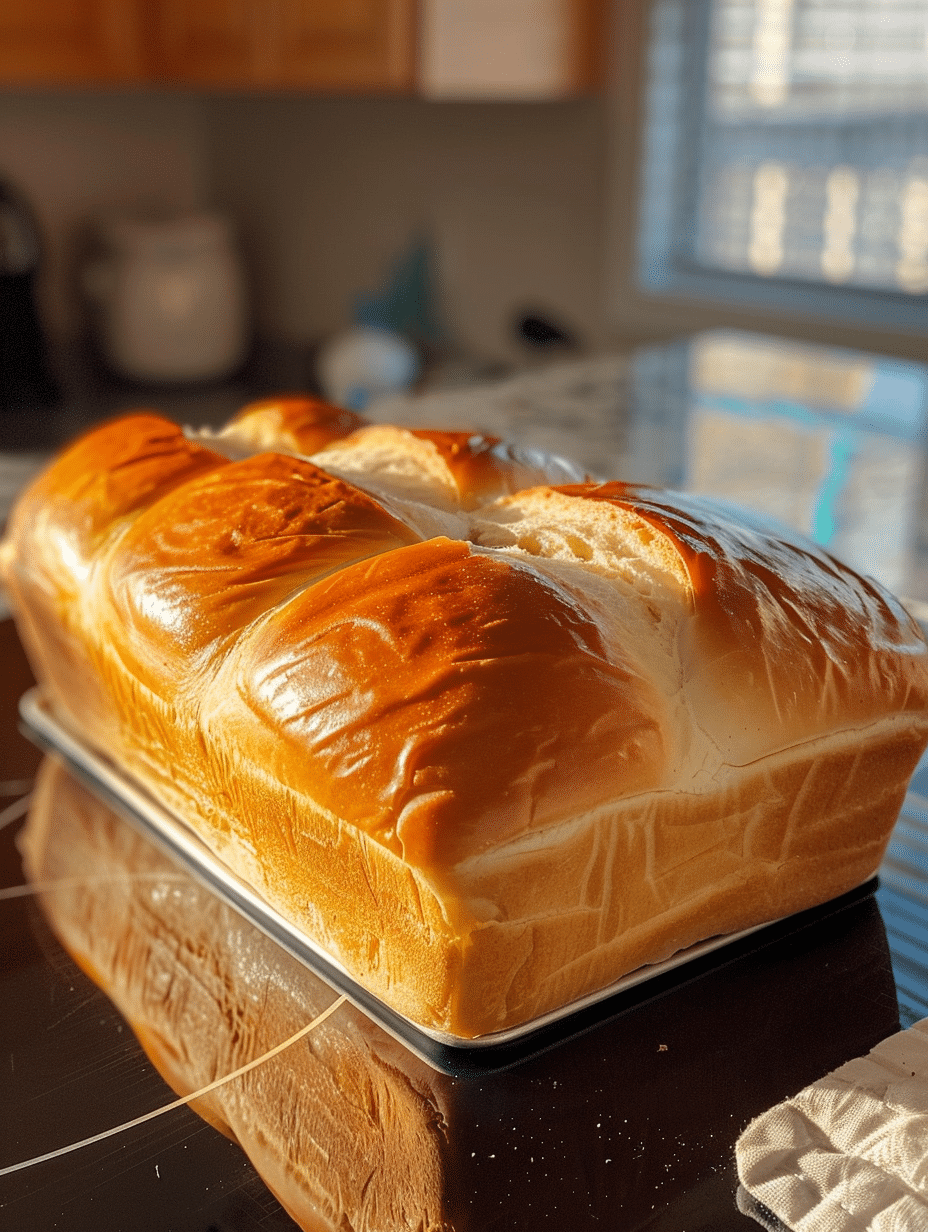
Milk bread is a tender, lightly sweet bread with an exceptionally soft crumb and delicate texture that originated in Japan and across East Asia. This enriched yeast bread uses milk and milk powder to create its signature pillowy softness that stays fresh for days longer than standard white bread. The subtle sweetness and fine crumb make milk bread perfect for sandwiches, French toast, or enjoying plain with butter and jam. Making milk bread at home is straightforward once you understand the basic technique of creating a proper dough structure and allowing adequate rise time. This recipe yields a loaf with commercial bakery quality that rivals anything you can buy.
Author Story and Baking Philosophy
I’m Eva Stoner, the creator of Fresh Recipes Corner, where I share simple, reliable recipes for everyday cooking. My love for cooking began in my grandmother’s kitchen, where I learned that good food doesn’t have to be complicated—it just needs care, patience, and the right techniques. Those early moments shaped how I bake today and inspired me to keep things practical and approachable.
I discovered milk bread during a trip through Tokyo, where I noticed these pillowy loaves in every neighborhood bakery. I became obsessed with understanding why Japanese milk bread tasted so different from Western sandwich breads. After years of testing and refinement, I’ve developed a reliable method that produces consistent results in a home kitchen. My approach focuses on understanding hydration, fermentation timing, and the science behind why milk creates such exceptional texture. This recipe represents my experience combined with traditional techniques passed down through Asian baking communities.
Recipe Overview
| Attribute | Value |
|---|---|
| Prep Time | 20 minutes |
| Cook Time | 28 minutes |
| Total Time | 2 hours 10 minutes |
| Servings | 1 loaf (12 slices) |
| Difficulty Level | Intermediate |
| Cuisine | Asian (Japanese) |
Why This Recipe Works
This milk bread recipe works because it balances hydration, fat content, and fermentation timing to develop the specific crumb structure that defines authentic milk bread. The combination of whole milk and heavy cream provides richness and moisture that creates an exceptionally tender crumb without making the dough difficult to handle. I’ve included milk powder to intensify the dairy flavor and contribute additional browning during baking, which you cannot achieve with liquid milk alone.
The dough technique in this recipe emphasizes proper kneading to develop gluten structure that traps gas evenly throughout the loaf. Most home bakers fail with milk bread because they either under-knead the dough, creating dense texture, or over-proof during the second rise, causing collapse in the oven. My method specifies exact rise times and visual cues so you can produce consistent results regardless of kitchen temperature. The egg wash adds shine and creates a subtle golden crust that contrasts beautifully with the soft interior.
I’ve tested this formula across different seasons and kitchen conditions, and it remains reliable when you follow the rise times as written. The sweetness is intentionally subtle—just enough to complement the bread’s natural wheat flavor without creating a dessert bread. This balance is what makes milk bread versatile for both sweet and savory applications.
Ingredients
| Ingredient | Quantity | Notes and Alternatives |
|---|---|---|
| Bread Flour | 2 1/2 cups | High protein content (12-14%) develops better gluten. All-purpose flour works but produces slightly less structure. Do not use cake flour. |
| Whole Milk | 1/2 cup | Use 2% or higher fat content. Non-dairy milk alternatives like oat or almond milk reduce browning and affect crumb softness. Coconut milk creates different flavor profile. |
| Heavy Cream | 1/4 cup | Adds richness and extends shelf life. Whole milk can substitute but reduces crumb softness. Cannot substitute with low-fat options. |
| Large Egg | 1 | Room temperature before mixing. Egg wash requires one additional egg. Substitute: 1 egg yolk mixed with 1 tablespoon water for richer color. |
| Granulated Sugar | 2 tablespoons | Feeds yeast and adds subtle sweetness. Honey can substitute at 1 1/2 tablespoons but creates slightly different texture. Brown sugar darkens crust. |
| Salt | 1 1/2 teaspoons | Essential for flavor and dough strength. Do not omit. Sea salt and kosher salt measure differently—use weight if possible (9 grams). |
| Instant Yeast | 2 1/4 teaspoons | One standard packet equals 2 1/4 teaspoons. Active dry yeast works but needs 5 additional minutes rise time. Do not use expired yeast. |
| Softened Butter | 2 tablespoons | Add after initial kneading. Cold butter delays incorporation and extends kneading time. Ghee can substitute for dairy-free option. |
| Milk Powder | 2 tablespoons | Intensifies dairy flavor and improves browning. Non-fat milk powder works fine. Omitting reduces flavor but does not prevent successful baking. |
Step-by-Step Instructions
Preparing the Dough
- Combine 2 1/2 cups bread flour, 2 tablespoons granulated sugar, 1 1/2 teaspoons salt, and 2 1/4 teaspoons instant yeast in a large mixing bowl, whisking together for 30 seconds to distribute yeast evenly.
- Warm 1/2 cup whole milk and 1/4 cup heavy cream to 80-85°F using a thermometer or test with your inner wrist until it feels barely warm, then add one large room-temperature egg to the milk mixture and whisk until combined.
- Pour the wet ingredients into the dry ingredients and stir with a wooden spoon until a shaggy dough forms with no visible dry flour remaining, approximately 1-2 minutes of mixing.
- Transfer the shaggy dough to a clean work surface and knead by hand for 3 minutes, pushing the dough away with the heel of your hand, folding it back over itself, and rotating the dough 90 degrees with each push.
- Add 2 tablespoons softened butter and 2 tablespoons milk powder to the dough and continue kneading for 5-7 minutes until the dough becomes smooth, elastic, and springs back when poked with a finger.
- Perform a windowpane test by taking a small piece of dough and gently stretching it between your fingers—the dough should stretch thin enough to see light through it without tearing.
First Rise
- Shape the kneaded dough into a ball by folding the edges toward the center and placing it seam-side down in a lightly oiled large bowl, then cover with a damp kitchen towel or plastic wrap.
- Place the bowl in a warm location such as a turned-off oven with the light on, an unheated proofing box, or a counter away from drafts and let rise for 60-75 minutes until the dough doubles in size and does not spring back immediately when poked.
- Check the dough by pressing your finger 1/2-inch deep into the surface—when ready, the impression should remain without the dough springing back.
Shaping and Second Rise
- Turn the risen dough out onto a lightly floured work surface and gently press out gas bubbles by patting the dough flat with your hands, working from the center toward the edges to maintain even thickness.
- Fold the dough in half lengthwise and then roll tightly from the folded edge toward you, creating a cylinder approximately 8 inches long and 4 inches wide, pressing the seam sealed as you roll.
- Place the shaped dough into a lightly greased 9×5-inch loaf pan with the seam side down and cover loosely with a damp towel or plastic wrap to retain moisture during the second rise.
- Let the dough rise for 45-50 minutes at room temperature until it rises 1 inch above the rim of the loaf pan and no longer springs back completely when poked with a floured finger.
Baking
- Preheat your oven to 375°F for 15 minutes while the dough completes its second rise, positioning the rack in the center of the oven for even heat distribution.
- Beat one egg with 1 tablespoon water in a small bowl and brush the egg wash over the top surface of the proofed dough using a pastry brush, applying an even coat without letting wash drip into the pan.
- Place the loaf pan in the preheated 375°F oven and bake for 25-30 minutes until the top is deep golden brown and the loaf sounds hollow when tapped on the bottom with your knuckles.
- Use an instant-read thermometer inserted into the center of the loaf to verify doneness—the internal temperature should reach 190°F when fully baked.
- Remove the loaf pan from the oven and let cool in the pan for 5 minutes before turning the bread out onto a wire cooling rack to cool completely for at least 1 hour before slicing.
Chef Tips for Perfect Results
- Monitor dough temperature by using a thermometer when warming milk—temperatures above 90°F will kill yeast, while temperatures below 75°F slow fermentation significantly and extend rise times.
- Perform the windowpane test during kneading to confirm proper gluten development; if the dough tears immediately, continue kneading for 2-3 additional minutes before testing again.
- Use room-temperature ingredients before mixing to ensure even hydration and consistent fermentation—cold eggs or milk require longer mixing time and can create uneven dough development.
- Skip the plastic wrap during rising if your kitchen is very humid, as condensation can make the dough surface sticky; use a damp towel instead, which allows slight air circulation.
- Insert the thermometer into the center of the loaf without touching the pan sides, as contact with the hot metal produces false readings; bake 2-3 additional minutes if the temperature reads below 190°F.
- Cool the bread on a wire rack rather than in the pan to prevent moisture from collecting on the bottom crust, which creates a soggy texture after one day.
Common Mistakes to Avoid
Under-Kneading the Dough
Under-kneading results in a dense, gummy crumb because gluten strands cannot form properly to trap gas evenly throughout the loaf. Fix this by kneading for the full 8-10 minutes specified and verifying gluten development with the windowpane test before proceeding. If you use a stand mixer, knead at medium speed for 6-8 minutes instead of hand kneading.
Over-Proofing During the Second Rise
Over-proofing causes the dough to rise too tall and collapse during baking, producing a sunken center and dense texture. Prevent this by checking the dough at 40 minutes rather than waiting the full 50 minutes, and by using the poke test to verify readiness—when the depression remains without springing back, the dough is ready to bake immediately.
Using Cold or Expired Yeast
Cold ingredients and expired yeast ferment slowly or not at all, producing flat bread with minimal rise and heavy texture. Confirm your yeast is fresh by checking the expiration date before purchasing and store it in the refrigerator or freezer after opening. Test yeast viability by mixing 1 teaspoon yeast with 1/4 cup warm water and 1 teaspoon sugar—it should foam within 5 minutes if alive.
Incorrect Oven Temperature
Ovens that run cold produce pale, under-baked loaves with gummy interiors, while ovens running hot create burnt exteriors before the interior bakes through. Invest in an inexpensive oven thermometer and place it on the center rack to verify actual temperature, adjusting your oven settings accordingly before baking subsequent loaves.
Slicing Before Complete Cooling
Slicing warm bread tears the crumb structure and releases steam that creates gumminess when the loaf cools. Wait a minimum of one hour after removing the bread from the oven before slicing, and use a serrated bread knife with a gentle sawing motion rather than pressing down, which compresses the soft crumb.
Variations and Substitutions
| Ingredient | Substitution | Impact on Flavor and Texture |
|---|---|---|
| Whole Milk | Evaporated milk (1/3 cup) mixed with 2 tablespoons water | Creates richer, slightly more concentrated milk flavor. Requires no additional adjustment to hydration. Results in slightly firmer crumb. |
| Heavy Cream | Additional 1/4 cup whole milk | Reduces richness and fat content. Crumb becomes slightly less tender and stale more quickly. Uses same hydration ratio so no recipe adjustment needed. |
| Granulated Sugar | Honey (1 1/2 tablespoons) or maple syrup | Adds subtle caramel notes. Creates slightly darker crust due to natural sugars. Extends shelf life by one additional day. |
| Butter | Ghee (same amount) or neutral oil (1 1/2 tablespoons) | Ghee intensifies richness with subtle nutty flavor. Oil creates lighter crumb with slightly less moisture retention. Both methods work equally well. |
| Bread Flour | All-purpose flour (3 cups to compensate for lower protein) | Reduces gluten development resulting in slightly softer, more delicate crumb. Loaf may not rise quite as tall. Adjust flour addition by 15-20% more to compensate. |
| Instant Yeast | Active dry yeast (2 1/2 teaspoons) or fresh yeast (2 tablespoons) | Active dry yeast requires 5-10 minutes longer rise time in each stage. Fresh yeast adds subtle complexity but requires storage in refrigerator and expires faster. |
| Milk Powder | Omit entirely or substitute 1 tablespoon nonfat dry milk | Omitting reduces dairy flavor intensity and slightly reduces browning. Nonfat milk powder works identically to full-fat milk powder with minimal texture change. |
| Salt | Sea salt or kosher salt (measure by weight: 9 grams) | All salt types produce identical results when measured by weight. Volume measurements vary because kosher salt is coarser and weighs less per teaspoon. |
Serving Suggestions and Pairings
Serve milk bread warm from the oven with cultured butter and fruit jam for a simple but luxurious breakfast that requires no additional preparation beyond spreading. The soft texture and subtle sweetness make milk bread exceptional for French toast—slice the bread 1 inch thick, soak briefly in an egg and milk mixture, and pan-fry until golden for breakfast that feeds a family of four.
Use milk bread for refined sandwiches with smoked salmon, cream cheese, and fresh dill, or create club sandwiches with roasted turkey, tomato, lettuce, and aioli for lunch. Toast thick slices and top with avocado, tomato, and sea salt for a simple lunch that showcases the bread’s natural sweetness.
Pair milk bread with afternoon tea alongside pastries and fresh fruit, or serve alongside Asian soups like miso broth or chicken noodle soup for dinner. Create French bread pudding by cubing leftover milk bread and baking it in a custard sauce made from eggs, heavy cream, and vanilla for a dessert that uses bread nearing the end of its fresh window.
Storage and Reheating
| Storage Method | Duration | Instructions and Notes |
|---|---|---|
| Room Temperature | 2-3 days | Wrap completely cooled bread in paper towels, then place in a paper bag or bread box to allow air circulation while retaining moisture. Do not use plastic wrap as it traps moisture and accelerates mold growth. |
| Refrigerator | 5-7 days | Wrap completely cooled bread in plastic wrap or place in an airtight container. Refrigeration extends shelf life but accelerates staling from cold temperatures, so use this method only when necessary for food safety reasons. |
| Freezer | 2-3 months | Slice bread before freezing for individual portion access. Wrap slices in plastic wrap, then place in a freezer-safe container to prevent freezer burn. Thaw at room temperature for 30-45 minutes before serving or toasting from frozen. |
| Toasting (Refrigerated) | N/A | Place slices in toaster set to medium-high setting and toast until exterior crisps while interior remains warm and soft, approximately 3-4 minutes depending on toaster power. |
| Oven Reheating (Room Temperature) | N/A | Wrap entire loaf in aluminum foil and heat in a 325°F oven for 10-15 minutes until warmed through. Remove foil during the final 2 minutes to slightly crisp the exterior while keeping interior soft. |
| Microwave (Not Recommended) | N/A | Microwave heating causes the crumb to become rubbery and dense within seconds. If using a microwave, wrap a single slice loosely in a paper towel and heat for 15-20 seconds maximum to minimize texture damage. |
Nutritional Information
| Nutrient | Amount per Serving |
|---|---|
| Calories | 145 |
| Protein | 4g |
| Fat | 2.5g |
| Carbohydrates | 28g |
| Dietary Fiber | 1g |
| Sugars | 3g |
| Sodium | 290mg |
Approximate values based on one slice from a 12-slice loaf baked with exact ingredients as specified. Values may vary slightly depending on ingredient brands and individual kitchen measurements. Milk bread provides moderate protein content from bread flour and eggs while remaining relatively low in fat compared to enriched breads containing additional butter or oils.
Frequently Asked Questions
Can I substitute all-purpose flour for bread flour in milk bread?
All-purpose flour works but produces noticeably softer and less structured loaves because of lower protein content averaging 10-12% compared to bread flour’s 12-14% protein. The finished loaf will be less tall and have a more tender crumb that compresses easily when sliced. If using all-purpose flour, increase the amount by 2-3 tablespoons to compensate for reduced gluten development, then proceed with the recipe unchanged.
How do I know when milk bread is done baking?
Milk bread is done when the top is deep golden brown and the loaf sounds hollow when you tap the bottom with your knuckles. Use an instant-read thermometer inserted into the center—the internal temperature must reach 190°F for complete baking. If the top browns too quickly before reaching temperature, cover the loaf loosely with aluminum foil during the final 5-10 minutes of baking.
Why did my milk bread collapse in the center?
Center collapse occurs from over-proofing during the second rise when the dough ferments too long and the gluten structure weakens, causing the bread to cave inward during oven spring. Prevent this by checking the dough at 40 minutes instead of waiting the full 50 minutes, and by using the poke test to determine exact readiness. In future bakes, shorten the second rise to 35-40 minutes if your kitchen temperature exceeds 75°F.
Can I make milk bread dough ahead and refrigerate it overnight?
Yes, milk bread dough can be refrigerated after shaping for up to 12 hours, which actually improves flavor through extended fermentation. After shaping the dough into a loaf, place it in the pan, cover with plastic wrap, and refrigerate immediately without allowing the second rise at room temperature. The next morning, remove the pan from the refrigerator and let it sit at room temperature for 90 minutes until the dough rises 1 inch above the pan rim, then proceed with egg wash and baking.
What’s the best way to slice warm milk bread without tearing the crumb?
Allow milk bread to cool for a minimum of one hour after removing it from the oven before attempting to slice, as warm bread compresses under knife pressure and tears easily. Use a serrated bread knife with a gentle sawing motion rather than applying downward pressure, which crushes the soft crumb and creates uneven slices. Dip the knife blade in hot water and wipe it clean between slices for smoother cuts through the loaf.
Can I use non-dairy milk to make milk bread?
Non-dairy milk alternatives like oat milk or almond milk can technically be used but produce noticeably different results—browning occurs less evenly, the crumb becomes slightly less tender, and the characteristic richness diminishes. Coconut milk creates an interesting variation with subtle tropical notes but alters the intended flavor profile significantly. For best results, use dairy milk as specified; if you must use non-dairy options, select oat milk for closest texture approximation.
Conclusion
Milk bread is an achievable homemade project that yields bakery-quality results when you follow proper kneading, fermentation, and baking techniques. This recipe combines traditional Japanese baking methods with reliable home kitchen principles to produce consistently soft, pillowy loaves every time. Your patience during rising stages and attention to the poke test ensures success where many home bakers fail. Enjoy your fresh-baked milk bread with simple toppings that let the bread’s subtle sweetness shine through.
Milk Bread: Soft, Fluffy Homemade Loaf
Ingredients
- 3 3/4 cups all-purpose flour
- 1/4 cup sugar
- 1/2 tsp salt
- 2 1/4 tsp active dry yeast
- 1 cup whole milk
- 1/2 cup heavy cream
- 1/3 cup milk powder
- 2 large eggs
- 1/2 cup unsalted butter, softened
Instructions
- In a large bowl, mix flour, sugar, salt, and yeast. In a separate bowl, whisk milk, heavy cream, milk powder, eggs, and butter. Add wet ingredients to dry and mix until combined. Knead dough on a floured surface until光滑 and stretchy (8-10 minutes). Cover and let rise 1 hour.
- Punch down the dough and shape into a loaf. Place in a greased 9×5-inch loaf pan. Cover and let rise 40-50 minutes. Preheat oven to 375°F (190°C). Bake 25-28 minutes until golden brown. Cool in pan 10 minutes before slicing.
Notes
Brush the loaf with milk cream mixture before baking for extra shine.
Store in an airtight container for up to 3 days.
