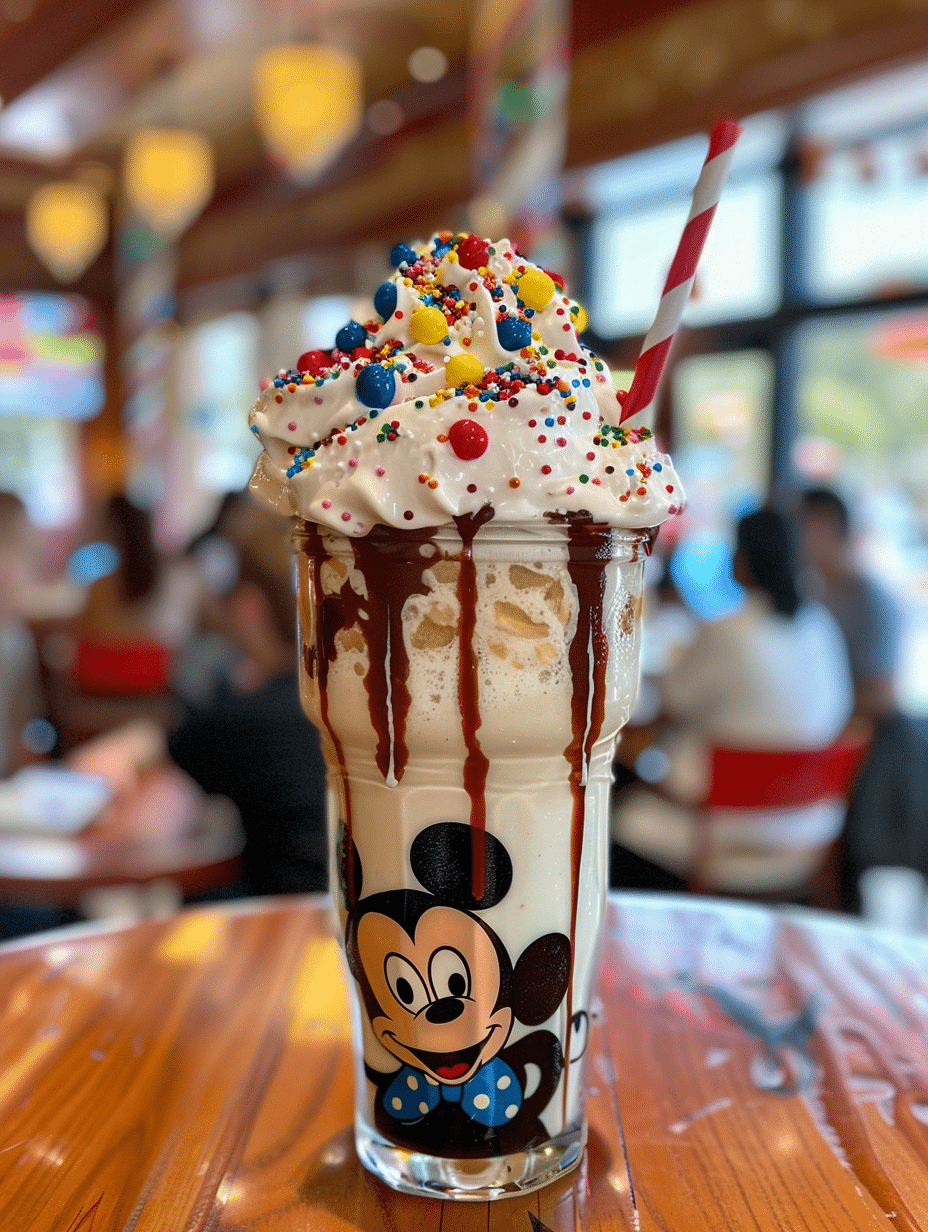
A Mickey Mouse milkshake is a vibrant, layered beverage that combines vanilla, chocolate, and strawberry flavors into one Instagram-worthy treat inspired by Disney’s most beloved character. This fun milkshake uses three distinct layers that create Mickey’s iconic silhouette when served in a tall glass, making it perfect for themed parties, family gatherings, or whenever you want to add a touch of nostalgia to your day. The recipe requires just basic pantry ingredients and takes about ten minutes from start to finish. Each spoonful delivers creamy vanilla ice cream, rich chocolate, and fresh strawberry sweetness in perfect balance. I’ve perfected this recipe over countless kitchen experiments, and it never fails to bring smiles to both kids and adults alike.
About Me and Fresh Recipes Corner
I’m Maya Collins, a 29-year-old from Austin, Texas, and co-creator at Fresh Recipes Corner, where I specialize in simple, refreshing drinks you can make anytime. My passion for beverage creation started in my mom’s kitchen when I was just mixing juices for fun, and it evolved into something I genuinely love doing every single day. Over the years, I’ve developed expertise in working with fruits, herbs, and natural ingredients to craft mocktails, smoothies, and soft drinks that are both easy to make and absolutely delicious.
My experience creating drinks has taught me that the best recipes are those that combine quality ingredients with creativity and simplicity. The Mickey Mouse milkshake embodies this philosophy perfectly. It’s whimsical enough to excite children but sophisticated enough to satisfy adult palates. Through Fresh Recipes Corner, I share tested recipes that deliver real results in real kitchens, backed by actual experience and a genuine commitment to flavor.
Recipe Overview
| Metric | Details |
|---|---|
| Prep Time | 10 minutes |
| Cook Time | 0 minutes |
| Total Time | 10 minutes |
| Servings | 2 servings |
| Difficulty Level | Easy |
| Cuisine | American |
Why This Recipe Works
This Mickey Mouse milkshake recipe works beautifully because it balances visual appeal with genuine flavor complexity. When I first created this drink, I wanted something that looked stunning but didn’t sacrifice taste for presentation. The three-layer approach achieves both goals simultaneously by using natural color separation and complementary flavors that enhance rather than compete with each other.
The vanilla base provides a neutral canvas that lets the chocolate and strawberry shine without overpowering each other. I’ve learned through experimentation that using quality vanilla ice cream makes a significant difference in the final result. The chocolate layer adds richness and depth, while the strawberry on top brings brightness and a slight tartness that prevents the drink from becoming one-note sweet. This layering technique also creates a textural progression as you drink, with each sip delivering a slightly different flavor combination.
What makes this recipe foolproof is its flexibility with ingredients and lack of technical difficulty. You don’t need special equipment beyond a blender and a tall glass. The recipe works consistently regardless of minor ingredient variations, and the visual result always impresses. I’ve served this to groups ranging from toddlers to grandparents, and everyone has enjoyed it equally.
Ingredients
| Ingredient | Quantity | Notes with Alternatives |
|---|---|---|
| Vanilla ice cream | 2 cups | Use quality vanilla; frozen yogurt works as lighter alternative |
| Whole milk | 1 cup | Almond milk, oat milk, or coconut milk are suitable substitutes |
| Chocolate ice cream | 1 cup | Dark chocolate ice cream adds sophistication |
| Chocolate syrup | 2 tablespoons | Use natural cocoa-based syrups for deeper flavor |
| Strawberries (fresh) | 1 cup | Frozen strawberries work equally well |
| Strawberry syrup | 2 tablespoons | Fresh strawberry puree offers natural alternative |
| Whipped cream | 2 tablespoons | Coconut cream or cool whip serve as alternatives |
| Maraschino cherries | 2 cherries | Optional for garnish and Mickey’s ears effect |
Step-by-Step Instructions
Phase One: Vanilla Base Layer
- Pour three-quarters cup of whole milk into your blender container first.
- Add one and one-half cups of vanilla ice cream to the milk.
- Blend on medium speed for forty-five seconds until completely smooth.
- Pour the vanilla mixture evenly into two tall serving glasses, filling each halfway.
- Place the glasses in the freezer for five minutes to set the base layer.
Phase Two: Chocolate Middle Layer
- Rinse your blender container thoroughly to avoid vanilla flavor transfer.
- Pour one-quarter cup of whole milk into the clean blender.
- Add one cup of chocolate ice cream to the milk.
- Pour two tablespoons of chocolate syrup into the blender as well.
- Blend on medium speed for thirty seconds until the mixture reaches pourable consistency.
- Remove the glasses from the freezer after the five-minute chill.
- Slowly pour the chocolate mixture down the inside of each glass along the rim.
- Freeze the glasses for another five minutes to set the chocolate layer.
Phase Three: Strawberry Top Layer
- Wash your blender container again and add one cup of fresh strawberries.
- Pour the remaining milk into the blender with the strawberries.
- Add two tablespoons of strawberry syrup to the mixture.
- Blend on medium-high speed for one minute until completely smooth.
- Remove the glasses from the freezer and carefully pour the strawberry mixture on top.
- Top each milkshake with a dollop of whipped cream.
- Place a maraschino cherry on top of the whipped cream for Mickey’s iconic look.
- Serve immediately with a long spoon or straw.
Chef Tips for Perfect Results
- Chill your glasses in the freezer for two minutes before starting to help layers stay distinct longer while drinking.
- Pour each layer slowly along the inside edge of the glass, never directly into the center, to prevent layers from mixing.
- Use slightly softer ice cream than you think necessary, as hard ice cream makes blending difficult and creates lumps.
- Keep your blender container clean between layers to prevent color mudding and maintain true Mickey colors.
- If layers mix slightly, don’t panic; the drink still tastes excellent even with blended colors.
- Serve immediately after completing the top layer for maximum visual separation and best texture.
Common Mistakes to Avoid
Mistake 1: Blending layers together while pouring. This happens when you pour new layers too quickly or directly into the center of the glass. Fix this by pouring slowly along the glass rim and waiting five minutes between layers. The freezing time allows each layer to set slightly, creating a natural barrier against mixing.
Mistake 2: Using ice cream that’s too hard. Rock-hard ice cream won’t blend smoothly and creates a grainy texture that feels unpleasant. Let your ice cream sit at room temperature for three to five minutes before blending so it’s scoopable but still frozen. This slight softening transforms the texture from chunky to genuinely creamy.
Mistake 3: Adding too much milk at once. Excess milk creates a thin, watery milkshake instead of the thick consistency you want. Measure milk carefully and add only what the recipe specifies. You can always blend longer if needed, but you cannot easily remove excess liquid.
Mistake 4: Using chocolate syrup with artificial colors. Some commercial syrups contain dyes that create muddy brown colors instead of vibrant red and brown layers. Choose syrups made from natural cocoa and real fruit when possible. This keeps your Mickey Mouse milkshake looking as good as it tastes.
Mistake 5: Forgetting to rinse the blender between layers. Vanilla residue in the chocolate layer creates an unpleasant taste, and chocolate residue makes strawberry appear brownish. Quick rinses between each layer take just thirty seconds but dramatically improve your final result.
Variations and Substitutions
| Original Ingredient | Substitution | Impact on Flavor |
|---|---|---|
| Vanilla ice cream | Cookies and cream ice cream | Adds vanilla sweetness with subtle cookie complexity |
| Whole milk | Oat milk | Creates creamier texture with slightly nutty undertones |
| Chocolate ice cream | Mint chocolate chip | Introduces refreshing mint that brightens the drink |
| Strawberry syrup | Fresh raspberry puree | Delivers deeper berry flavor with slight tartness |
| Whipped cream | Whipped coconut cream | Adds tropical note while maintaining structure |
| Maraschino cherry | Fresh strawberry half | Provides fresher flavor and more natural appearance |
| Chocolate syrup | Natural cocoa powder mixed with honey | Creates richer, less artificially sweet chocolate taste |
Serving Suggestions and Pairings
Serve your Mickey Mouse milkshake at Disney-themed birthday parties alongside themed snacks like Mickey-shaped pretzels and fruit platters. This beverage pairs beautifully with light finger foods such as mini cupcakes, sugar cookies, and cheese and crackers. For family movie nights, especially when watching classic Disney films, this milkshake becomes the perfect nostalgic companion.
The Mickey Mouse milkshake also works wonderfully for children’s celebrations like classroom parties, summer picnics, and theme park send-off events. Serve it in tall clear glasses so guests can admire the layer effect before drinking. Adults enjoying this drink at casual gatherings often appreciate it as a whimsical dessert alternative to traditional sweet treats.
Consider offering your guests both a tall spoon and a regular straw, allowing them to choose their eating method. Some prefer the spoon approach to taste each layer separately, while others enjoy the straw method for a mixed flavor experience. Present the milkshakes in a shaded area to prevent melting during outdoor events.
Storage and Reheating
| Method | Duration | Instructions |
|---|---|---|
| Immediate serving | Best within 10 minutes | Blend and serve immediately while layers remain distinct |
| Refrigerator storage | Up to 24 hours | Store in airtight container; remix before serving as separation occurs |
| Freezer storage | Up to 1 week | Pour into freezer-safe container; thaw slightly before serving for creamy texture |
| Individual portions | Up to 12 hours | Prepare in tall glasses, cover with plastic wrap, refrigerate until serving time |
The Mickey Mouse milkshake is best enjoyed immediately after preparation when the layers remain visually distinct and the texture is perfectly thick. If you must make it ahead, prepare the components separately and blend individual servings just before serving. Pre-blended milkshakes gradually lose their textural appeal as layers naturally merge over time.
Nutritional Information
Approximate values per serving (one Mickey Mouse milkshake).
| Nutrient | Amount per Serving |
|---|---|
| Calories | 380 |
| Protein | 6 grams |
| Total Fat | 12 grams |
| Saturated Fat | 7 grams |
| Carbohydrates | 58 grams |
| Dietary Fiber | 1 gram |
| Sugars | 45 grams |
| Sodium | 180 milligrams |
| Calcium | 220 milligrams |
Nutritional values vary based on specific ice cream brands and substitutions you make. Using frozen yogurt instead of traditional ice cream reduces fat content by approximately four grams per serving. Substituting plant-based milk lowers sodium slightly while maintaining similar calorie counts. These values represent a standard recipe prepared with full-fat dairy products and regular syrups.
Frequently Asked Questions
Can I make a Mickey Mouse milkshake without chocolate syrup?
Yes, you can definitely make this drink without chocolate syrup by using pure blended cocoa powder mixed with a small amount of honey or agave nectar. This creates a richer chocolate flavor and cleaner color than commercial syrups. Mix one tablespoon of cocoa powder with one tablespoon of honey, then add it to your chocolate layer blend. The drink maintains its vibrant three-layer appearance while tasting more naturally chocolatey.
How do I keep the layers from mixing together?
Layers stay distinct by freezing each one for five minutes before adding the next layer and by pouring very slowly along the inside rim of the glass. The freezing time allows each layer to set slightly, creating a natural barrier that prevents mixing. Pouring along the rim rather than directly into the center distributes the liquid gradually across the surface, allowing it to settle on top of the layer below instead of crashing through it.
What’s the best type of strawberry to use for the top layer?
Fresh strawberries create the brightest pink color and most authentic strawberry flavor, while frozen strawberries work just as well and often blend more smoothly. If using fresh berries, choose ripe ones with deep red color for maximum flavor intensity. Frozen strawberries actually blend faster because their icy texture breaks down more easily than fresh berries, reducing total blending time by about fifteen seconds.
Can I prepare this milkshake several hours in advance?
You can prepare the individual layer components up to four hours ahead and store them in separate containers in the refrigerator. Blend and layer the milkshake no more than thirty minutes before serving to maintain layer distinction. If you absolutely must prepare it further in advance, make it in the glass, cover it loosely, and keep it refrigerated; the layers will blend together somewhat but the flavor remains excellent.
Is there a dairy-free version of the Mickey Mouse milkshake?
Yes, you can create a completely dairy-free version by using coconut ice cream, oat milk, and dairy-free whipped cream instead of regular equivalents. Coconut ice cream provides rich creaminess while oat milk creates a smooth blending consistency. The flavor profile changes slightly with these substitutions, gaining subtle coconut notes, but the visual appearance and overall appeal remain identical to the traditional recipe.
How many calories does each layer contribute to the total?
The vanilla base layer contributes approximately 180 calories per serving, the chocolate middle adds about 140 calories, and the strawberry top contributes roughly 60 calories, totaling about 380 calories. These estimates vary based on specific product brands and portion sizes. Using reduced-fat ice cream or frozen yogurt decreases the vanilla layer’s contribution by about thirty-five calories per serving.
Final Thoughts
The Mickey Mouse milkshake brings nostalgic Disney magic to your kitchen while requiring nothing more than basic ingredients and simple blending techniques. This three-layer drink delivers visual wow-factor alongside genuine flavor appeal, making it equally beloved by children and adults. From my years creating beverages at Fresh Recipes Corner, I’ve learned that the best recipes combine joy with simplicity, exactly what this milkshake provides in every sip. Make this Mickey Mouse milkshake for your next celebration and watch as the vibrant vanilla, chocolate, and strawberry layers steal the show.
Mickey Mouse Milkshake Recipe
Ingredients
- 2 cups vanilla ice cream
- 2 tbsp chocolate syrup
- 2 tbsp strawberry syrup
- 1 cup milk
- Whipped cream, for topping
- 4 candy-coated chocolate pieces (Mickey Ear-shaped)
- Sprinkle (optional)
Instructions
- Chill a tall glass in the freezer for 2-3 minutes.
- Spoon 1 cup vanilla ice cream into the glass.
- Pour 1 tbsp chocolate syrup over the ice cream, letting it sink and form a crescent shape.
- Carefully pour 1 tbsp strawberry syrup in a second crescent, mirroring the first.
- Top with 1/2 cup milk, gently lifting the glass to allow layers to settle.
- Spoon whipped cream over the top and place 2 candy-coated chocolate pieces at the bottom to form Mickey's ears.
- Add sprinkle if desired.
Notes
Chilling the glass helps maintain layer structure.
Add the candy pieces last to avoid melting.
For a non-dairy version, use plant-based ice cream and syrup.