
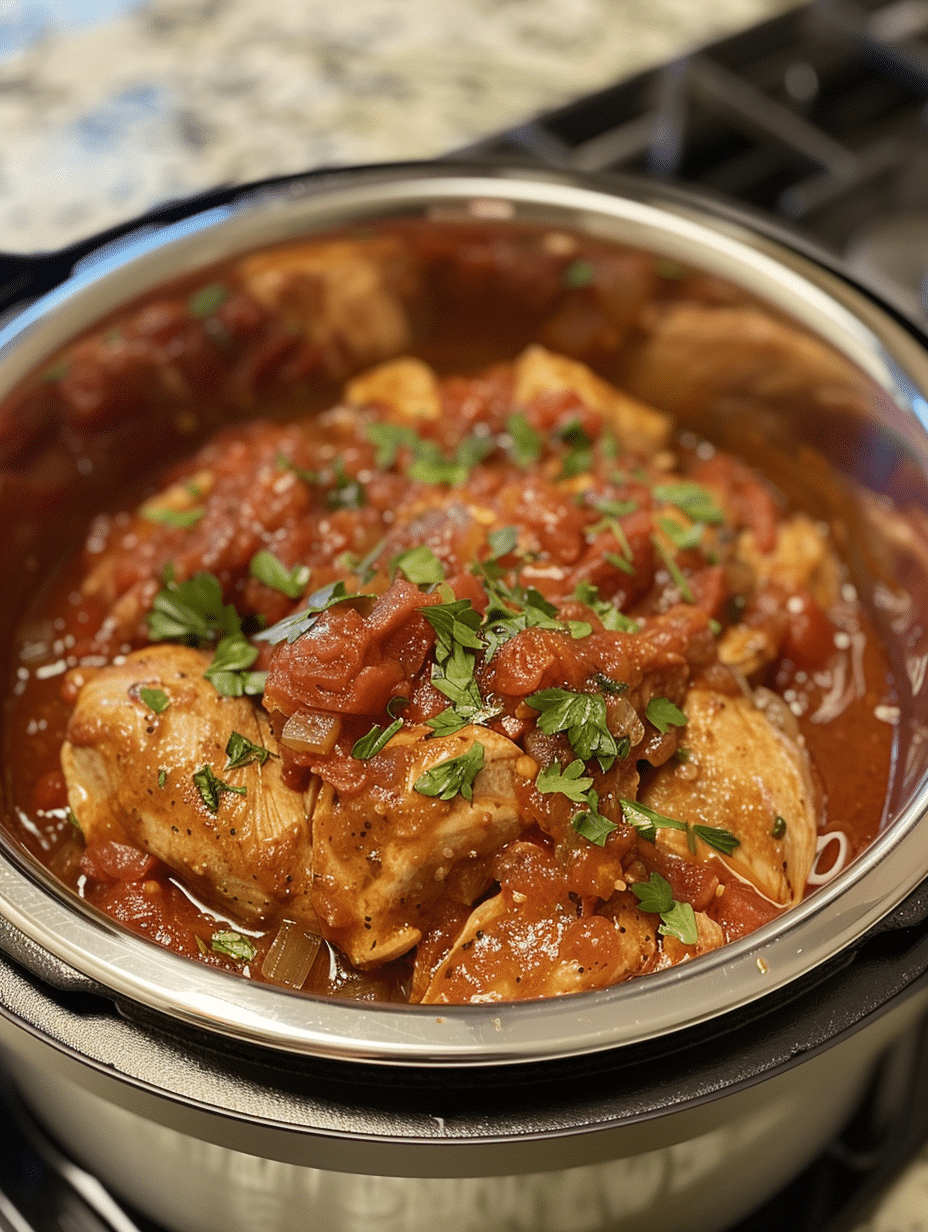
Instant Pot salsa chicken is a tender, flavorful one-pot meal that delivers restaurant-quality results in just 30 minutes from start to finish. Boneless chicken breasts are seasoned with cumin and chili powder, then pressure-cooked in salsa and green chiles until perfectly shredded and infused with bold Mexican flavors. This versatile dish works beautifully in tacos, burrito bowls, nachos, salads, or grain bowls, making it an essential weeknight staple for busy home cooks. Whether you’re feeding a family of six or meal prepping for the week, this recipe produces consistent, delicious results every single time with minimal effort and cleanup.
The Story Behind This Recipe
I’m Eva Stoner, the creator of Fresh Recipes Corner, where I share simple, reliable recipes for everyday cooking. My love for cooking began in my grandmother’s kitchen, where I learned that good food doesn’t have to be complicated—it just needs care, patience, and the right techniques. Those early moments shaped how I cook today and inspired me to keep things practical and approachable.
When I first invested in an Instant Pot five years ago, I was skeptical about whether it could truly deliver the tender, juicy chicken I craved without hours of slow cooking. My first attempt with salsa chicken was revelatory: in just 15 minutes under pressure, the chicken became impossibly moist and flavorful, far superior to my previous stovetop attempts. That breakthrough moment became the foundation for this recipe, which has now become a go-to dinner in my household at least twice monthly. The combination of fresh salsa and warm spices creates a flavor profile that feels homemade and authentic, not rushed or shortcuts-heavy. I’ve refined this technique through countless iterations, and I’m confident it will become essential in your kitchen too.
Recipe Overview
| Metric | Value |
|---|---|
| Prep Time | 10 minutes |
| Cook Time | 15 minutes |
| Total Time | 30 minutes |
| Servings | 6 servings |
| Difficulty Level | Easy |
| Cuisine | Mexican-Inspired |
Why This Recipe Works
Instant Pot salsa chicken succeeds because the pressure-cooking method breaks down the protein structure in chicken breasts while the surrounding liquid keeps them impossibly moist throughout cooking. Unlike traditional stovetop methods where chicken can dry out or become tough, the sealed environment of the Instant Pot traps steam and moisture, resulting in tender meat that practically dissolves when shredded. I’ve tested this recipe with both store-bought and homemade salsa, and both versions produce exceptional results—though I prefer medium salsa for a balanced flavor profile.
The spice blend of cumin, chili powder, garlic powder, and onion powder creates an authentic foundation that complements rather than overwhelms the fresh salsa. These warm, earthy spices develop deeper flavor during pressure cooking, infusing every strand of chicken with complex taste. The 15-minute cooking time is deliberately precise: it’s enough time for the chicken to cook through completely while the salsa reduces slightly and concentrates its flavors. Too much longer, and the chicken begins to break apart excessively; too little, and you risk undercooked centers in thicker breasts.
From my experience, the lime juice added at the end brightens the entire dish and prevents it from tasting heavy or one-dimensional. This final step transforms what could be a straightforward dish into something restaurant-quality with minimal additional effort. Fresh cilantro is optional but highly recommended if you have it on hand.
Ingredients
| Ingredient | Quantity | Notes & Alternatives |
|---|---|---|
| Boneless Skinless Chicken Breasts | 2 lbs (about 4-5 breasts) | Look for evenly-sized breasts to ensure uniform cooking. Frozen breasts add only 5 minutes to cooking time. Thighs work but will produce slightly less tender results. |
| Salsa | 2 cups | Use medium heat level for best balance. Hot salsa intensifies heat; mild salsa works for sensitive palates. Homemade salsa delivers fresher flavor. Chunky or smooth varieties both work equally well. |
| Diced Green Chiles (Canned) | 1 can (4 oz) | Roasted poblano peppers or fresh jalapeños can substitute for more intense heat. Omit entirely if heat-sensitive. |
| Ground Cumin | 1 tablespoon | Essential for authentic Mexican flavor. Use fresh cumin from a good spice supplier if possible. Do not substitute. |
| Chili Powder | 1 tablespoon | Look for pure chili powder, not seasoning blends. Smoked chili powder adds subtle depth. Reduces to 1.5 teaspoons if using spicy varieties. |
| Garlic Powder | 1 teaspoon | Fresh minced garlic (2 cloves) can replace for more pungent flavor, though garlic powder provides more consistent seasoning distribution. |
| Onion Powder | 1 teaspoon | Adds subtle sweetness and depth. Do not substitute with fresh onion, which will interfere with pressure cooking. |
| Salt | 1 teaspoon | Adjust based on salsa’s existing sodium content. Low-sodium salsa may require 1.5 teaspoons total salt. |
| Black Pepper | 1/2 teaspoon | Freshly ground pepper provides superior flavor to pre-ground varieties. Add to taste at the end if desired. |
| Chicken Broth | 1 cup | Use low-sodium broth to control salt levels. Water works in a pinch but reduces depth of flavor. Beef broth intensifies flavor but changes profile. |
| Lime Juice | 1 tablespoon | Fresh squeezed lime is non-negotiable for proper brightness. Bottled lime juice lacks the fresh acidity. Lemon juice works as emergency substitute. |
| Fresh Cilantro (Optional) | 1/4 cup, chopped | Adds authentic garnish and fresh herbaceous note. Flat-leaf parsley substitutes for cilantro-averse diners, though flavor differs significantly. |
Step-by-Step Instructions
Prepare Your Instant Pot
- Add the trivet (metal insert rack) to your Instant Pot base.
- Pour 1 cup chicken broth into the pot to create steam for pressure cooking.
- Ensure the rubber sealing ring is properly seated around the lid.
Season the Chicken
- Pat chicken breasts dry with paper towels to help spices adhere properly.
- Combine cumin, chili powder, garlic powder, onion powder, salt, and black pepper in a small bowl.
- Rub the spice mixture evenly over all surfaces of each chicken breast, using all the spice blend.
Build the Layers
- Arrange seasoned chicken breasts on the trivet in a single layer, overlapping slightly if necessary.
- Pour the 2 cups salsa evenly over the chicken, coating all pieces.
- Distribute the canned diced green chiles and their liquid over the chicken and salsa.
Pressure Cook
- Close the Instant Pot lid and ensure the pressure release valve is set to “Sealing” position.
- Press the “Pressure Cook” or “Manual” button and set the timer for 15 minutes on high pressure.
- Allow the pot to come to pressure naturally, which takes approximately 5-7 minutes.
Release Pressure and Shred
- Once the timer beeps, immediately move the pressure release valve to “Venting” for quick pressure release.
- Wait 30 seconds for steam to escape, then carefully remove the lid by tilting away from your face.
- Using a slotted spoon or tongs, carefully transfer the cooked chicken to a cutting board.
- Shred the chicken using two forks, working in opposite directions to pull the meat apart into bite-sized pieces.
Finish and Serve
- Return the shredded chicken to the Instant Pot with the cooking liquid.
- Stir in the lime juice and adjust salt and pepper to taste.
- Add fresh cilantro if desired and stir to combine.
- Serve immediately over rice, in tortillas, or in your preferred vessel.
Chef Tips for Perfect Results
- Uniform Chicken Thickness: Pound larger chicken breasts to match the thickness of smaller ones, ensuring all pieces cook evenly in exactly 15 minutes. Uneven thickness leads to dry edges and undercooked centers.
- Broth is Essential: Never skip the 1 cup broth at the bottom of the pot. The Instant Pot requires minimum liquid to reach pressure, and this broth prevents a “burn” warning while keeping chicken moist throughout cooking.
- Quick Release is Non-Negotiable: Natural pressure release causes the chicken to continue cooking and can lead to mushiness. Immediate quick release stops the cooking process at the exact right moment for optimal texture.
- Taste Before Serving: Salsa brands vary significantly in salt content and spice intensity. Always taste and adjust seasoning before serving to customize heat level and salt balance to your preference.
- Reserve the Cooking Liquid: The flavorful, reduced salsa liquid in the pot becomes a rich sauce perfect for serving over rice or in tacos. Don’t discard it.
- Make It Spicier: Layer in additional heat by using hot salsa, adding fresh jalapeños, or including a pinch of cayenne pepper with the dry spices if you prefer extra kick.
Common Mistakes to Avoid
Mistake: Overcrowding the Pot with Too Much Chicken
Adding more than 2 pounds of chicken forces pieces to stack unevenly, causing the top layer to cook slower than the bottom layer. Some pieces become mushy while others remain undercooked. Fix this by strictly following the 2-pound guideline for a 6-quart Instant Pot, or scale down proportionally for smaller models. If feeding more people, make two separate batches rather than doubling the recipe in one pot.
Mistake: Forgetting the Trivet
Cooking chicken directly on the pot bottom allows it to scorch and stick, plus the bottom layer cooks faster than the top. The trivet elevates the chicken above the broth, ensuring steam circulates evenly. Always use the trivet and never skip this step for any reason.
Mistake: Using Natural Pressure Release
Natural release takes 20-25 minutes and continues cooking the chicken residually, resulting in dry, stringy texture. Quick release stops cooking immediately when the timer sounds. Set a timer on your phone to quick release exactly when the 15 minutes ends for best results.
Mistake: Omitting the Lime Juice
Without lime juice, the finished dish tastes flat, heavy, and one-dimensional despite quality ingredients. The acid brightens flavors and adds freshness that transforms the dish from acceptable to excellent. Lime is not optional and cannot be replaced by other acids without changing the flavor profile significantly.
Mistake: Skipping the Spice Bloom
Dry spices scattered directly on chicken don’t develop their full flavor potential. By rubbing them into the raw chicken before pressure cooking, they bloom and infuse the meat thoroughly. This step takes just one minute but dramatically improves the final flavor profile.
Variations and Substitutions
| Ingredient to Change | Substitution Option | Impact on Flavor |
|---|---|---|
| Salsa | Pico de gallo + tomato sauce (1.5 cups pico + 0.5 cup sauce) | Fresher, chunkier texture with brighter tomato flavor. Less spice than jarred salsa versions. |
| Green Chiles | 2 fresh jalapeños, diced | Significantly more heat and fresher pepper flavor. Removes the canned taste entirely. |
| Green Chiles | 1 can roasted poblano peppers | Smoky, complex pepper flavor with milder heat. More sophisticated profile for special occasions. |
| Cumin | Increase to 1.5 tablespoons | Deeper, earthier Mexican profile. Use only if cumin is a favorite spice in your kitchen. |
| Chili Powder | Smoked paprika (reduce to 1.5 teaspoons) | Shifts to smoky, less traditionally Mexican. Reduces heat level significantly. |
| Cilantro | Mexican oregano (1 teaspoon dried, added with dry spices) | More herbaceous, Mediterranean note. Changes the fresh brightness to warm earthiness. |
| Chicken Broth | Vegetable broth | Slightly lighter flavor, still excellent results. Use low-sodium version to control salt. |
| Lime Juice | Fresh lemon juice | More acidic and sharp brightness. Acceptable emergency substitute but lacks lime’s specific note. |
| Chicken Breasts | Boneless skinless thighs (3 lbs) | Richer, more forgiving texture due to higher fat content. Less likely to dry out, requires same cooking time. |
Serving Suggestions and Pairings
Instant Pot salsa chicken is remarkably versatile and works beautifully across dozens of dishes and occasions. For casual weeknight tacos, serve the shredded chicken in warm flour or corn tortillas with toppings like shredded cheese, diced tomatoes, sour cream, and additional cilantro. For a heartier meal, build burrito bowls by layering cilantro-lime rice, black beans, the salsa chicken, corn, diced bell peppers, guacamole, and pico de gallo in individual bowls.
For entertaining, create an impressive nachos platter by arranging tortilla chips on a large sheet pan, topping with salsa chicken, melted cheese, jalapeños, and black beans, then garnish with sour cream, fresh cilantro, and lime wedges after baking at 375°F for 8-10 minutes. Salsa chicken also excels in salads: toss it with mixed greens, corn, black beans, tortilla strips, and a lime-cilantro vinaigrette for a light lunch option.
For breakfast applications, shred the chicken finer and use it to fill breakfast burritos with scrambled eggs, cheese, and potatoes. At casual gatherings, serve the chicken in soft slider buns with coleslaw and lime crema for an unexpected twist on traditional sliders. For meal prep containers, pair portions of salsa chicken with roasted vegetables, cauliflower rice, or brown rice for five balanced lunches. During family dinners, serve it alongside Spanish rice, refried beans, and warm cornbread for a complete Mexican-inspired feast.
Storage and Reheating
| Storage Method | Duration | Instructions |
|---|---|---|
| Refrigerator (with cooking liquid) | 3-4 days | Transfer chicken and salsa liquid to an airtight container. Store at 40°F or below. The liquid keeps chicken moist and flavorful. Stir before using. |
| Refrigerator (drained) | 3-4 days | If draining the liquid, store chicken alone in an airtight container. Add fresh salsa when reheating to prevent drying out. Less flavorful than wet storage. |
| Freezer (with cooking liquid) | 2-3 months | Freeze in freezer bags with liquid to maintain moisture. Label with date. Thaw overnight in refrigerator before reheating, or reheat from frozen by adding 5-10 extra minutes to microwave time. |
| Freezer (portioned individual containers) | 2-3 months | Portion into individual meal prep containers for convenient grab-and-heat lunches. Stack flat in freezer to save space. Thaw before heating. |
| Microwave Reheating | 1-2 minutes | Place frozen or refrigerated chicken in a microwave-safe bowl. Cover and heat at 50% power for 2-3 minutes (from frozen) or 1-2 minutes (from refrigerated). Stir halfway through. Add a splash of water or broth if too dry. |
| Stovetop Reheating | 5-7 minutes | Transfer chicken and liquid to a skillet over medium heat. Stir occasionally until warmed through, approximately 5-7 minutes. This method ensures even heating and preserves texture best. |
| Instant Pot Reheating | 3-4 minutes | Add cold chicken and liquid to the Instant Pot. Cook on high pressure for 3 minutes. Quick release pressure. Ideal for reheating large quantities without heating the whole kitchen. |
Nutritional Information
| Nutrient | Amount Per Serving |
|---|---|
| Calories | 185 |
| Protein | 32g |
| Fat | 2.5g |
| Saturated Fat | 0.7g |
| Carbohydrates | 6g |
| Dietary Fiber | 1g |
| Sugar | 3g |
| Sodium | 620mg |
| Cholesterol | 85mg |
Approximate values based on USDA database and standard recipe analysis. Actual values vary by brand and specific ingredients used. If storing chicken in cooking liquid, increase sodium slightly.
Frequently Asked Questions
Can I substitute chicken thighs for the chicken breasts in this instant pot recipe?
Yes, boneless skinless chicken thighs work excellently and many home cooks prefer them for superior texture and juiciness. Use 3 pounds of thighs, which contain more fat and won’t dry out during pressure cooking. The cooking time remains 15 minutes on high pressure. Thighs produce a more forgiving dish since their higher fat content makes them virtually impossible to overcook, making this substitution ideal for less experienced cooks.
How do I know if the instant pot salsa chicken is fully cooked?
The chicken is fully cooked after exactly 15 minutes on high pressure followed by quick release. To verify doneness, the internal temperature should reach 165°F when measured with an instant-read thermometer in the thickest part of the largest breast. After shredding, the meat should pull apart easily with minimal resistance and show no pink or translucent sections. If you suspect undercooked chicken, return it to the pot and pressure cook for an additional 2-3 minutes.
What should I do if the instant pot says “burn” and won’t pressurize?
The “burn” error indicates the pot detected food on the bottom burning due to insufficient liquid. Add another 1/2 cup of chicken broth immediately and use the deglaze function to scrape any stuck-on food from the pot bottom. Ensure the trivet is in place and the chicken sits on it, not directly on the pot. Most “burn” errors occur when the broth amount falls below the minimum required for pressure, so strictly measure the 1 cup starting broth and never reduce this amount.
Can I make this recipe ahead of time for meal prep?
Yes, this recipe is ideal for meal prep and can be made up to 4 days in advance when stored with the cooking liquid in airtight containers. The chicken actually improves in flavor as it sits, with the salsa and spices continuing to permeate the meat. Portion into individual containers immediately after cooking and refrigerate until ready to eat. Reheat in the microwave or on the stovetop with a splash of water if needed to restore moisture.
Is there a way to make instant pot salsa chicken spicier for heat lovers?
Use hot salsa instead of medium salsa as your base, add an extra can of roasted green chiles or fresh jalapeños, and include 1/4 teaspoon cayenne pepper with the dry spice blend. You can also stir in a few dashes of hot sauce after cooking if additional heat is desired. Each modification intensifies the heat level without overpowering the balanced spice profile, allowing you to customize the final dish to your tolerance level.
What are the best tortillas to serve with instant pot salsa chicken tacos?
Both flour and corn tortillas work beautifully, though each offers different qualities. Flour tortillas are larger, softer, and easier to fill generously, making them ideal for casual weeknight meals. Corn tortillas provide authentic Mexican flavor and are naturally gluten-free, with a more delicate texture that shows off the chicken. Warm tortillas immediately before serving by wrapping them in a damp towel and microwaving for 30 seconds or heating them directly over a gas flame for 10 seconds per side, which improves texture and flavor significantly.
Conclusion
Instant Pot salsa chicken delivers exceptional flavor and versatility in just 30 minutes, making it an essential recipe for any home cook seeking reliable weeknight solutions. The combination of tender, shredded chicken, authentic Mexican spices, and bright salsa creates a foundation for countless dishes from tacos to burrito bowls. This recipe proves that quick cooking doesn’t mean compromising on taste or quality. Master this technique and you’ll return to it again and again for family dinners, meal prep, and casual entertaining.
Instant Pot Salsa Chicken
Ingredients
- 3 (6-ounce) boneless, skinless chicken breasts
- 2 cups chunky salsa (24 oz jar)
- 1 cup chopped green chiles (11 oz can)
- 1 tbsp ground cumin
- 1 tbsp chili powder
- 1 tsp dried oregano
- 0.5 tsp salt
- 0.5 tsp black pepper
- 2 tbsp olive oil (optional)
Instructions
- Season chicken breasts with cumin, chili powder, oregano, salt, and pepper.
- Heat oil in Instant Pot on sauté setting, sear chicken 2-3 minutes per side (optional).
- Add salsa, green chiles, and any accumulated juices.
- Close lid, set to pressure cook (high) for 15 minutes.
- Natural release for 10 minutes, then shred chicken with two forks.
- Stir mixture gently before serving.
Notes
Shred with fork or use chicken shredder attachment
Store in airtight container up to 3 days
For extra flavor, add 2 cloves garlic, minced
Serve warm in tortillas, rice bowls, or grain salads
