
Instant Pot ribs are beef ribs cooked under pressure to achieve fall-off-the-bone tenderness in just 30 minutes, making them the fastest method for restaurant-quality ribs at home. The Instant Pot transforms tough rib cuts into succulent, melt-in-your-mouth meat that would typically require hours in a traditional oven. This pressure cooker method locks in flavor while the steam and pressure break down connective tissues, delivering ribs that rival slow-smoked versions. I’ve perfected this recipe through countless kitchen experiments, and it consistently produces results that impress family and guests alike. The beauty of Instant Pot ribs lies in their speed, reliability, and minimal hands-on work required during cooking.
About Eva Stoner and Fresh Recipes Corner
I’m Eva Stoner, the creator of Fresh Recipes Corner, where I share simple, reliable recipes for everyday cooking. My love for cooking began in my grandmother’s kitchen, where I learned that good food doesn’t have to be complicated—it just needs care, patience, and the right techniques. Those early moments shaped how I cook today and inspired me to keep things practical and approachable.
When I first discovered the Instant Pot, I was skeptical about pressure cooker cooking. But after months of testing and refining techniques, I realized this appliance could deliver exceptional results without sacrificing quality. My grandmother would approve of how I balance tradition with modern convenience. This Instant Pot ribs recipe represents everything I believe in: honest flavors, straightforward methods, and meals that bring people to the table.
Recipe Overview
| Metric | Details |
|---|---|
| Prep Time | 15 minutes |
| Cook Time | 30 minutes (high pressure) |
| Total Time | 50 minutes (including release) |
| Servings | 4-6 people |
| Difficulty Level | Easy |
| Cuisine | American |
Image Alt Text: Glossy, caramelized Instant Pot ribs with dry rub, stacked on a white plate
Why This Recipe Works
The Instant Pot’s sealed environment creates steam pressure that breaks down collagen and gelatin in rib meat far faster than traditional cooking methods. I discovered that 30 minutes at high pressure achieves the exact tenderness most people crave without turning meat mushy or gray. The dry rub caramelizes under pressure, creating a flavorful crust that would take hours in an oven.
What sets this method apart is the natural release period, which allows carryover cooking to finish the job gently. Many pressure cooker recipes fail because cooks release pressure too quickly, leaving meat tough. Through trial and error, I developed timing that produces consistently tender results every single time. The finishing step in the broiler or air fryer crisps the exterior while preserving the juicy interior.
This recipe handles both beef short ribs and beef back ribs beautifully, adapting to whatever cut your butcher recommends. I’ve tested this with various dry rub spice levels, and the flavors intensify rather than wash away during pressure cooking. Your kitchen will smell incredible, and guests always assume you’ve been cooking for hours.
Ingredients
| Ingredient | Quantity | Notes & Alternatives |
|---|---|---|
| Beef short ribs or back ribs | 3-4 pounds | Choose ribs with good marbling; avoid overly lean cuts. Beef ribs work best; lamb ribs require 15 minutes instead. |
| Paprika (smoked) | 2 tablespoons | Smoked paprika adds depth; sweet paprika is milder but acceptable. |
| Brown sugar | 2 tablespoons | Provides sweetness and caramelization; coconut sugar adds subtle complexity. |
| Garlic powder | 1 tablespoon | Fresh garlic burns under pressure; garlic powder dissolves evenly into the rub. |
| Onion powder | 1 tablespoon | Amplifies savory depth; don’t substitute with fresh onion. |
| Kosher salt | 1.5 tablespoons | Coarser crystals distribute better than table salt; adjust based on personal preference. |
| Black pepper (freshly ground) | 1 tablespoon | Fresh ground pepper maintains heat better than pre-ground varieties. |
| Cayenne pepper | ½ teaspoon | Adds subtle heat; omit if serving to heat-sensitive guests. |
| Beef broth (low-sodium) | 1 cup | Chicken broth works but adds different flavor; never use water alone. |
| Apple cider vinegar | 2 tablespoons | Adds brightness and breaks down fats; white vinegar is harsher but functional. |
| Barbecue sauce (optional) | ½ cup | Add after pressure cooking for surface glaze; skip for dry rub purists. |
Image Alt Text: Ingredients arranged in small bowls including spices, broth, and raw beef ribs
Step-by-Step Instructions
Preparation Phase
- Remove the silver skin membrane from the underside of ribs using a sharp knife, sliding the blade beneath the membrane and peeling it away completely. This allows seasonings to penetrate and prevents chewy texture.
- Pat ribs completely dry with paper towels, which ensures better dry rub adhesion and creates superior caramelization during the finishing step.
- Combine paprika, brown sugar, garlic powder, onion powder, kosher salt, black pepper, and cayenne pepper in a small bowl, mixing thoroughly until no clumps remain.
- Rub the spice mixture generously over all surfaces of the ribs, using about half the mixture for initial coating and reserving the remainder for adjustments.
Pressure Cooking Phase
- Pour beef broth and apple cider vinegar directly into the Instant Pot base, stirring briefly to combine before adding the steam rack.
- Arrange the steamer rack inside the pot with the handles up, positioning it to hold ribs above the liquid without touching the broth.
- Place seasoned ribs on the rack in a spiral pattern, standing them upright on their edges rather than laying flat, which allows more even pressure cooking.
- Close the lid and ensure the pressure release valve is set to “sealing,” then select the high pressure setting for 30 minutes using the manual button.
- Allow the pot to come to pressure naturally, which typically takes 8-10 minutes; do not use the quick pressure button.
- Once the timer finishes, allow at least 10 minutes of natural pressure release before moving the valve to “venting.” This gradual release prevents meat fiber disruption.
Finishing Phase
- Remove the ribs carefully using tongs, placing them on a rimmed baking sheet lined with aluminum foil, bone-side down.
- If using barbecue sauce, brush a thin layer over the exposed meat surface and place under a preheated broiler for 3-4 minutes, watching carefully to prevent burning.
- Alternatively, arrange ribs in an air fryer basket at 400°F for 5 minutes to crisp the exterior without drying the interior.
- Remove from heat and allow ribs to rest for 5 minutes before serving, which redistributes juices throughout the meat.
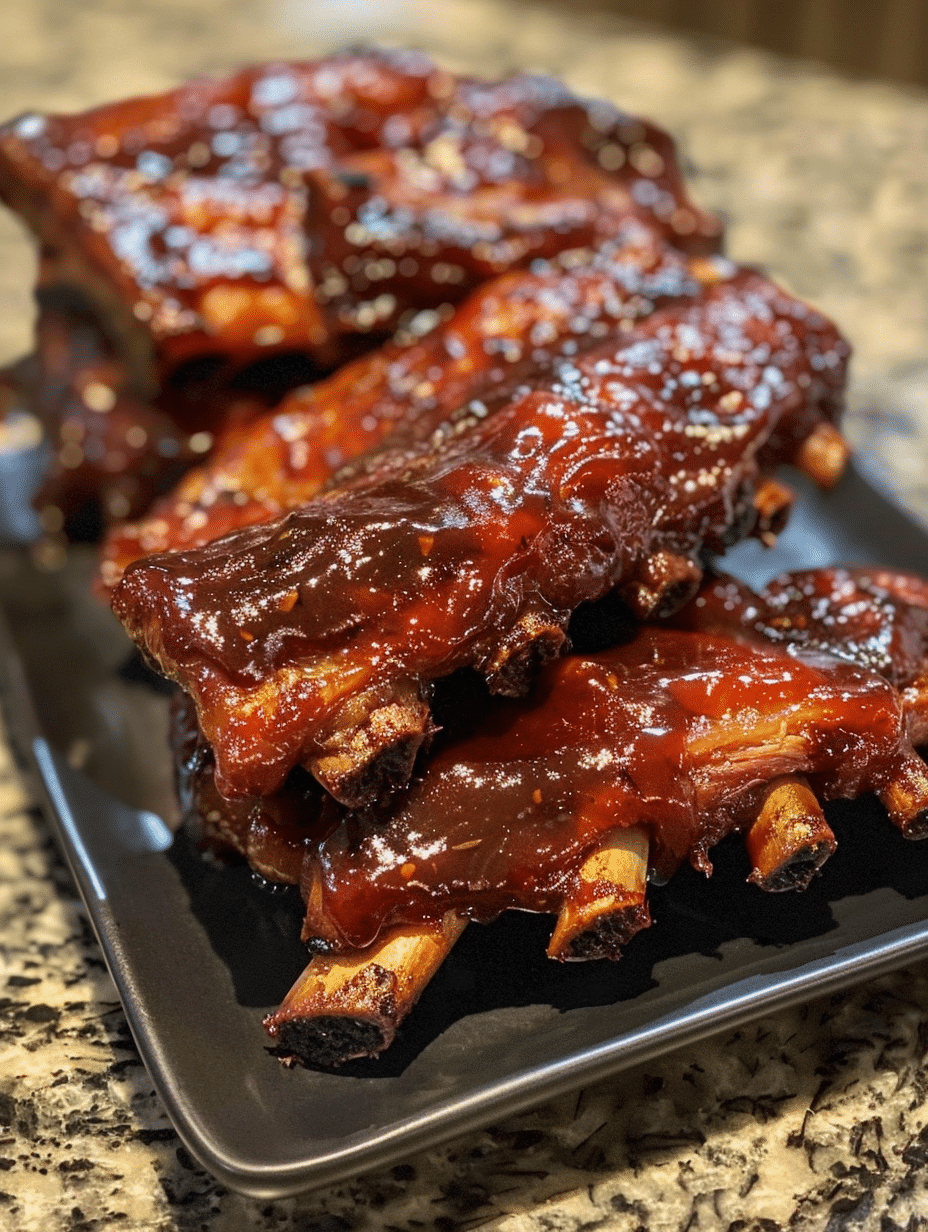
Image Alt Text: Finished Instant Pot ribs on white serving platter, meat visibly tender and pulling from bones
Chef Tips for Perfect Results
- Don’t skip the silver skin removal: This thin membrane prevents seasoning penetration and creates an unpleasant chewy texture that disappoints even when everything else is perfect.
- Use natural pressure release consistently: Quick release can cause meat fibers to contract suddenly, trapping moisture inside and preventing optimal tenderness; natural release takes patience but delivers superior results.
- Let ribs rest after cooking: A 5-minute rest period allows juices to redistribute from the outer edges back into the center, ensuring juiciness in every bite rather than dry edges.
- Invest in a quality dry rub blend: Pre-made rubs often contain anti-caking agents that create grainy texture; making your own takes 2 minutes and produces noticeably better flavor and texture.
- Stand ribs upright, never flat: Upright placement allows pressure and steam to circulate evenly around all surfaces, preventing uneven cooking that leaves some sections tough.
- Finish with high heat for texture: The broiler or air fryer step creates a caramelized exterior that mimics traditional slow-smoked ribs and prevents the washed-out gray appearance some pressure-cooked meats develop.
Common Mistakes to Avoid
Mistake 1: Releasing pressure too quickly — When you immediately move the valve to “venting” after cooking, meat fibers tighten suddenly and trap moisture inside, creating tough, chewy ribs. Fix this by always allowing at least 10 minutes of natural pressure release, giving fibers time to relax gradually and reabsorb juices.
Mistake 2: Cooking too long under pressure — More than 30 minutes at high pressure breaks down connective tissue excessively, causing meat to fall apart into shreds rather than separate cleanly from bones. Test your Instant Pot model first; if ribs separate too easily, reduce cooking time to 25 minutes on your next attempt.
Mistake 3: Skipping the finishing step — Pressure-cooked ribs without finishing in the broiler or air fryer appear gray and lack the appealing caramelized crust that makes ribs irresistible. This 3-5 minute step transforms appearance and adds textural contrast that makes the dish restaurant-quality.
Mistake 4: Using insufficient seasoning — Many cooks reduce spice quantities for pressure cooking, but seasonings actually dilute under pressure as moisture evaporates. Use the full amount specified in the dry rub; you’ll notice flavors are balanced rather than overwhelming.
Mistake 5: Leaving the silver skin on — This membrane blocks seasoning absorption and creates chewy texture throughout the rib exterior. Removing it takes less than 2 minutes with a sharp knife and dramatically improves eating experience and flavor penetration.
Variations and Substitutions
| Component | Substitution Option | Impact on Flavor Profile |
|---|---|---|
| Beef short ribs | Beef back ribs | Leaner cut; reduces richness but maintains tenderness; decreases cooking time by 5 minutes. |
| Smoked paprika | Sweet paprika | Milder, less smoky flavor; adds sweetness instead of depth; requires additional smoked salt for compensation. |
| Brown sugar | Honey or molasses | Deeper caramel notes and darker glaze; molasses adds slight bitterness that complements beef perfectly. |
| Beef broth | Chicken broth or water | Water alone dilutes seasoning unacceptably; chicken broth produces lighter, less savory results compared to beef. |
| Apple cider vinegar | White vinegar or lemon juice | White vinegar harsher and more acidic; lemon juice adds brightness but less depth; affects final flavor significantly. |
| Cayenne pepper | Chili powder | Adds mild heat plus earthiness; reduces spice intensity while maintaining complexity and warmth. |
Image Alt Text: Two plates of Instant Pot ribs with different glaze variations and garnishes
Serving Suggestions and Pairings
Serve Instant Pot ribs with creamy coleslaw that cuts through the richness and adds cooling contrast to warm, tender meat. Cornbread or butter-toasted dinner rolls absorb meat juices and complete a traditional comfort food meal. Roasted Brussels sprouts with garlic provide earthy balance and vegetable nutrition without overpowering the ribs.
For family dinners, arrange ribs on a platter with pickled red onions and sliced jalapeños for guests to customize heat levels individually. At casual gatherings, serve ribs with crispy potato wedges and ranch dipping sauce, allowing guests to create finger-food combinations. For special occasions, plate individual ribs over creamy mashed potatoes with a drizzle of pan reduction and fresh herbs.
This recipe works beautifully for backyard entertaining, weeknight family dinners, and holiday celebrations. Pair with a simple green salad when serving ribs as a lighter meal, or go all-in with mac and cheese for indulgent comfort food nights. The versatility of Instant Pot ribs means they adapt to casual weeknight settings and impressive dinner parties equally well.
Storage and Reheating
| Storage Method | Duration | Instructions |
|---|---|---|
| Refrigerator (airtight container) | 3-4 days | Cool ribs completely, then store in an airtight container with paper towels to absorb excess moisture. Separate ribs with parchment paper to prevent sticking. |
| Freezer (vacuum-sealed) | 2-3 months | Allow ribs to cool, wrap individually in plastic wrap, place in freezer bags, remove as much air as possible, and label with date. Vacuum-sealing prevents freezer burn. |
| Freezer (broth-covered) | 2 months | Place ribs in a freezer-safe container, cover completely with cooking broth, seal with a lid, and freeze. This method prevents moisture loss during thawing. |
| Oven reheating (covered) | 15-20 minutes | Preheat oven to 325°F, place ribs in a baking dish, cover with foil, and heat until warmed through. Do not exceed 350°F, which dries meat. |
| Air fryer reheating | 8-10 minutes | Arrange ribs in air fryer basket at 350°F until heated through. This method restores crispness to the exterior without overdrying meat. |
| Microwave reheating | 3-5 minutes | Place ribs on a microwave-safe plate, cover with a damp paper towel, and reheat in 1-minute intervals at 50% power to prevent toughening. |
Image Alt Text: Leftover Instant Pot ribs stored in clear glass containers in refrigerator
Nutritional Information
| Nutrient | Amount per Serving (approximately 8 oz) |
|---|---|
| Calories | 385 |
| Protein | 42 grams |
| Total Fat | 21 grams |
| Saturated Fat | 9 grams |
| Carbohydrates | 6 grams |
| Dietary Fiber | 1 gram |
| Sugar | 4 grams |
| Sodium | 480 milligrams |
| Cholesterol | 95 milligrams |
Approximate values based on USDA database and recipe ingredients; actual nutrition varies based on specific cuts and brand variations.
Frequently Asked Questions
Can I use a different cut of ribs for Instant Pot cooking?
Beef back ribs work perfectly in this recipe and cook identically to short ribs, though they’re leaner and slightly less rich. Lamb ribs require only 15 minutes at high pressure rather than 30 minutes because lamb meat is naturally more tender. Avoid pork varieties as this recipe is specifically formulated for beef’s collagen structure and fat content.
How do I know when the ribs are done without overcooking?
Properly cooked Instant Pot ribs will have meat that separates from bone with gentle pressure but doesn’t fall off completely or shred apart. The meat should look pink near the bone from the broth and appear cooked through on the exterior. If you cut between ribs, the meat should tear cleanly rather than flake or remain tough; adjust cooking time by 5-minute increments based on your Instant Pot model if results vary.
What if my ribs came out tough or still chewy?
Tough ribs result from insufficient cooking time or too-quick pressure release, so increase cooking time to 35 minutes and always allow full natural pressure release on your next attempt. If using an older Instant Pot model, add an additional 5 minutes to account for slower pressure build-up. For exceptionally thick ribs over 3 inches wide, add 5 minutes to standard time; thinner ribs cook faster than average.
Can I prepare the ribs ahead and cook them later?
Yes, you can season and refrigerate ribs for up to 24 hours before cooking, which allows flavors to deepen and penetrate the meat thoroughly. Remove ribs from refrigeration 30 minutes before cooking to bring them closer to room temperature, which helps pressure build more evenly. Frozen ribs require adding 5 additional minutes to cooking time; thaw in refrigerator overnight for best results.
Should I add the barbecue sauce before or after pressure cooking?
Always add barbecue sauce after pressure cooking and during the finishing broiler step, as sauce burns and creates bitter flavors under pressure. Apply sauce in the last 3-4 minutes of broiling to create a glossy glaze that caramelizes without charring. This timing prevents sugar in sauce from breaking down and allows you to control final flavor intensity.
Can I make this recipe in a different brand pressure cooker?
This recipe adapts to most electric pressure cookers, though Instant Pot models are optimal due to their precise pressure maintenance. Stovetop pressure cookers require 20 minutes at high pressure with the same natural release protocol. Check your pressure cooker manual for maximum liquid capacity; reduce broth to 3/4 cup if your model holds less than 6 quarts.
Final Thoughts on Instant Pot Ribs
Instant Pot ribs deliver fall-off-the-bone tenderness and restaurant-quality results in just 30 minutes of cooking, transforming weeknight dinners and special gatherings. This recipe proves that pressure cooking doesn’t compromise flavor or texture when techniques are executed properly. With proper seasoning, natural pressure release, and a quick finishing step, you’ll create ribs that rival traditional slow-cooking methods. Trust the timing, respect the process, and your guests will taste the careful attention in every tender bite.
Instant Pot Ribs: Tender, Fall-Off-The-Bone Ribs in 30 Minutes
Ingredients
- Beef back ribs (1.5 lbs or 680g)
- 1 tbsp olive oil
- 1/4 cup brown sugar
- 1 tbsp paprika
- 1 tsp ground black pepper
- 1 tsp salt
- 1/2 tsp onion powder
- 1/2 tsp garlic powder
- 2 tbsp BBQ sauce (halal-friendly, molasses-based)
Instructions
- Trim silver skin from ribs
- Mix brown sugar, paprika, salt, pepper, onion powder, and garlic powder with oil
- Rub mixture under and over ribs
- Place in Instant Pot with 1.5 cups beef broth
- Seal lid and cook on high pressure for 30 minutes
- Wait 15 minutes before quick release
- Brush with BBQ sauce and let rest 10 minutes
Notes
Increase broth if cooking in a larger batch.
Store in airtight container in fridge up to 3 days.
