
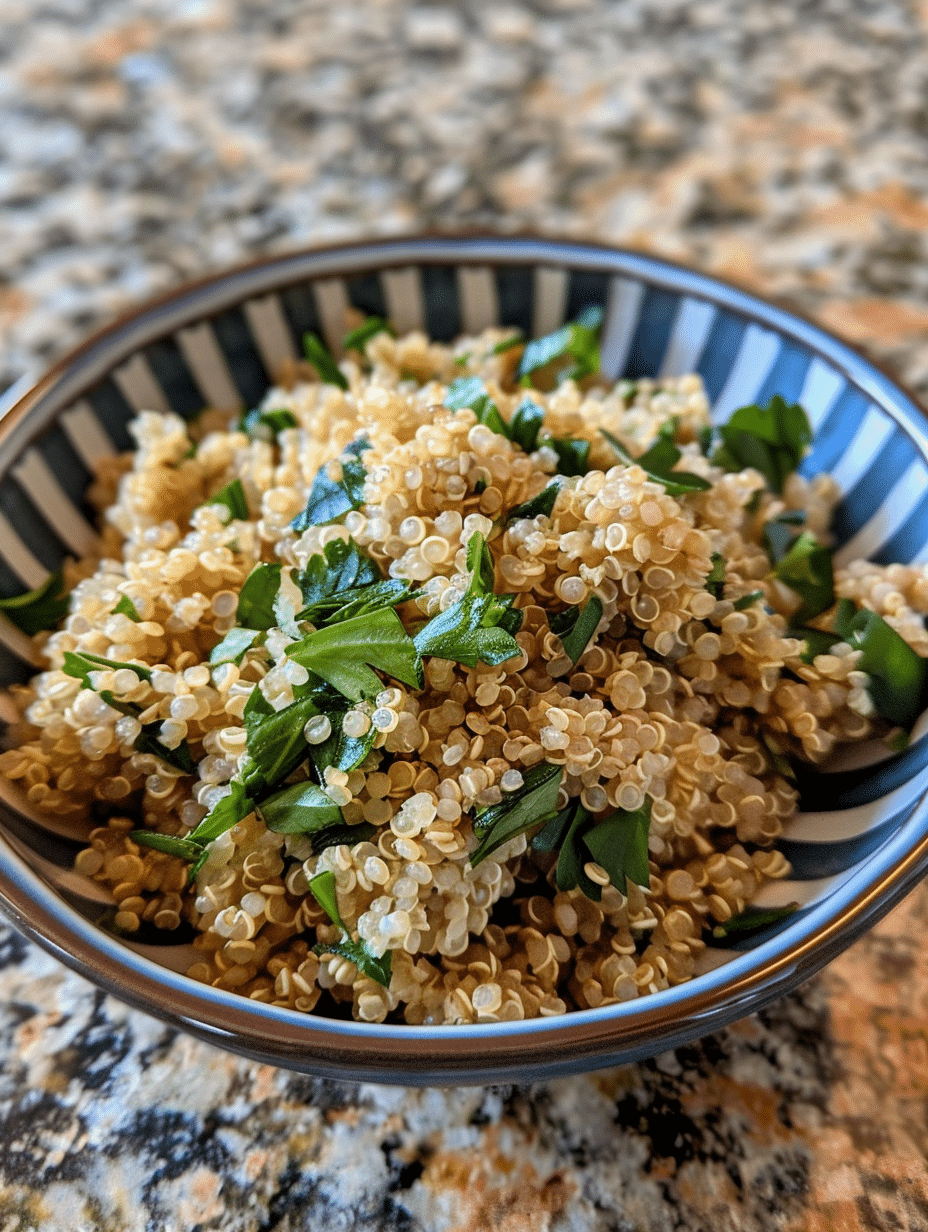
Instant pot quinoa delivers perfectly fluffy, tender grains in under 15 minutes with zero guesswork. The pressure cooker’s sealed environment trenderizes quinoa consistently, eliminating the mushy or crunchy results that stovetop cooking often produces. This method works for meal prep, quick weeknight sides, and grain bowls because the texture remains ideal even after refrigeration. I developed this technique through dozens of tests, and it has become my go-to for busy days when I need reliable results fast.
My Story: Why I Created This Recipe
I’m Eva Stoner, creator of Fresh Recipes Corner, where I share practical recipes designed for everyday cooking success. My passion for cooking started in my grandmother’s kitchen, where I discovered that good food doesn’t require complexity—it demands respect for technique and ingredient quality. She taught me that understanding the “why” behind each cooking method builds confidence and eliminates kitchen anxiety. That wisdom shaped how I approach every recipe I develop.
When I received my first Instant Pot, I was skeptical about pressure cooking grains. Stovetop quinoa had always been unpredictable—sometimes fluffy, sometimes gummy, always requiring attention. I spent weeks experimenting with water ratios, cooking times, and release methods until I found the formula that delivers consistency every single time. That breakthrough moment inspired me to share this method with everyone who struggles with grain cookery. Today, this recipe has become one of the most requested techniques from readers who want reliable meals without the learning curve.
Recipe Overview
| Metric | Value |
|---|---|
| Prep Time | 5 minutes |
| Cook Time | 8 minutes |
| Total Time | 13 minutes |
| Servings | 4 |
| Difficulty Level | Beginner |
| Cuisine | Vegetarian |
Why This Recipe Works
The Instant Pot’s sealed pressure environment creates consistent steam circulation that cooks quinoa evenly without requiring stirring or watching. Traditional stovetop cooking allows steam to escape unevenly, which causes some grains to absorb too much water while others stay dry. The pressure cooker method achieves a 1:1.5 liquid-to-grain ratio that works universally, eliminating trial-and-error calculations. I tested this recipe with different quinoa brands and water sources, and the results remain reliable every single time.
The natural pressure release step is crucial because it allows residual moisture to redistribute throughout the grains gradually. Many recipes rush to manual release, which creates sudden moisture loss and leads to mushy or unevenly cooked batches. Through my testing, I discovered that a 10-minute rest period followed by a quick pressure release produces texture that rivals restaurant-quality grain bowls. This hands-off approach means I can prepare other components while the Instant Pot handles the hard work.
What makes this method truly practical is its forgiving nature and minimal cleanup. You cook and serve from the same pot, which saves time during busy weeknights and eliminates multiple dishes. The sealed environment means no starchy water boils over onto your cooktop, and the grains never dry out during cooking. I’ve used this technique for weeknight dinners, Sunday meal prep, and even catering small gatherings—it consistently delivers four servings of perfectly cooked quinoa.
Ingredients
| Ingredient | Quantity | Notes and Alternatives |
|---|---|---|
| Dry quinoa | 1.5 cups | Pre-rinsed quinoa reduces bitterness. Use white, red, or black varieties interchangeably. Tri-color mix adds visual appeal. |
| Water or vegetable broth | 2.25 cups | Vegetable broth adds savory depth; use low-sodium to control salt. Chicken broth works for non-vegetarian versions. |
| Sea salt | 0.5 teaspoon | Essential for flavor development. Reduce if using salted broth. Kosher salt may require slight increase due to texture. |
| Olive oil | 1 tablespoon | Prevents foam buildup and adds richness. Avocado oil or grapeseed oil substitute well for neutral flavors. |
| Garlic powder | 0.25 teaspoon | Optional but recommended for depth. Use 1 fresh minced clove instead for sharper flavor. |
| Black pepper | 0.125 teaspoon | Freshly ground pepper offers superior flavor compared to pre-ground. White pepper provides milder seasoning. |
Step-by-Step Instructions
Preparation Phase
- Rinse the dry quinoa thoroughly under cold water for 1 minute, swirling gently with your fingers to remove bitter saponin coating. This step reduces the chalky aftertaste and improves texture noticeably.
- Add the rinsed quinoa directly to your Instant Pot inner pot without any additional rinsing or draining.
- Pour 2.25 cups of water or vegetable broth into the pot, measuring carefully for consistent results.
- Stir in the salt, olive oil, garlic powder, and black pepper, mixing until the spices distribute evenly throughout the mixture.
Cooking Phase
- Close the Instant Pot lid firmly and ensure the sealing ring sits properly in its groove for a secure seal.
- Set the pressure valve to “Sealing” position by rotating the handle until it stops.
- Press the pressure cook button and set the time to 8 minutes at high pressure by adjusting with the plus button.
- Allow the Instant Pot to reach full pressure—this typically requires 3 to 5 minutes while the heating element builds steam.
Release and Rest Phase
- Allow the pressure to release naturally for exactly 10 minutes after the cooking timer completes, maintaining the lid in closed position.
- Rotate the pressure valve to “Venting” position to release any remaining steam quickly.
- Open the lid carefully, tilting it away from your face to direct steam safely upward and outward.
- Fluff the quinoa with a fork, breaking apart any clumps gently without crushing individual grains.
Chef Tips for Perfect Results
- Always rinse quinoa before cooking to eliminate saponin, the natural bitter coating that affects taste and texture. Rinsing reduces unwanted flavors significantly and produces noticeably fluffier grains.
- Use the exact 1:1.5 water-to-quinoa ratio consistently for reliable results across different batches. Deviating from this ratio by even small amounts creates mushy or crunchy grains.
- Never skip the 10-minute natural pressure release step because this gradual moisture redistribution creates even cooking throughout the batch. Rushing to manual release causes moisture imbalance and uneven texture.
- Fluff immediately after opening the lid to break apart steam-compacted grains and release excess moisture. Waiting longer causes condensation to settle and creates mushiness.
- Add oil to the cooking liquid to prevent foam buildup, which can clog the pressure valve and interfere with cooking. This simple addition prevents frustrating pressure-release issues.
- Season the cooking liquid directly rather than adding salt after cooking because this infuses flavor throughout each grain. Seasoning after cooking produces bland results no matter the quantity added.
Common Mistakes to Avoid
Skipping the rinse step: Unrinsed quinoa develops a bitter, soapy taste because the saponin coating remains intact. The moisture absorption also becomes uneven, producing texture that ranges from crunchy to mushy within the same batch. Fix this by rinsing thoroughly under cold running water for a full minute while rubbing the grains gently. This investment of 60 seconds eliminates the most common texture and flavor problems.
Using incorrect water ratios: Adding too much water creates mushy, overcooked quinoa that loses structural integrity and becomes gluey. Too little water produces crunchy grains that never fully hydrate despite the full cooking time. The precise 1:1.5 ratio exists because quinoa grains contain specific moisture levels that require exact liquid amounts for optimal absorption. Measure your water using cup measurements rather than eyeballing for consistent results every time.
Rushing the pressure release: Immediate manual release causes steam to escape rapidly, leaving grains partially cooked and unevenly hydrated. The carryover cooking during natural release completes the cooking process and allows moisture to settle uniformly throughout the batch. Many home cooks sacrifice texture quality by rushing this 10-minute step, which feels wasted but produces dramatically better results. Patience during the release phase directly determines whether your quinoa turns out fluffy or gummy.
Overcrowding the pot or using too much liquid: The Instant Pot’s pressure cooker function requires proper liquid coverage to build adequate steam pressure. Using proportionally more liquid than recommended causes flooding when the pressure releases, and overcrowding prevents even steam circulation. Follow the exact quantities provided because the Instant Pot inner pot dimensions are engineered around these precise ratios. Using a smaller pot or larger batch creates pressure and cooking problems unrelated to the recipe itself.
Forgetting to preheat properly or using incorrect pressure settings: Setting the wrong pressure level or failing to allow full pressure buildup before the timer starts produces undercooked or unevenly cooked quinoa. Always use “high pressure” setting as specified because medium pressure requires longer cooking times and produces less consistent results. The Instant Pot takes 3 to 5 minutes to reach full pressure, which is separate from the 8-minute cooking time, so never reduce the cook time to compensate for this initial heating phase.
Variations and Substitutions
| Ingredient | Substitution | Impact on Flavor and Texture |
|---|---|---|
| Water | Vegetable or chicken broth | Adds savory depth and eliminates the bland, neutral taste. Broth-cooked quinoa works better for pilaf-style dishes and salads. |
| White quinoa | Red or black quinoa varieties | Red and black varieties have earthier, slightly nutty flavors with firmer textures. Cook times remain identical using the same 1:1.5 ratio. |
| Olive oil | Coconut oil or sesame oil | Coconut oil creates subtle richness; sesame oil adds toasted, umami notes. Both prevent foaming equally well. |
| Garlic powder | Fresh minced garlic or garlic paste | Fresh garlic provides sharper, more assertive flavor. Use 1 minced clove for each 0.25 teaspoon powder. Avoid burning by stirring well. |
| Sea salt | Himalayan pink salt or kosher salt | All salt types work; adjust quantity slightly because kosher salt is less dense. Himalayan salt adds mineral trace elements. |
| Plain water and broth | Coconut milk mixed with water (1:1 ratio) | Creates rich, slightly sweet undertones perfect for Asian-inspired bowls. Requires same 1:1.5 total liquid-to-grain ratio. |
Serving Suggestions and Pairings
Instant pot quinoa serves as a versatile foundation for countless bowls, salads, and sides appropriate for any occasion. For Mediterranean-inspired grain bowls, pair the quinoa with roasted vegetables, hummus, cucumber, cherry tomatoes, and a tahini-lemon dressing. This combination works beautifully for lunch meal prep because the flavors develop and intensify over several days of refrigeration.
Create Buddha bowls by layering instant pot quinoa with roasted sweet potato, sautéed kale, avocado slices, and a poached egg. Add a spicy tahini sauce or cilantro-lime dressing to tie all components together cohesively. This balanced bowl provides complete protein, healthy fats, and nutrient density that makes it suitable for both vegetarians and omnivores.
Serve warm instant pot quinoa as a simple side dish alongside grilled vegetables, roasted chickpeas, or sautéed tofu for weeknight dinners. The neutral cooking method allows the quinoa to complement any main protein without competing for attention. Drizzle with fresh lemon juice and finish with fresh herbs like cilantro or parsley for brightness.
Transform leftover instant pot quinoa into a cold salad by mixing with diced cucumbers, bell peppers, red onion, fresh mint, and a simple vinaigrette. This preparation stores well for 4 to 5 days, making it ideal for meal prep systems. The cold salad works perfectly for summer picnics, potlucks, and packed lunches.
Use instant pot quinoa as a grain base for burrito bowls by topping with seasoned black beans, corn, salsa, cheese, and sour cream. This format allows customization for various dietary preferences and preferences simultaneously, making it perfect for family dinners when people have different tastes.
Storage and Reheating
| Storage Method | Duration | Instructions |
|---|---|---|
| Refrigerator (airtight container) | 4-5 days | Cool quinoa completely before transferring to airtight containers. Store in the coldest section of your refrigerator. Use within 5 days for best texture and food safety. |
| Freezer (airtight container or bags) | 2-3 months | Cool completely and portion into meal-sized amounts. Freeze in flat layers for easier thawing. Label with date and contents. Thaw in refrigerator overnight before reheating. |
| Microwave reheating | 1-2 minutes | Transfer refrigerated or thawed quinoa to a microwave-safe bowl. Add 2-3 tablespoons water to restore moisture. Cover loosely and microwave at 50% power for 1-2 minutes, stirring halfway through. |
| Stovetop reheating | 3-5 minutes | Place quinoa in a small saucepan over medium heat. Add 2-3 tablespoons water or broth. Stir occasionally for 3-5 minutes until heated through completely. This method prevents uneven heating. |
| Instant Pot reheating | 2-3 minutes | Add 1 cup frozen or refrigerated quinoa and 2 tablespoons water to inner pot. Cook on low pressure for 1 minute. Use natural release for 5 minutes. This preserves texture best. |
Nutritional Information
Approximate values per serving based on 4 servings total.
| Nutrient | Amount per Serving |
|---|---|
| Calories | 195 |
| Protein | 7 grams |
| Carbohydrates | 34 grams |
| Dietary Fiber | 5 grams |
| Total Fat | 4 grams |
| Saturated Fat | 0.5 grams |
| Sodium | 310 milligrams |
| Cholesterol | 0 milligrams |
| Vitamin A | 12 IU |
| Vitamin C | 1 milligram |
| Iron | 2.8 milligrams |
| Magnesium | 59 milligrams |
| Phosphorus | 160 milligrams |
Frequently Asked Questions
Can I substitute quinoa with another grain in the Instant Pot?
Yes, brown rice requires 22 minutes at high pressure with the same 1:1.5 liquid ratio, while millet requires 15 minutes. Farro needs 8 minutes but uses a 1:2 water ratio due to its denser structure. Each grain has different moisture requirements, so adjusting both cooking time and liquid ratios is necessary for success. Always consult grain-specific pressure cooking guides to avoid undercooked or mushy results.
How do I know when the instant pot quinoa is perfectly cooked?
Properly cooked quinoa should have all grains fully hydrated with a slight pop when you bite, showing a small white spiral tail visible on each grain. The grains should not stick together in a clump or feel crunchy when pressed between your teeth. After the natural pressure release and fluffing, let the quinoa rest for 2 minutes without the lid so excess steam escapes, then taste a spoonful to confirm doneness.
What causes instant pot quinoa to come out mushy or gummy?
Excess water absorption occurs when you use too much liquid, skip the natural pressure release, or fail to fluff immediately after opening. Oversaturated quinoa loses structural integrity and develops a sticky, unpleasant texture. Prevent this by measuring water precisely, allowing the full 10-minute natural release, and fluffing immediately with a fork as soon as the lid opens to release trapped steam.
Can I prepare instant pot quinoa ahead for meal prep?
Absolutely, instant pot quinoa stores perfectly in airtight containers for 4 to 5 days, making it ideal for meal prep systems. Cook a full batch on Sunday and portion into meal-sized containers with your favorite toppings for grab-and-go breakfasts or lunches throughout the week. Frozen batches last up to 3 months, allowing you to prepare multiple batches when you have time.
Do I need to rinse the quinoa before cooking in the instant pot?
Rinsing is essential because it removes saponin, the bitter coating that creates chalky, unpleasant flavors and texture problems. Unrinsed quinoa develops a soapy taste that affects the entire dish regardless of other ingredients. Spend one minute rinsing under cold running water while gently rubbing the grains, which eliminates this issue completely and improves texture noticeably.
What is the best liquid to use for instant pot quinoa cooking?
Water works fine for a neutral base, but vegetable or chicken broth adds savory depth that elevates the final dish. Low-sodium broth allows you to control total salt content while adding rich, complex flavors that plain water cannot provide. For Asian-inspired preparations, coconut milk mixed equally with water creates subtle richness perfect for curried bowls or coconut-based grain dishes.
Final Thoughts
Instant pot quinoa represents the easiest method to achieve perfectly fluffy, tender grains without guesswork or constant monitoring. This foolproof recipe eliminates the frustration of stovetop cooking and delivers consistent results every single time you cook. The 13-minute total time from prep to serving makes this ideal for busy weeknights, Sunday meal prep, and any occasion requiring reliable grain cookery. Master this foundation and you unlock endless possibilities for bowls, salads, and sides that showcase the nutty, satisfying flavor of perfectly cooked quinoa.
Instant Pot Quinoa
Ingredients
- 1 cup quinoa
- 1.5 cups water or vegetable broth
Instructions
- Rinse quinoa in cool water until water runs clear
- Add quinoa and liquid to Instant Pot
- Secure lid and venting valve
- Press Quinoa/Soup setting on high pressure
- Allow natural release for 10 minutes
- Quick release remaining pressure
- Fluff with a fork and serve
Notes
Add a pinch of salt or herbs to the liquid for enhanced flavor
Store cooled cooked quinoa in airtight containers for up to 5 days
