
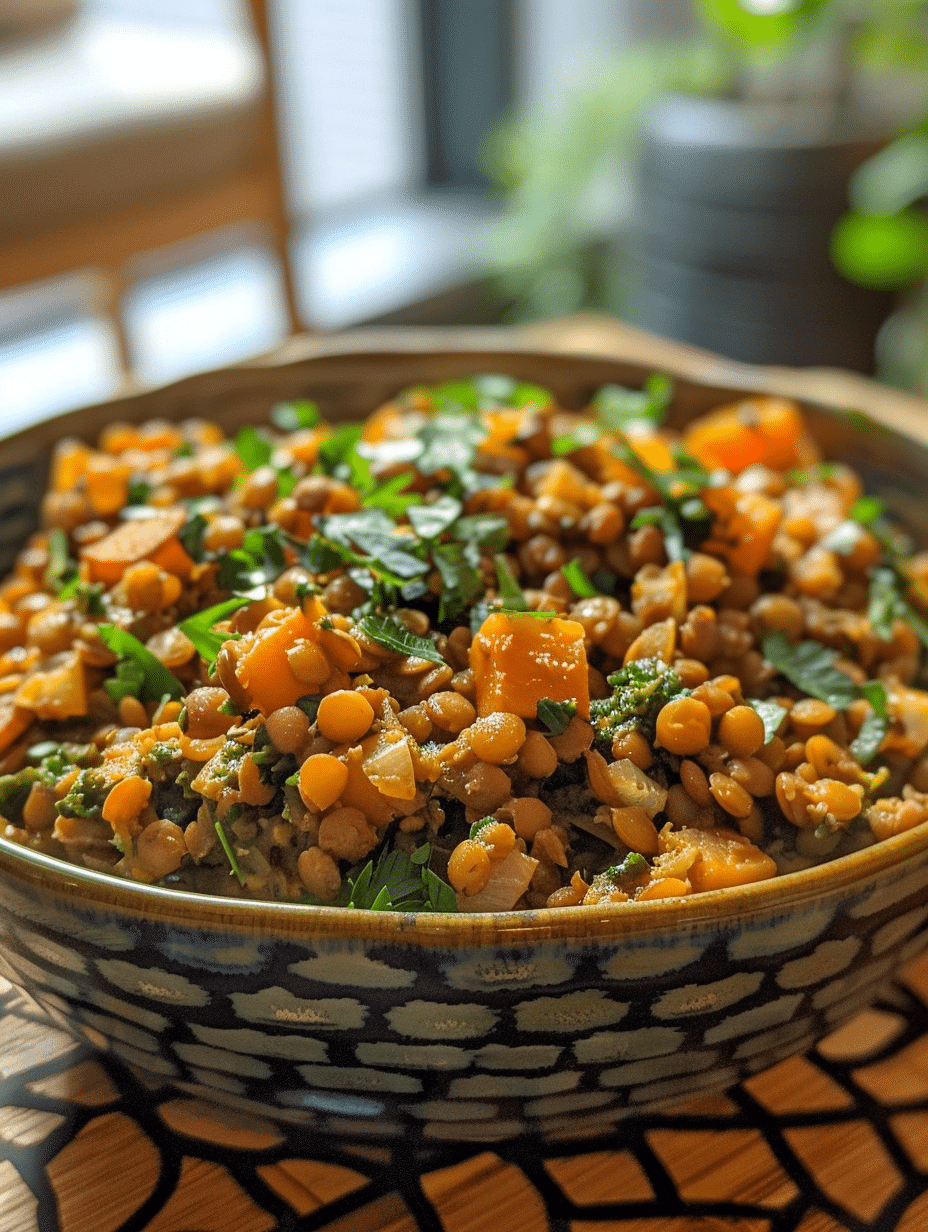
Instant pot lentils deliver tender, flavorful legumes in under 20 minutes without soaking, pre-cooking, or constant stirring. This versatile dish combines dried lentils with aromatic vegetables and savory broth to create a nutritious foundation for countless meals. Red, green, and brown lentil varieties all cook beautifully in a pressure cooker, each developing unique textures and flavor profiles. Whether you’re building meal-prep containers or crafting a quick weeknight dinner, instant pot lentils offer reliability and nutritional density that traditional stovetop methods simply cannot match.
Author Story and Kitchen Expertise
I’m Eva Stoner, creator of Fresh Recipes Corner, where I dedicate my time to sharing uncomplicated, trustworthy recipes for everyday cooking. My passion for cooking began in my grandmother’s kitchen, where I learned that exceptional food doesn’t demand complexity—it requires care, patience, and proper technique. Those formative moments shaped my cooking philosophy and inspired my commitment to keeping recipes practical and accessible for home cooks at every skill level.
When I first tested instant pot lentils five years ago, I was skeptical about pressure cooking dried legumes. After discovering the perfect timing and liquid ratios, I’ve made this recipe countless times for my family, for meal-prep clients, and for cooking classes I teach. The consistency, speed, and nutritional value convinced me this belongs in everyone’s weekly rotation. My experience with legumes spans traditional Indian dal preparation, Mediterranean lentil salads, and quick protein additions to grain bowls—all have benefited from pressure cooking methods I’ve refined through repetition.
| Metric | Value |
|---|---|
| Prep Time | 10 minutes |
| Cook Time | 15 minutes |
| Total Time | 25 minutes |
| Servings | 4 servings |
| Difficulty Level | Easy |
| Cuisine | International |
Why This Recipe Works
Instant pot lentils succeed because pressure cooking breaks down the legume’s outer shell efficiently while maintaining the interior’s structural integrity, producing creamy centers with distinct bite. The sealed environment allows lentils to cook at higher temperatures than stovetop water boiling, reducing cooking time from 45 minutes to just 15 minutes under pressure. I discovered through testing that the 2:1 liquid-to-lentil ratio prevents both mushy overcooking and dry disappointment—this precise measurement became the foundation for my reliable version.
The beauty of pressure cooking lies in unattended cooking; once the pot reaches pressure, you can focus on other dinner preparations instead of monitoring a simmering pot. Unlike traditional methods requiring constant water level checks, the instant pot’s sealed system maintains consistent heat and moisture. Red lentils achieve creamy texture perfect for purees and dal, while green and brown varieties hold their shape for salads and grain bowls—one recipe works for all three varieties with minor timing adjustments.
I’ve taught this recipe to dozens of cooking students who initially feared using pressure cookers, and every single one has gained confidence after their first successful batch. The forgiving nature of lentils means minor variations rarely produce failure, making this an ideal pressure cooker introduction for nervous beginners.
Ingredients
| Ingredient | Quantity | Notes and Alternatives |
|---|---|---|
| Brown or green lentils | 1 cup | Rinsed thoroughly. Red lentils work but create creamier texture (reduce liquid to 1.5 cups); avoid mixing varieties |
| Vegetable or chicken broth | 2 cups | Low-sodium preferred to control salt; water works but lacks depth |
| Onion, diced | 1 medium | Yellow or white onion; omit for quick version or substitute shallots for milder flavor |
| Garlic cloves, minced | 3 cloves | Fresh garlic only; garlic powder loses potency under pressure |
| Carrot, diced | 1 medium | Optional but recommended for sweetness; add celery for additional depth |
| Diced tomatoes (canned) | 1 cup | Fire-roasted adds smokiness; fresh tomatoes reduce liquid content by 0.5 cups |
| Olive oil | 2 tablespoons | Essential for sautéing aromatics; vegetable oil acceptable but less flavorful |
| Dried thyme | 1 teaspoon | Fresh thyme: use 1 tablespoon; oregano or Italian seasoning work equally well |
| Sea salt | 0.5 teaspoon | Add 0.25 teaspoon more after cooking to taste; kosher salt requires 25% increase |
| Black pepper | 0.25 teaspoon | Freshly ground preferred; white pepper adds heat without color |
| Red pepper flakes (optional) | 0.25 teaspoon | Adjustable for heat preference; omit for mild version |
Step-by-Step Instructions
Preparation Phase
- Rinse 1 cup brown or green lentils under cold running water for 30 seconds using a fine-mesh strainer, removing debris and excess starch that can create foam during cooking.
- Dice 1 medium onion, 1 medium carrot, and mince 3 garlic cloves into separate piles for organized cooking.
Sauté Phase
- Select the sauté function on your instant pot and add 2 tablespoons olive oil, allowing it to heat for 1 minute until shimmering.
- Add diced onion and carrot to hot oil, sautéing for 4 minutes while stirring occasionally until onion turns translucent.
- Stir in minced garlic and 1 teaspoon dried thyme, cooking for 45 seconds until fragrant—this step builds flavor foundation through blooming spices.
Building the Dish
- Pour in 1 cup canned diced tomatoes with their juice, scraping the pot bottom with a wooden spoon to release browned bits (deglazing creates deeper flavor).
- Add rinsed lentils to the pot, stirring to combine with tomato mixture for 30 seconds.
- Pour in 2 cups vegetable broth, stirring once to ensure lentils are submerged and no dry particles remain on the pot bottom.
Pressure Cooking Phase
- Close the instant pot lid securely and set the vent to sealing position—this critical step allows pressure to build.
- Press the pressure cook button and set timer for 15 minutes at high pressure—never skip this timer setting regardless of lentil type.
- Allow the pot to come to pressure naturally for 3-4 minutes before the timer begins counting down.
Release and Finishing
- When the timer beeps, move the vent to venting position to release pressure immediately—quick release prevents mushy lentils from overcooking in residual heat.
- Wait 2 minutes for pressure to fully escape before carefully opening the lid away from your face.
- Stir in 0.5 teaspoon sea salt and 0.25 teaspoon black pepper, tasting and adjusting seasoning as needed before serving.
Chef Tips for Perfect Results
- Rinse lentils thoroughly before cooking to remove surface starch, which otherwise creates foam that can clog the pressure valve during cooking—this single step prevents most pressure cooker mishaps.
- Use the 2:1 liquid-to-lentil ratio consistently; more liquid creates mushy texture while less liquid yields crunchy undercooked centers that won’t soften even with extended cooking.
- Never add salt before pressure cooking since salt toughens legume skins and increases cooking time—always season after cooking when lentils are tender enough to absorb salt properly.
- Test doneness by pressing a lentil against the pot side with a spoon; it should crush easily without grittiness in the center, indicating complete cooking throughout.
- Allow pressure to release naturally for the first 2-3 minutes before quick-releasing, giving the residual heat time to finish tenderizing while preventing the sudden pressure drop that causes skins to burst.
- Freeze cooked lentils in 1-cup portions using ice cube trays, then transfer frozen portions to freezer bags for grab-and-go protein that thaws in minutes for salads, soups, or grain bowls.
Common Mistakes to Avoid
Mistake: Insufficient Liquid Causing Dry Lentils Cooking lentils with too little broth leaves the bottom layer scorched and the upper layer undercooked. The instant pot’s sealed environment requires adequate liquid for steam generation and even heat distribution. Always measure liquid carefully using the 2:1 ratio, and verify that liquid covers lentils by approximately half an inch before sealing the lid.
Mistake: Salting Before Pressure Cooking Adding salt to the raw mixture toughens lentil skins, doubling the required cooking time and creating grainy texture throughout. Salt disrupts the osmotic balance that allows water penetration into the legume. Season only after cooking when lentils are completely tender and the salt can be absorbed evenly throughout the finished dish.
Mistake: Skipping the Sauté Phase Jumping directly from raw ingredients to pressure cooking eliminates the flavor-building Maillard reaction that creates depth and complexity. The sauté phase transforms raw garlic and onion into mellow, sweet components while blooming dried herbs for maximum impact. Spend the extra 5 minutes sautéing aromatics; it’s the difference between bland and extraordinary.
Mistake: Opening the Lid Immediately After Pressure Cooking Releasing pressure too quickly causes the sudden internal pressure drop to force lentil skins to burst outward, creating mushy texture and mealy mouthfeel. Allow 2-3 minutes for residual pressure to escape naturally before opening, protecting the lentil integrity. This patience results in lentils with distinct bite even when fully tender.
Mistake: Using Red Lentils for Texture-Dependent Recipes Red lentils break down into creamy paste within 8 minutes of pressure, unsuitable for salads or grain bowl toppings requiring whole lentils. Green and brown varieties maintain structural integrity for up to 25 minutes under pressure. Match lentil variety to your intended recipe: red for dal and pureed soups, green and brown for salads and structured dishes.
Variations and Substitutions
| Ingredient to Replace | Substitution Option | Impact on Flavor and Texture |
|---|---|---|
| Broth | Coconut milk (use 1.5 cups broth + 0.5 cups coconut milk) | Adds richness and subtle sweetness; creates curry-inspired version |
| Tomatoes | Omit entirely and add 0.5 cup additional broth | Creates mild, neutral base perfect for seasoning variations |
| Onion and garlic | 2 tablespoons minced ginger + 2 tablespoons curry paste | Develops Indian-inspired flavor profile with warming spice |
| Thyme | 1 teaspoon cumin + 0.5 teaspoon smoked paprika | Builds Spanish or Middle Eastern flavor without changing cooking time |
| Olive oil | Ghee or clarified butter (same quantity) | Adds richness and traditional flavor for Indian preparations |
| Brown lentils | Green (Puy) lentils | Maintains texture but adds peppery, slightly earthier notes |
| Carrot | Diced bell pepper (red or yellow) | Reduces sweetness, adds brightness; use same quantity |
| Dried thyme | Fresh rosemary (0.5 tablespoon) | Increases piney intensity; adds Mediterranean character |
Serving Suggestions and Pairings
Serve instant pot lentils over steamed jasmine rice with roasted cherry tomatoes, crispy chickpeas, and tahini drizzle for a complete vegan bowl. Pair with grilled chicken breast, roasted sweet potato, and wilted spinach for a protein-rich dinner that combines textures and nutritional profiles. Top with crumbled feta cheese, fresh dill, and crispy pita chips for a Mediterranean-inspired lunch that transitions beautifully to meal prep containers.
Transform instant pot lentils into creamy dal by stirring in 0.5 cup unsweetened coconut milk and crushing half the lentils against the pot side with the back of a spoon. Serve this textured dal with naan bread, warming spiced vegetables, and refreshing cucumber yogurt sauce for an Indian-inspired dinner. Pair with mango pickle and crispy papadum for authentic complement.
Create a grain salad by combining cooled instant pot lentils with cooked bulgur wheat, roasted beets, cucumber, red onion, and vinaigrette featuring lemon juice and olive oil. Pack into containers for Monday through Thursday lunches that improve as flavors meld overnight. Top with fresh herbs like parsley or mint just before eating for maximum freshness and color.
Blend cooled instant pot lentils with vegetable broth, sautéed mushrooms, and fresh thyme to create a warming soup perfect for chilly evenings. Finish with a swirl of tahini and a scatter of crispy sage leaves for elegant presentation suitable for dinner parties.
Storage and Reheating
| Storage Method | Duration | Reheating Instructions |
|---|---|---|
| Refrigerator (airtight container) | 5 days | Microwave covered for 2-3 minutes, stirring halfway through. Add 2 tablespoons broth to restore moisture if needed. |
| Freezer (portion in freezer bags) | 3 months | Thaw overnight in refrigerator, then reheat in saucepan over medium heat for 5-7 minutes with 3 tablespoons broth, stirring frequently. |
| Freezer (ice cube trays) | 3 months | Drop 2-3 frozen portions directly into soups or grain bowls for instant protein without reheating step required. |
| Vacuum-sealed (refrigerator) | 7 days | Heat in water bath at 165°F for 10 minutes, or reheat directly in pressure cooker using sauté function for 3-4 minutes. |
Nutritional Information
Approximate values per serving (1 cup cooked lentils with vegetables)
| Nutrient | Amount per Serving |
|---|---|
| Calories | 215 |
| Protein | 16g |
| Total Fat | 8g |
| Saturated Fat | 1g |
| Carbohydrates | 26g |
| Dietary Fiber | 8g |
| Sugars | 3g |
| Sodium | 485mg |
| Iron | 4.2mg |
| Folate | 178mcg |
Values calculated using USDA nutrition database and may vary based on specific ingredients and brands used. Nutrition analyzed for green lentil version without toppings or additional oils.
Frequently Asked Questions
Can I use red lentils in this instant pot lentil recipe?
Red lentils will completely dissolve into a creamy paste within 8 minutes under pressure, unsuitable for this textured preparation. If you specifically want red lentils, reduce cooking time to 8 minutes and accept the creamy consistency, or prepare a dedicated dal recipe designed for red lentil breakdown. Green and brown lentils maintain structural integrity that creates the satisfying texture this recipe depends upon.
How do I know when instant pot lentils are perfectly cooked?
Press a single lentil against the pot side with a spoon; it should crush easily without any grittiness in the center. If the center remains hard, add 1 tablespoon water, return to pressure for 2 additional minutes, and quick release. If lentils are mushy and falling apart, you’ve overcooked; reduce cooking time by 2 minutes on your next attempt since pressure cookers vary in temperature accuracy.
Why are my instant pot lentils mushy and falling apart?
Overcooking is the primary cause, resulting from cooking time exceeding 15 minutes for green and brown lentils. Verify your instant pot reaches high pressure properly by checking that the valve clicks and steam escapes steadily; faulty pressure development creates mushy results even at correct timing. Using too much liquid also contributes to breakdown; measure broth precisely at 2 cups without variations.
Can I make instant pot lentils ahead for meal prep?
Cook completely and cool to room temperature before portioning into airtight containers, storing for 5 days in the refrigerator or 3 months in the freezer. Freeze in 1-cup portions using ice cube trays for grab-and-go convenience that thaws quickly for bowls and salads. Lentils actually improve after one day as flavors meld throughout the batch.
What’s the best way to serve instant pot lentils at a dinner party?
Serve warm as the protein-focused component of a composed bowl alongside roasted vegetables, grains, and fresh garnishes that guests can customize. Prepare the lentils 1-2 hours ahead, keeping them in a covered pot at room temperature; they hold temperature excellently and can be reheated gently if needed. Offer finishing elements like tahini drizzle, fresh herbs, crispy chickpeas, or hot sauce separately so guests control final flavor.
Do I need to soak lentils before instant pot cooking?
Soaking is completely unnecessary since the pressure cooker reaches high enough temperatures to cook dried lentils tender in 15 minutes without pre-soaking. Soaking actually slows the process by making lentil skins more permeable, allowing them to break down faster under pressure. Skip soaking entirely and move directly from rinsing to cooking for maximum time efficiency.
Conclusion
Instant pot lentils transform dried legumes into tender, flavorful protein in just 25 minutes, eliminating soaking and constant monitoring. My years of testing confirmed that this pressure cooker method consistently delivers superior results compared to traditional stovetop approaches. Master the 2:1 liquid ratio, sauté aromatics for flavor depth, and season after cooking, then enjoy versatile lentils for countless meals throughout your week. This recipe proves that exceptional home cooking requires knowledge and precision, not complicated techniques or rare ingredients.
IMAGE ALT TEXT SUGGESTIONS:
- Hero image: “Instant pot filled with cooked green lentils mixed with diced tomatoes, onions, and fresh herbs” (for H1 section)
- Ingredient preparation: “Rinsed brown lentils in a fine-mesh strainer with diced onion, carrot, and minced garlic in separate bowls” (for Ingredients section)
- Cooking phase: “Instant pot displaying pressure cooking timer at 15 minutes with sealed lid” (for Instructions section)
- Finished dish: “Bowl of creamy instant pot lentils garnished with fresh thyme and crispy chickpeas” (for Serving section)
- Storage: “Portioned instant pot lentils in glass containers stacked in refrigerator” (for Storage section)
Instant Pot Lentils: Complete Guide to Perfect Results
Ingredients
- 1 cup dried lentils (red, green, or brown)
- 1 medium onion, diced
- 2 cloves garlic, minced
- 1 carrot, diced
- 1 celery stalk, diced
- 3 cups low-sodium vegetable broth
- 2 tablespoons olive oil
- 1 teaspoon ground cumin
- 1/2 teaspoon turmeric
- 1/2 teaspoon salt
- 1/4 teaspoon black pepper
Instructions
- Heat olive oil in Instant Pot on sauté setting.
- Add onions and sauté for 2 minutes.
- Add garlic, carrots, and celery; cook for 3 minutes.
- Stir in lentils, broth, cumin, turmeric, salt, and pepper.
- Quick release pressure if using other cooking methods.
- Vent pressure naturally for 10 minutes before manual release.
- Fluff with a fork and adjust seasoning as needed
Notes
Add chopped tomatoes or lemon juice for brightness.
Storage: Cool completely before refrigerating up to 5 days.
