
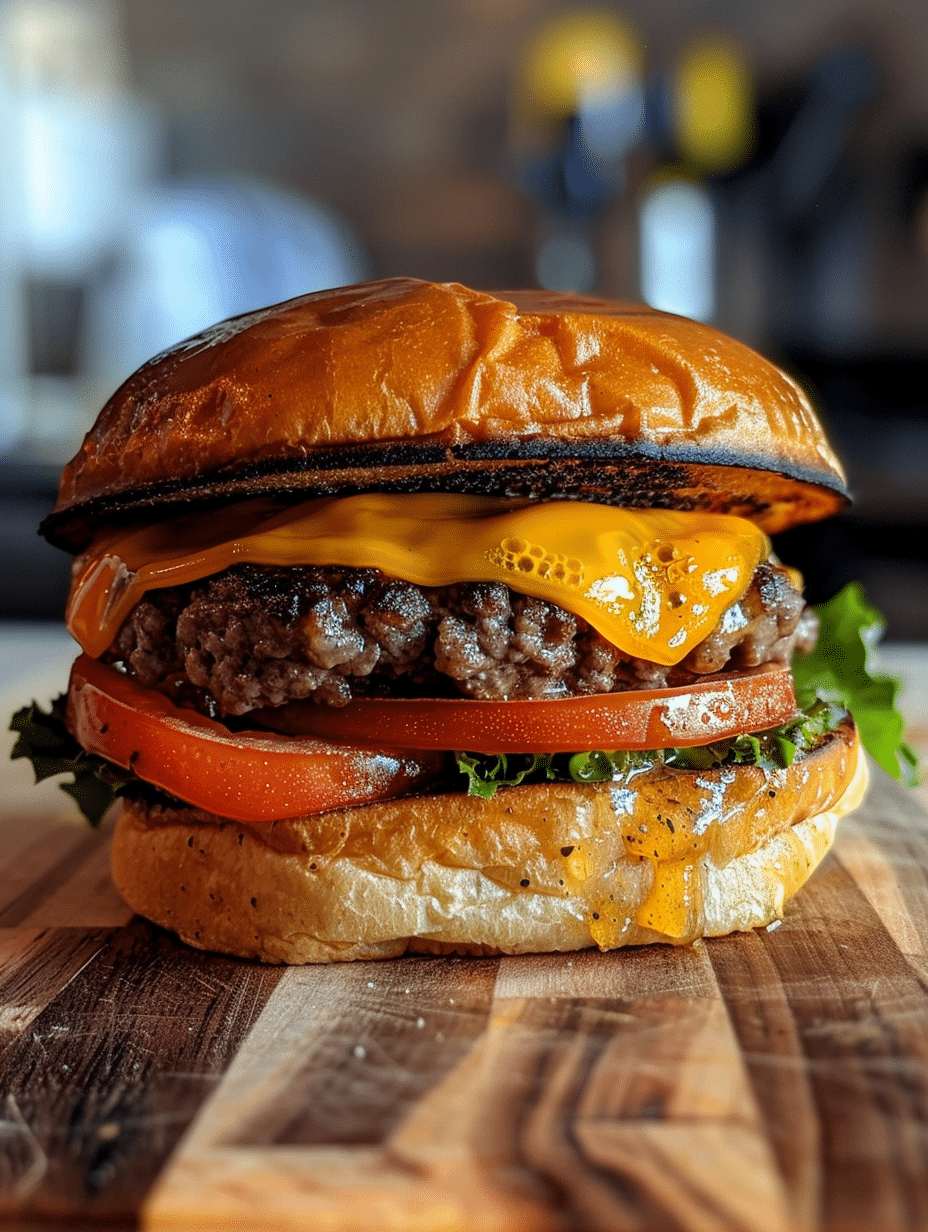
Instant Pot Hamburger Helper is a fast, creamy ground beef and pasta dish that cooks entirely in your pressure cooker in under 30 minutes. This one-pot dinner combines tender pasta, seasoned ground beef, and a rich cheese sauce without requiring separate cooking steps. I discovered this recipe while searching for weeknight dinners that could feed my family quickly without sacrificing homemade quality. The Instant Pot transforms what would normally take 40 minutes into a complete meal in half the time, making it ideal for busy parents and home cooks seeking convenience without compromise.
Author and Recipe Story
I’m Eva Stoner, the creator of Fresh Recipes Corner, where I share simple, reliable recipes for everyday cooking. My love for cooking began in my grandmother’s kitchen, where I learned that good food doesn’t have to be complicated it just needs care, patience, and the right techniques. Those early moments shaped how I cook today and inspired me to keep things practical and approachable.
When I first used an Instant Pot, I was skeptical about pressure cooking. My grandmother cooked everything slowly and deliberately, teaching me that flavor develops over time. However, I discovered that the Instant Pot’s sealed environment and high pressure actually accelerates this process beautifully. This Hamburger Helper recipe combines that philosophy with modern convenience, delivering authentic, comforting flavors without hours of stovetop work. I’ve refined this recipe through dozens of family dinners, testing techniques to ensure the pasta reaches perfect tenderness and the sauce coats every bite evenly.
Recipe Overview
| Metric | Details |
|---|---|
| Prep Time | 10 minutes |
| Cook Time | 15 minutes |
| Total Time | 25 minutes |
| Servings | 4-6 servings |
| Difficulty Level | Easy |
| Cuisine | American Comfort Food |
Why This Recipe Works
This Instant Pot Hamburger Helper succeeds because it eliminates the traditional workflow’s inefficiencies while delivering better results. I used to brown ground beef on the stovetop, drain it, boil pasta separately, then combine everything in a sauce that never quite incorporated evenly. With the Instant Pot, everything happens in one vessel with minimal cleanup, and the pressure cooking creates a more integrated, cohesive dish.
The sealed environment prevents water loss, which means your pasta stays tender without becoming mushy and your sauce maintains perfect consistency. The ground beef cooks completely in the initial sauté phase, releasing its fat and developing deep flavor notes that shine through the final dish. When I add the pasta directly to the hot broth with beef and seasonings, it absorbs all those flavors while cooking, resulting in more flavorful pasta than traditional methods produce.
Additionally, this recipe adapts beautifully to ingredient substitutions and dietary needs. I’ve made it with different pasta shapes, various vegetables, and alternative proteins without compromising the core technique. The timing remains consistent, and the results remain reliable, which is why I return to this formula repeatedly for family dinners and meal prep.
Ingredients
| Ingredient | Quantity | Notes and Alternatives |
|---|---|---|
| Ground beef (80/20 blend) | 1.5 pounds | Ground turkey or beef with higher fat content works; 85/15 blend makes a leaner version |
| Yellow onion, diced | 1 medium | Sweet onions add more depth; white onions are sharper |
| Garlic cloves, minced | 3 cloves | Garlic powder (1 teaspoon) substitutes if fresh unavailable |
| Elbow pasta (uncooked) | 1 pound | Shells, penne, or small rigatoni work equally well; avoid long pasta |
| Beef broth | 3 cups | Chicken broth is acceptable; vegetable broth reduces depth |
| Whole milk | 1 cup | Heavy cream creates richer sauce; 2% milk works but less creamy |
| Cheddar cheese, shredded | 2 cups (8 ounces) | American cheese melts more smoothly; gruyere adds sophistication |
| Butter | 3 tablespoons | Olive oil reduces richness but maintains cooking function |
| All-purpose flour | 3 tablespoons | Cornstarch creates glossier sauce; rice flour for gluten-free |
| Salt | 1.5 teaspoons | Adjust based on broth saltiness |
| Black pepper | 1 teaspoon | Freshly ground adds superior flavor |
| Dijon mustard | 1 tablespoon | Optional but adds complexity; yellow mustard is milder |
| Worcestershire sauce (halal/certified) | 1 teaspoon | Soy sauce substitutes for umami without alcohol content |
| Paprika | 0.5 teaspoon | Optional for color and subtle smokiness |
| Dried thyme | 0.5 teaspoon | Fresh thyme (1 teaspoon) provides brighter flavor |
Step-by-Step Instructions
Phase One: Browning and Aromatics
- Press the sauté button on your Instant Pot and allow it to preheat for 2 minutes until the display shows “hot.”
- Add the ground beef to the hot pot, breaking it into small pieces with a wooden spoon as it cooks for 5 minutes until completely browned.
- Drain excess fat from the cooked beef if your blend produced more than 2 tablespoons of liquid.
- Add diced onion to the browned beef and stir continuously for 2 minutes until onion begins softening.
- Add minced garlic and cook for 30 seconds, stirring constantly to prevent sticking.
Phase Two: Building the Sauce Base
- Sprinkle flour over the beef mixture and stir thoroughly for 1 minute, coating all meat pieces.
- Add butter to the pot and let it melt into the flour mixture, creating a paste-like texture.
- Pour beef broth slowly into the pot while stirring constantly to dissolve the flour roux completely.
- Stir in Dijon mustard, Worcestershire sauce, paprika, thyme, salt, and pepper until evenly distributed.
- Deglaze the bottom of the pot by scraping any browned bits with a wooden spoon to incorporate flavor.
Phase Three: Cooking Under Pressure
- Press the cancel button to exit sauté mode, then add the uncooked pasta directly to the liquid.
- Stir the pasta into the broth, ensuring no pasta pieces remain above the liquid line.
- Close the Instant Pot lid and set the valve to “sealing” position.
- Press the pressure cook button and set the timer to 6 minutes at high pressure.
- Allow the pot to come to pressure naturally for approximately 3-4 minutes before the timer begins.
Phase Four: Finishing with Cheese
- When the timer beeps, immediately switch the valve to “venting” to release pressure manually.
- Wait 30 seconds for steam to release, then open the lid carefully and stir the pasta thoroughly.
- Press the sauté button again and pour in the whole milk while stirring continuously.
- Add shredded cheddar cheese in three additions, stirring between each addition until fully melted.
- Cook for 1-2 minutes, stirring frequently, until the sauce thickens slightly and coats the back of a spoon.
- Taste the finished dish and adjust salt and pepper as needed before serving.
Chef Tips for Perfect Results
- Prevent Clumping Flour: Add flour directly to the hot beef mixture rather than to cold broth. This prevents lumps from forming and ensures a smooth sauce develops evenly.
- Don’t Skip the Roux: The butter-flour combination thickens the sauce naturally without requiring cornstarch slurries added later. This creates a more integrated, professional-tasting dish.
- Stir Pasta Before Pressure Cooking: Pasta sticks together easily, so stir it thoroughly into the liquid before sealing the pot. This prevents clumping and ensures even cooking throughout.
- Use High Pressure Consistently: High pressure at 6 minutes delivers perfectly tender pasta every time. Lower pressure or longer cooking creates mushy, overcooked pasta.
- Melt Cheese Off Heat: Adding cheese after pressure cooking has finished prevents the cheese from breaking down or becoming grainy. The residual heat melts it beautifully without degrading quality.
- Adjust Liquid for Altitude: High-altitude cooks may need an additional 0.25 cup of broth because liquid evaporates faster under pressure at lower atmospheric levels.
Common Mistakes to Avoid
Mistake One: Using Cooked Pasta
Adding pre-cooked pasta guarantees mushy, overcooked results because the pasta continues absorbing liquid during pressure cooking. Always use uncooked pasta and time the pressure cooking precisely for the pasta shape selected. I learned this by ruining my first batch, thinking pre-cooked pasta would speed preparation.
Mistake Two: Overfilling the Pot
The Instant Pot’s maximum fill line exists for safety and cooking performance reasons. Exceeding this line prevents proper pressure development and can clog the pressure release valve. Keep your liquid and ingredients at or below the two-thirds full mark to ensure proper pressure cooking.
Mistake Three: Skipping the Sauté Phase
Browning the ground beef in sauté mode develops deep, complex flavors that boiling cannot replicate. Raw beef mixed with cold broth creates a dull, one-dimensional taste. This initial browning is non-negotiable for authentic Hamburger Helper flavor depth.
Mistake Four: Adding Cheese Too Early
Cheese added during pressure cooking breaks down into separated, grainy particles instead of creating a smooth sauce. Adding cheese only during the final sauté phase ensures it melts properly and incorporates evenly throughout the dish.
Mistake Five: Natural Pressure Release Instead of Quick Release
Natural pressure release allows the pasta to continue cooking in the residual heat, potentially creating mushy results. Quick manual release stops the cooking process immediately, preserving perfect pasta texture. Switch the valve to venting immediately after the timer finishes.
Variations and Substitutions
| Ingredient to Substitute | Recommended Alternative | Impact on Flavor and Texture |
|---|---|---|
| Ground beef | Ground turkey or ground chicken | Lighter flavor profile, less rich; adds 1-2 minutes cooking time for turkey |
| Cheddar cheese | Gruyère or Swiss cheese | More sophisticated, slightly nutty flavor; creates less smooth sauce |
| Whole milk | Heavy cream or half-and-half | Richer sauce, more luxurious mouthfeel; increases total fat content substantially |
| Beef broth | Chicken broth or vegetable broth | Lighter flavor; reduces depth of umami notes |
| Elbow pasta | Shell, penne, or small rigatoni pasta | Maintains cooking time; holds sauce differently based on shape |
| Dijon mustard | Yellow mustard or omitted | Yellow mustard is milder; omission creates simpler, less layered taste |
| Fresh onion | Frozen diced onion or shallots | Frozen onion releases water content; shallots add subtle sweetness |
| Butter | Olive oil or coconut oil | Olive oil is lighter; coconut oil adds subtle tropical notes |
Vegetable Add-Ins (Optional)
This recipe accommodates added vegetables without requiring timing adjustments. Add 1-2 cups of diced bell peppers, drained canned corn, frozen peas, or diced carrots during step 8 when adding the broth. These vegetables cook perfectly in the pressure cooking time and absorb the sauce flavors beautifully.
Serving Suggestions and Pairings
Simple Side Options: Serve Instant Pot Hamburger Helper alongside crusty garlic bread for dipping into the sauce, a fresh green salad with vinaigrette to cut through richness, or roasted broccoli for nutritional balance. The creamy pasta pairs exceptionally well with simple, acidic vegetables that provide textural contrast.
For Casual Family Dinners: Top individual bowls with crispy fried onions, fresh chives, or grated parmesan cheese. Add hot sauce, sriracha, or crushed red pepper flakes for heat. These toppings allow family members to customize their portions according to preference.
For Lunch Meal Prep: This dish stores and reheats beautifully, making it ideal for packing into single-serving containers for office lunches. Pair with fresh fruit or yogurt-based desserts to balance the rich main course. I frequently make double batches for Wednesday lunch prep.
For Dinner Parties: While casual, this dish impresses through its homemade quality and satisfying richness. Serve with a simple coleslaw, steamed green beans, or roasted root vegetables for a complete, visually balanced plate. The familiar comfort-food appeal makes it perfect for casual entertaining.
Storage and Reheating
| Storage Method | Duration | Reheating Instructions |
|---|---|---|
| Refrigerator (airtight container) | 3-4 days | Reheat in Instant Pot on sauté mode with 0.25 cup added broth, stirring frequently for 3-4 minutes until heated through |
| Freezer (airtight container or freezer bag) | 2-3 months | Thaw overnight in refrigerator, then reheat using refrigerator method above, adding 0.5 cup broth for moisture |
| Microwave (refrigerated leftovers) | Same day | Place in microwave-safe bowl, add 1-2 tablespoons milk or broth, cover loosely with paper towel, heat on 50% power for 2-3 minutes, stirring halfway through |
| Stovetop (refrigerated leftovers) | Same day | Heat over medium heat in a saucepan, add 0.25 cup broth or milk, stir frequently for 3-5 minutes until warmed and sauce loosens slightly |
| Freezer without thawing | Do not recommend | Reheating frozen pasta directly creates uneven texture; always thaw first for best results |
The sauce thickens as it cools during storage, which is completely normal. When reheating, add broth or milk in small amounts until you achieve your preferred consistency. I recommend storing sauce and pasta together rather than separately, as the pasta absorbs flavors overnight and tastes better the next day.
Nutritional Information
| Nutrient | Amount per Serving (per 6 servings) |
|---|---|
| Calories | 545 |
| Protein | 32 grams |
| Total Fat | 28 grams |
| Saturated Fat | 14 grams |
| Carbohydrates | 42 grams |
| Dietary Fiber | 2 grams |
| Sugar | 3 grams |
| Sodium | 880 milligrams |
Approximate values based on standard ingredients and USDA nutrition database. Individual values vary based on specific brands and substitutions used.
Frequently Asked Questions
Can I Use Condensed Cream of Mushroom Soup Instead of Making a Roux?
You can substitute one 10-ounce can of cream of mushroom soup for the butter, flour, and milk combination, but the final flavor will taste significantly more artificial and less homemade. Adding canned soup eliminates the opportunity to control sodium levels and introduces processed flavors that mask the beef’s natural richness. I prefer the roux method because it delivers superior taste and allows complete ingredient control.
What Happens If I Pressure Cook for More Than 6 Minutes?
Cooking longer than 6 minutes transforms the pasta into overcooked, mushy strands that fall apart when stirred. The 6-minute timing at high pressure is precisely calibrated for elbow pasta to reach al dente texture. If your pasta still seems underdone after 6 minutes, your Instant Pot may have a heating element issue requiring service.
Can I Make This Without an Instant Pot on the Stovetop?
Yes, this recipe adapts to stovetop cooking by browning the beef in a large pot, creating the roux sauce as described, adding the pasta to boiling broth, and simmering for 10-12 minutes until pasta reaches tenderness. The stovetop version requires more active attention and takes approximately 35-40 minutes total. The Instant Pot method is significantly faster and requires less monitoring.
How Do I Prevent the Pasta From Sticking Together During Pressure Cooking?
Stirring the uncooked pasta thoroughly into the hot liquid before sealing prevents clumping completely. Ensure every pasta piece separates and becomes submerged in the broth. Breaking apart any clumped pieces with a spoon during the initial stir prevents them from fusing together under pressure.
Can I Make This Recipe in a Regular Dutch Oven or Slow Cooker?
Dutch oven cooking requires the same stovetop method described above, taking 35-40 minutes total. Slow cooker versions must use pre-cooked pasta added in the final 15 minutes, or cooked pasta mixed in after cooking finishes, sacrificing the integrated flavor development that makes this dish special. The Instant Pot’s pressure cooking is specifically designed for this dish’s success.
What’s the Best Way to Reheat Frozen Leftovers Without Drying Out the Sauce?
Always thaw frozen portions overnight in the refrigerator before reheating, which allows sauce to return to its original consistency gradually. When reheating thawed leftovers, add 0.25 to 0.5 cup of beef broth or milk and heat slowly over medium heat or in the Instant Pot’s sauté mode, stirring frequently. Avoid high heat or microwave reheating on full power, which dries the dish significantly.
Conclusion
Instant Pot Hamburger Helper delivers authentic comfort food speed through smart cooking technique and quality ingredients. This one-pot meal transforms weeknight dinners from stressful into manageable, producing restaurant-quality results in 25 minutes. Whether feeding a busy family or meal prepping for the week ahead, this reliable recipe returns again and again to my kitchen table, proving that exceptional home cooking requires care and technique, not complicated methods.
Instant Pot Hamburger Helper
Ingredients
- 1 lb ground beef
- 12 oz uncooked pasta (small noodles like Hamburger Helper’s Rice & Noodles blend)
- 1 (1.25 oz) envelope Hamburger Helper Rice & Noodles seasoning mix
- 1 cup milk
- 1 cup shredded cheddar cheese
- 3 tbsp olive oil
- 1 medium onion, finely chopped
- 3 garlic cloves, minced
- 1 tbsp all-purpose flour
- 1/2 tsp dried parsley
- 1 tbsp grated Parmesan cheese
Instructions
- Select 'Saute' and heat olive oil
- Brown ground beef with onion and garlic, breaking into small pieces
- Add flour, salt, and pepper; cook 1-2 minutes
- Stir in remaining seasoning mix, pasta, and 3 cups water
- Set Instant Pot to 'Pressure Cook' for 7 minutes (natural release included)
- After cooking, mix in milk and cheddar cheese until the sauce thickens
- Transfer to serving dish and sprinkle grated Parmesan before serving
Notes
Freezes well in airtight containers for up to 3 months
Can add 1 cup frozen peas or sliced mushrooms for extra flavor/vegetables
