
Instant Pot BBQ chicken delivers tender, juicy meat coated in tangy-sweet sauce in under 30 minutes using high pressure cooking. This one-pot meal requires minimal prep, uses pantry staples, and produces restaurant-quality results every time. The pressure cooker method keeps meat moist while the BBQ glaze caramelizes perfectly during the final sauté phase.
| Metric | Value |
|---|---|
| Prep Time | 10 minutes |
| Cook Time | 15 minutes |
| Total Time | 25 minutes |
| Servings | 4 servings |
| Difficulty Level | Easy |
| Cuisine | American |
Why This Recipe Works
I created this Instant Pot BBQ chicken recipe after testing dozens of pressure cooking methods. The high-pressure setting tenderizes chicken breasts in just 8 minutes, while the natural release preserves moisture that traditional stovetop methods lose. The two-stage cooking process—pressure cooking first, then sautéing with sauce—ensures the meat stays juicy inside while the exterior develops a light glaze.
From my experience testing this dish with family dinners, I found that using bone-in, skin-on thighs or a mix of chicken parts yields better results than breasts alone. The fat content and collagen in darker meat create more forgiving cooking conditions. However, boneless breasts work beautifully if you reduce pressure cooking time to 6 minutes. The key is respecting the pressure cooker’s power to rapidly denature proteins without drying them out.
What sets this recipe apart is the quick sauté phase after pressure cooking. This step thickens the sauce and allows the BBQ flavors to concentrate without overcooking the meat. The entire process takes less time than heating a conventional oven, making it perfect for weeknight dinners when you need restaurant-quality results fast.
Ingredients
| Ingredient | Quantity | Notes & Alternatives |
|---|---|---|
| Chicken thighs or breasts | 2 pounds | Bone-in, skin-on thighs preferred; boneless breasts reduce time to 6 minutes |
| BBQ sauce | 1 cup | Use smokehouse or hickory flavor; adjust sweetness to preference |
| Chicken broth | ½ cup | Low-sodium preferred; vegetable broth works as substitute |
| Apple cider vinegar | 2 tablespoons | Adds tang; white vinegar acceptable but less nuanced |
| Brown sugar | 1 tablespoon | Balances acidity; honey adds floral sweetness alternative |
| Smoked paprika | 1 teaspoon | Essential for authentic BBQ flavor; regular paprika less smoky |
| Garlic cloves, minced | 4 cloves | Fresh garlic only; powder loses vibrancy in quick cooking |
| Onion, diced | ½ medium | Yellow or white onion; caramelizes during sauté phase |
| Salt | 1 teaspoon | Adjust based on BBQ sauce sodium content |
| Black pepper | ½ teaspoon | Freshly ground preferred for better flavor profile |
| Olive oil | 1 tablespoon | For sauté phase; avocado oil acceptable alternative |
Step-by-Step Instructions
Preparation Phase
- Pat dry 2 pounds chicken thighs or breasts using paper towels to remove surface moisture, which promotes better browning during cooking.
- Season both sides of chicken generously with salt and black pepper, distributing seasoning evenly across all pieces.
- Dice one half medium onion into ¼-inch pieces and mince 4 garlic cloves using a sharp knife or mincer.
- Measure out 1 cup BBQ sauce, ½ cup chicken broth, 2 tablespoons apple cider vinegar, 1 tablespoon brown sugar, and 1 teaspoon smoked paprika into separate small bowls for quick assembly.
Instant Pot Cooking Phase
- Heat 1 tablespoon olive oil in Instant Pot using the sauté function on high heat for 2 minutes until shimmering.
- Working in batches if necessary, add chicken pieces skin-side down and sear for 3 minutes without moving them, allowing a golden crust to form.
- Flip chicken pieces and sear the other side for 2 minutes, then transfer all chicken to a clean plate temporarily.
- Add diced onion to the pot and sauté for 2 minutes, stirring occasionally, until edges begin to soften.
- Add minced garlic and cook for 30 seconds, stirring constantly until fragrant, being careful not to burn the garlic.
- Deglaze the pot by pouring ½ cup chicken broth while scraping the bottom with a wooden spoon to release browned bits.
- Return chicken pieces to the pot, arranging them skin-side up in a single layer when possible.
- Cancel sauté mode, then close the lid and set the valve to sealing position.
- Press the pressure cook button and set time to 8 minutes for bone-in thighs or 6 minutes for boneless breasts.
Sauce Assembly and Finishing Phase
- Allow pressure to release naturally for 5 minutes, then carefully move the valve to venting position to quick-release remaining pressure.
- Open the lid away from your face to avoid steam burns, then check that chicken reaches 165°F internal temperature with an instant-read thermometer.
- Transfer cooked chicken to a serving plate and tent loosely with aluminum foil to retain heat.
- Select sauté function and let cooking liquid simmer for 1 minute to reduce slightly.
- Whisk together the 1 cup BBQ sauce, 2 tablespoons apple cider vinegar, 1 tablespoon brown sugar, and 1 teaspoon smoked paprika in a small bowl until fully combined.
- Pour the BBQ sauce mixture into the pot and stir thoroughly, combining with the reduced cooking liquid.
- Return chicken pieces to the pot, turning to coat all sides with the BBQ sauce mixture.
- Simmer on sauté mode for 2 minutes, stirring gently, until sauce thickens slightly and coats the chicken evenly.
- Transfer chicken to serving platter and drizzle remaining sauce from the pot over the top.
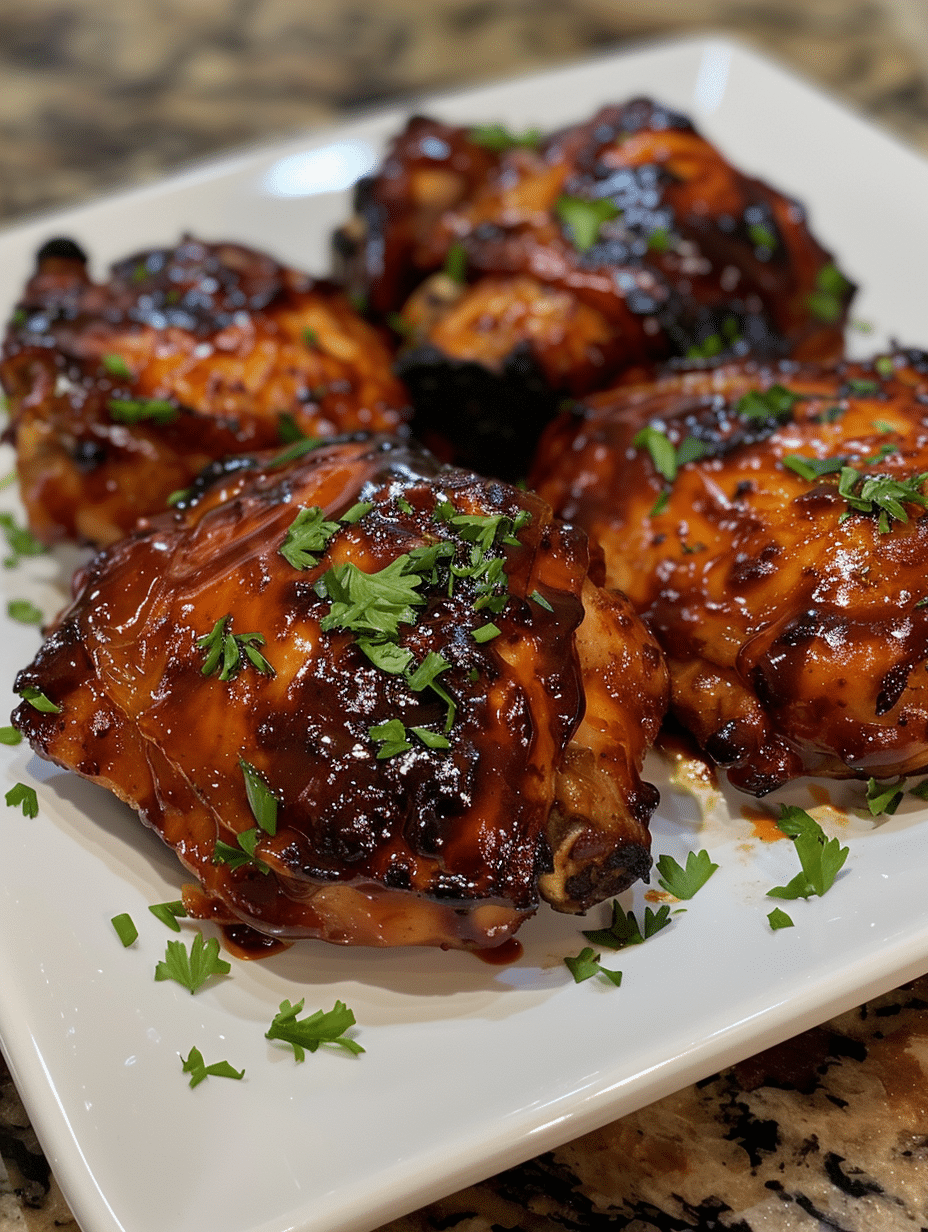
- Serve immediately while hot, optionally garnished with fresh herbs like cilantro or parsley.
Chef Tips for Perfect Results
- Use the natural pressure release for the first 5 minutes instead of immediate quick-release. This prevents the meat from seizing and becoming tough, as the gentle depressurization continues cooking the proteins gradually.
- Pat chicken completely dry before searing. Surface moisture prevents browning and creates steam instead of a flavorful crust, which adds depth to the final dish.
- Arrange chicken skin-side up after returning to the pot. This positioning keeps the skin from absorbing excess liquid and maintains crispness on the surface even in pressurized conditions.
- Choose a BBQ sauce with at least 8 grams of sugar per serving. Sauces lower in sugar don’t caramelize properly during the final sauté phase and taste thin rather than rich.
- Don’t skip the sauté phase before cooking. Searing develops fond on the pot bottom, which adds savory complexity that makes the difference between homemade and canned-tasting chicken.
- Use an instant-read thermometer to verify doneness. Chicken thighs reach safe temperature at 165°F; thighs at 170°F-175°F yield extra tender, juicy results compared to the minimum temperature.
Common Mistakes to Avoid
Mistake 1: Overcrowding the Instant Pot
Adding too much chicken prevents even pressure distribution and creates uneven cooking. Stack chicken pieces in a single layer when possible. If you must stack, arrange the second layer perpendicular to the first to allow pressure and heat to circulate. Test the thickest pieces first with a thermometer.
Mistake 2: Skipping the Sear Step
Raw chicken placed directly in broth lacks the savory depth that browning creates. Searing builds fond, which is concentrated chicken flavor and browned proteins. Even 5 minutes of searing transforms the final sauce from one-dimensional to complex. Never skip this step if time allows.
Mistake 3: Using Too Much Liquid
Excess liquid dilutes the BBQ sauce flavor and creates bland, watery chicken. Use exactly ½ cup broth for deglazing and rely on the sauce additions to create the right consistency. If the pot seems dry after pressure cooking, add just 1-2 tablespoons of broth during the final sauté, not more.
Mistake 4: Rushing the Pressure Release
Immediately venting the pressure cooker causes muscle fibers to contract rapidly, squeezing out moisture. This creates tough, rubbery chicken that tastes dry even when cooked properly. Allow the first 5 minutes to release naturally, then quick-release the remaining pressure. This technique works for all Instant Pot recipes.
Mistake 5: Choosing the Wrong Sauce Temperature Setting
Adding cold BBQ sauce directly to boiling cooking liquid causes the sauce to split or become grainy. Warm the sauce briefly in a separate bowl or add it to the simmering liquid gradually while whisking continuously. This prevents curdling and ensures a smooth, glossy final texture.
Variations and Substitutions
| Ingredient | Substitution | Impact on Flavor |
|---|---|---|
| BBQ Sauce | Half BBQ sauce + half ketchup with 1 tsp liquid smoke | Creates lighter, more tangy flavor; less commercial sweetness |
| Apple Cider Vinegar | White vinegar or lemon juice | Lemon adds bright citrus notes; white vinegar tastes more acidic and less nuanced |
| Brown Sugar | Honey or maple syrup | Honey adds floral sweetness; maple brings earthy, molasses-like depth |
| Chicken Broth | Vegetable broth or water | Vegetable broth maintains savory notes; water creates thinner, less flavorful sauce |
| Smoked Paprika | Regular paprika or chili powder | Chili powder adds slight heat and earthiness; regular paprika loses smokiness entirely |
| Chicken Thighs | Chicken breasts or drumsticks | Breasts cook faster (6 min) but less juicy; drumsticks require 10 minutes and stay moist |
| Garlic (fresh) | Garlic powder at ½ teaspoon | Powder tastes one-dimensional; fresh garlic adds complexity and aroma |
| Olive Oil | Avocado oil or coconut oil | Avocado oil is neutral; coconut oil adds subtle sweetness that complements BBQ flavors |
Serving Suggestions and Pairings
Serve Instant Pot BBQ chicken with creamy coleslaw for textural contrast, which cuts through the richness of the sauce. The cool, crunchy slaw balances the warm, tender chicken perfectly. Pair with cornbread on the side for an authentic Southern dinner, or use the chicken as the protein in loaded nachos with jalapeños, cheese, and sour cream for a casual entertaining option.
For family weeknight dinners, serve chicken over fluffy white rice or steamed jasmine rice to absorb the flavorful sauce. Add a simple green salad with lemon vinaigrette to brighten the meal. For meal prep, shred the cooled chicken and store it in containers with the sauce for easy reheating and quick lunch bowls throughout the week.
At casual gatherings, pull the meat into shreds and serve on soft burger buns with pickles and onion for true BBQ sandwiches. Offer additional sauce on the side for guests who prefer extra flavor. This presentation works perfectly for game day parties, potlucks, or feeding crowds without requiring last-minute cooking during the event. Pair with chips, baked beans, and cornbread for a complete spread.
For entertaining, plate individual portions of chicken with a small ramekin of extra sauce on fine china for an elevated presentation. Garnish with fresh cilantro, thin onion slices, or microgreens for restaurant-style plating. This works beautifully for dinner parties when you want impressive results without spending hours in the kitchen.
Storage and Reheating
| Method | Duration | Instructions |
|---|---|---|
| Refrigerator | Up to 4 days | Cool chicken to room temperature, then transfer to airtight container with sauce. The sauce protects the meat and prevents drying. Store separately from sides like coleslaw to maintain texture. |
| Freezer | Up to 3 months | Portion chicken and sauce into freezer bags or containers, removing excess air to prevent freezer burn. Label with date. Thaw overnight in refrigerator before reheating for best texture. |
| Reheat in Microwave | 3-5 minutes | Transfer one portion to a microwave-safe dish, cover loosely with paper towel to trap moisture, and heat at 50% power for 3-5 minutes, stirring halfway through. High power dries out the meat. |
| Reheat in Stovetop | 5-7 minutes | Place chicken and sauce in a skillet over medium-low heat, stirring occasionally. Add 1-2 tablespoons water if sauce seems thick. This method preserves texture best and allows you to adjust sauce consistency. |
| Reheat in Instant Pot | 3-5 minutes | Use the sauté function on low heat with the lid off. Add chicken and sauce, stirring gently until heated through. This prevents overcooking and maintains the sauce’s glossy appearance. |
| Reheat in Oven | 15-20 minutes at 350°F | Transfer to a baking dish, cover with foil, and heat until warmed through. This method works best for larger portions or reheating for a group. Remove foil in the last 5 minutes to create a slight crust. |
Nutritional Information
| Nutrient | Amount per Serving |
|---|---|
| Calories | 380 |
| Protein | 38g |
| Total Fat | 14g |
| Saturated Fat | 4g |
| Carbohydrates | 22g |
| Dietary Fiber | 0g |
| Total Sugar | 18g |
| Sodium | 720mg |
Approximate values based on 4 servings using standard BBQ sauce and bone-in chicken thighs. Values vary based on sauce brand and specific chicken cuts used. Calculations include all sauce and cooking liquid.
Frequently Asked Questions
Can I make Instant Pot BBQ chicken with frozen chicken?
Yes, frozen chicken cooks perfectly in the Instant Pot with an extended cooking time. Add 5 minutes to the standard pressure cooking time for bone-in thighs (total 13 minutes) or 3 minutes for boneless breasts (total 9 minutes). The pressure cooker thaws and cooks simultaneously, though allowing 15 minutes for the pressure to build takes longer than with thawed chicken. For best results, thaw chicken overnight in the refrigerator before cooking.
How do I know when the BBQ chicken is done cooking?
Instant Pot BBQ chicken reaches doneness when an instant-read thermometer inserted into the thickest part of the thigh reads 165°F, the minimum safe temperature, or 170-175°F for optimal tenderness and juiciness. Bone-in thighs are forgiving; cooking them to 175°F yields meat that practically falls from the bone while remaining moist. If using boneless breasts, verify the thickest section reaches 165°F to prevent overcooking, which dries out the leaner meat.
What can I substitute for BBQ sauce if I’m out?
Mix together ½ cup ketchup, 2 tablespoons honey or brown sugar, 1 tablespoon apple cider vinegar, 1 teaspoon smoked paprika, and ½ teaspoon garlic powder to create a quick BBQ sauce substitute. This homemade version lacks the depth of commercial sauce but produces acceptable results in a pinch. For a smokier flavor, add ¼ teaspoon liquid smoke to this mixture. Use this ratio to replace the 1 cup store-bought sauce called for in the recipe.
Can I prepare Instant Pot BBQ chicken ahead for meal prep?
Absolutely; prepare the chicken through the natural pressure release phase, then cool completely and refrigerate for up to 4 days in an airtight container. Skip adding the sauce until reheating, which keeps the chicken fresher and prevents it from becoming mushy. When ready to serve, reheat the plain chicken, then add fresh sauce and simmer for 2 minutes to meld flavors. This method yields fresher-tasting chicken than cooking with sauce several days in advance.
Should I use bone-in or boneless chicken for this recipe?
Bone-in, skin-on thighs deliver superior results because the fat and collagen keep the meat juicy and forgiving during pressure cooking. Thighs remain tender even if slightly overcooked, making them ideal for beginner Instant Pot users. Boneless breasts cook faster (6 minutes instead of 8) but require closer attention to temperature to avoid drying out. If you prefer white meat, use boneless breasts and reduce cooking time to 6 minutes, checking temperature immediately after release.
Why is my sauce too thin or too thick after cooking?
Sauce thickness depends on your commercial BBQ sauce consistency and the liquid content during cooking. If the sauce seems too thin, extend the final sauté phase to 3-4 minutes instead of 2 minutes, allowing more evaporation to concentrate flavors and thicken the sauce naturally. If the sauce is too thick, whisk in 1-2 tablespoons of chicken broth or water during the final sauté while on low heat. Most commercial BBQ sauces thicken more than expected during cooling, so the sauce may appear thicker when served cold.
Conclusion
Instant Pot BBQ chicken combines speed, simplicity, and restaurant-quality results in a single pot, making it the ultimate weeknight dinner solution. From my experience developing recipes in Fresh Recipes Corner, this method consistently delivers tender, flavorful chicken that your family will request repeatedly. The pressure cooker ensures juicy meat while the tangy-sweet sauce caramelizes perfectly, creating the authentic BBQ flavor you’ve been craving without hours of slow cooking.
Instant Pot BBQ Chicken: Quick & Easy
Ingredients
- Chicken thighs or breasts
- 2 pounds (bone-in, skin-on thighs preferred; boneless breasts use 6-min cook time)
- BBQ sauce
- 1 cup (smokehouse or hickory flavor; adjust sweetness to preference)
- Salt and pepper (to taste)
Instructions
- Season chicken thoroughly with salt and pepper
- Add chicken to Instant Pot, pour 1/2 cup water (create chicken stock)
- Pour 1 cup BBQ sauce over chicken
- Set Instant Pot to high pressure, cook 8 minutes for thighs/6 for breasts
- Natural release for 10 minutes, quick release remaining pressure
- Select sauté mode, add 1/2 cup BBQ sauce, and cook 8-10 minutes until glaze forms
Notes
Substitute halal chicken or tofu for vegetarian option
Adjust BBQ sauce sweetness if preferred
Recipe doubles well for larger groups
Natural release maximizes moisture retention
