
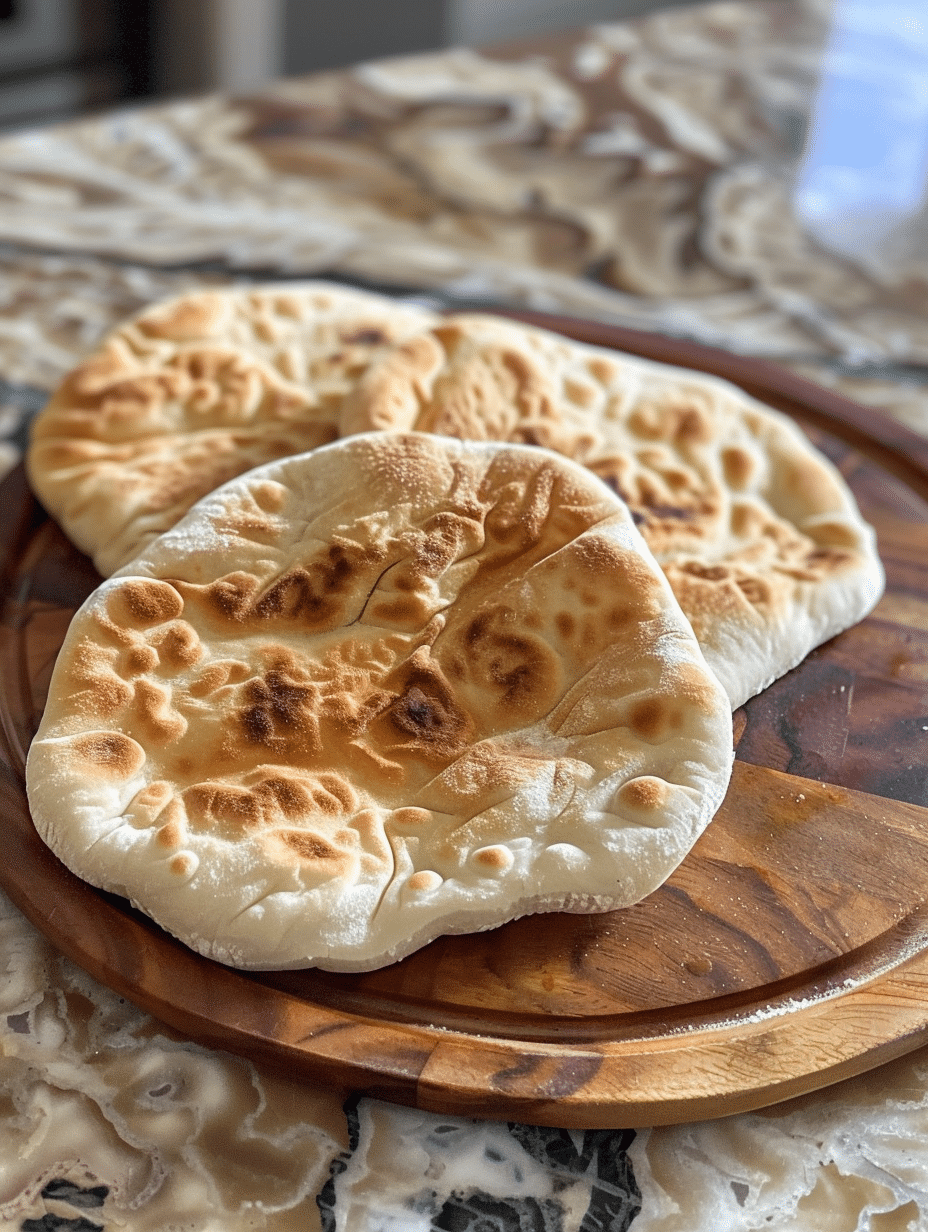
Pita bread is a soft, pillowed flatbread with a hollow center pocket that forms during baking, making it perfect for stuffing with fillings, scooping dips, or serving alongside Mediterranean and Middle Eastern dishes. This ancient bread has been a staple of Mediterranean cuisine for thousands of years, and making it at home is surprisingly simple. The magic happens in your oven when the dough puffs up and creates those signature air pockets that everyone loves. Most home bakers are intimidated by bread-making, but pita bread proves that fresh, authentic results are completely achievable with basic ingredients and proper technique. I’ve perfected this recipe over years of experimentation, and I’m excited to share exactly how to create bakery-quality pita bread in your own kitchen.
About Fresh Recipes Corner and My Baking Journey
I’m Eva Stoner, the creator of Fresh Recipes Corner, where I share simple, reliable recipes for everyday cooking. My love for cooking began in my grandmother’s kitchen, where I learned that good food doesn’t have to be complicated—it just needs care, patience, and the right techniques. Those early moments shaped how I cook today and inspired me to keep things practical and approachable.
Growing up, my grandmother would bake fresh bread almost weekly, and pita bread was always in her rotation. She taught me that baking is as much about understanding your ingredients as it is about following measurements. When I first tried making pita bread, I made every beginner mistake: overworking the dough, incorrect water temperature, and an oven that wasn’t hot enough. After dozens of batches and careful observation, I cracked the code. Today, I create recipes that honor traditional techniques while making them accessible for home cooks who want authentic results without unnecessary complexity.
Recipe Overview
| Metric | Value |
|---|---|
| Prep Time | 15 minutes |
| Cook Time | 4 minutes per batch |
| Total Time | 1 hour 20 minutes |
| Servings | 8 pita breads |
| Difficulty Level | Easy to Intermediate |
| Cuisine | Mediterranean / Middle Eastern |
Why This Recipe Works
I developed this pita bread recipe after testing dozens of variations, and it works because it balances hydration, fermentation time, and oven temperature perfectly. The dough is soft enough to puff dramatically during baking but sturdy enough to handle without tearing. I use instant yeast because it provides reliable results, and the warm water activates it consistently without requiring a separate blooming step that adds unnecessary time and variables.
From my experience, the single most important factor for pocket formation is oven temperature. Your oven must reach 475°F before the pitas go in, and I recommend using a pizza stone or cast iron skillet preheated for at least 15 minutes. This intense dry heat creates steam inside the bread almost immediately, causing the dough to puff like a balloon. The first 30 seconds of baking are absolutely critical—if your oven isn’t hot enough, the bread will simply brown without developing pockets.
The fermentation time matters more than most bakers realize. I let the dough rise for exactly one hour because this develops flavor and creates a supple, extensible dough that stretches easily and traps steam effectively. A shorter rise produces bland bread that doesn’t puff well, while a longer rise can lead to overproofing and sticky, difficult-to-handle dough. This timing has never failed me in my kitchen or when I’ve coached others through the process.
Ingredients
| Ingredient | Quantity | Notes and Alternatives |
|---|---|---|
| All-Purpose Flour | 3 cups (360g) | Use unbleached flour for better flavor. Bread flour creates chewier pitas but requires slightly less water. Can substitute whole wheat flour for up to 1 cup, though this reduces puffing. |
| Instant Yeast | 1 packet (2.25 teaspoons) | Use active dry yeast in equal quantity, but increase hydration by 1 tablespoon water. Do not use rapid-rise yeast as fermentation time is essential here. |
| Salt | 1 teaspoon | Sea salt or kosher salt work equally well. Salt strengthens gluten and enhances flavor. Do not omit or reduce below 0.75 teaspoons. |
| Olive Oil | 1 tablespoon | Extra virgin olive oil adds richness. Neutral oil works but lacks flavor. Oil tenderizes the crumb and aids in browning. |
| Warm Water | 1 cup (240ml) | Water temperature should be 105-110°F (40-43°C). Too hot kills yeast; too cold prevents activation. Use filtered water for best results. |
Step-by-Step Instructions
Phase 1: Mixing and Activation
- Combine 3 cups all-purpose flour, 2.25 teaspoons instant yeast, and 1 teaspoon salt in a large mixing bowl, stirring to distribute yeast evenly throughout the flour.
- Pour 1 tablespoon olive oil and 1 cup warm water (105-110°F) into the flour mixture, using your hand or a wooden spoon to stir until a shaggy, wet dough forms.
- Let the dough rest for 5 minutes, allowing flour to fully hydrate and making kneading easier.
Phase 2: Kneading
- Knead the dough on a lightly floured surface for 8 minutes, working it until smooth and elastic, using a pushing and folding motion with the heel of your hand.
- Test the dough’s readiness by performing the windowpane test: gently stretch a small piece between your fingers; it should form a thin, translucent membrane without tearing.
- Return the kneaded dough to a lightly oiled bowl, then turn the dough to coat all sides with oil, preventing a dry surface from forming.
Phase 3: Bulk Fermentation
- Cover the bowl with a damp kitchen towel or plastic wrap, then let the dough rise at room temperature (70-75°F) for exactly 1 hour until doubled in size.
- Press the dough gently with your finger; if the indent springs back slowly and only partially, the fermentation is complete.
Phase 4: Shaping
- Turn the dough out onto a lightly floured work surface, then divide it into 8 equal pieces using a bench scraper or sharp knife.
- Roll each piece into a tight ball by tucking the edges underneath and rolling on the work surface until the surface is smooth and taut.
- Let the balls rest for 5 minutes covered with a towel, allowing the gluten to relax and making rolling easier.
- Roll each ball into a circle approximately 5 inches in diameter and ¼ inch thick, using light, even pressure and rotating the dough frequently for uniform thickness.
Phase 5: Baking
- Preheat your oven to 475°F (245°C) with a pizza stone or cast iron skillet inside for at least 15 minutes, ensuring the surface reaches full temperature.
- Working in batches of 2-3 pitas, carefully place the dough circles onto the preheated surface using a pizza peel or large spatula, avoiding crowding.
- Bake for 3-4 minutes until the pitas puff dramatically and develop light golden-brown spots on the bottom, watching carefully as cooking time is brief.
- Transfer the baked pitas to a wire rack using tongs, then wrap them in a clean kitchen towel while still warm to keep them soft.
- Repeat steps 14-16 with remaining dough, preheating the baking surface between batches if necessary.
Chef Tips for Perfect Results
- Invest in an oven thermometer: Most home ovens run 25-50°F cooler or hotter than the dial indicates. Accurate temperature is non-negotiable for pita puffing. Place it on the same rack where your pitas will bake to get true readings.
- Use a pizza stone or cast iron: These materials absorb and radiate intense, dry heat that standard baking sheets cannot match. Preheat them for at least 15 minutes and never place cold pitas directly on them or you’ll create thermal shock that prevents puffing.
- Roll to consistent thickness: Uneven thickness causes some parts to puff while others brown without rising. Aim for exactly ¼ inch throughout, using a ruler if needed on your first few attempts. Consistent thickness is the difference between successful and failed pitas.
- Don’t skip the rest after shaping: Allowing shaped balls to rest for 5 minutes relaxes the gluten network, making the final rolling much easier and reducing the toughness that comes from overworking the dough during shaping.
- Watch the first 60 seconds: Most puffing happens immediately when pitas hit the hot surface. Keep your oven light on and watch carefully; if you see uneven browning, rotate the pitas halfway through the bake using a long-handled spatula.
- Wrap while warm: Pitas steam themselves soft when wrapped immediately after baking. This step is essential for maintaining the tender texture that makes homemade pita bread superior to store-bought versions.
Common Mistakes to Avoid
Mistake 1: Using Water That’s Too Hot or Too Cold
Why it fails: Water above 120°F kills yeast cells, preventing fermentation entirely. Water below 100°F activates yeast too slowly, resulting in sluggish rising and flat bread. How to fix it: Measure water temperature with an instant-read thermometer and aim for exactly 105-110°F. Test it with your inner wrist like you’re checking a baby’s bathwater; it should feel pleasantly warm but not hot.
Mistake 2: Oven Temperature Below 450°F
Why it fails: Pita puffing depends on rapid steam generation. Moderate temperatures allow moisture to escape as water vapor rather than creating dramatic steam pockets inside the bread. The dough simply bakes into a flat, dense disk. How to fix it: Use an independent oven thermometer to verify actual temperature, not the dial setting. Preheat for at least 20 minutes and bake on a preheated pizza stone or cast iron to ensure consistent, high heat.
Mistake 3: Skipping the Bulk Fermentation Time
Why it fails: One full hour develops gluten strength and creates flavor compounds that shorter fermentation periods cannot achieve. Rushing this step produces bland, dense bread that won’t puff properly because the dough lacks gas-holding capacity. How to fix it: Mark your timer and wait the full 60 minutes at room temperature. You can’t speed fermentation without sacrificing quality; patience is a key ingredient here.
Mistake 4: Rolling Uneven Thickness
Why it fails: Thin areas overcook and harden before thicker sections develop steam. Thick areas remain doughy and dense. The result is inconsistent texture, with some pitas crispy and others gummy. How to fix it: Use gentle, even pressure while rolling and rotate the dough frequently. Aim for exactly ¼ inch thickness and use a ruler on your first batch to calibrate your rolling technique.
Mistake 5: Not Wrapping Freshly Baked Pitas
Why it fails: Pitas cool exposed to air, causing moisture to evaporate and the exterior to harden into a brittle shell. How to fix it: Immediately transfer hot pitas to a clean kitchen towel and fold the towel over them, trapping steam. Leave them wrapped for at least 5 minutes, allowing residual heat to soften the exterior and distribute moisture throughout.
Variations and Substitutions
| Original Ingredient | Substitution | Impact on Flavor and Texture |
|---|---|---|
| All-Purpose Flour | Whole Wheat Flour (substitute up to 1 cup) | Adds nutty, earthy flavor and increases fiber content. Reduces rise significantly and creates denser, chewier texture. Whole wheat dough requires 1-2 tablespoons additional water for proper hydration. |
| Olive Oil | Neutral Oil (vegetable, canola, or avocado oil) | Creates lighter, less distinctive flavor profile. Texture remains unchanged. Use equal quantity. Neutral oils work when you want pita bread as a neutral vehicle for fillings. |
| Instant Yeast | Active Dry Yeast | Requires slightly longer fermentation (75 minutes instead of 60). Creates more rustic, complex flavor. Use equal quantity by weight. Do not substitute with rapid-rise yeast as fermentation time is critical. |
| Water | Half Water, Half Milk | Creates richer, more tender crumb with subtle dairy flavor. Milk proteins enhance browning and create softer texture. Use 0.5 cup warm water and 0.5 cup warm milk heated to 105-110°F. |
| Basic Recipe | Za’atar Pita Bread (add 2 tablespoons za’atar spice mix to flour before mixing) | Adds herbal, tangy flavor with sumac notes. Increases complexity and pairs perfectly with Mediterranean fillings. Does not affect rise or texture significantly. |
| Basic Recipe | Herb-Infused Pita (add 1 tablespoon dried oregano or Italian seasoning to flour) | Creates aromatic flavor with Mediterranean character. Pairs beautifully with Greek salads and hummus. Does not affect rise or texture. |
Serving Suggestions and Pairings
Pita bread serves as a versatile vehicle for countless Mediterranean and Middle Eastern dishes. Here are my favorite ways to enjoy fresh homemade pita:
Casual Lunch Wraps: Stuff warm pita with grilled chicken breast, crisp lettuce, ripe tomatoes, cucumber slices, and tzatziki sauce for a quick, satisfying meal. Add crumbled feta cheese for extra tang and Mediterranean authenticity.
Mezze Platter Pairing: Arrange fresh pitas alongside hummus, baba ganoush, tabbouleh, dolmas, marinated olives, and crumbled white cheese for an elegant appetizer spread. This presentation works beautifully for dinner parties and casual entertaining.
Breakfast Sandwiches: Create savory morning meals by filling pita with scrambled eggs, sautéed spinach, sun-dried tomatoes, and labneh (strained yogurt). This transforms pita bread into something special beyond typical sandwich bread.
Dip Vehicles: Slice cooled pitas into triangles, brush lightly with olive oil, and toast them for homemade pita chips. Serve with roasted red pepper hummus, baba ganoush, or traditional chickpea hummus. Homemade chips taste infinitely better than store-bought versions.
Shawarma and Kebab Wraps: Use warm pita to wrap seasoned grilled vegetables, legumes, or falafel with tahini sauce and fresh herbs for complete Mediterranean meals. The pocket holds fillings securely while the bread stays soft enough to eat comfortably.
Special Occasion: Pita and Olive Oil Tasting: Toast fresh pita bread and serve it simply with premium extra virgin olive oil infused with garlic and herbs for dipping. This elegant preparation highlights the bread’s pure, subtle flavors and works beautifully as a dinner starter.
Storage and Reheating
| Storage Method | Duration | Instructions |
|---|---|---|
| Room Temperature (Wrapped) | 1-2 days | Wrap cooled pitas in a clean kitchen towel or place in a paper bag. Store away from heat sources. Texture remains soft and pleasant for eating fresh or making sandwiches. |
| Refrigerator | 3-4 days | Place cooled pitas in an airtight container or resealable plastic bag. Refrigeration slows mold growth but causes some moisture loss. Warm briefly before serving for best texture. |
| Freezer | Up to 3 months | Cool completely, stack with parchment paper between each piece, and place in a freezer-safe bag, removing excess air. Label with date. Freezing preserves texture and taste remarkably well. |
| Reheating: Oven Method | 5 minutes | Wrap pitas in foil and place in a 300°F oven for 5 minutes. This gently reheats without overdrying. Remove foil carefully to avoid steam burns. |
| Reheating: Stovetop Method | 1-2 minutes | Place pita in a dry skillet over medium heat, flipping after 30 seconds. This creates a slightly toasted exterior while keeping the interior soft. Perfect for immediate use in wraps. |
| Reheating: Microwave Method | 30 seconds | Wrap one pita in a damp paper towel and microwave for 15-30 seconds. Quick but can create uneven heating. Use for rush situations only. |
| Thawing Frozen Pita | 1-2 hours room temperature or overnight refrigerated | Remove pitas from freezer and unwrap partially to allow air circulation. Once thawed, reheat using oven or stovetop method for best texture restoration. |
Nutritional Information
The following nutritional values are based on one pita bread from this recipe. Approximate values may vary based on exact ingredients used and measurement precision.
| Nutrient | Amount per Serving |
|---|---|
| Calories | 165 |
| Total Fat | 2g |
| Saturated Fat | 0.3g |
| Trans Fat | 0g |
| Cholesterol | 0mg |
| Sodium | 292mg |
| Total Carbohydrates | 32g |
| Dietary Fiber | 1g |
| Total Sugars | 0g |
| Protein | 5g |
Frequently Asked Questions
Can I substitute all-purpose flour with bread flour to make pita bread?
Yes, bread flour works well for pita bread and creates a slightly chewier crumb due to higher protein content. Reduce the water by 1-2 tablespoons since bread flour absorbs more liquid than all-purpose flour. The fermentation time remains the same, and the puffing result is equally impressive. Bread flour is my second choice when I want extra structure and chew.
How do I know when pita bread is properly done baking?
Pita bread is done when it puffs dramatically and the bottom develops light golden-brown spots, typically 3-4 minutes at 475°F. Open the oven and look for significant puffing and browning on the bottom; the top may appear pale, which is normal. If you see no puffing after 3 minutes, your oven temperature is likely too low and needs adjustment.
Why isn’t my pita bread puffing?
Non-puffing pita bread results from insufficient oven temperature, improper dough hydration, or inadequate fermentation time. Check your oven temperature with an independent thermometer; it must reach at least 475°F. Verify you used exactly 1 cup warm water (not measured loosely) and allowed the dough to rise for the full 60 minutes. These three factors account for 95% of puffing failures.
Can I make pita bread dough in advance and refrigerate it overnight?
Yes, cold fermentation improves flavor dramatically and provides convenience. After mixing, knead, and initial rise, place the dough in an oiled bowl, cover it, and refrigerate for 8-16 hours. Remove from the refrigerator, let it warm to room temperature for 30 minutes, then divide and shape. The overnight rest develops complex flavors that shorter fermentation cannot achieve.
What’s the best way to serve pita bread warm?
Serve pita bread immediately after baking while still steaming, wrapped in a clean kitchen towel to trap heat and maintain softness. The pocket is most pronounced and easiest to fill when the bread is warm. If serving later, wrap in foil and warm in a 300°F oven for 5 minutes before serving.
Can I freeze pita bread after baking?
Yes, freeze pita bread successfully for up to 3 months. Cool completely, stack with parchment paper between pieces, and place in a freezer-safe bag with excess air removed. Thaw at room temperature or in the refrigerator before reheating using the oven method for best texture results. Frozen-then-reheated pita tastes nearly identical to fresh.
Final Thoughts on Homemade Pita Bread
Making pita bread at home transforms your understanding of this ancient staple and fills your kitchen with the aroma of fresh baking. This recipe delivers consistent, impressive results that rival professional bakeries once you understand the critical factors: precise water temperature, proper oven heat, and patient fermentation. The soft, pillowed texture of homemade pita bread makes every Mediterranean meal more delicious. I encourage you to bake this recipe several times, noting how the flavors deepen and your technique strengthens with practice. Master this foundational bread, and you’ll unlock countless possibilities for wraps, sandwiches, and elegant entertaining. Your homemade pita bread will establish a new standard for what bread should taste like.
Homemade Pita Bread
Ingredients
- 2 1/2 cups all-purpose flour
- 1 teaspoon salt
- 1 tablespoon olive oil
- 1 teaspoon instant yeast
- 3/4 cup warm water (110°F / 45°C)
Instructions
- Combine flour and salt in a large bowl
- Add olive oil and instant yeast, then mix
- Gradually add warm water and knead until smooth
- Cover and let rest for 30 minutes
- Divide dough into 8 balls, roll into 1/4-inch thick rounds
- Preheat oven to 450°F (230°C) and place a baking stone/rack on middle shelf
- Bake for 4-5 minutes until pitas puff and turn golden
Notes
Let dough rest properly for optimal expansion
Store in airtight container for up to 2 days
For reheating, warm in oven at 350°F (180°C) for 2-3 minutes
