
Gluten free cake is a tender, indulgent dessert made without wheat flour that delivers the same soft crumb and satisfying flavor as traditional cakes. I’ve spent years perfecting gluten free baking techniques, and the secret lies in understanding how alternative flour blends work and using the right binding agents. This isn’t a compromise dessert; it’s a genuine cake that celebrates simplicity and honest ingredients. Whether you’re avoiding gluten for celiac disease, sensitivity, or personal preference, this recipe proves that gluten free cakes rival any conventional version. The combination of rice flour, almond flour, and cornstarch creates a structure that’s light yet sturdy enough to hold frosting beautifully.
My Journey to Perfect Gluten Free Cakes
I’m Lila Bennett, a 34-year-old home baker based in Portland, Oregon, and my kitchen is almost always filled with the smell of something sweet. I fell in love with baking as a kid, sneaking tastes of cookie dough and watching simple ingredients turn into something comforting and delicious. What started with slightly overbaked cookies turned into years of experimenting with cakes, pancakes, and all kinds of desserts—learning through trial, error, and a lot of taste-testing.
My real education in gluten free baking came when my sister was diagnosed with celiac disease about seven years ago. She’d always loved my desserts, and I wasn’t about to let her miss out. The first few attempts were dense, dry, and honestly disappointing. I spent the next year testing flour blends, understanding protein ratios, and learning why gluten free batters behave differently. I discovered that xanthan gum wasn’t the villain I thought it was, that eggs needed to be room temperature for proper emulsification, and that acid (like apple cider vinegar or lemon juice) actually improves texture.
Today, I bake gluten free cakes regularly—not out of obligation, but because I genuinely love how they turn out. My sister now requests my gluten free cake for her birthday every year, and guests who don’t have any dietary restrictions ask for seconds without realizing it’s gluten free. That’s when I knew the recipe worked. This article shares everything I’ve learned through real kitchen experience, failures included.
Recipe Overview
| Metric | Value |
|---|---|
| Prep Time | 15 minutes |
| Cook Time | 28–32 minutes |
| Total Time | 45 minutes (plus cooling) |
| Servings | 12 slices |
| Difficulty Level | Intermediate |
| Cuisine | American |
Why This Recipe Works
This gluten free cake uses a thoughtful blend of flours that work together to replicate what gluten does structurally. Rice flour provides a neutral base and helps the crumb stay tender. Almond flour adds moisture and richness from its natural oils, preventing the dry texture that plagues many gluten free baked goods. Cornstarch contributes starch that helps bind the batter without adding toughness or grittiness. The xanthan gum acts as an emulsifier and binder, giving the cake the elastic quality that gluten normally provides. I’ve learned through dozens of experiments that this specific ratio creates a cake that rises evenly, holds moisture for days, and slices cleanly without crumbling.
The technique matters as much as the ingredients. Creaming butter and sugar for a full three minutes incorporates air into the batter, which creates lift during baking. Adding eggs one at a time ensures they emulsify properly into the butter mixture. The acid in the apple cider vinegar reacts with the baking soda in the baking powder, creating carbon dioxide that helps the cake rise. This combination of flour blend, technique, and chemical reaction is what separates a good gluten free cake from a great one.
I learned the hard way that room temperature ingredients are non-negotiable for gluten free cakes. Cold eggs won’t emulsify properly, and cold milk can cause the batter to seize. The first time I skipped this step, my cake came out dense and separated. Now I pull everything from the refrigerator 30 minutes before baking, and the difference is noticeable every single time.
Ingredients
| Ingredient | Quantity | Notes & Alternatives |
|---|---|---|
| Rice flour | 1.5 cups | Use white rice flour for neutral flavor. Brown rice flour works but adds slight nutty taste. Oat flour can replace 0.5 cup of rice flour for added flavor. |
| Almond flour | 0.75 cups | Finely ground, blanched almond flour works best. Hazelnut flour or sunflower seed flour can substitute for nut-free option (use same quantity). |
| Cornstarch | 0.5 cups | Ensures tender crumb. Can substitute with tapioca starch or arrowroot powder in equal amounts. |
| Baking powder | 2 teaspoons | Double-acting aluminum-free baking powder recommended. Do not substitute with baking soda unless recipe specifically calls for it. |
| Xanthan gum | 0.5 teaspoon | Omit if using a pre-mixed gluten free flour blend that already contains xanthan gum. Essential for binding without gluten. |
| Salt | 0.25 teaspoon | Enhances flavor and strengthens gluten free structure. Use fine sea salt or table salt. |
| Butter (unsalted) | 0.75 cup (1.5 sticks) | Room temperature is critical for proper creaming. Can use dairy-free butter alternative for vegan version. |
| Granulated sugar | 1.25 cups | Standard white sugar. Can use 1 cup sugar plus 0.25 cup coconut sugar for subtle caramel undertone. |
| Large eggs | 3 | Must be room temperature for emulsification. Cannot be replaced with flax eggs in this recipe; use egg replacer designed for baking. |
| Vanilla extract | 1 teaspoon | Pure vanilla extract recommended. Almond extract (0.5 teaspoon) can be added for additional complexity. |
| Whole milk | 0.75 cup | Cow’s milk, oat milk, or almond milk all work. Non-dairy milks may produce slightly different crumb texture. |
| Apple cider vinegar | 1 tablespoon | Creates buttermilk reaction that aids rise and tenderness. Can substitute with white vinegar or lemon juice. |
Step-by-Step Instructions
Preparation Phase
- Preheat your oven to 350°F and position the rack in the center of the oven for even heat distribution.
- Grease two 8-inch round cake pans thoroughly with butter or non-stick spray, then dust the bottoms and sides with rice flour to prevent sticking.
- Line the bottom of each pan with parchment paper for easier removal after baking.
Dry Ingredients
- Measure rice flour, almond flour, cornstarch, baking powder, xanthan gum, and salt into a medium mixing bowl.
- Whisk these dry ingredients together for 30 seconds, breaking up any lumps in the almond flour and xanthan gum.
- Set the dry mixture aside; do not sift unless lumps are visible.
Wet Ingredients and Creaming
- Place room temperature butter into a large mixing bowl and beat on medium speed for 1 minute until softened.
- Add granulated sugar to the softened butter and continue beating for 3 minutes until the mixture is light, fluffy, and pale in color.
- Scrape down the sides of the bowl with a rubber spatula, ensuring no sugar or butter remains stuck to the sides.
Egg Integration
- Add the first egg to the butter-sugar mixture and beat on medium speed for 45 seconds until fully incorporated and the mixture looks slightly curdled.
- Add the second egg and beat for another 45 seconds.
- Add the third egg and beat for 45 seconds more.
- Stir in vanilla extract by hand or on low speed until just combined; do not overmix.
Acid Reaction
- Pour whole milk into a small bowl or measuring cup and add apple cider vinegar immediately.
- Stir gently and let sit for 1 minute to allow the buttermilk reaction to develop; small curds may form.
Combining Wet and Dry
- Add one-third of the dry flour mixture to the butter-egg mixture and fold in gently with a rubber spatula until just combined.
- Pour one-half of the buttermilk mixture into the bowl and fold in gently until just combined.
- Add another one-third of the dry flour mixture and fold in gently.
- Add the remaining buttermilk mixture and fold in gently.
- Add the final one-third of dry flour mixture and fold in gently until just combined; do not overmix or the cake will be tough.
- The final batter should be thick, smooth, and pourable.
Panning and Baking
- Divide the batter evenly between the two prepared pans using an ice cream scoop or measuring cup for consistency.
- Tap each pan gently on the counter twice to release any air bubbles trapped in the batter.
- Place both pans in the preheated 350°F oven on the center rack, positioning them side by side.
- Bake for 28 to 32 minutes until the tops are light golden brown and a toothpick inserted into the center comes out clean or with a few moist crumbs.
- Do not rely on time alone; check with a toothpick starting at 26 minutes to avoid overbaking.
Cooling
- Remove both pans from the oven and place on a wire cooling rack.
- Allow the cakes to cool in the pans for exactly 10 minutes; this prevents breakage and helps them set.
- Run a thin knife around the edges of each cake to loosen it from the pan.
- Invert each pan onto a wire rack and gently remove the parchment paper.
- Allow the cakes to cool completely for at least 2 hours before frosting or serving.
Chef Tips for Perfect Results
- Room temperature is essential: Remove eggs, butter, and milk from the refrigerator at least 30 minutes before baking. Cold ingredients won’t emulsify properly, resulting in dense cake with poor crumb structure.
- Measure flour by weight when possible: Volume measurements can vary; one cup of rice flour can weigh anywhere from 5.6 to 6.2 ounces depending on how densely it’s packed. Use a kitchen scale for accuracy.
- Don’t skip the acid: The apple cider vinegar or lemon juice reacts with baking powder to create extra lift and tender crumb. This step is non-negotiable in gluten free cakes.
- Fold, don’t stir, when combining: Once you start adding dry ingredients to wet, use a rubber spatula and fold gently rather than stirring vigorously. Overmixing develops texture that makes gluten free cake tough and dense.
- Invest in an oven thermometer: Oven temperature fluctuations are the leading cause of gluten free cake failures. A cheap oven thermometer ($5–10) prevents underbaking and overbaking.
- Test for doneness carefully: A toothpick should come out with a few moist crumbs, not completely clean and dry. Gluten free cakes continue cooking slightly after removal from the oven.
Common Mistakes to Avoid
Mistake 1: Using Cold Ingredients
Cold butter won’t cream properly with sugar, and cold eggs won’t emulsify into the batter. This results in a dense, grainy cake with poor crumb structure. Always let butter, eggs, and milk sit on the counter for 30 minutes before mixing.
Mistake 2: Skipping the Xanthan Gum
Gluten provides elasticity and binding power in regular cakes. Xanthan gum replaces this function in gluten free baking. Without it, the cake will be crumbly and fragile. If you’re using a pre-mixed gluten free flour blend that already contains xanthan gum, omit the additional 0.5 teaspoon to avoid excessive binding.
Mistake 3: Overmixing the Batter
Unlike regular cake batter, gluten free batter becomes tough and dense when overmixed. The reason is that without gluten to provide elasticity, over-agitation from mixing tightens the structure too much. Fold gently when combining wet and dry ingredients, and stop as soon as no dry flour streaks remain.
Mistake 4: Opening the Oven Door Too Early
Gluten free cakes are more sensitive to temperature fluctuations than regular cakes. Opening the oven door before 26 minutes allows heat to escape, which disrupts the rising process. Check for doneness starting at 26 minutes, but avoid opening the door before that point.
Mistake 5: Not Measuring Flour Accurately
Scooping flour directly from the bag compacts it into the measuring cup, resulting in too much flour. This creates a dry, dense cake. Use a spoon to fluff flour in the bag, then spoon it into your measuring cup and level off with a knife. Better yet, weigh your flour for true accuracy.
Variations and Substitutions
| Ingredient | Substitution | Impact on Flavor and Texture |
|---|---|---|
| Vanilla extract | Almond extract (0.5 tsp) or lemon zest (1 tbsp) | Adds complexity and subtle alternate flavor. Lemon zest brightens without changing moisture content. |
| Almond flour | Sunflower seed flour or pumpkin seed flour (nut-free) | Reduces allergen load but adds slightly earthier taste. Maintains texture and moisture similarly. |
| White sugar | Coconut sugar (1 cup) or maple syrup (1 cup, reduce milk to 0.5 cup) | Adds caramel or deep molasses notes. Maple syrup creates denser, moister crumb. |
| Butter | Dairy-free butter or coconut oil (use refined for neutral flavor) | Produces vegan cake with similar texture. Coconut oil may impart subtle coconut flavor. |
| Cornstarch | Tapioca starch or arrowroot powder | Creates similarly tender crumb. All three are neutral in flavor. |
| Whole milk | Oat milk, almond milk, or coconut milk | Non-dairy milks work well. Oat milk creates smoothest crumb; coconut milk adds richness. |
| Apple cider vinegar | Lemon juice or white vinegar | All create the buttermilk reaction needed for rise. Lemon juice adds subtle citrus note. |
Flavor Variations to Try
Chocolate Gluten Free Cake: Replace 0.25 cups of rice flour with unsweetened cocoa powder. Add 0.5 teaspoon instant espresso powder to deepen chocolate flavor. Proceed with recipe as written.
Lemon Gluten Free Cake: Add 2 tablespoons lemon zest to the butter-sugar mixture during creaming. Replace vanilla extract with lemon extract (0.5 teaspoon). Add 2 tablespoons fresh lemon juice to the buttermilk mixture. The result is bright, tender, and perfectly suited to a light glaze.
Strawberry Gluten Free Cake: Reduce milk to 0.5 cup and add 0.25 cup strawberry puree (fresh strawberries blended smooth). Fold 0.5 cup fresh diced strawberries into the batter just before panning. This creates a naturally flavored cake with fresh fruit throughout.
Spiced Gluten Free Cake: Add 1 teaspoon ground cinnamon, 0.5 teaspoon ground ginger, 0.25 teaspoon ground nutmeg, and 0.125 teaspoon ground cloves to the dry flour mixture. Increase vanilla to 1.5 teaspoons. This creates a warm, comforting cake perfect for fall gatherings.
Serving Suggestions and Pairings
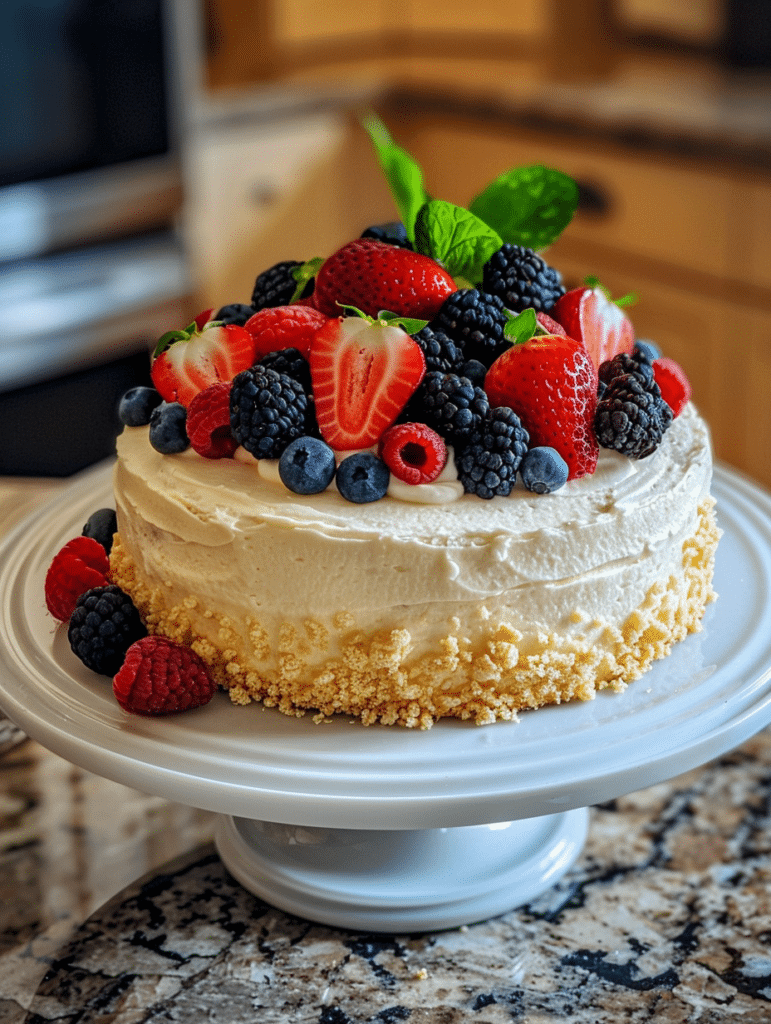
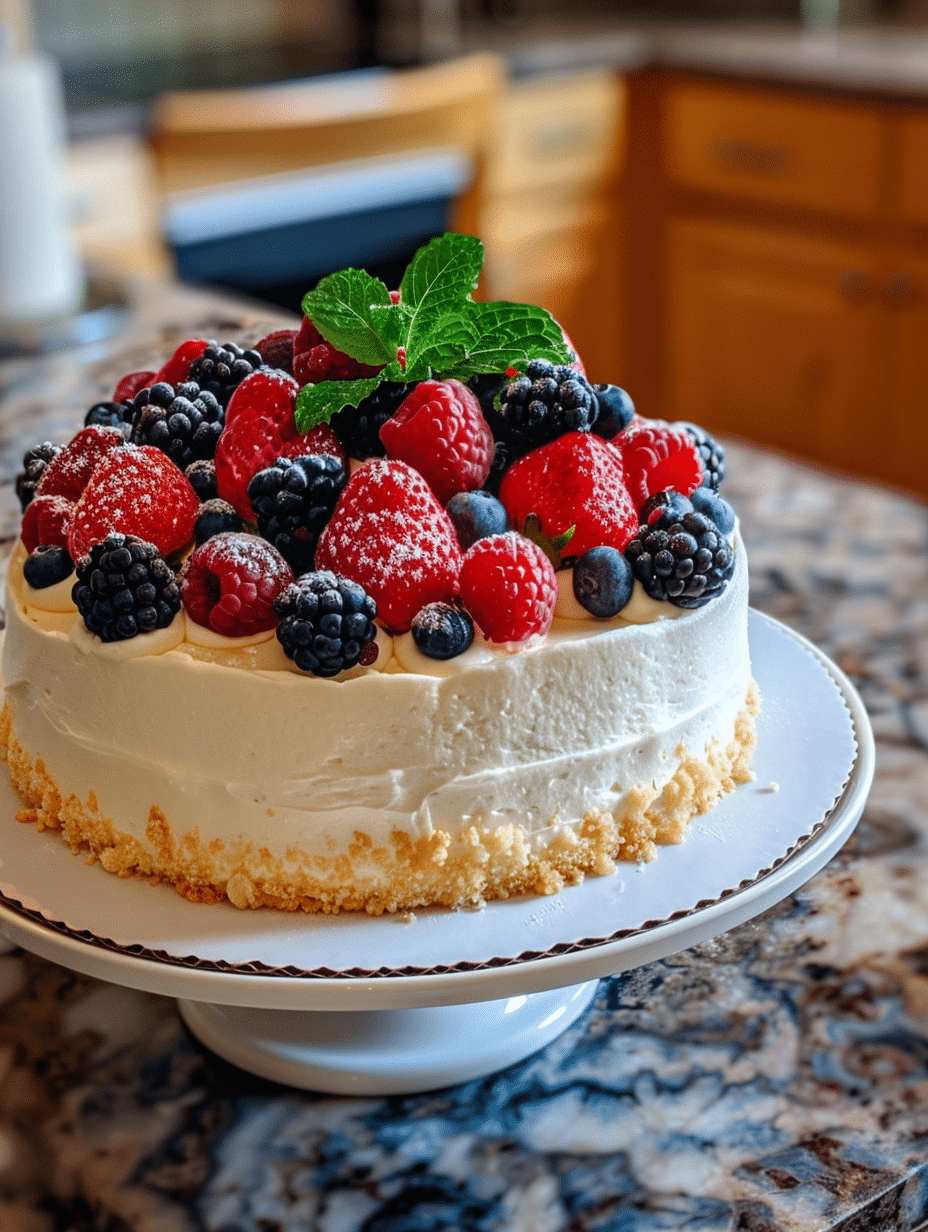
This gluten free cake pairs beautifully with classic vanilla buttercream frosting, which provides a neutral backdrop that lets the delicate crumb shine through. The two-layer cake serves 12 people generously for a small dinner party, or 8 people with leftover slices. For a birthday celebration, decorate with fresh berries, edible flowers, or simple piped borders using the buttercream. The cake’s tender crumb holds up well to both frosting and filling.
For Celebrations: Layer the two cakes with jam and whipped cream between layers for a simple but elegant presentation. A dusting of powdered sugar on top adds refinement without extra work. This approach works perfectly for anniversary dinners or garden parties.
For Everyday Dessert: Serve a single-layer cake dusted with powdered sugar alongside a cup of coffee or tea. The cake’s delicate flavor doesn’t overwhelm; it complements rather than dominates. This is my sister’s preferred way to enjoy it—simple and unadorned.
For Potlucks and Gatherings: The cake transports well and actually improves in texture over 24 hours as moisture redistributes through the crumb. Bring it unfrosted, frosted, or as two layers with frosting in a separate container for assembly on-site. Many guests will be pleasantly surprised it’s gluten free.
Beverage Pairings: Pair with hot coffee, herbal tea (particularly chamomile or vanilla-based blends), or a glass of cold milk. The cake’s subtle flavor works across all these beverages without clashing.
Storage and Reheating
| Method | Duration | Instructions |
|---|---|---|
| Room Temperature | 2 days | Store in an airtight container or cover tightly with plastic wrap. Flavor actually improves as moisture redistributes through the crumb. |
| Refrigerator | 5 days | Place in an airtight container on a shelf (not door). Cold temperatures slow mold growth. Remove from refrigerator 30 minutes before serving for best texture. |
| Freezer (Unfrosted) | 3 months | Wrap each cake layer individually in plastic wrap, then in aluminum foil. Store in a freezer bag. Thaw at room temperature for 4 hours before frosting. |
| Freezer (Frosted) | 2 months | Freeze uncovered on a baking sheet until solid (about 4 hours), then wrap in plastic wrap and foil. Thaw at room temperature for 6 hours. |
| Reheating | N/A | This cake is best served at room temperature or chilled. If desired to warm slightly, wrap in foil and heat at 275°F for 8–10 minutes. Do not microwave as it dries the crumb. |
Nutritional Information
The following values are approximate and calculated per serving (one slice of two-layer cake divided into 12 servings). Actual values may vary based on specific brands of ingredients used.
| Nutrient | Amount per Serving |
|---|---|
| Calories | 285 |
| Total Fat | 14g |
| Saturated Fat | 8g |
| Trans Fat | 0g |
| Cholesterol | 68mg |
| Sodium | 280mg |
| Total Carbohydrates | 38g |
| Dietary Fiber | 1.5g |
| Total Sugars | 26g |
| Protein | 4g |
Frequently Asked Questions
Can I use a pre-made gluten free flour blend instead of mixing my own?
Yes, you can substitute 2.75 cups of a quality pre-made gluten free flour blend for the rice flour, almond flour, and cornstarch combined. Ensure the blend already contains xanthan gum, and omit the additional 0.5 teaspoon of xanthan gum from the recipe. Popular brands like Bob’s Red Mill 1-to-1 or King Arthur Gluten Free all-purpose flour work well and often produce identical results to my mixed-flour approach.
How do I know when the gluten free cake is done baking?
A toothpick inserted into the center should come out clean or with just a few moist crumbs clinging to it. If the toothpick comes out with wet batter, bake for another 2 minutes. Gluten free cakes continue cooking slightly after removal from the oven due to residual heat, so it’s better to slightly underbake than overbake.
Why did my gluten free cake turn out dense and dry?
The most common causes are overbaking, too much flour (usually from packing flour into measuring cups), or overmixing the batter. To fix this: use a kitchen scale to measure flour accurately, check for doneness at 26 minutes using a toothpick, and fold ingredients gently rather than stirring vigorously. If you’re using a pre-made flour blend, it might contain too much baking powder or xanthan gum for this recipe, so try reducing each by 0.25 teaspoon.
Can I make this gluten free cake the day before serving?
Absolutely, and the flavor and texture actually improve after 24 hours as moisture redistributes through the crumb. Store unfrosted layers in an airtight container at room temperature or in the refrigerator. Frost the morning of serving or up to 8 hours before. This makes it an excellent choice for entertaining or special events where you want to prepare ahead.
Is this gluten free cake recipe safe for people with celiac disease?
Yes, this recipe uses only naturally gluten free ingredients and contains no cross-contamination risks as written. However, always verify that your rice flour, almond flour, baking powder, and xanthan gum are certified gluten free, as these products can be cross-contaminated during processing. Check package labels for a gluten free certification mark from a trusted organization.
What should I frost this gluten free cake with?
Vanilla buttercream frosting (butter, powdered sugar, vanilla, and a splash of milk) is classic and lets the cake shine. Cream cheese frosting adds subtle tang that complements the cake’s tender crumb. Chocolate ganache creates an elegant presentation. For lighter options, whipped cream or a simple powdered sugar glaze work beautifully without overwhelming the delicate flavor of the cake.
Final Thoughts on Gluten Free Cakes
Gluten free cake baking has taught me that limitations often inspire creativity and precision. This recipe represents years of testing, failure, and eventual success in my Portland kitchen. The tender crumb, delicate flavor, and reliable rise prove that gluten free desserts deserve equal standing with their wheat-based counterparts. When you follow these steps carefully—measuring by weight when possible, using room temperature ingredients, and folding gently—you’ll produce a cake that delights everyone at your table. Bake this, share it, and enjoy the simple pleasure of slice after perfect slice.
Gluten Free Cake
Equipment
- 2 round cake pans 8-inch pans recommended
- mixing bowls
- electric mixer
- rubber spatula
- whisk
- measuring cups and spoons
- wire cooling rack
Ingredients
- 1 1/2 cups rice flour
- 3/4 cup almond flour
- 1/2 cup cornstarch
- 2 tsp baking powder
- 1/2 tsp xanthan gum
- 1/4 tsp salt
- 3/4 cup unsalted butter, room temperature
- 1 1/4 cups granulated sugar
- 3 large eggs
- 1 tsp vanilla extract
- 3/4 cup whole milk
- 1 tbsp apple cider vinegar
Instructions
- Preheat oven to 350°F and position the rack in the center of the oven.
- Grease two 8-inch round cake pans and dust lightly with rice flour.
- Line the bottom of each pan with parchment paper.
- Whisk together rice flour, almond flour, cornstarch, baking powder, xanthan gum, and salt in a medium bowl.
- Beat room-temperature butter until softened and smooth.
- Add granulated sugar and beat for 3 minutes until light and fluffy.
- Scrape down the sides of the bowl with a rubber spatula.
- Add the first egg and beat until fully incorporated.
- Add the second egg and beat until smooth.
- Add the third egg and beat until fully combined.
- Mix in vanilla extract on low speed.
- Combine whole milk and apple cider vinegar in a measuring cup and let sit briefly.
- Add one-third of the dry ingredients and fold gently into the batter.
- Add half of the milk mixture and fold gently until combined.
- Repeat alternating dry and wet ingredients, ending with dry ingredients.
- Divide batter evenly between the prepared cake pans.
- Tap pans gently on the counter to release trapped air bubbles.
- Bake for 28–32 minutes until the tops are golden and a toothpick comes out with a few moist crumbs.
- Cool cakes in the pans for 10 minutes.
- Run a knife around the edges and invert cakes onto a wire rack.
- Remove parchment paper and cool completely before frosting or serving.
