
A coffee milkshake is a delicious blend of strong cold brew coffee, creamy milk, ice cream, and sweetener that creates a smooth, frosty beverage perfect for any time of day. This dessert drink combines the bold richness of espresso with the indulgence of a classic milkshake, delivering natural caffeine alongside creamy satisfaction. I discovered this recipe while experimenting in my mom’s kitchen in Austin, and it quickly became my go-to refresher during hot Texas afternoons. The beauty of a coffee milkshake lies in its versatility: you control the strength, sweetness, and creaminess to match your exact preferences. Whether you’re fueling a busy morning or cooling down after dinner, this drink adapts to your needs with minimal ingredients and maximum flavor impact.
About the Creator
I’m Maya Collins, a 29-year-old from Austin, Texas, and co-creator at Fresh Recipes Corner, where I focus on simple, refreshing drinks you can make anytime. My journey started in my mom’s kitchen, mixing juices for fun while exploring flavor combinations. Over time, that casual hobby transformed into a genuine passion for crafting beverages that are both easy to prepare and bursting with natural taste.
At Fresh Recipes Corner, I specialize in working with fresh fruits, aromatic herbs, and quality ingredients to create mocktails, smoothies, and soft drinks that anyone can master. My experience blending drinks has taught me the importance of balance: how cold brew strength interacts with milk fat, how sweetness enhances coffee notes, and how ice cream texture transforms a simple coffee drink into something memorable. This coffee milkshake recipe reflects years of kitchen testing and real-world feedback from my community.
Recipe Overview
| Attribute | Details |
|---|---|
| Prep Time | 5 minutes |
| Brew/Chill Time | 2-4 hours (for cold brew) |
| Total Time | 10 minutes (plus brew time) |
| Servings | 2 servings |
| Difficulty Level | Easy |
| Cuisine | American, Café-Style |
Why This Recipe Works
This coffee milkshake recipe succeeds because it balances three essential elements: robust coffee flavor, creamy richness, and perfectly controlled sweetness. During my first attempts, I learned that using cold brew instead of hot coffee prevents the drink from becoming diluted as ice melts, maintaining intense coffee notes throughout. The cold brew method also removes the acidity that hot coffee extraction creates, resulting in a smoother, less bitter final beverage that highlights natural chocolate and caramel undertones.
I’ve found that combining two different creamy ingredients—milk and ice cream—creates a texture that’s denser than a standard smoothie but lighter than a pure ice cream sundae. The milk acts as a vehicle for flavor while the ice cream provides body and richness. Adding just one tablespoon of sweetener gives you control; you can taste the coffee first, then adjust if needed. This approach respects the complexity of quality coffee rather than masking it under excessive sugar.
What makes this recipe truly special is its adaptability to your equipment and preferences. Whether you own a high-powered blender or a standard one, this drink comes together in under two minutes once your cold brew is ready. The ingredient ratios allow for easy scaling: double everything for a party, or halve it for a single serving. I’ve tested this with various coffee styles, milk options, and ice cream flavors, and it consistently delivers café-quality results at home.
Ingredients
| Ingredient | Quantity | Notes with Alternatives |
|---|---|---|
| Cold Brew Coffee | 1 cup (240 ml) | Use strong cold brew concentrate for deepest flavor. Store-bought cold brew works well. Avoid hot coffee as it dilutes with melting ice. |
| Whole Milk | ½ cup (120 ml) | Whole milk provides creamiest texture. Substitute with 2% milk for lighter version, oat milk for dairy-free option, or almond milk for lower calories. |
| Vanilla Ice Cream | 1 cup (240 ml / 2 scoops) | High-quality vanilla creates classic flavor base. Use coffee ice cream for intensified coffee notes, or salted caramel for sweeter profile. |
| Granulated Sugar or Honey | 1 tablespoon (12 g) | Taste first before adding. Use honey for smoother sweetness, maple syrup for subtle depth, or skip entirely if ice cream is sweetened enough. |
| Ice Cubes | 1 cup (240 ml) | Crushed ice blends faster than large cubes. Freeze cold brew into cubes overnight for coffee-flavored ice that won’t dilute. |
| Pinch of Sea Salt | ⅛ teaspoon | Optional but recommended. Enhances coffee flavor complexity. Omit if using salted caramel ice cream. |
Step-by-Step Instructions
Phase 1: Prepare Your Coffee Base
- Brew cold brew coffee using 1 part coarsely ground coffee to 4 parts cold water, steeping in the refrigerator for 12 to 24 hours until dark and full-bodied.
- Strain the cold brew through a fine-mesh filter or cheesecloth, discarding the grounds.
- Measure out exactly 1 cup of strained cold brew for this recipe, refrigerating any extra for future use.
Phase 2: Assemble Blender Components
- Pour the 1 cup cold brew coffee into your blender pitcher first, ensuring it reaches the liquid line.
- Add ½ cup whole milk, pouring slowly to avoid splashing during the blend cycle.
- Scoop 2 scoops of vanilla ice cream directly into the pitcher, breaking it into smaller chunks if it’s very hard.
- Sprinkle 1 tablespoon of granulated sugar and a pinch of sea salt over the top.
Phase 3: Blend to Perfection
- Add 1 cup of ice cubes to the pitcher with all other ingredients.
- Secure the blender lid tightly, ensuring it’s sealed properly to prevent spillage.
- Start on low speed for 3 seconds to break down large ice pieces and ice cream chunks without creating air pockets.
- Increase to medium-high speed and blend for 30 to 45 seconds, stopping halfway to check consistency.
- Blend until the mixture reaches a smooth, pourable consistency with no visible ice chunks—similar to a thick milkshake, not a slushy.
Phase 4: Serve Immediately
- Pour the blended coffee milkshake into two tall glasses, dividing evenly.
- Serve immediately while still cold and frothy, using wide straws or spoons for sipping.
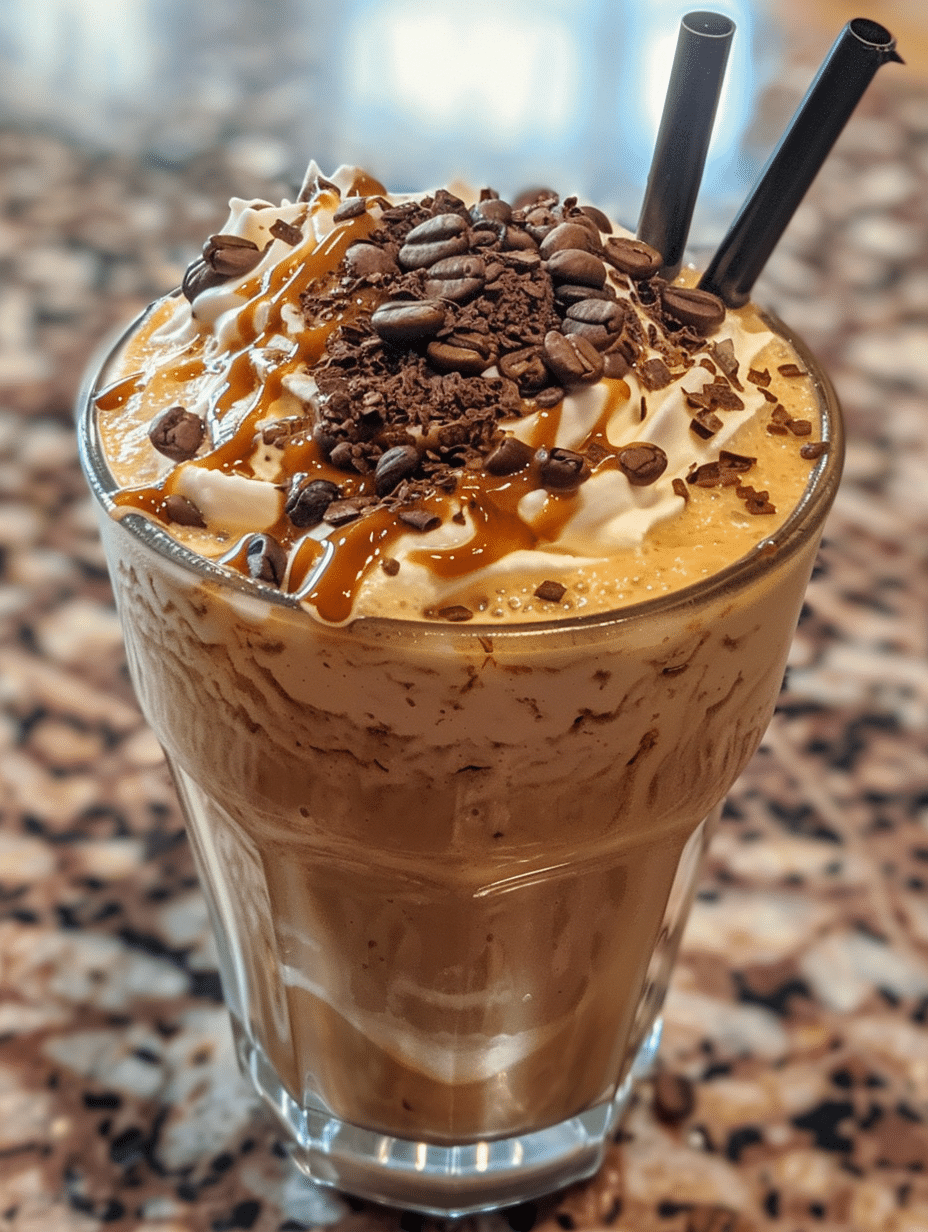
- Top with whipped cream if desired, drizzling with a small amount of chocolate syrup for visual appeal.
Image ALT suggestion: “Two tall glasses of creamy coffee milkshake with frothy tops, garnished with whipped cream and served with black straws.”
Chef Tips for Perfect Results
- Make cold brew concentrate one day ahead and store it in an airtight glass container in the refrigerator for up to two weeks. This ensures you always have strong coffee ready for milkshake making.
- Freeze coffee in ice cube trays overnight to create coffee-flavored ice cubes that prevent dilution as they melt during blending, maintaining boldness throughout.
- Add ice cream in smaller pieces rather than trying to blend two large scoops at once; this reduces blender strain and creates smoother texture in half the time.
- Taste the mixture after 20 seconds of blending before adding sweetener; you may find the ice cream provides enough sugar already, reducing overall calorie content.
- If your blender struggles with frozen ingredients, reduce ice to ¾ cup and add cold brew that’s been pre-chilled in the freezer for 30 minutes instead.
- Pour the completed milkshake into chilled glasses for extended coldness; place glasses in the freezer for 5 minutes while you blend.
Common Mistakes to Avoid
Using Hot Coffee Instead of Cold Brew
Hot coffee cools down too quickly during blending, and the rapid temperature change causes extra ice to melt, resulting in a watery, over-diluted drink that tastes more like coffee-flavored water than a milkshake. The solution: always prepare cold brew 12 to 24 hours ahead, keeping it in a sealed container in the refrigerator so it stays cold and concentrated until blending time.
Adding Too Much Sweetener Before Tasting
Ice cream already contains substantial sugar, and over-sweetening creates a cloying drink that masks the nuanced coffee flavor you worked to achieve. Taste a small amount first, then add sugar incrementally; remember that cold temperatures suppress sweetness perception, so the drink tastes less sweet when frozen than at room temperature.
Overblending or Blending Too Long
Extended blending incorporates excess air, creating a thin, foamy texture that separates into liquid and foam rather than maintaining creamy consistency. Stop blending as soon as ice disappears and the mixture flows smoothly; typically 30 to 45 seconds on medium-high speed is sufficient.
Using Low-Fat Milk or Skipping Milk Entirely
Relying only on ice cream for creaminess results in an overly thick, ice cream-like consistency that’s difficult to drink through a straw. Including milk creates the proper flow and texture balance; even ½ cup of milk makes the difference between a spoonable dessert and a drinkable beverage.
Blending Ice Cream That’s Too Warm or Too Hard
Ice cream straight from a warm counter blends too easily into mush, while ice cream straight from a deep freeze refuses to break down without excessive blender strain. Store ice cream in a standard freezer where it reaches optimal scoopability in 15 to 20 minutes; if it’s rock hard, let it sit at room temperature for 2 to 3 minutes before scooping.
Variations and Substitutions
| Ingredient | Substitution | Impact on Flavor and Texture |
|---|---|---|
| Vanilla Ice Cream | Coffee Ice Cream | Intensifies coffee flavor dramatically; reduces need for additional sweetener. Results in a more robust, adult-oriented drink. |
| Vanilla Ice Cream | Salted Caramel Ice Cream | Adds sweetness and butterscotch depth; creates a dessert-forward milkshake. Balance with slightly less added sugar. |
| Whole Milk | Oat Milk | Adds subtle sweetness and creamy mouthfeel; creates a vegan-friendly drink. Texture remains smooth and rich. |
| Whole Milk | Heavy Cream | Increases richness dramatically; creates ultra-luxe texture. Use only ¼ cup as cream has higher fat content than milk. |
| Cold Brew Coffee | Espresso Shots (2-3 shots) Mixed with Cold Water | Creates stronger coffee intensity; excellent if cold brew isn’t available. Mix espresso with ½ cup cold water to achieve similar strength. |
| Granulated Sugar | Maple Syrup or Agave Nectar | Adds subtle depth and smoother sweetness; creates silkier mouthfeel. Use same quantity by volume. |
| Plain Milkshake | Add Chocolate Syrup (2 tablespoons) | Creates mocha flavor profile; coffee becomes secondary. Increases sweetness significantly. |
| Plain Milkshake | Add Cinnamon (¼ teaspoon) | Introduces warm spice notes that complement coffee complexity. Creates sophisticated, chai-like undertones. |
| Plain Milkshake | Add Vanilla Extract (½ teaspoon) | Enhances vanilla notes and smooths overall flavor. Creates more rounded, less bitter coffee taste. |
Serving Suggestions and Pairings
Serve this coffee milkshake as an afternoon pick-me-up paired with a light pastry like a croissant or butter cookie; the drink’s coffee intensity complements buttery baked goods without overwhelming them. For a dessert course, present the milkshake alongside chocolate biscotti or almond tuile cookies, allowing guests to dunk if desired. A breakfast setting calls for pairing with a simple banana bread or blueberry muffin, where the coffee flavor enhances rather than competes with mild, fruit-forward flavors.
At summer gatherings, serve coffee milkshakes in tall glasses over crushed ice as a caffeine-forward alternative to traditional iced tea. Include toppings bar setup: whipped cream, chocolate shavings, cinnamon powder, and caramel drizzle allow guests to customize their own experience. For brunch entertaining, prepare cold brew ahead and set up a milkshake station where guests choose their ice cream flavor, creating personalized drinks that spark conversation.
Cold weather occasions benefit from serving this beverage in mugs with thick handles, allowing guests to hold warm cups while enjoying a cold drink—the contrast creates a sensory experience. Pair with warm chocolate croissants or fresh cinnamon rolls for maximum comfort appeal. For late-night gatherings, reduce the cold brew to ½ cup and increase milk to ¾ cup, creating a lower-caffeine version suitable for evening service without sacrificing flavor.
Image ALT suggestion: “Coffee milkshake served with pastries, whipped cream, and chocolate shavings on a wooden table.”
Storage and Reheating
| Method | Duration | Instructions |
|---|---|---|
| Refrigerated (Prepared Milkshake) | Up to 1 hour | Pour into airtight container immediately after blending. Cover tightly to prevent oxidation. Separation occurs; shake well before serving. Best consumed immediately. |
| Cold Brew Concentrate | Up to 2 weeks | Store in glass container with airtight seal in coldest part of refrigerator. Use for multiple milkshake batches throughout the week. |
| Individual Components | See separate timelines | Store cold brew (2 weeks), milk (5-7 days opened), ice cream (2-3 months unopened). Assemble fresh each time for optimal texture. |
| Frozen (Prepared Milkshake) | Up to 3 hours | Pour into freezer-safe container, leaving 1-inch headspace for expansion. Thaw slightly at room temperature before serving. Texture becomes icy and separated. |
| Do Not Reheat | N/A | Coffee milkshakes are served cold exclusively. Heating destroys the desired cold, creamy texture and alters flavor profile negatively. Always keep frozen or refrigerated. |
Nutritional Information
Approximate values per serving (½ recipe, serves 2):
| Nutrient | Amount per Serving |
|---|---|
| Calories | 220-250 |
| Protein | 4-5 g |
| Total Fat | 8-10 g |
| Saturated Fat | 5-6 g |
| Carbohydrates | 28-32 g |
| Dietary Fiber | 0 g |
| Sugars | 22-26 g |
| Sodium | 80-100 mg |
| Caffeine | 95-120 mg |
Note: Nutritional values vary based on specific ice cream brand, milk fat content, and cold brew strength. Using low-fat milk reduces calories by 40-50. Substituting with oat milk adds 10-15 calories but increases carbohydrates slightly.
Frequently Asked Questions
Can I Make a Coffee Milkshake Without an Espresso Machine or Cold Brew Setup?
Yes, you can brew strong hot coffee and pour it over ice to create a quick cold coffee base, though cold brew produces superior flavor without bitterness. If you choose hot coffee, brew a double-strength pot using twice the grounds, let it cool to room temperature, then chill in the refrigerator for at least one hour before blending. The drink won’t taste quite as refined as cold brew versions, but it remains delicious and requires no special equipment.
How Do I Prevent My Coffee Milkshake From Becoming Too Watery?
Use cold brew coffee instead of hot coffee, which dilutes as it cools. Freeze coffee into cubes overnight so melting ice contributes coffee flavor rather than watery dilution. Ensure your blender reaches proper consistency quickly by not over-blending, which melts additional ice and creates excess liquid in the drink.
What’s the Best Way to Make This Recipe Dairy-Free?
Substitute whole milk with oat milk, which provides creamy texture and subtle sweetness similar to dairy milk. Replace vanilla ice cream with coconut ice cream or oat-based ice cream designed for dairy-free consumption. The result tastes equally rich and satisfying, requiring no other adjustments to the recipe method.
Can I Prepare the Ingredients Ahead for Quick Blending Later?
Prepare cold brew concentrate the night before and store it in a glass container in the refrigerator. Set aside your desired amount for that day’s milkshake. Scoop ice cream into small bowls and freeze until blending time. Keep milk in the refrigerator. When ready to blend, combine all components; this reduces hands-on time to under two minutes.
How Many Hours Can a Completed Coffee Milkshake Sit Before Serving?
Serve completed milkshakes within 15 to 20 minutes of blending for optimal texture and temperature. If you must delay service, cover the glass with plastic wrap and refrigerate for up to one hour maximum. After one hour, separation occurs and texture becomes grainy as ice cream particles settle.
Does This Recipe Work Well for Large Batches at Parties?
This recipe scales up easily by multiplying all ingredients by the number of servings needed. For 12 servings, prepare 6 cups cold brew, 3 cups milk, 6 cups vanilla ice cream, and 6 cups ice. Blend in batches of 2 servings rather than attempting one massive batch, which overloads most blenders and creates inconsistent texture. Pour each batch into a pitcher as you complete it, keeping it chilled until service time.
Final Thoughts
A coffee milkshake delivers café-quality indulgence with minimal effort and maximum flavor impact. The simple formula of cold brew, milk, ice cream, and ice transforms into something restaurant-worthy when you respect each ingredient’s role in the final drink. My experience developing this recipe has shown me that attention to detail—using cold brew instead of hot coffee, blending briefly rather than excessively, and tasting before sweetening—separates mediocre milkshakes from memorable ones.
This drink adapts beautifully to your mood and ingredients on hand. Make it classically with vanilla ice cream, or customize it toward mocha territory with chocolate elements or coffee ice cream. Whether you’re seeking an afternoon energy boost, a dessert course on warm days, or a simple way to impress guests with homemade café drinks, this coffee milkshake recipe delivers satisfaction every single time.
Coffee Milkshake Recipe: Creamy Cold Brew Bliss
Ingredients
- 2 cups cold brew coffee, chilled
- 1 cup whole milk
- 2/3 cup vanilla ice cream
- 1 to 2 tablespoons sugar or simple syrup (adjust to taste)
- 1/2 teaspoon vanilla extract (optional)
- Ice cubes (as needed)
Instructions
- Chill your cold brew coffee in the refrigerator for 2–4 hours if not already cold.
- In a blender, combine cold brew coffee, whole milk, vanilla ice cream, sugar or sweetener, and vanilla extract.
- Blend until smooth and creamy, adding a few ice cubes if you prefer a thicker texture.
- Taste and adjust sweetness or coffee strength as needed.
- Pour into two tall glasses and serve immediately.
Notes
Substitute dairy milk with almond, oat, or soy milk for a vegan version.
Use low-fat ice cream or frozen yogurt for a lighter option.
Cold brew coffee can be made using a French press or cold brew coffee maker for best results.