A coconut milkshake is a smooth, creamy beverage that blends coconut milk with ice cream and fresh fruit into a luxurious drink. The coconut flavor combines with vanilla and banana to create an indulgent tropical experience you can make in five minutes. This recipe delivers restaurant-quality taste using simple pantry staples and fresh ingredients. Unlike store-bought versions, homemade coconut milkshakes let you control sweetness, texture, and ingredient quality. Whether you’re cooling off on a hot day or serving guests an impressive dessert drink, this coconut milkshake satisfies cravings instantly.
Meet the Recipe Creator
I’m Maya Collins, a 29-year-old from Austin, Texas, and a co-creator at Fresh Recipes Corner, where I focus on simple, refreshing drinks you can make anytime. I started by mixing juices in my mom’s kitchen just for fun, and over time it turned into a real passion. I love working with fruits, herbs, and natural ingredients to create mocktails, smoothies, and soft drinks that are easy but full of flavor.
My coconut milkshake recipe comes from countless summer afternoons spent experimenting with tropical flavors. After moving to Austin, I discovered how satisfying a well-made cold drink could be when the temperature climbs past 95 degrees. Through trial and error, I developed this coconut milkshake formula that balances richness with refreshment. My friends started requesting it for gatherings, and now it’s my signature drink at Fresh Recipes Corner. I’ve refined this recipe through hundreds of batches to ensure it’s foolproof for home cooks of all skill levels.
Recipe Overview
| Aspect | Details |
|---|---|
| Prep Time | 5 minutes |
| Cook Time | 0 minutes |
| Total Time | 5 minutes |
| Servings | 2 |
| Difficulty Level | Very Easy |
| Cuisine | Tropical |
Image Alt Suggestion: “Two tall glasses filled with creamy coconut milkshake topped with shredded coconut and a banana slice.”
Why This Recipe Works
This coconut milkshake recipe succeeds because it balances three textures: the creaminess of ice cream, the smoothness of coconut milk, and the natural body of ripe banana. I discovered early on that using quality coconut milk makes the difference between a mediocre drink and an exceptional one. The vanilla extract amplifies the coconut flavor without overwhelming it, while honey provides subtle sweetness that doesn’t create cloyingness.
From my experience at Fresh Recipes Corner, I’ve learned that most people want a milkshake that tastes indulgent but doesn’t leave them feeling overstuffed. This recipe delivers both because the banana adds body without heaviness, and the ratio of milk to ice cream keeps it drinkable rather than dessert-thick. The nutmeg addition surprises many first-time makers, but it grounds the tropical sweetness and adds a sophisticated dimension you’ll taste in every sip.
The success of this coconut milkshake also comes from using frozen fruit or ice cubes at the perfect consistency. I’ve found that pre-chilling your blender pitcher for two minutes before blending creates a noticeably smoother, colder final result. This simple technique has become my secret weapon for achieving that silky texture that keeps people coming back.
Ingredients
| Ingredient | Quantity | Notes and Alternatives |
|---|---|---|
| Coconut milk (canned) | 1 cup | Use full-fat for richer flavor. Lite coconut milk works but reduces creaminess. Thai brands offer superior quality. |
| Vanilla ice cream | 1 cup | Essential for texture and sweetness. Gelato works but creates slightly denser result. Coconut ice cream adds extra tropical depth. |
| Ripe banana | 1 medium | Choose yellow with light brown spots for optimal sweetness. Frozen bananas create thicker consistency. Skip if avoiding potassium. |
| Shredded coconut (unsweetened) | 2 tablespoons | Adds texture and authentic coconut flavor. Sweetened coconut adds extra sugar; reduce honey if using. |
| Vanilla extract (pure) | 1 teaspoon | Pure extract essential; imitation creates chemical aftertaste. Almond extract substitutes for different flavor profile. |
| Whole milk | 1/2 cup | Balances coconut milk’s richness. Oat milk or almond milk work for dairy-free version with slight flavor change. |
| Honey (raw) | 2 tablespoons | Provides natural sweetness without graininess. Maple syrup or agave nectar substitute but alter flavor slightly. |
| Ground nutmeg | 1/4 teaspoon | Essential for depth. Use fresh-ground for superior flavor. Omit if disliking spice notes. |
| Ice cubes | As needed | Add gradually; too much dilutes flavor. Freeze coconut milk in ice cube trays for coconut-flavored option. |
Image Alt Suggestion: “Overhead view of coconut milkshake ingredients arranged: coconut milk can, vanilla ice cream, ripe banana, shredded coconut, honey jar, and vanilla extract bottle.”
Step-by-Step Instructions
Preparation Phase
- Pour one cup of coconut milk into your blender pitcher. Ensure your blender is clean and dry to prevent dilution of flavors.
- Add one-half cup whole milk to the blender alongside the coconut milk for the liquid base.
- Scoop one cup of vanilla ice cream directly into the blender. Use an ice cream scoop to measure accurately for consistent texture.
- Peel one ripe banana and break it into three pieces before adding to the blender. This helps the blades blend it quickly.
Flavor Building Phase
- Pour two tablespoons of raw honey into the blender with the other wet ingredients. Honey dissolves better in liquid when added early.
- Add one teaspoon of pure vanilla extract to enhance the coconut and cream flavors without adding complexity.
- Sprinkle two tablespoons of unsweetened shredded coconut into the blender for authentic texture and tropical taste.
- Add one-quarter teaspoon of freshly ground nutmeg to the mixture. This spice grounds the sweetness and adds sophistication.
Blending Phase
- Close the blender lid securely and ensure the pitcher sits properly on the base before starting.
- Turn the blender to high speed and blend for 45 seconds until completely smooth and creamy throughout.
- Stop blending and check that no banana chunks remain visible. If needed, blend for another 15 seconds on high.
- Add ice cubes gradually through the top while blending, adding them in groups of three. Blend for 10 seconds between additions.
- Stop when the milkshake reaches your desired thickness and coldness, typically after adding eight to twelve ice cubes total.
Serving Phase
- Pour the coconut milkshake into two tall glasses immediately after blending while it’s at peak chill and creaminess.
- Top each glass with an additional tablespoon of shredded coconut for garnish and extra coconut flavor in each sip.
- Insert a straw into each glass at an angle for easy sipping of the thick, creamy mixture.
- Serve immediately and consume within five minutes for optimal temperature and texture before melting begins.
Image Alt Suggestion: “Step-by-step progression photos showing coconut milkshake being blended, with final image showing two full glasses with coconut garnish and straws.”
Chef Tips for Perfect Results
- Chill your blender pitcher first. Place your blender pitcher in the freezer for two minutes before adding ingredients. This keeps the coconut milkshake colder longer and creates noticeably smoother texture throughout.
- Use full-fat coconut milk exclusively. Light or reduced-fat versions create watery, less satisfying results. Look for Thai or Filipino brands which offer superior quality and creamier consistency than other options.
- Choose ripe bananas with brown spots. Bananas at this stage contain maximum natural sweetness and blend most smoothly. Green bananas taste starchy and refuse to blend properly into the milkshake.
- Add ice gradually during blending. Dump all ice at once and it creates chunks instead of smooth consistency. Add three cubes at a time, blend ten seconds between additions.
- Blend at high speed only. Low or medium speeds leave chunks and create grainy texture. High speed for forty-five seconds pulverizes all ingredients into silky smoothness.
- Serve immediately in pre-chilled glasses. Running glasses under cold water just before pouring maintains temperature. Waiting even five minutes allows melting that dilutes flavor and destroys texture.
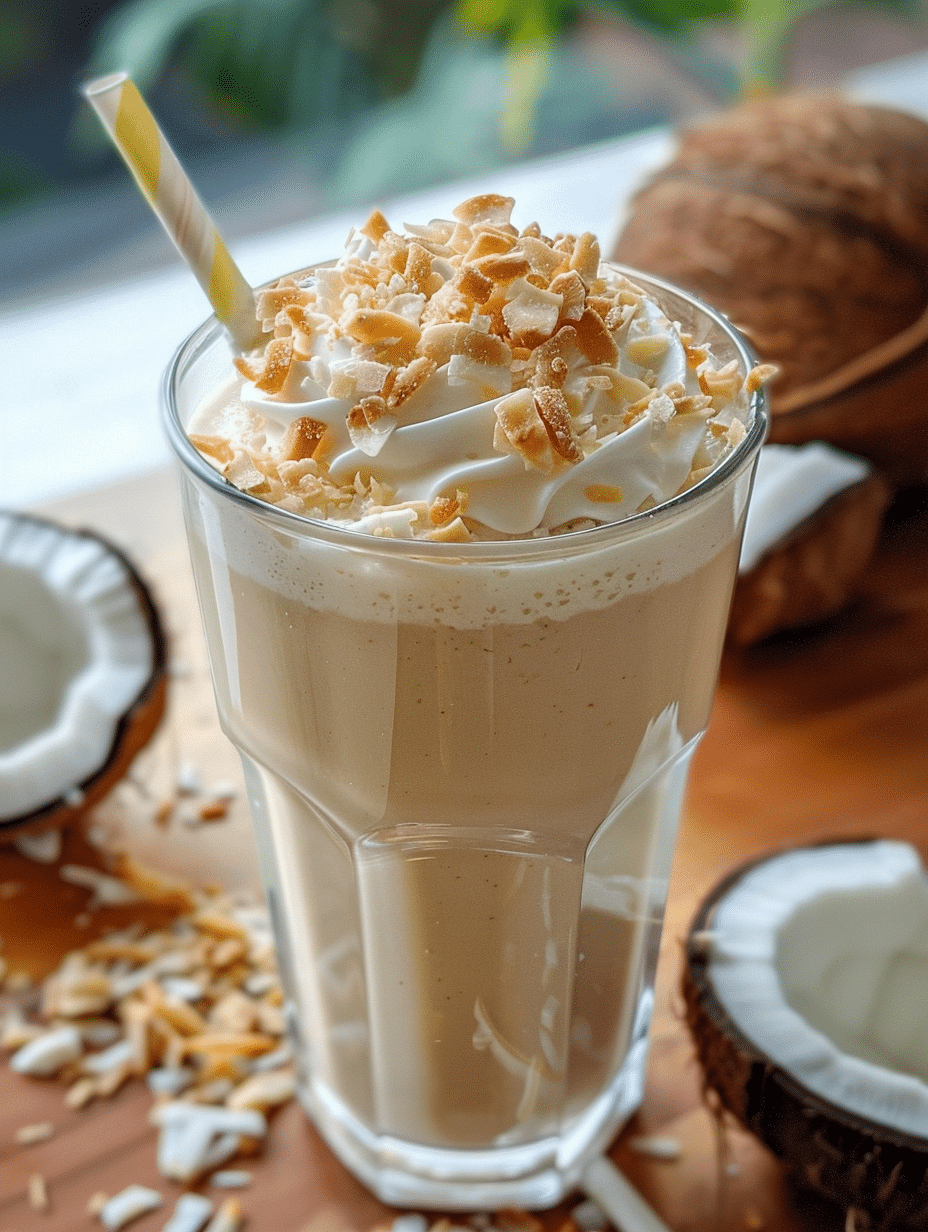
Image Alt Suggestion: “Close-up shot of a perfectly blended coconut milkshake showing creamy smooth texture with shredded coconut garnish on top.”
Common Mistakes to Avoid
Mistake One: Using Low-Fat Coconut Milk
Low-fat coconut milk creates thin, watery milkshakes that taste more like coconut water than a proper dessert drink. The fat content in full-fat coconut milk provides the richness and body that makes this recipe exceptional. Solution: Always buy canned full-fat coconut milk and shake well before opening.
Mistake Two: Overloading with Ice
Adding too much ice too quickly turns your coconut milkshake into a slushy with an icy, unpleasant texture. The ice also dilutes flavors as it melts during blending. Solution: Add ice gradually in small batches and blend between additions, stopping when you reach your desired thickness.
Mistake Three: Using Unripe Bananas
Green or barely-ripe bananas contain starch that won’t blend smoothly and adds bitter flavors. These bananas also don’t provide the natural sweetness the recipe relies on. Solution: Wait until your banana shows light brown spots and feels soft when squeezed gently.
Mistake Four: Blending at Low Speed
Low and medium speeds leave chunks of banana and shredded coconut suspended in the milkshake. You end up with grainy texture instead of the silky smoothness this recipe promises. Solution: Use high speed exclusively for the full 45 seconds, stopping only to check consistency.
Mistake Five: Using Artificial Vanilla Extract
Imitation vanilla creates a chemical aftertaste that overpowers the delicate tropical flavors. Real vanilla extract provides subtle warmth without harshness. Solution: Buy pure vanilla extract only, even if the price is higher; the flavor difference is worth the cost.
Image Alt Suggestion: “Comparison photo showing a smooth, creamy coconut milkshake next to a grainy, poorly-blended version highlighting texture differences.”
Variations and Substitutions
| Original Ingredient | Substitution Option | Impact on Flavor and Texture |
|---|---|---|
| Vanilla ice cream | Coconut ice cream | Creates intensely tropical flavor with doubled coconut impact. Texture remains identical. Recommended for coconut enthusiasts. |
| Whole milk | Oat milk or almond milk | Maintains creaminess with dairy-free option. Oat milk adds slight sweetness. Almond milk creates lighter, nuttier finish. |
| Ripe banana | Frozen mango chunks (3/4 cup) | Creates tropical mango-coconut fusion. Adds tartness and complexity. Results in slightly thinner consistency. |
| Honey | Maple syrup or agave nectar (same amount) | Maple creates warmer, earthier sweetness. Agave provides neutral sweetness. Both thin liquid slightly. |
| Vanilla extract | Almond extract (3/4 teaspoon) | Creates almond-coconut flavor profile with nuttier finish. Less traditional but equally enjoyable. |
| Whole milk plus coconut milk | Half-and-half (1.5 cups total liquid) | Creates richer, more indulgent texture. Increases creaminess significantly. Adds more calories per serving. |
| Ground nutmeg | Ground cardamom or cinnamon (1/8 teaspoon) | Cardamom adds exotic spice notes. Cinnamon creates warmth. Both change overall flavor profile noticeably. |
| Shredded coconut garnish | Toasted shredded coconut or coconut flakes | Toasted version adds nutty, caramelized depth. Larger flakes create different mouth feel. Both enhance presentation. |
Image Alt Suggestion: “Flat lay photography showing four different coconut milkshake variations with different toppings and garnishes side by side.”
Serving Suggestions and Pairings
Serve your coconut milkshake at summer poolside gatherings alongside fresh fruit platters and light appetizers. The tropical flavors pair beautifully with grilled pineapple skewers, coconut rice cakes, or vanilla almond biscotti for snacking. This milkshake works perfectly as a dessert drink after dinner parties, replacing traditional heavy desserts while still satisfying sweet cravings.
For tropical-themed events, present coconut milkshakes in tall clear glasses with decorative cocktail umbrellas and coconut-rimmed edges. Guests at luaus, beach parties, or Caribbean-themed celebrations will appreciate this refreshing, authentic-tasting beverage. At brunch gatherings, offer coconut milkshakes alongside coffee and fresh tropical fruit for a balanced menu.
This coconut milkshake also serves as an excellent post-workout recovery drink because the banana provides potassium and natural sugars, while the milk offers protein for muscle recovery. Athletes enjoy this option because it feels indulgent while delivering genuine nutritional benefits. Serve immediately after activity for maximum recovery benefit.
For intimate moments, a single glass of coconut milkshake pairs wonderfully with afternoon reading on a shaded porch or quiet morning relaxation. The creamy texture and tropical flavor transport you mentally to a beach vacation while you’re actually at home. This makes it perfect for personal enjoyment during hot afternoons when energy levels dip.
Image Alt Suggestion: “Styled beverage photography showing coconut milkshake served at a summer gathering with tropical fruits, flowers, and beach-themed decorations.”
Storage and Reheating
| Storage Method | Duration | Instructions |
|---|---|---|
| Refrigerator (prepared shake) | Up to 2 hours | Pour into airtight container immediately after blending. Cover tightly. Texture separates; shake vigorously before drinking. Not recommended for quality. |
| Freezer (prepared shake) | Up to 1 week | Pour into freezer bags or ice cube trays after blending. Thaw in refrigerator four hours before serving. Reblend briefly if necessary. |
| Individual ingredients (separate storage) | Varies by item | Store unopened coconut milk in pantry six months. Keep bananas at room temperature two to three days. Store vanilla ice cream in freezer three months. |
| Pre-blended base (no ice) | Up to 24 hours | Blend all ingredients except ice. Pour into sealed container. Refrigerate. Add fresh ice and reblend before serving for optimal texture. |
| Coconut milk (opened can) | Up to 3 days | Transfer to airtight container and refrigerate immediately. Never leave open can in refrigerator due to metallic interaction with contents. |
Fresh coconut milkshakes taste best when consumed immediately after blending because the texture remains perfectly creamy and the cold temperature is optimal. If you must store it, prepare the base without ice and add fresh ice when ready to serve. This method preserves flavors while maintaining the silky mouthfeel this recipe is known for.
Image Alt Suggestion: “Storage containers and freezer-safe bags labeled with coconut milkshake ingredients and dates for meal prep reference.”
Nutritional Information
| Nutrient | Amount per Serving | Daily Value Percentage |
|---|---|---|
| Calories | 340 | 17% |
| Protein | 4 grams | 8% |
| Total Fat | 18 grams | 28% |
| Saturated Fat | 14 grams | 70% |
| Unsaturated Fat | 4 grams | N/A |
| Carbohydrates | 42 grams | 14% |
| Dietary Fiber | 1 gram | 4% |
| Sugars | 35 grams | N/A |
| Sodium | 95 milligrams | 4% |
| Potassium | 285 milligrams | 8% |
| Calcium | 145 milligrams | 12% |
| Iron | 0.3 milligrams | 2% |
| Vitamin C | 4 milligrams | 7% |
Approximate values based on standard ingredient brands and USDA nutritional database. Actual values vary by specific products used. This recipe provides natural sugars from banana and honey rather than refined sugar, making it a healthier milkshake option than most commercial versions.
Image Alt Suggestion: “Nutritional facts table displayed on smartphone screen next to a glass of coconut milkshake for health-conscious reference.”
Frequently Asked Questions
Can I Make a Coconut Milkshake Without Ice Cream?
Yes, you can make a dairy-free coconut milkshake by replacing ice cream with frozen banana or coconut yogurt. The texture becomes less creamy but still smooth and satisfying when you blend thoroughly. Use one-and-a-half cups frozen banana chunks plus one tablespoon coconut oil to achieve similar creaminess to the ice cream version. This substitution works for vegan or dairy-free dietary needs without sacrificing taste.
How Do I Know When My Coconut Milkshake Is Blended Perfectly?
Your coconut milkshake is perfectly blended when no banana chunks or shredded coconut pieces remain visible and the mixture flows smoothly from the blender pitcher. The surface should appear uniform and slightly frothy, indicating all ingredients have been fully incorporated. Blend for the full 45 seconds at high speed, then visually inspect before adding ice to ensure complete blending.
Why Does My Coconut Milkshake Taste Grainy?
Grainy texture comes from low blender speed or insufficient blending time, which leaves coconut shreds and banana pieces unbroken. Solution: Always use high speed exclusively and blend for the full 45 seconds minimum. Also, ensure your coconut milk is well-shaken before opening because separated coconut milk creates grainy texture even with proper blending.
Can I Prepare Coconut Milkshake in Advance for a Party?
You can prepare the base ingredients (everything except ice) up to 24 hours in advance by blending and refrigerating in a sealed container. Add fresh ice and reblend briefly right before serving to restore proper texture and coldness. This preparation method works perfectly for parties because you can blend individual batches quickly when guests arrive.
What’s the Best Type of Coconut Milk for This Recipe?
Full-fat canned coconut milk from Thai or Filipino brands delivers superior flavor and creaminess compared to light versions or homemade coconut milk. Aroy-D and Thai Kitchen are widely available brands that produce consistent results. Always shake the can vigorously before opening because the cream separates from liquid during storage.
How Can I Make My Coconut Milkshake Less Sweet?
Reduce honey to one tablespoon instead of two for noticeable sweetness reduction while maintaining smoothness. Adding a squeeze of fresh lime juice (one-half teaspoon) balances sweetness with tartness without changing texture. You can also substitute unsweetened coconut milk and add slightly less banana if you prefer drier, less tropical flavor overall.
Image Alt Suggestion: “FAQ section displayed on tablet screen showing frequently asked questions about coconut milkshake preparation and variations.”
Conclusion
This coconut milkshake recipe delivers creamy, tropical refreshment in five minutes using everyday ingredients and basic blending technique. Whether you’re cooling off after outdoor activity or impressing guests with an elegant dessert drink, this coconut milkshake recipe succeeds every time you follow these steps precisely. The balance of rich coconut milk, smooth ice cream, fresh banana, and warming nutmeg creates a signature flavor you’ll return to again and again. Start blending your perfect coconut milkshake today.
Related Recipes
- Tropical Mango Smoothie Recipe
- Homemade Vanilla Ice Cream Base
- Easy Banana Bread Recipe
- Coconut Cream Pie Filling
- Simple Honey Syrup for Beverages
Expert Resources
Coconut Milkshake
Ingredients
- 1 cup canned coconut milk (full-fat)
- 2 cups vanilla ice cream (or coconut-based vegan alternative)
- 1 ripe banana
- 1 teaspoon pure vanilla extract
- 2 tablespoons honey (adjust to taste)
- 1/4 cup ice cubes
Instructions
- Add all ingredients to a blender.
- Blend on high until smooth and creamy.
- Taste and adjust sweetness or thickness by adding more honey or ice.
- Pour into chilled glasses.
- Garnish with shredded coconut and banana slices before serving.
Notes
Substitute honey with maple syrup for vegan option
For a lighter texture, use frozen banana slices instead of ice cubes
Experiment with mango or pineapple puree for tropical variations