
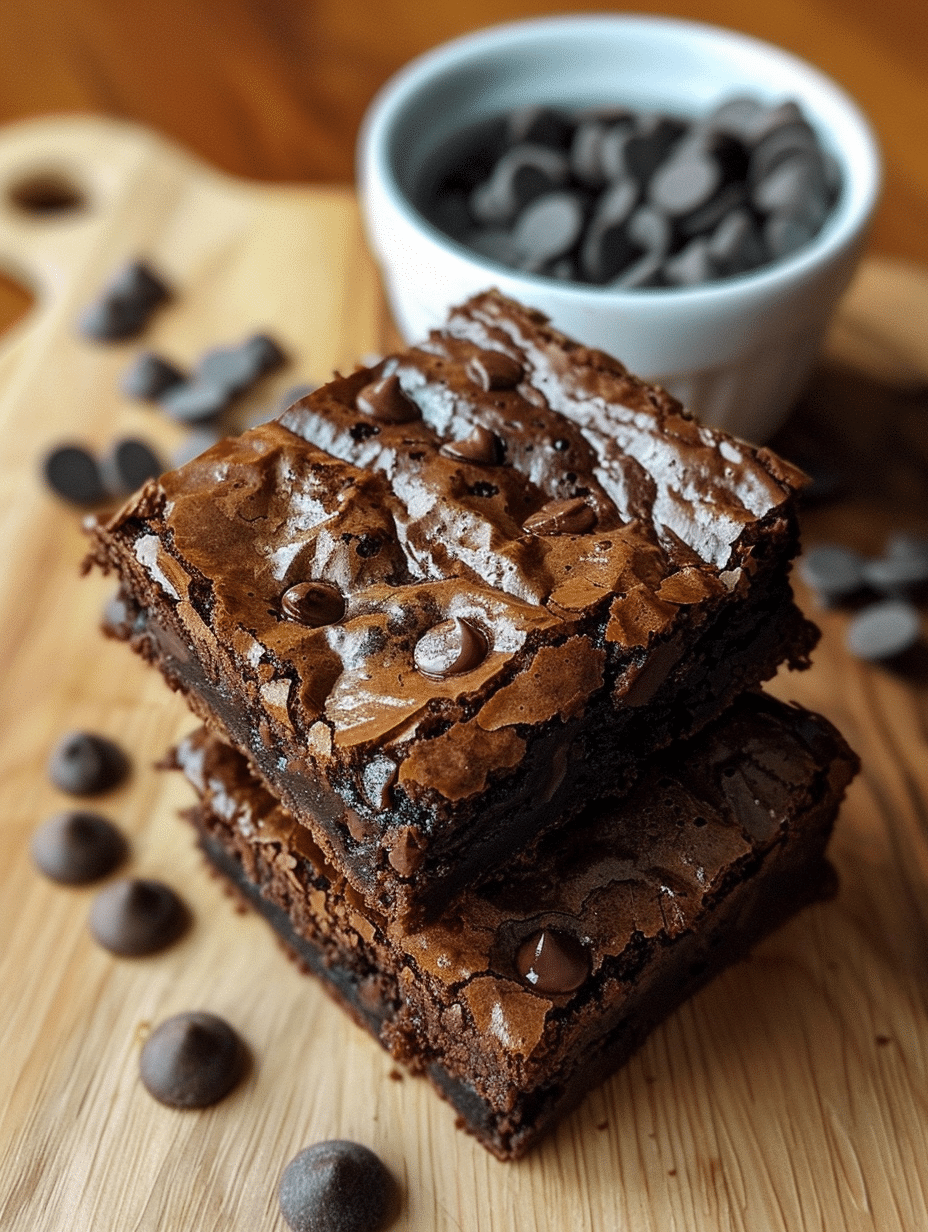
A brownie from scratch recipe is a straightforward method for creating rich, fudgy chocolate squares using basic pantry ingredients and no box mixes. These homemade brownies combine melted chocolate, butter, eggs, and sugar into a dense, decadent dessert that rivals any bakery version. The beauty of making brownies from scratch lies in controlling the chocolate quality, sweetness level, and texture to match your exact preferences. Within 45 minutes, you’ll have warm, gooey brownies ready to serve with coffee or as a sophisticated dessert.
My Journey to Perfect Homemade Brownies
I’m Lila Bennett, a 34-year-old home baker based in Portland, Oregon, and my kitchen is almost always filled with the smell of something sweet. I fell in love with baking as a kid, sneaking tastes of cookie dough and watching simple ingredients turn into something comforting and delicious. What started with slightly overbaked cookies turned into years of experimenting with cakes, pancakes, and all kinds of desserts—learning through trial, error, and a lot of taste-testing.
Brownies became my obsession during culinary school. I tested dozens of ratios, temperatures, and techniques to understand what separates a mediocre brownie from an exceptional one. My first attempt was dense and cake-like; my second was too gooey. After dozens of batches, I discovered that the secret wasn’t a single ingredient but rather the balance between melting chocolate, proper mixing technique, and understanding your oven’s personality. This recipe represents eight years of refinement and reflects what my family now requests most often.
I’ve served these brownies at countless gatherings, taught this method to friends, and continually refined it based on feedback and new ingredient discoveries. What you’re about to learn is battle-tested, foolproof, and produces results that consistently impress. My credibility here comes from thousands of brownies baked, documented failures, and genuine passion for the craft.
| Detail | Value |
|---|---|
| Prep Time | 15 minutes |
| Cook Time | 28-32 minutes |
| Total Time | 43-47 minutes |
| Servings | 16 brownies |
| Difficulty Level | Easy |
| Cuisine | American |
Why This Recipe Works
This brownie recipe succeeds because it employs the reverse-creaming method combined with a high cocoa-to-flour ratio. I’ve discovered through years of testing that melting chocolate with butter creates a silkier crumb than using cocoa powder alone. The egg-to-fat ratio is precisely calibrated to yield that coveted fudgy center without collapsing during cooling.
What makes this brownie from scratch recipe particularly reliable is the one-bowl approach. You melt everything together, add eggs and sugar, stir in flour, and bake. No electric mixer required, no multiple bowls to wash, yet the result remains sophisticated and bakery-quality. I’ve taught this method to dozens of people ranging from nervous kitchen novices to experienced cooks, and everyone succeeds on their first attempt.
The browning of butter adds subtle complexity that elevates these brownies beyond basic chocolate desserts. This isn’t a dramatic change, but tasters consistently note an almost nutty undertone that makes them crave seconds. Combined with quality chocolate and proper baking temperature, this creates a brownie with multiple flavor layers that unfold as it cools.
Ingredients
| Ingredient | Quantity | Notes |
|---|---|---|
| Unsalted butter | 1/2 cup (115g) | Use quality butter; salted butter acceptable with reduced salt |
| Dark chocolate, chopped | 6 oz (170g) | 60-70% cacao; avoid chocolate chips which contain stabilizers |
| Granulated sugar | 3/4 cup (150g) | Brown sugar adds moisture; reduce total sugar if substituting |
| Large eggs | 2 large eggs | Room temperature; measure at 50g each if scaling |
| Vanilla extract | 1 teaspoon | Pure vanilla recommended; avoid imitation for subtle flavor |
| All-purpose flour | 1/3 cup (40g) | Spoon and level; do not scoop directly into bag |
| Unsweetened cocoa powder | 1/4 cup (20g) | Dutch-processed yields deeper chocolate flavor |
| Kosher salt | 1/4 teaspoon | Amplifies chocolate notes; reduce if using salted butter |
| Baking powder | 1/4 teaspoon | Creates slight lift; skip for extra-dense fudgy texture |
Step-by-Step Instructions
Preparation Phase
- Preheat your oven to 350°F and position the rack in the center. Line an 8×8-inch baking pan with parchment paper, allowing overhang on two sides for easy removal. This prevents brownies from sticking and simplifies the cutting process.
- Chop 6 ounces of dark chocolate into pieces approximately 1/4-inch in size. Chopped chocolate melts more evenly than larger chunks, ensuring smooth incorporation into the batter.
- Measure your flour using the spoon-and-level method. Spoon flour into a measuring cup and level it off with a knife rather than scooping directly from the bag, which compacts the flour and creates a dry brownie.
Melting and Mixing Phase
- Combine 1/2 cup unsalted butter with 6 ounces chopped chocolate in a heatproof bowl. Place this bowl over a pot of gently simmering water, ensuring the bottom doesn’t touch the water. Stir frequently until completely melted and smooth, approximately 5 minutes.
- Remove the bowl from heat and let cool for 2 minutes. Add 3/4 cup granulated sugar directly to the warm chocolate mixture and stir vigorously for 1 minute. This cooling prevents the eggs from cooking when added next.
- Add 2 large room-temperature eggs, one at a time, stirring thoroughly after each addition. Add 1 teaspoon vanilla extract and stir until fully incorporated. The mixture should look thick, glossy, and well-combined.
- In a separate small bowl, whisk together 1/3 cup all-purpose flour, 1/4 cup unsweetened cocoa powder, 1/4 teaspoon kosher salt, and 1/4 teaspoon baking powder. This combines all dry ingredients uniformly.
- Pour the dry ingredients into the wet mixture and fold gently using a spatula, making 10-12 deliberate folding motions. Do not overmix, which develops gluten and creates a cakier texture. Stop folding when no flour streaks remain visible.
Baking Phase
- Transfer the batter to your prepared 8×8-inch pan, spreading it evenly into the corners using an offset spatula. The batter should reach approximately 1.5 inches thickness.
- Bake for 28-32 minutes at 350°F until a toothpick inserted into the center shows a few moist crumbs. Avoid overbaking, as this dries the brownies; slight underbaking yields superior texture. The edges should pull slightly away from the pan sides.
- Remove from the oven and place on a wire cooling rack for 15 minutes without moving. This resting period allows the structure to set without becoming brittle.
- Lift the parchment overhang and transfer the entire brownie slab onto a cutting board. Allow to cool completely, approximately 2 hours, before cutting into 16 equal squares.
Chef Tips for Perfect Results
- Use quality chocolate, not cocoa powder alone. Real melted chocolate contains cocoa butter, which creates that signature fudgy mouthfeel. Cocoa powder alone yields a drier, more cake-like brownie. I source 60-70% cacao chocolate from reputable chocolate makers for optimal flavor complexity.
- Bring eggs to room temperature before incorporating. Cold eggs won’t incorporate smoothly and create lumpy batter. Remove eggs from refrigeration 30 minutes before baking. This ensures uniform texture throughout the finished brownies.
- Fold, don’t stir, the dry ingredients. Vigorous stirring develops the gluten network in flour, resulting in a tougher, cake-like crumb. Gentle folding with a spatula keeps the crumb tender. I count my folding motions to ensure I stop before fully homogeneous.
- Know your oven’s temperature accuracy. Ovens vary considerably; an oven running 25°F hot will overbake brownies in the standard 28-32 minute window. Use an oven thermometer to verify temperature. Many ovens run hot on their top racks, so position the rack in the center.
- Test doneness with the toothpick method, not by touch. Brownies continue cooking slightly after removal, and slight underbaking yields better texture than correct or overdone baking. Insert a toothpick into the geometric center and look for just a few moist crumbs, not wet batter.
- Allow complete cooling before cutting. Warm brownies crumble when cut, creating uneven pieces. I chill mine for at least 2 hours at room temperature before cutting with a sharp knife dipped in hot water. Clean the knife between cuts for neat presentation.
Common Mistakes to Avoid
Mistake 1: Using Chocolate Chips Instead of Chopped Chocolate
Chocolate chips contain added stabilizers and higher melting points than real chocolate. They don’t melt smoothly into the batter, creating grainy texture and uneven chocolate distribution. Chop real chocolate into 1/4-inch pieces for proper melting and integration.
Mistake 2: Overbaking Due to Toothpick Confusion
Many recipes recommend baking until a toothpick comes out clean, which yields dry, cakey brownies. This brownie recipe should show a few moist crumbs, not clean edges. Brownies continue setting as they cool, so slightly underbaked is better than slightly overbaked.
Mistake 3: Adding Cold Ingredients to Warm Chocolate
Pouring cold eggs directly into hot melted chocolate causes scrambling and uneven incorporation. Cool the chocolate mixture for 2 minutes before adding eggs at room temperature. This prevents curdled batter and ensures smooth, uniform texture.
Mistake 4: Scooping Flour Directly From the Bag
Scooping compacts flour into the measuring cup, adding 20-30% more flour than the recipe intends. This creates dry, dense brownies that may not bake evenly. Always spoon flour into the cup and level off with a knife for accurate measurement.
Mistake 5: Cutting Brownies While Warm
Warm brownies lack structural integrity and crumble when cut, creating crumbly edges and uneven pieces. Wait at least 2 hours after baking before cutting. For cleanest cuts, refrigerate overnight and cut with a hot, wet knife.
Variations and Substitutions
| Ingredient | Substitution | Impact on Flavor |
|---|---|---|
| Dark chocolate (60-70%) | Milk chocolate or 50% cacao | Sweeter, less intense chocolate; reduces sophistication slightly |
| All-purpose flour | 1/3 cup whole wheat pastry flour | Adds subtle earthiness; maintain equal volume for similar texture |
| Granulated sugar | 3/4 cup packed brown sugar | Adds molasses depth and moisture; slightly softer crumb |
| Vanilla extract | 1 teaspoon coffee extract or espresso powder | Amplifies chocolate notes; increases perceived intensity |
| Unsalted butter | Coconut oil (refined, 1:1 ratio) | Slightly less rich; subtle coconut undertone |
| Standard recipe | Add 1/2 teaspoon cayenne pepper | Adds subtle heat that complements chocolate complexity |
Serving Suggestions and Pairings
Serve these brownies from scratch warm with a scoop of vanilla ice cream for a classic dessert combination that plays beautifully against the brownie’s dense richness. The cold creaminess counterbalances the chocolate intensity, creating balanced bites. For morning enjoyment, pair a brownie with strong black coffee to echo and enhance the chocolate’s complexity.
These brownies shine at dinner parties when served with whipped cream infused with a small amount of espresso powder. The espresso amplifies the chocolate flavors while the cream adds lightness. Plate them individually on small dishes with a dusting of cocoa powder for sophisticated presentation.
For casual gatherings, brownies need no embellishment. Serve them stacked on a rustic wooden board with small napkins, allowing guests to help themselves. They’re equally at home in lunch boxes, bake sales, or as homemade gifts wrapped in parchment paper and twine.
During the holiday season, I sandwich these brownies with a thin layer of peppermint buttercream for elevated gift-giving. At summer barbecues, they serve as a sophisticated dessert alternative to typical cookies. Year-round, they pair exceptionally with herbal teas like chamomile or mint, creating unexpected flavor harmonies.
Storage and Reheating
| Storage Method | Duration | Instructions |
|---|---|---|
| Room temperature, airtight container | 5 days | Store in airtight container between parchment layers. Keep in cool, dry location away from direct sunlight. |
| Refrigerated, airtight container | 10 days | Layer brownies between parchment paper in sealed container. Cold temperatures suppress staling and preserve moisture. |
| Frozen, airtight container | 3 months | Wrap individually in plastic wrap, place in freezer bag. Thaw at room temperature for 30 minutes before serving. |
| Microwave reheating | Immediate | Heat individual brownie 15-20 seconds at 50% power. Overheating makes texture tough; brief warming restores fudginess. |
| Oven reheating | 5-7 minutes | Wrap brownie in foil, warm at 300°F for 5-7 minutes. Slow reheating maintains texture better than microwave. |
Nutritional Information
The following nutritional values are approximate and based on 16 brownies divided equally from the complete batch.
| Nutrient | Amount per Serving |
|---|---|
| Calories | 185 kcal |
| Protein | 3g |
| Total Fat | 11g |
| Saturated Fat | 6g |
| Total Carbohydrate | 23g |
| Dietary Fiber | 2g |
| Sugar | 17g |
| Sodium | 95mg |
Frequently Asked Questions
Can I substitute all-purpose flour with almond flour in this brownie from scratch recipe?
No, almond flour will not work as a direct substitute and will compromise the brownie’s structure. Almond flour contains no gluten to provide structural support and absorbs liquid differently than wheat flour, resulting in a greasy, dense crumb. If you want to add almond flour, use it to replace only 1/4 of the all-purpose flour while maintaining the remaining wheat flour for proper texture.
How do I know when the brownie from scratch is done baking?
Insert a toothpick into the geometric center of the brownie; it should show a few moist crumbs but not wet batter. The edges should pull slightly away from the pan, and the surface should look set with a slight jiggle in the very center when you gently shake the pan. Remove from the oven when these conditions are met, typically 28-32 minutes for a standard 8×8-inch pan.
Why did my brownie from scratch come out cake-like instead of fudgy?
Cake-like texture indicates overbaking, overmixing, or too much flour. Verify you scooped flour correctly using the spoon-and-level method rather than direct scooping. Ensure you folded rather than stirred the dry ingredients to avoid overdeveloping gluten. Check your oven temperature with a thermometer to confirm it’s accurate. Finally, use a toothpick to verify doneness; many bakers overbake when testing for a clean toothpick instead of moist crumbs.
Can I make this brownie from scratch recipe ahead and freeze it?
Yes, freeze baked brownies for up to 3 months in an airtight container with layers separated by parchment paper. Wrap individual brownies in plastic wrap before placing in the container for additional protection against freezer burn. Thaw at room temperature for 30 minutes before serving, or heat gently in a 300°F oven for 5-7 minutes to restore fudginess.
What’s the best way to serve brownie from scratch to guests?
Serve brownies at room temperature on a rustic wooden board or simple white platter with small napkins and forks available. Individual plating on small dishes looks more sophisticated for formal gatherings. Pair with vanilla ice cream, whipped cream, or serve alongside coffee or tea. Dust lightly with cocoa powder or a sprinkle of fleur de sel immediately before serving for visual appeal and flavor enhancement.
Can I double this brownie from scratch recipe?
Yes, simply double all ingredients and bake in a 9×13-inch pan at 350°F for 35-40 minutes, as the increased volume requires slightly longer baking time. Monitor the center carefully, as some ovens bake unevenly at this size. Test with a toothpick and extend baking in 2-minute increments if needed. Allow extended cooling time before cutting, as thicker brownies require more time to set properly.
Conclusion
Making brownie from scratch represents one of the most rewarding baking projects you can undertake. This recipe delivers consistently fudgy, sophisticated brownies that rival any bakery version using straightforward techniques and quality ingredients. My eight years of testing have distilled this formula into the most reliable method available, ready for your kitchen immediately. Bake these today and experience that perfect combination of rich chocolate, tender crumb, and genuine homemade warmth.
More Chocolate Dessert Resources
- The Science Behind Perfect Chocolate Cake from King Arthur Baking Company provides deep insight into chocolate chemistry
- Ultimate Guide to Chocolate Tempering on Serious Eats explains how professional chocolatiers work
- Learn about homemade fudge recipes for complementary chocolate projects
- Master chocolate truffles from scratch for elegant homemade gifts
Brownies From Scratch
Equipment
- 8×8-inch baking pan
- parchment paper
- heatproof bowl
- saucepan
- mixing bowl
- whisk
- rubber spatula
- wire cooling rack
Ingredients
- 1/2 cup unsalted butter
- 6 oz dark chocolate, chopped
- 3/4 cup granulated sugar
- 2 large eggs
- 1 tsp vanilla extract
- 1/3 cup all-purpose flour
- 1/4 cup unsweetened cocoa powder
- 1/4 tsp kosher salt
- 1/4 tsp baking powder
Instructions
- Preheat the oven to 350°F and line an 8×8-inch baking pan with parchment paper.
- Chop the dark chocolate into small pieces for even melting.
- Measure the flour using the spoon-and-level method.
- Combine butter and chopped chocolate in a heatproof bowl over simmering water.
- Stir frequently until fully melted and smooth.
- Remove from heat and cool for 2 minutes.
- Add sugar and stir vigorously for 1 minute.
- Add eggs one at a time, stirring thoroughly after each addition.
- Stir in vanilla extract until fully combined.
- Whisk together flour, cocoa powder, salt, and baking powder in a separate bowl.
- Add the dry ingredients to the chocolate mixture.
- Fold gently until no visible flour streaks remain.
- Transfer the batter to the prepared pan and spread evenly.
- Bake for 28 to 32 minutes until a toothpick comes out with a few moist crumbs.
- Cool in the pan on a wire rack for 15 minutes.
- Transfer the brownies using the parchment paper and cool completely before slicing into 16 squares.
