
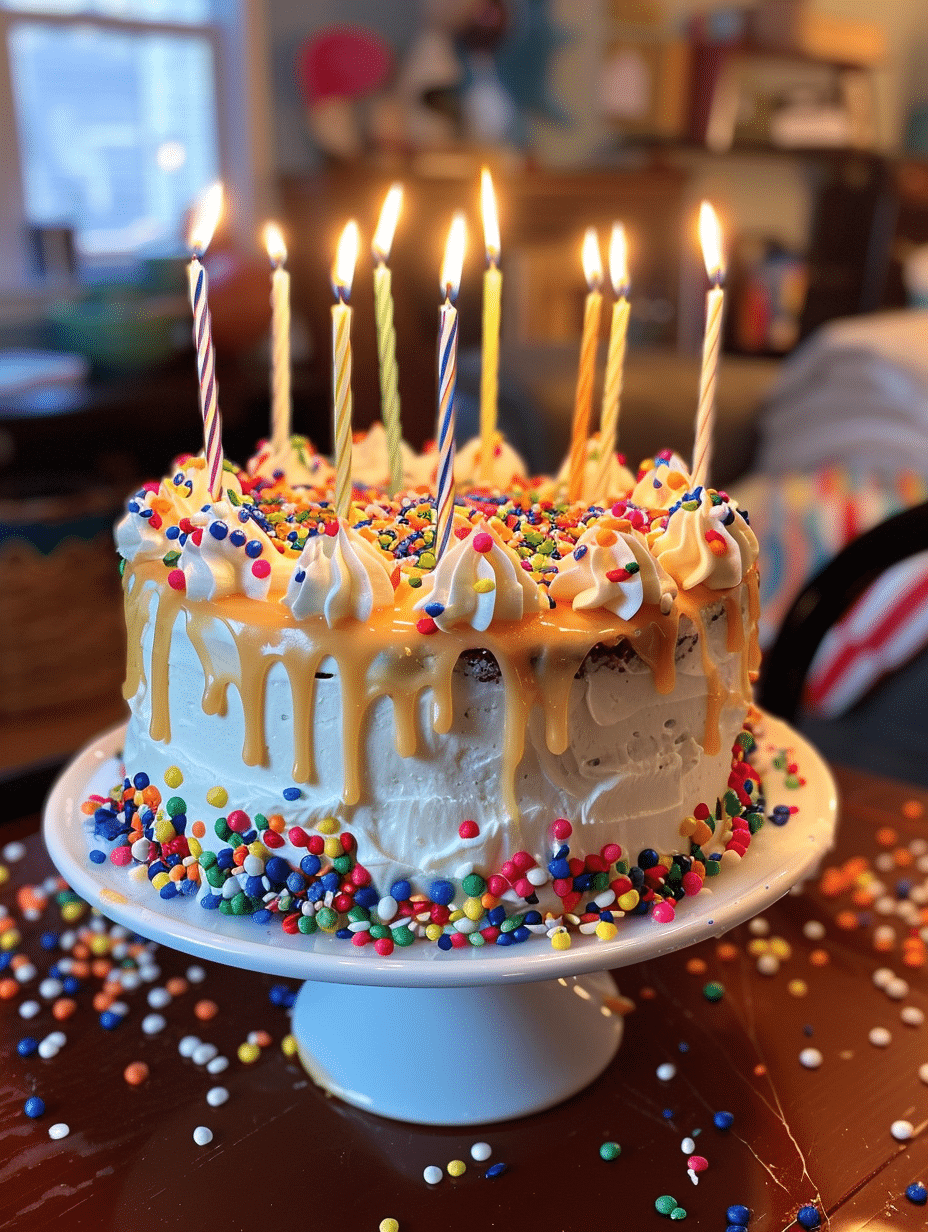
An anniversary cake is a celebratory dessert designed to mark milestones in relationships and create lasting memories around the table. This elegant layer cake combines moist vanilla sponge with silky buttercream frosting and delicate decorative elements that transform any celebration into something truly special. Whether you’re marking one year together or fifty, this recipe delivers impressive results with straightforward techniques any home baker can master. The structure works beautifully for anniversaries, weddings, or any occasion that deserves something sweeter than ordinary.
Baking Story: Why Anniversary Cakes Matter to Me
I’m Lila Bennett, a 34-year-old home baker based in Portland, Oregon, and my kitchen is almost always filled with the smell of something sweet. I fell in love with baking as a kid, sneaking tastes of cookie dough and watching simple ingredients turn into something comforting and delicious. What started with slightly overbaked cookies turned into years of experimenting with cakes, pancakes, and all kinds of desserts—learning through trial, error, and a lot of taste-testing.
Anniversary cakes hold a special place in my baking journey. Eight years ago, I baked my first celebration cake for my parents’ 30th anniversary. It wasn’t perfect—the layers tilted slightly, and my frosting application was rough—but their faces lit up in a way that changed everything about how I see baking. That moment taught me that celebration cakes aren’t really about technical perfection. They’re about love, effort, and marking moments that matter.
Since then, I’ve baked dozens of anniversary cakes for friends, family, and through my small catering business. I’ve learned what actually works, what fails, and how to create a cake that tastes extraordinary and looks like it came from a professional bakery. This recipe represents everything I’ve learned: reliable technique, stunning appearance, and flavor that makes people close their eyes and smile.
Recipe Overview
| Metric | Value |
|---|---|
| Prep Time | 25 minutes |
| Cook Time | 32-35 minutes |
| Total Time | 1 hour 15 minutes (plus cooling) |
| Servings | 12-14 slices |
| Difficulty Level | Intermediate |
| Cuisine | American |
Why This Recipe Works
This anniversary cake recipe combines proven techniques I’ve refined through hundreds of bakes. The vanilla sponge uses the creaming method, which creates tender, moist layers every single time. I’ve learned that room-temperature ingredients are non-negotiable here—they incorporate smoothly into the batter and bake more evenly than cold ingredients. The result is a cake that stays fresh for three days without becoming dry or dense.
The buttercream frosting strikes a balance between stability and ease. Too much butter and it becomes greasy; too little and it won’t hold peaks for decorating. I’ve landed on a ratio that holds decorative swirls, piping details, and even smooth finishes without requiring professional equipment. After testing dozens of variations, this formula outperforms every other method I’ve tried.
What makes this specifically suitable for anniversaries is the versatility. The neutral vanilla base accepts food coloring in any shade, works with fresh fruit layers, pairs beautifully with jam fillings, and accommodates dietary modifications without sacrificing taste. I’ve baked versions for vegan guests, nut-free celebrations, and everything in between. The structure stays strong no matter what additions you make.
Ingredients
| Ingredient | Quantity | Notes and Alternatives |
|---|---|---|
| All-purpose flour | 2¼ cups | Spoon and level for accuracy. Cake flour creates softer crumb but all-purpose is more forgiving for beginners. |
| Baking powder | 2¼ teaspoons | Must be fresh (less than 6 months old). Double-acting baking powder works best for even rise. |
| Baking soda | ½ teaspoon | Reacts with buttermilk for extra lift. Don’t substitute; it serves a specific function. |
| Fine sea salt | ½ teaspoon | Enhances vanilla flavor. Table salt works but use ¼ teaspoon less due to smaller crystals. |
| Unsalted butter, softened | 1 cup (2 sticks) | Room temperature is essential. Cut into cubes for faster softening. Salted butter requires reducing salt to ¼ teaspoon. |
| Granulated sugar | 1¾ cups | White sugar creates lighter crumb. Honey or maple syrup adds moisture but requires adjusting liquid by ¼ cup. |
| Large eggs | 3 eggs | Room temperature. Cold eggs don’t incorporate smoothly and can cause curdling. Use 6 tablespoons separated if substituting with egg whites. |
| Pure vanilla extract | 2 teaspoons | Use pure vanilla, never imitation. Almond extract adds complexity but reduce to 1½ teaspoons. |
| Buttermilk, room temperature | ¾ cup | Creates tender texture through acid reaction. Substitute: mix ¾ cup milk with 1 tablespoon lemon juice, rest 5 minutes. |
| Unsalted butter, for frosting | 1½ cups (3 sticks) | Room temperature cubes. This is non-negotiable for proper frosting consistency. |
| Powdered sugar | 4 cups | Sifted before measuring. Packed measurement creates dense, overly sweet frosting. Sift after measuring. |
| Heavy cream or milk | 3-4 tablespoons | Adjusts frosting consistency. Start with 3 tablespoons; add more if frosting is too stiff. Heavy cream creates richer frosting. |
| Vanilla extract | 1 teaspoon | Use pure vanilla extract, matching the cake’s flavor. |
Step-by-Step Instructions
Preparation Phase
- Preheat your oven to 350°F (175°C). Position the rack in the center for even heating.
- Prepare two 8-inch round cake pans by rubbing softened butter inside and coating with flour, tapping out excess. Alternatively, line bottoms with parchment paper for guaranteed release.
- Measure flour using the spoon-and-level method: fluff flour in bag, spoon into measuring cup, level with a knife. Overmeasuring is the most common reason cakes become dense.
- Combine flour, baking powder, baking soda, and salt in a medium bowl. Whisk together 8-10 times to distribute leavening agents evenly throughout.
- Set the dry mixture aside. Remove butter and eggs from refrigeration now if they’re not already at room temperature.
Creaming Phase
- Place room-temperature butter in a large mixing bowl. Beat on medium speed for 2-3 minutes until pale and fluffy, scraping bowl sides once halfway through.
- Gradually add sugar in four additions, beating for 1 minute between each addition. This slow incorporation creates a stable emulsion that traps air.
- Add eggs one at a time, beating on medium speed for 30 seconds after each addition. The batter should look light and slightly fluffy at this point.
- Mix in vanilla extract, beating for 15 seconds until incorporated and fragrant.
Combining Phase
- Reduce mixer speed to low. Add half the flour mixture, mixing for 20 seconds until mostly combined.
- Add all the buttermilk and mix on low speed for 20 seconds.
- Add the remaining flour mixture and mix on low speed for 20 seconds, scraping bowl bottom once. Do not overmix; lumps are better than overdeveloped gluten.
- Divide batter evenly between prepared pans. Level the tops with an offset spatula.
Baking Phase
- Bake for 32-35 minutes until a toothpick inserted in the center emerges with one or two moist crumbs. Cakes should spring back when lightly touched and smell intensely sweet.
- Remove from oven and cool in pans for 15 minutes on a wire rack.
- Invert cakes onto the rack to cool completely, 1 hour minimum. Attempting to frost warm cake causes frosting to melt and slide off.
Frosting Phase
- Beat room-temperature butter in a large mixing bowl on medium-high speed for 3-4 minutes until fluffy and pale, stopping to scrape bowl sides.
- Reduce speed to low. Add half the powdered sugar (sifted), mixing for 30 seconds.
- Add 2 tablespoons of cream and mix on low speed for 30 seconds.
- Add remaining powdered sugar and mix on low for 30 seconds. Increase speed to medium and beat for 2 minutes until light and fluffy.
- Add remaining cream 1 tablespoon at a time until frosting reaches spreading consistency—thick enough to hold peaks but soft enough to spread smoothly.
- Mix in vanilla extract and beat for 15 seconds.
Assembly Phase
- Place first cake layer on a level cake board or serving plate. Secure with dabs of frosting underneath to prevent sliding.
- Spread ¾ cup frosting evenly over the first layer using an offset spatula, leaving ½-inch from the edge.
- Place second layer on top, pressing gently to level. If layers are uneven, use a serrated knife to level the tops before frosting.
- Frost the top and sides with remaining frosting. Apply a thin crumb coat first (15 minutes in freezer), then add the final frosting layer for a clean finish.
- Decorate as desired: piped borders, fresh fruit, edible flowers, or personalized topper with the anniversary year or message.
Chef Tips for Perfect Results
- Room Temperature is Non-Negotiable: Set butter, eggs, and buttermilk out for 30-45 minutes before baking. Cold ingredients don’t incorporate smoothly and create dense, uneven crumbs. Test butter by pressing your finger—it should yield slightly without leaving a dent.
- Measure Flour by Weight When Possible: One cup of flour can weigh anywhere from 4.2 to 5.5 ounces depending on how it’s packed. A kitchen scale eliminates this variable. If measuring by volume, use the spoon-and-level method without fail.
- Don’t Open the Oven Door Before 30 Minutes: Sudden temperature changes cause uneven rising and sinking centers. Oven windows are your friend—look through glass rather than opening the door during the first half of baking.
- Test Doneness Correctly: A toothpick should emerge with one or two moist crumbs clinging to it, not completely clean. Overbaked cake becomes dry; slightly underbaked is better. The carryover heat continues cooking as cakes cool.
- Sift Powdered Sugar for Frosting: This single step eliminates lumps that create grainy frosting texture. Unsifted sugar contains air pockets that create inconsistent mixing. Sift before measuring for the most accurate results.
- Chill Frosted Cake Before Decorating: A 15-30 minute freezer stop firms the frosting and makes piping, adding details, and applying topping much easier. Cold frosting holds decorative shapes without slumping.
Common Mistakes to Avoid
Mistake 1: Using Cold Ingredients Cold butter doesn’t cream properly, and cold eggs won’t incorporate smoothly into the batter. The result is a dense cake with poor rise. Remove all ingredients from refrigeration 45 minutes before mixing. Test butter by pressing with your finger—it should yield without leaving deep marks.
Mistake 2: Overmixing the Batter Mixing develops gluten in the flour, creating a tough, chewy cake instead of tender crumb. Stop mixing as soon as you see no flour streaks. Small lumps are perfectly acceptable and will disappear during baking. Undermixing produces lighter cake than overmixing.
Mistake 3: Frosting While Cake is Still Warm Warm cake causes frosting to melt and slide off the sides, creating an uneven appearance and soggy cake. Cool cakes completely on a wire rack—at least one hour. Testing: the cake should feel room temperature to the touch when you place your hand on the side.
Mistake 4: Not Leveling Uneven Layers If your cake layers aren’t level, the top layer slides around and the finished cake looks sloppy. Use a serrated bread knife or cake leveler to trim the domed tops to create flat surfaces. This takes 60 seconds and transforms the final appearance.
Mistake 5: Skipping the Crumb Coat A thin first layer of frosting traps crumbs and creates a smooth base for the final frosting layer. Without it, crumbs mix into the final frosting and create a speckled, unprofessional appearance. Freeze the crumb coat for 15 minutes before applying the final layer.
Variations and Substitutions
| Ingredient to Substitute | Substitution Option | Impact on Flavor and Texture |
|---|---|---|
| Vanilla Extract | Almond Extract (use 1½ teaspoons) | Creates delicate almond flavor that’s sophisticated and slightly floral. Works beautifully for elegant anniversaries. |
| Buttermilk | Whole Milk + Lemon Juice (¾ cup milk + 1 tablespoon lemon juice, rest 5 minutes) | Creates equally tender crumb with slightly sharper flavor from acidity. Tanginess is slightly less pronounced than buttermilk. |
| All-Purpose Flour | Cake Flour (use 2⅔ cups, sift before measuring) | Creates significantly more tender, delicate crumb with softer texture. Cake flour has less protein and absorbs less liquid. |
| Granulated Sugar | Light Brown Sugar (packed, 1¾ cups) | Adds subtle caramel and molasses notes with slightly moister crumb. Cake stays fresher longer due to brown sugar’s hygroscopic properties. |
| Unsalted Butter (frosting) | Cream Cheese (use 1 cup cream cheese + ½ cup butter) | Creates tangy, less sweet frosting that pairs beautifully with vanilla cake. More delicate and requires 30-minute chill before decorating. |
| Vanilla Extract | Espresso Powder (1½ teaspoons mixed into frosting) | Creates sophisticated mocha frosting that complements vanilla cake beautifully. Enhances chocolate notes without tasting like coffee. |
| Whole Milk or Cream (frosting) | Fruit Puree—Raspberry, Strawberry, or Passion Fruit (3-4 tablespoons) | Creates naturally colored, fruity frosting with subtle flavor. Use seedless puree. May require slight increase in powdered sugar to maintain consistency. |
| Regular Frosting | Swiss Meringue Buttercream | Creates silkier, less sweet frosting with slightly bouncy texture. Requires whipping egg whites with sugar over heat—more advanced technique but superior taste and appearance. |
Serving Suggestions and Pairings
Serve anniversary cake at room temperature for optimal flavor and moisture. Cut slices using a long serrated knife dipped in hot water and wiped clean between each cut for clean, professional-looking slices. A 12-14 slice serving size creates elegant portions that aren’t overwhelming.
Classic Pairing: Serve with freshly brewed coffee or tea during an anniversary dinner, positioned as the grand finale after a lighter meal. The vanilla-forward flavor pairs beautifully with Earl Grey tea, which adds aromatic bergamot notes that complement the cake without overwhelming it.
Morning Celebration: Serve slices with fresh berries and whipped cream at an anniversary brunch. Strawberries, raspberries, or blueberries add color, freshness, and tartness that balances the cake’s sweetness.
Evening Dessert: Pair with chilled sparkling cider or non-alcoholic champagne for a festive feel. The bubbles complement the cake’s delicate structure and cleanse the palate between bites.
Decorative Presentation: Top with fresh edible flowers (pansies, violas, or roses), personalized cake toppers with anniversary years, or fresh berries arranged on the frosting. Dusting with powdered sugar creates an elegant, finished appearance.
Occasion Pairing Ideas: Use this cake for 1st anniversaries with fresh flowers, 25th anniversaries with silver leaf accents, or 50th anniversaries with gold leaf decoration. The neutral vanilla base accepts any color scheme or decorative style.
Storage and Reheating
| Storage Method | Duration | Instructions |
|---|---|---|
| Unfrsted Cake Layers (Room Temperature) | 1 day maximum | Wrap individually in plastic wrap. Store in an airtight container away from direct light. Texture remains moist and tender. |
| Unfrosted Cake Layers (Refrigerated) | 3 days | Wrap tightly in plastic wrap, then aluminum foil. Remove from refrigeration 1 hour before frosting to return to room temperature. |
| Frosted Cake (Room Temperature) | 2 days | Place in cake box or cover loosely with a cake dome. Keep away from heat sources and direct sunlight. Buttercream frosting sets at room temperature. |
| Frosted Cake (Refrigerated) | 5 days | Place in cake box on a shelf (not door). Frosting hardens slightly in cold but protects the cake layers. Remove 30 minutes before serving for best texture and flavor. |
| Frosted Cake (Frozen) | 2-3 months | Wrap entire cake (on plate) in plastic wrap, then aluminum foil. Thaw completely in the refrigerator for 24 hours, then at room temperature for 1-2 hours before serving. |
| Individual Cake Slices (Room Temperature) | 2 days | Wrap individually in plastic wrap, place in airtight container. Protect frosting from damage by separating layers with parchment paper. |
| Individual Cake Slices (Refrigerated) | 5 days | Store in airtight container on a shelf. Remove 20 minutes before serving to return to room temperature and restore moisture. |
| Reheating (Frozen Cake) | N/A—thaw only | Thaw in refrigerator for 24 hours, then at room temperature for 1-2 hours. Do not microwave or heat—frosting will melt unevenly. |
Nutritional Information
Approximate values per serving (based on 14 servings, includes frosting):
| Nutrient | Amount per Serving |
|---|---|
| Calories | 385 kcal |
| Protein | 3.2 grams |
| Fat | 21 grams |
| Carbohydrates | 48 grams |
| Fiber | 0.4 grams |
| Sugar | 38 grams |
| Sodium | 310 milligrams |
Note: Nutritional information is calculated using standard USDA database values. Actual values may vary based on specific ingredients used. These are approximate values for planning purposes only.
Frequently Asked Questions
Can I Use a Dairy-Free Butter Substitute for This Anniversary Cake Recipe?
Dairy-free butter alternatives work if they contain at least 80 percent fat and match the creaming behavior of regular butter. Avoid light or spreads that have added water or air. Test the substitute by creaming it with sugar—it should reach a pale, fluffy consistency in 2-3 minutes, matching regular butter performance. Vegan cakes baked with quality dairy-free butter are virtually indistinguishable from traditional versions.
How Do I Know When the Anniversary Cake is Fully Baked?
Insert a toothpick into the center of each cake layer at 32 minutes. The toothpick should emerge with one or two moist crumbs clinging to it, not completely clean. The cake edges should pull away slightly from the pan sides, and the tops should spring back immediately when lightly touched with a finger. If the center jiggles when you gently shake the pan, it needs 2-3 more minutes of baking.
Why is My Anniversary Cake Sinking in the Middle?
A sunken center indicates either underbaking or opening the oven door too early, disrupting the rise. Ensure your oven is accurately preheated to 350°F using a separate oven thermometer for verification. Don’t open the oven door during the first 28 minutes of baking. If the problem persists, your leavening agents may be expired—baking powder and baking soda expire after 6 months of opening.
Can I Make This Anniversary Cake Layers Two Days in Advance?
Unfrosted cake layers store beautifully in the refrigerator for up to 3 days, wrapped individually in plastic wrap and aluminum foil. Remove from the refrigerator 1 hour before frosting to return them to room temperature, which ensures even frosting application and proper texture. Wrapping them well prevents them from absorbing refrigerator odors.
What’s the Best Way to Transport a Frosted Anniversary Cake to an Event?
Freeze the frosted cake for 30 minutes until the frosting firms completely, then place it in a sturdy cake box with non-slip padding or an anti-skid mat on the bottom. Position the box on a flat car seat (never in a trunk or on a slanted surface). Keep the car temperature cool and avoid sudden acceleration or braking. Transport upright, never tilted, and arrive at least 30 minutes early to allow the cake to adjust to room temperature before serving.
How Do I Make This Anniversary Cake Gluten-Free?
Replace all-purpose flour with a 1:1 gluten-free flour blend designed for baking (such as Bob’s Red Mill or King Arthur Baking Company). These blends include xanthan gum for structure and typically require no other adjustments. Measure carefully using a scale or the spoon-and-level method, as gluten-free flour is more sensitive to measurement variation. The resulting cake will be equally tender and delicious with no compromise in texture or taste.
Conclusion
An anniversary cake represents more than dessert—it’s a edible celebration of commitment, connection, and shared sweetness. This recipe delivers reliable results through straightforward techniques and premium ingredients. From your first anniversary to your golden milestone, this vanilla cake with silky buttercream frosting creates the perfect centerpiece for your celebration, whether enjoyed around an intimate dinner table or shared at a formal gathering. Bake this cake with intention, decorate with love, and watch as it becomes the memory-making moment your special day deserves.
For additional celebration cake inspiration, explore King Arthur Baking Company’s cake techniques or check out our guide to cake decorating basics. Your anniversary cake awaits.
Anniversary Cake
Equipment
- 2 round 8-inch cake pans
- electric mixer
- mixing bowls
- measuring cups and spoons
- wire cooling rack
- offset spatula
- cake board or serving plate
- serrated knife
Ingredients
- 2 1/4 cups all-purpose flour
- 2 1/4 tsp baking powder
- 1/2 tsp baking soda
- 1/2 tsp fine sea salt
- 1 cup unsalted butter, softened
- 1 3/4 cups granulated sugar
- 3 large eggs
- 2 tsp pure vanilla extract
- 3/4 cup buttermilk
- 1 1/2 cups unsalted butter for frosting
- 4 cups powdered sugar
- 4 tbsp heavy cream or milk
- 1 tsp vanilla extract for frosting
Instructions
- Preheat oven to 350°F (175°C) and position the rack in the center of the oven.
- Grease and flour two 8-inch round cake pans or line them with parchment paper.
- Measure flour using the spoon-and-level method for accurate texture.
- Whisk together flour, baking powder, baking soda, and salt in a medium bowl.
- Allow butter and eggs to reach room temperature before mixing.
- Beat softened butter in a large bowl for 2–3 minutes until pale and fluffy.
- Add sugar gradually in four additions, beating between each addition until fluffy.
- Add eggs one at a time, beating after each addition until incorporated.
- Add vanilla extract and mix briefly until fragrant.
- Mix in half of the flour mixture on low speed until mostly combined.
- Add all the buttermilk and mix gently until combined.
- Add the remaining flour mixture and mix until just combined without overmixing.
- Divide batter evenly between prepared cake pans and smooth the tops.
- Bake for 32–35 minutes until a toothpick inserted in the center comes out with a few moist crumbs.
- Cool cakes in pans for 15 minutes, then transfer to a wire rack to cool completely.
- Beat butter for frosting on medium-high speed for 3–4 minutes until fluffy.
- Add half the powdered sugar and mix slowly until combined.
- Add 2 tablespoons cream and mix until smooth.
- Add remaining powdered sugar and beat until light and fluffy.
- Add additional cream as needed until frosting reaches a spreadable consistency.
- Mix in vanilla extract for the frosting.
- Place the first cake layer on a serving plate and secure with a small amount of frosting underneath.
- Spread frosting evenly over the first layer.
- Place the second cake layer on top and level if needed.
- Apply a crumb coat, chill briefly, then frost the top and sides smoothly.
- Decorate with fresh fruit, flowers, piping, or anniversary toppers before serving.
