
Written by EVA
Making a gluten-free loaf that is crusty and delicious doesn’t have to be difficult. With the no-knead method, anyone can bake a beautiful, easy gluten-free bread without much effort. This article breaks down the entire process to help you make your own perfect loaf, every time.
Understanding the Key Ingredients for Gluten-Free Bread
Before you dive into making your bread, it’s crucial to understand the ingredients that will create the best gluten-free loaf. These ingredients play a critical role in achieving the perfect texture, taste, and rise.
Gluten-Free Flour Blends for Best Results
The foundation of gluten-free bread lies in the flour blend. Unlike regular wheat flour, gluten-free flour doesn’t have the natural elasticity needed for structure, so a combination of different gluten-free flours is necessary. Here are the key flours you’ll typically need for a great gluten-free loaf:
- Rice Flour: This is the main flour base in most gluten-free bread recipes. It adds structure and volume.
- Tapioca Flour: Known for helping with elasticity and a soft texture, tapioca flour is important for binding the ingredients.
- Potato Starch: This helps with the moisture and overall texture of the bread.
- Xanthan Gum or Guar Gum: These are binding agents that help replicate the function of gluten. They create the chewy, bread-like texture.
Table of Contents
Table of Contents
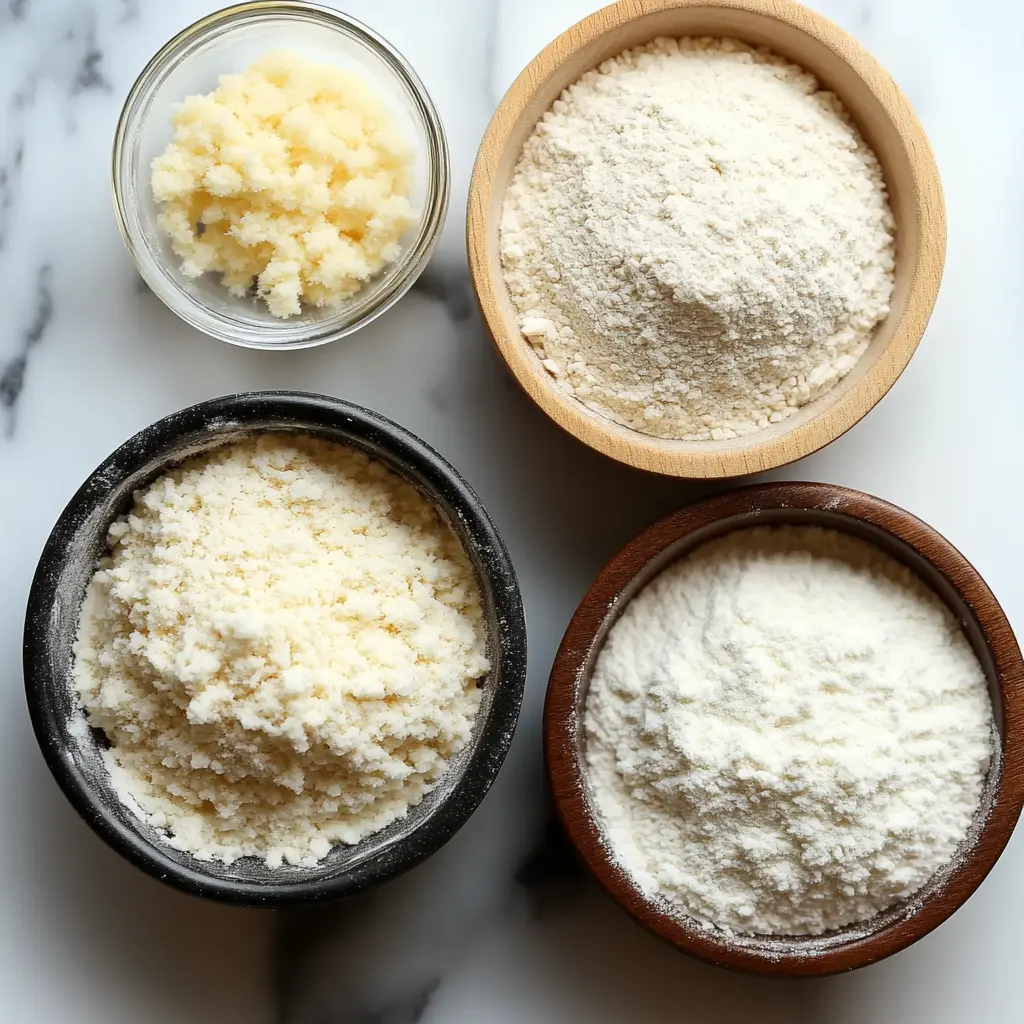
Ingredients for the Flour Blend:
- 1 ½ cups rice flour
- 1 cup tapioca flour
- 1 cup potato starch
- 1 teaspoon xanthan gum (or guar gum)
Using a high-quality gluten-free flour blend is key for a light and airy loaf that doesn’t turn out dense.
Yeast and its Role in Gluten-Free Bread
Yeast is essential for helping the bread rise and develop that light, airy texture. However, gluten-free doughs tend to rise slower than traditional wheat doughs because there is no gluten to help hold the structure. It’s important to use active dry yeast to ensure that it reacts properly.
Other Yeast Ingredients:
- 1 packet active dry yeast (or about 2 ¼ teaspoons)
- 1 tablespoon honey or sugar (to feed the yeast)
The No-Knead Method for Simple Gluten-Free Bread
One of the biggest advantages of making gluten-free bread is using the no-knead method, which simplifies the process significantly. Unlike traditional bread that requires kneading to develop gluten, gluten-free bread doesn’t need this step, making it more accessible for beginners and busy bakers alike.
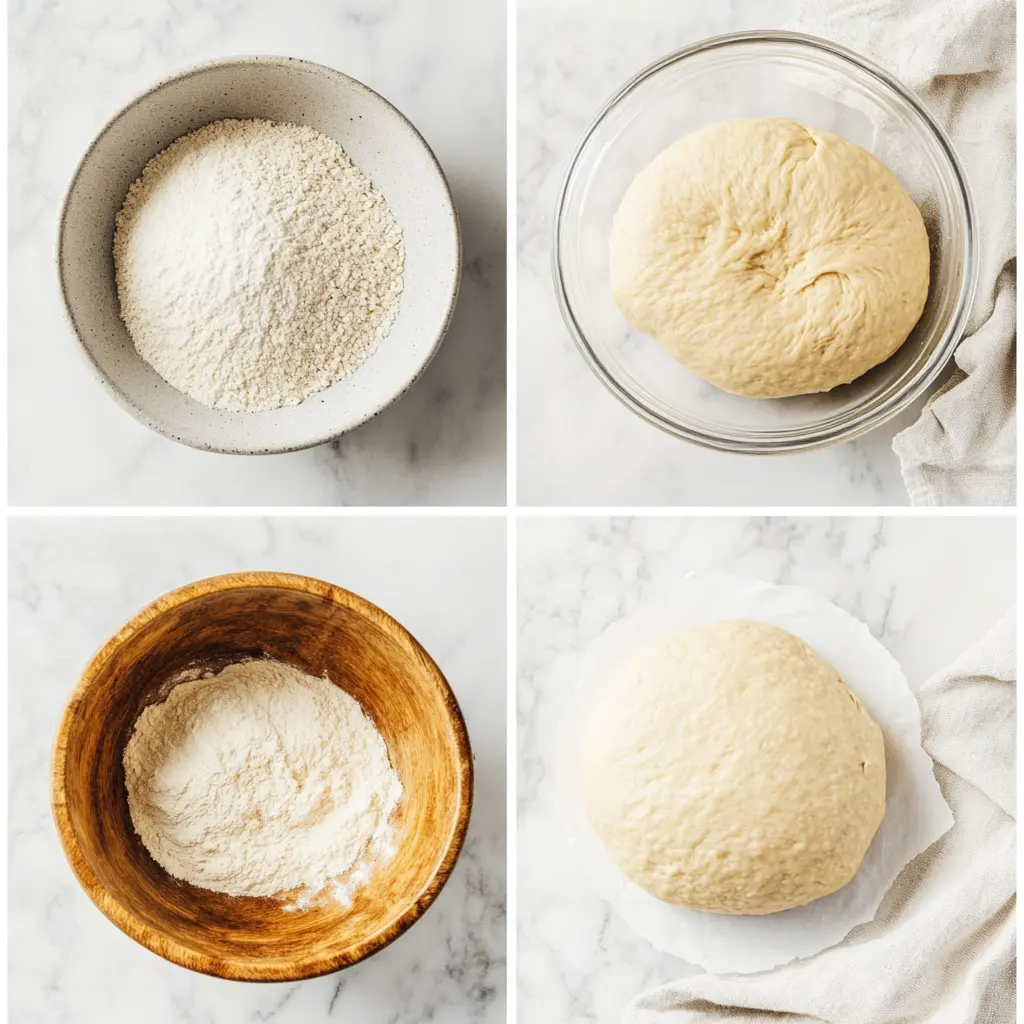
How to Make No-Knead Gluten-Free Dough
The beauty of the no-knead technique is that it requires very little hands-on time, allowing you to prepare the dough and let it rise without any extra work. Here’s how to make a simple no-knead gluten-free dough:
- Mix the Dry Ingredients: In a large bowl, combine your gluten-free flour blend, xanthan gum (if needed), salt, and sugar. Stir to ensure everything is evenly distributed.
- Activate the Yeast: In a separate bowl, combine warm water (around 110°F or 45°C) with the honey or sugar. Add the yeast and stir to dissolve. Let it sit for about 5-10 minutes, or until the mixture becomes frothy.
- Combine Wet and Dry Ingredients: Pour the activated yeast mixture into your dry ingredients. Stir until the dough is fully combined. The dough will be thick and sticky, which is normal for gluten-free bread.
- Let it Rest: Cover the dough with a clean kitchen towel or plastic wrap. Allow it to rise in a warm, draft-free area for 2-3 hours. The dough should at least double in size.
- Shape the Dough: After the dough has risen, transfer it to a parchment paper-lined baking sheet or into a greased baking pan. Shape the dough into your desired loaf shape, smoothing the top as needed.
- Final Rise: Let the dough rise for an additional 30 minutes before baking.
Benefits of the No-Knead Technique for Gluten-Free Bread
Using the no-knead technique for gluten-free bread has several advantages:
- Time-Saving: You don’t need to spend time kneading the dough, which is often the most labor-intensive part of bread-making. The yeast does all the hard work during the resting period.
- No Overworking the Dough: Gluten-free doughs are more delicate than traditional doughs. Kneading can make them dense or gummy. With the no-knead method, you avoid this issue.
- Better Texture: Since you’re not overworking the dough, you’ll end up with a loaf that has a lighter, airier texture, which is often hard to achieve in gluten-free bread.
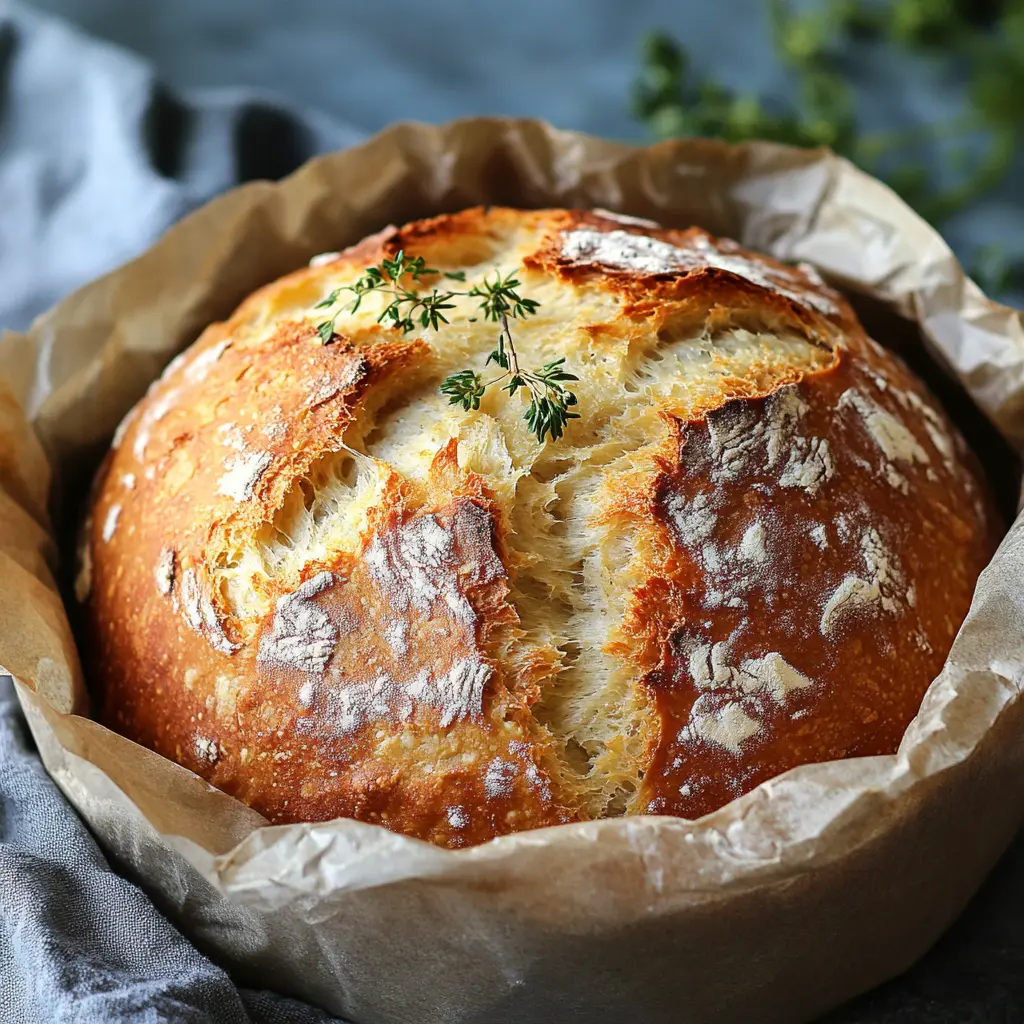
Baking Techniques for Crusty Gluten-Free Bread
The key to getting a crusty, golden-brown exterior while keeping the inside soft and tender is all in the baking techniques. Here’s how to bake a no-knead gluten-free loaf with a perfectly crusted exterior.
Achieving the Perfect Crust with High Heat
A high oven temperature is essential to getting that satisfying, crisp crust on gluten-free bread. Gluten-free doughs tend to need a hotter, more intense heat to create the perfect rise and crust without drying out.
- Preheat Your Oven: Set your oven to 450°F (230°C). A hot oven ensures the bread begins baking immediately, creating the desired rise and texture.
- Use a Baking Stone or Dutch Oven: If you have one, use a baking stone or Dutch oven to bake your gluten-free bread. These tools help distribute heat more evenly, which is crucial for achieving the perfect crust. A Dutch oven, in particular, helps trap heat and moisture, which leads to a nice, thick crust.
- Place the Bread in the Preheated Oven: Once the dough has risen and you’re ready to bake, carefully transfer it to your preheated baking stone or Dutch oven. If using a baking sheet, ensure it’s preheated as well.
- Baking Time: Bake your gluten-free bread for 35-45 minutes, or until the crust is golden and the internal temperature of the bread reaches 200°F (93°C) using a food thermometer. This ensures the inside is fully cooked and fluffy.
Steam in the Oven for Extra Crispiness
Adding steam to the oven during the first few minutes of baking can enhance the crust’s texture and improve the overall appearance of the loaf.
- Create Steam: One simple way to create steam is by placing a shallow pan of water at the bottom of your oven while it’s preheating. This will generate steam that helps the dough rise more evenly and develop a shiny, crisp crust.
- Remove the Steam Source: After the first 10-15 minutes of baking, you can remove the pan of water to allow the bread to finish baking and crisp up further.
By incorporating steam and high heat, you’ll achieve a beautifully crusty loaf that is perfect for slicing.
Troubleshooting Common Gluten-Free Bread Issues
Even the most experienced bakers can encounter challenges when making gluten-free bread. While there are many factors that can affect the outcome, understanding how to troubleshoot common issues can make a big difference. Here’s how to solve some of the most frequent problems that occur when baking gluten-free bread.
Dealing with Dense or Flat Bread
One of the most common issues with gluten-free bread is ending up with a dense or flat loaf. This can happen for a variety of reasons, but don’t worry! There are simple fixes.
Common Causes:
- Inactive yeast: If your yeast doesn’t bubble or froth after being activated in warm water, it’s no longer viable. Make sure your yeast is fresh.
- Insufficient rise time: Gluten-free bread often needs more time to rise than regular bread. If you rush this process, your bread may not rise properly and will turn out dense.
- Too much flour: Gluten-free flours can absorb moisture differently, so adding too much flour can result in a dense texture. Be sure to measure your flour carefully and avoid packing it into your measuring cup.
Solutions:
- Always test your yeast by proofing it in warm water with a little sugar. If the mixture doesn’t froth, your yeast may be expired and should be replaced.
- Allow the dough to rise for the full recommended time. Don’t rush it—gluten-free doughs tend to need extra time to develop.
- Consider reducing the amount of flour in the recipe by a tablespoon or two and check the dough’s consistency. It should be sticky but not overly dry.
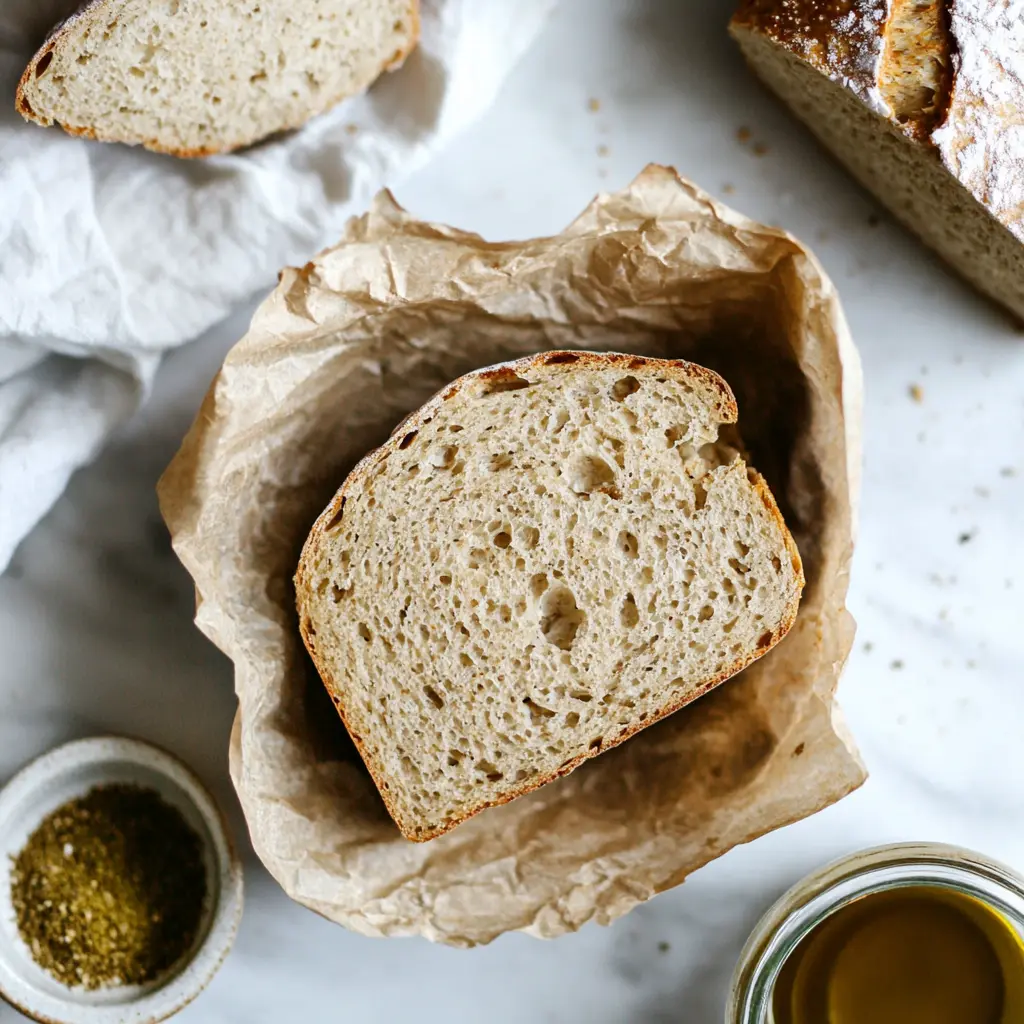
Fixing a Gummy or Undercooked Center
If your gluten-free bread has a gummy or wet center, it usually means the bread hasn’t been baked long enough. This is a common issue for those new to gluten-free baking, but it’s easy to fix with a few adjustments.
Common Causes:
- Underbaking: Gluten-free bread often requires a longer baking time compared to traditional bread due to the lack of gluten, which helps the bread hold its shape.
- Incorrect oven temperature: If the oven temperature is too low, your bread may cook unevenly, leading to an undercooked center.
Solutions:
- Use a thermometer: To ensure your bread is fully cooked, use a food thermometer to check the internal temperature. It should read at least 200°F (93°C) to ensure the bread is cooked all the way through.
- Bake longer: If you suspect your bread is undercooked, return it to the oven for another 5-10 minutes. Check the bread frequently to prevent overbaking, which could cause it to dry out.
By paying attention to the rise time and baking conditions, you’ll be able to avoid the most common issues and ensure your bread is light, fluffy, and perfectly baked.
How to Make Gluten-Free Bread Taste Like Regular Bread
One of the main concerns when baking gluten-free bread is the flavor. Gluten-free bread often has a different taste and texture compared to traditional wheat bread. However, with the right ingredients and techniques, it’s entirely possible to create gluten-free bread that tastes just like, or even better than, regular bread.
Adding Flavor with Ingredients Like Vinegar and Sweeteners
To enhance the taste of gluten-free bread, a few secret ingredients can make a huge difference. Vinegar, for example, helps create a more authentic taste and improves the texture. It also helps activate the yeast, providing a more traditional “bread-like” rise.
Key Ingredients for Flavor:
- Vinegar: Adding a teaspoon of vinegar (apple cider or white vinegar) to your dough helps boost the yeast’s activity and balances the flavor. This makes the bread taste less “bready” and more similar to traditional loaves.
- Sweeteners: A small amount of honey, maple syrup, or coconut sugar can add subtle sweetness to your bread. This also helps feed the yeast for a better rise and deeper flavor.
Ingredient Tip:
- Add 1 tablespoon of apple cider vinegar and 1 tablespoon of honey to your dough mixture. This combination not only improves the flavor but also gives the bread a pleasant texture.
Using Herbs and Spices for Flavor Boost
Adding herbs and spices can make gluten-free bread taste even more delicious. Just like in traditional bread-making, spices can elevate the flavor profile and turn your loaf into a standout dish.
Herbs and Spices to Try:
- Garlic Powder: A popular addition, garlic powder gives the bread an aromatic and savory flavor.
- Rosemary or Thyme: Fresh herbs like rosemary or thyme can add depth to the bread’s flavor, making it perfect for serving with dinner or as part of a sandwich.
- Cinnamon or Nutmeg: For a sweeter version of gluten-free bread, try adding a dash of cinnamon or nutmeg. These spices pair well with breads made from rice flour and are excellent for breakfast.
Flavor Tip:
- For a savory twist, add 1 tablespoon of finely chopped rosemary and 1 teaspoon of garlic powder into your dough for an amazing flavor.
By incorporating these ingredients, you’ll find that your gluten-free bread can taste nearly identical to traditional wheat bread, with a flavor that’s just as rich and satisfying.
Storage Tips to Keep Gluten-Free Bread Fresh
One challenge many gluten-free bread bakers face is keeping their loaves fresh. Gluten-free bread tends to dry out more quickly than traditional bread, but with the right storage methods, you can prolong its freshness and enjoy it for several days.
How to Store Gluten-Free Bread Properly
Proper storage is crucial for maintaining the texture and flavor of gluten-free bread. Here are some tips to ensure your loaf stays fresh:
- Wrap It Tightly: Once your bread has cooled to room temperature, wrap it tightly in plastic wrap or aluminum foil. This helps prevent it from drying out and losing moisture.
- Use an Airtight Container: Store the wrapped bread in an airtight container. If you don’t have one, a large resealable plastic bag can work as well. Make sure the bag or container seals properly to keep air out.
- Store at Room Temperature: For short-term storage, keep your gluten-free bread at room temperature. It should stay fresh for about 2-3 days when stored this way.
Storage Tip:
- If you’re not planning to finish the bread within a few days, freezing is the best option. Slicing the bread before freezing allows you to pull out individual slices whenever you need them.
Reviving Stale Gluten-Free Bread
Even the best-stored gluten-free bread can get stale after a couple of days. Fortunately, there are ways to bring it back to life without throwing it away.
- Reheat with a Damp Towel: If your gluten-free bread has gone stale, wrap it in a damp towel and place it in the oven for 5-10 minutes at 350°F (175°C). This will soften the bread and help restore some moisture.
- Toast It: If the bread is too dry to eat as-is, toasting it can give it a fresh texture. Toasted gluten-free bread makes a great base for sandwiches or toppings like avocado or peanut butter.
- Use it for Breadcrumbs: If your bread has become too stale to eat on its own, consider turning it into breadcrumbs. Simply dry out the bread further in the oven, then pulse it in a food processor. Gluten-free breadcrumbs can be used for coatings or as a topping for casseroles and salads.
Gluten-Free Bread Variations to Try
Once you master the basic recipe for no-knead gluten-free bread, you can start experimenting with different variations to suit your taste or dietary preferences. Whether you want a heartier loaf or something sweeter, there are plenty of creative ways to make gluten-free bread even more delicious.
Adding Seeds and Nuts for Extra Texture
Seeds and nuts are fantastic additions to gluten-free bread because they not only enhance the texture but also add nutritional value. Whether you prefer a hearty, nutty loaf or a lighter one with some crunchy seeds, you can easily incorporate these ingredients into your dough.
Popular Seeds and Nuts to Try:
- Chia Seeds: These small seeds absorb moisture and expand, helping create a more substantial texture in your gluten-free bread.
- Flaxseeds: Ground flaxseeds are rich in omega-3 fatty acids and provide a slightly nutty flavor to your bread.
- Sunflower Seeds: These seeds add a nice crunch and are a good source of vitamins and minerals.
- Walnuts: For a nutty, slightly sweet flavor, consider adding chopped walnuts to your dough. They pair especially well with cinnamon or honey.
How to Add Them:
- For a bread with great texture, add ¼ cup sunflower seeds and ¼ cup chia seeds into your dough after mixing in the wet ingredients. For a nuttier bread, fold in ½ cup chopped walnuts just before the final rise.
Sweet Gluten-Free Bread Options
Gluten-free bread doesn’t always have to be savory. You can create sweet versions of your no-knead loaf, perfect for breakfast, snacks, or dessert. Sweet gluten-free breads often feature ingredients like dried fruit, chocolate chips, or a dash of cinnamon, making them a delightful treat.
Sweet Ingredients to Add:
- Dried Fruit: Raisins, cranberries, or dried apricots can be added to give your bread a fruity sweetness.
- Chocolate Chips: Adding dark chocolate or semi-sweet chocolate chips transforms the bread into a dessert-like treat.
- Cinnamon: A teaspoon or two of cinnamon adds warmth and pairs wonderfully with dried fruit or nuts.
Sweet Version Tip:
- Add ½ cup raisins, ¼ cup chopped dried apricots, and 1 teaspoon ground cinnamon to your dough for a deliciously sweet gluten-free bread that pairs perfectly with butter or jam.
FAQs About Gluten-Free Bread
When it comes to baking gluten-free bread, there are plenty of questions that arise. From flavor to texture, understanding the answers to common queries can make the baking process easier and more successful. Below are some of the most frequently asked questions about gluten-free bread.
What is the most delicious gluten-free bread?
The most delicious gluten-free bread often depends on personal preference. However, many people find that breads made with a combination of rice flour, tapioca flour, and potato starch produce the best results. These blends offer a soft, light texture while maintaining flavor. Additionally, incorporating herbs, spices, or sweeteners like honey can greatly enhance the taste of gluten-free bread. For a rich, hearty loaf, adding seeds or nuts can add both texture and flavor.
Pro Tip: To improve the flavor further, add ingredients like apple cider vinegar or honey, which help mimic the taste of traditional bread and enhance the texture.
What is the trick to making good gluten-free bread?
The key to making good gluten-free bread lies in using the right flour blend, letting the dough rise for an adequate amount of time, and baking it at the right temperature. Some tricks include:
Allowing for a long rise: Gluten-free bread dough usually needs more time to rise than traditional bread, so be patient.
Using the right flour blend: Avoid using just one type of gluten-free flour. A mixture of rice flour, tapioca flour, and potato starch is ideal for achieving the right texture.
Incorporating xanthan gum or guar gum: These ingredients provide the necessary binding properties that gluten would normally offer.
What is the biggest challenge of making gluten-free bread?
The biggest challenge when making gluten-free bread is achieving the right texture. Without gluten, it can be hard to create a loaf that’s light, airy, and not too dense. Some common issues include a gummy or heavy texture, which is often the result of over-mixing the dough or not letting it rise long enough. Additionally, finding the right balance of ingredients is key—too much flour or not enough yeast can negatively impact the final product.
Solution: Follow a proven recipe, allow the dough to rise properly, and be careful with the amount of flour you add.
Can gluten-free bread taste like normal bread?
Yes, gluten-free bread can taste like regular bread with the right techniques and ingredients. While gluten-free bread naturally lacks the flavor of wheat-based bread, you can add ingredients like vinegar, herbs, and spices to replicate the traditional taste. Additionally, ensuring the bread rises properly and has enough flavor from sweeteners or other additions will help it taste just like the “real thing.”
Tip: Adding a bit of vinegar or honey can help activate the yeast and improve the flavor, making your gluten-free bread taste more like traditional loaves.
Conclusion
Making gluten-free bread that is easy, crusty, and delicious is absolutely achievable with the right ingredients and techniques. By using a good flour blend, letting your dough rise properly, and incorporating flavor-boosting ingredients like vinegar and sweeteners, you can create a gluten-free loaf that rivals traditional bread. Whether you prefer a savory or sweet version, experimenting with different ingredients and baking methods can lead to an endless variety of delicious, homemade gluten-free breads.
Don’t forget to visit our Facebook page and save this recipe to Pinterest for more delicious dishes and culinary inspiration!
Print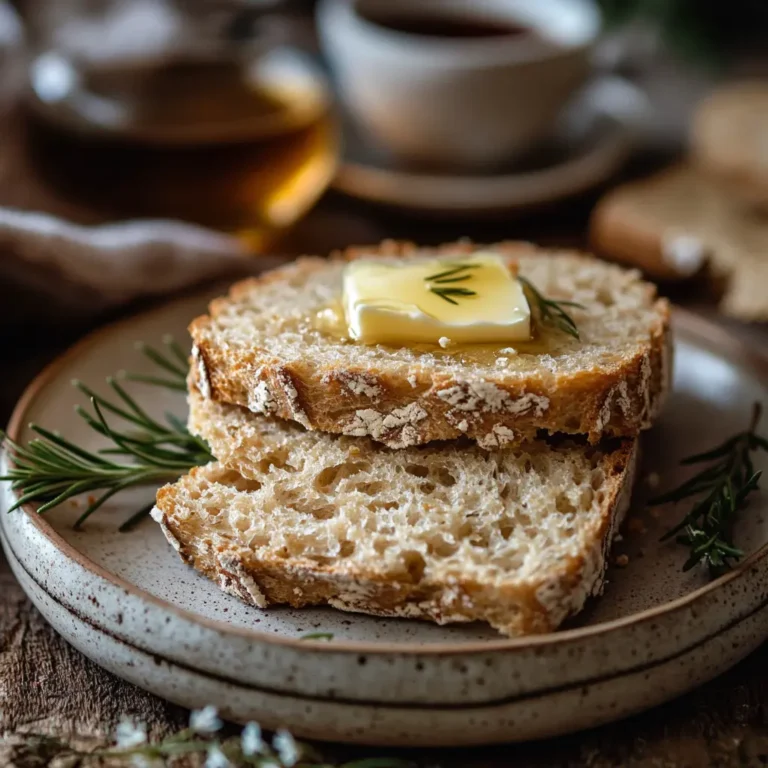
No Knead Gluten Free Bread That Works: Easy, Crusty, Delicious
Making a gluten-free loaf that is crusty and delicious doesn’t have to be difficult. With the no-knead method, anyone can bake a beautiful, easy gluten-free bread without much effort.
- Total Time: 3 hours 15 minutes
- Yield: 1 loaf 1x
Ingredients
- 1 ½ cups rice flour
- 1 cup tapioca flour
- 1 cup potato starch
- 1 teaspoon xanthan gum (or guar gum)
- 1 packet active dry yeast (or about 2 ¼ teaspoons)
- 1 tablespoon honey or sugar
- Warm water (around 110°F or 45°C)
- 1 teaspoon salt
- 1 tablespoon sugar
Instructions
- Preheat your oven to 450°F (230°C).
- In a large bowl, combine rice flour, tapioca flour, potato starch, xanthan gum (if needed), salt, and sugar. Stir to ensure everything is evenly distributed.
- In a separate bowl, combine warm water with the honey or sugar. Add the yeast and stir to dissolve. Let it sit for 5-10 minutes until frothy.
- Pour the activated yeast mixture into the dry ingredients. Stir until the dough is fully combined. The dough will be thick and sticky.
- Cover the dough with a clean kitchen towel or plastic wrap. Let it rise in a warm, draft-free area for 2-3 hours until it doubles in size.
- Transfer the dough to a parchment paper-lined baking sheet or a greased baking pan. Shape it into a loaf and smooth the top.
- Let the dough rise for an additional 30 minutes.
- Place the dough in the preheated oven. Bake for 35-45 minutes, or until the crust is golden and the internal temperature reaches 200°F (93°C).
- Optional: For a crisper crust, add steam to the oven during the first 10-15 minutes of baking by placing a shallow pan of water at the bottom of the oven.
Notes
Ensure your yeast is fresh and that the dough has enough time to rise properly for the best texture. Use a food thermometer to check the internal temperature for doneness.
- Prep Time: 15 minutes
- Cook Time: 45 minutes
- Category: Bread
- Method: Baked
- Cuisine: Gluten-Free
Nutrition
- Serving Size: 1 slice
- Calories: 150
- Sugar: 2g
- Sodium: 200mg
- Fat: 1g
- Saturated Fat: 0g
- Unsaturated Fat: 1g
- Trans Fat: 0g
- Carbohydrates: 32g
- Fiber: 3g
- Protein: 3g
- Cholesterol: 0mg
Keywords: gluten-free bread, no-knead, easy bread, crusty loaf, gluten-free baking